Creating Non-Global Zones
You can create a non-global zone to keep the applications running inside this zone isolated from other applications.
Before You Begin
You must have a resource pool with available CPU shares. For instructions about creating a new resource pool, see Creating New Resource Pools.
 To Create a Non-Global Zone
Steps
-
If the Container Manager GUI is not already open, access it as described in To Start the Container Manager GUI.
-
Select the Hosts view by selecting the Hosts tab in the navigation window.
A list of hosts is displayed in the navigation window.
-
Select a Solaris 10 host.
-
Select the Zones tab.
-
Click the New Zone button.
The New Zone wizard appears.
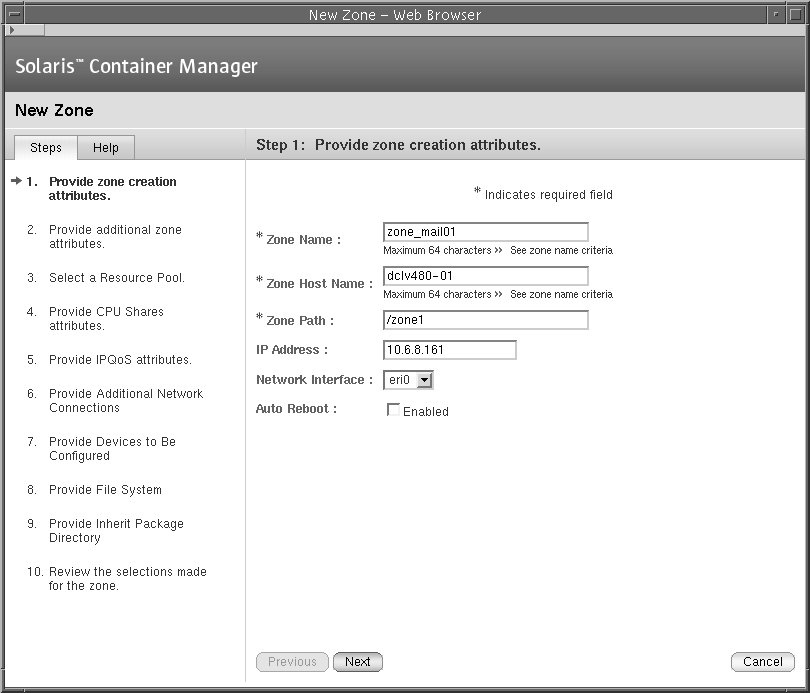
Figure 6–1 Zone Creation Parameters Window

-
Type the appropriate values for the fields: zone name, zone host name, zone path, IP address, and network interface.
The zone host name is the unique name for the zone as a virtual host. It is not the host name or the machine name.
The zone path is an absolute path and starts from the root (/) directory.
Note –If the directory given in the zone path field exists, the permission for the root directory must be 700. Otherwise, the zone is not created.
If the directory given in the zone path field does not exist, the Solaris Container Manager creates a directory with this name and assigns 700 permission to the root directory.
Each zone can have network interfaces that should be configured when the zone transitions from the “installed” state to the “ready” state.
-
(Optional) Select the Enabled check box, if you want the zone to automatically reboot when the system reboots.
-
Type the root user name.
-
(Optional) Select the appropriate values in the Locale, Terminal Type, Naming Service, and Time Zone lists.
Locale specifies the language that will be used for this zone.
Terminal type specifies the type of the terminal.
Naming service translates host names to IP addresses and IP addresses to host names.
Time zone specifies the time zone for the zone.
-
Type the appropriate values in the Domain Name and Name Server fields.
In the Name Server field, type the name server value followed by IP address. For example, the value in the Name Server field could be ns1.sun.com (10.255.255.255).
-
Select a resource pool for the zone.
-
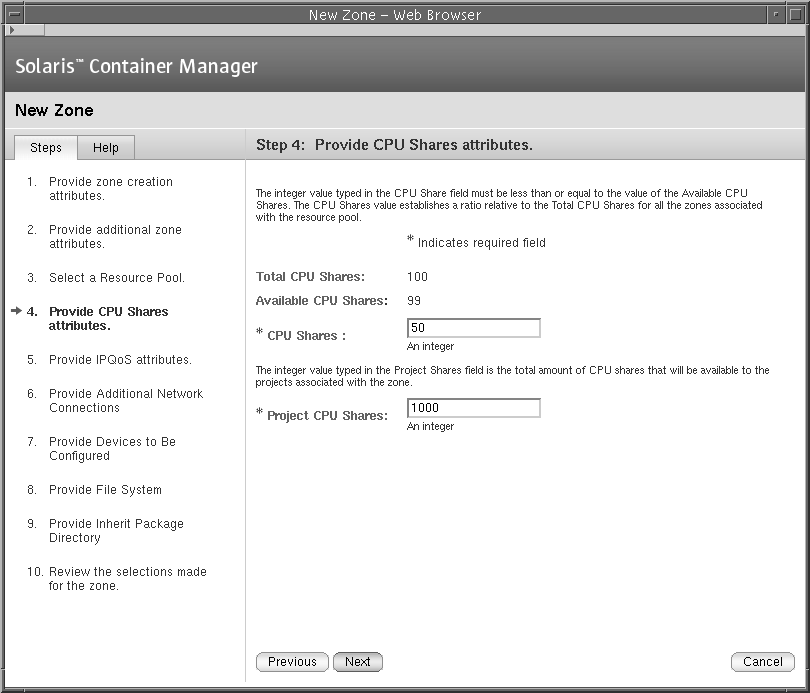
Type the appropriate values in the CPU Shares and Project CPU Shares fields.
Figure 6–2 CPU Shares Window

The CPU Shares field specifies the number of CPU shares that is allocated to this zone from the resource pool. This number must be less than or equal to the CPU shares that are available for the resource pool.
The Project CPU Shares field specifies the number of CPU shares that is allocated to the projects in the zone.
-
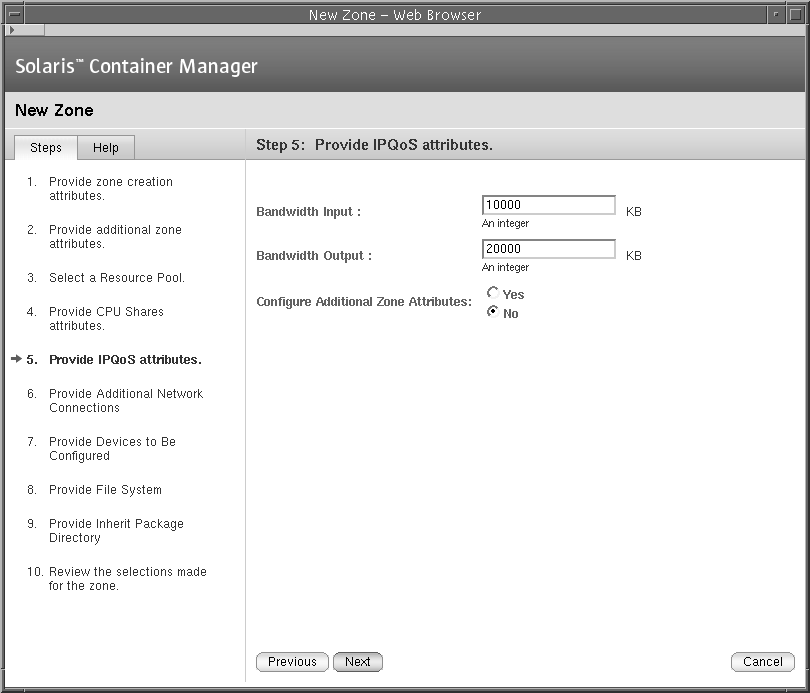
(Optional) Type the minimum input bandwidth and output bandwidth for the IP quality of service feature.
Figure 6–3 IPQoS Attributes Window

-
Choose whether to configure additional attributes for the zone.
-
If you want to configure additional attributes for the zone, select the Yes option and click Next.
Type the additional IP addresses for this zone and select the appropriate network interfaces.
Type the device directories that are to be configured for this zone.
Type the details of the additional file systems that are to be mounted in this zone.
Type the directories that contain packaged software that this zone shares with the global zone.
For more information about these additional zone attributes, see Zone Configuration Data in System Administration Guide: Solaris Containers-Resource Management and Solaris Zones.
Review the selections that you made for the zone and Click Finish to save your changes.
-
If you do not want to configure additional attributes for the zone, select the No option and click Next.
Review the selections that you made for the zone and Click Finish to save your changes.
The information in the zones table is updated with the new zone. When a zone is created, it will be in an “incomplete” state. After inheriting certain packages from the global zone, the zone will be changed to the “running” state.
-
- © 2010, Oracle Corporation and/or its affiliates
