Removing a Board
Note -
It is not necessary to remove an I/O+ board from the card cage to remove and replace GBICs. A GBIC may be removed and replaced "live" (without removing power from the system or board). However, the necessary software precautions must be taken whenever the I/O path to a particular disk is to be interrupted; halt all I/O activity to the disk affected by the replacement of a GBIC. To replace a GBIC or fiber optic cable, proceed to "GBICs".
Removing a Board from a Powered-On System
A board should be removed from a powered-on system only after the ASR software has disabled that board, otherwise, the operating system should be halted and the system powered off prior to board removal. See Chapter 11, Powering Off and On and then "Removing a Board from a Powered-Off System".
-
Ensure that the board has been disabled by the ASR software. See "Hot-Plug Feature".
Once disabled by ASR, one of two results occurs:
-
The three LEDs on the board are not lit (board has no power).
-
The outer two green LEDs are not lit and the middle yellow LED is lit (board is in low power mode).
-
-
Unfasten any cable connectors from the front panel and set them aside.
Label cables to identify them for reconnection later.
-
Use a Phillips #1 screwdriver to mechanically release the board from the system card cage.
Insert the screwdriver into each quarter-turn access slot (the slots are located on the left and right sides of the board front panel) and then turn a quarter turn so that the arrow points to the unlocked position. See Figure 4-6.
Figure 4-6 Unlocking and Locking Quarter-Turn Access Slots

-
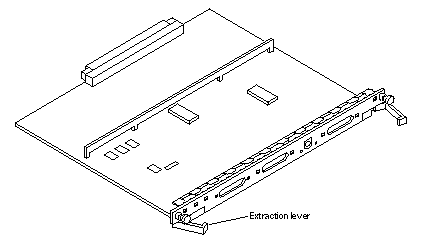
Pull the ends of both extraction levers outward simultaneously to unseat the board centerplane connector from the centerplane receptacles. See Figure 4-7.
Figure 4-7 Extraction Lever in Extract Position

-
If a board is not immediately replaced, a filler panel must be installed in its place.
See "Filler Panels".
Removing a Board from a Powered-Off System
-
Use a Phillips #1 screwdriver to mechanically release the board from the system card cage.
Insert the screwdriver into each quarter-turn access slot (the slots are located on the left and right sides of the board front panel) and then turn one-quarter turn so that the arrow points to the unlocked position. See Figure 4-6.
-
Unfasten any cable connectors from the front panel and set them aside.
Label cables to identify them for reconnection later.
-
Pull the ends of both extraction levers outward simultaneously to unseat the board from the centerplane receptacles. See Figure 4-7.
-
If a board is not immediately replaced, a filler panel must be installed in its place.
See "Filler Panels".
- © 2010, Oracle Corporation and/or its affiliates
