Predefining Hosts
You can define managed hosts in the console before the systems are set up and the agent is installed.
 To Predefine Hosts in the Console
Before You Begin
Ensure that the system dependency server (SDS) and the console or CLI are installed. For information about installing the SDS, see Chapter 3, Installing the System Dependency Server and Knowledge Base, in Sun Update Connection - Enterprise 1.0 Quick Start Guide: Getting Started.
-
Start the console with predefined host enabled.
# uce_console -manual_host_create true
When the console opens, the Add Host button on the tool bar is enabled.
-
Click Add Host.
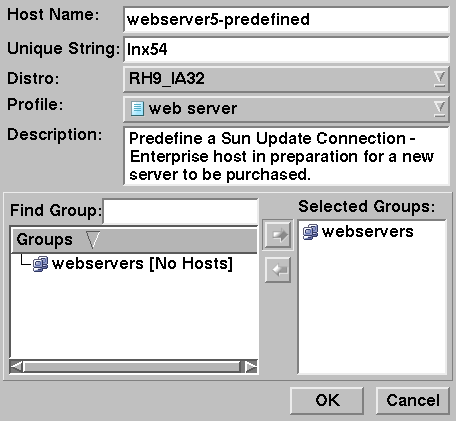
The Add Host window opens.

-
In the Host Name field, type a name for the host.
-
In the Unique String field, type the unique string to be reserved for the host.
-
Select the distribution to be installed on the host.
-
(Optional) Select a profile to attach to the host.
-
(Optional) In the Description field, type the description for the host.
-
(Optional) In the Groups section, select a group to which you want the host to belong.
-
Click OK.
The host name appears in the Hosts list, with the yellow Not Connected icon.
 To Predefine Hosts With the CLI
Using the CLI, the Sun Update Connection – Enterprise hostname is the Unique String. You can change the host name later, but the Unique String should be the real string of the host.
Before You Begin
Ensure that the system dependency server (SDS) and the console or CLI are installed. For information about installing the SDS, see Chapter 3, Installing the System Dependency Server and Knowledge Base, in Sun Update Connection - Enterprise 1.0 Quick Start Guide: Getting Started.
- © 2010, Oracle Corporation and/or its affiliates
