 To Add a Category
-
In the Components list, under Local, select a default category.
-
Do one of the following:
-
From the tool bar, click the Add Category button.
-
From the Components menu, choose Local -> Add Category.
-
In the Components list, right-click the selected category and choose Local -> Add Category.
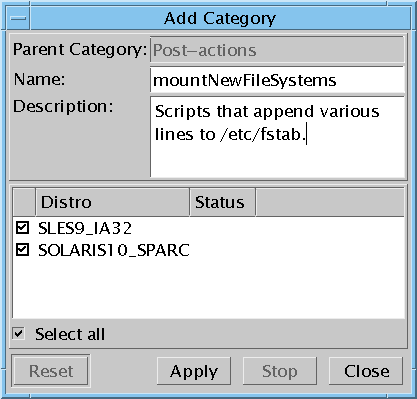
The Add Category window opens.

-
-
Type a name and description for the new category.
-
Check distributions to which you want this category to be assigned.
-
Click Apply.
The status column indicates when the category is uploaded to the knowledge base.
-
Click Close.
The Add Category window closes. You might have to wait until the Components list is updated with the new category; time depends on your local environment configuration.
Example 5–1 Adding a Category with the CLI
The create a new category CLI command puts the category into all distributions (default) if you do not use the -D parameter. To add the category to one specific distribution, use the -D parameter and the name of the distribution. (The -ld command outputs the names of distributions.) See Add Local Category (-alc) Command.
#! /bin/bash echo -n “Enter your user name:” read user echo -n “Enter your password:” read password echo -n “Type a name for the new category:” read newCatName echo -n “Enter a desription for the new category:” read newCatDesc echo “Under which category should this one be added?” echo “Valid answers: Local RPMs, Local PKGs, Probes, Pre-actions,” echo “Post-actions, Macros, Configuration files,” echo “or an existing user category under one of these: /existing_subcategory” read parent uce_cli -alc -T “$newCatName” -ds “$newCatDesc” -pT “$parent” -u “$user” -p “$password” |
- © 2010, Oracle Corporation and/or its affiliates
