 To Create a Profile
In this procedure, you will create and save a new profile, to be used later in a job. Users of all levels can perform this procedure in the console. Other users see your profiles as read-only. They can deploy or copy your profiles; they cannot delete or edit them. This restriction applies to users of all levels.
-
Do one of the following:
-
Do one of the following:
-
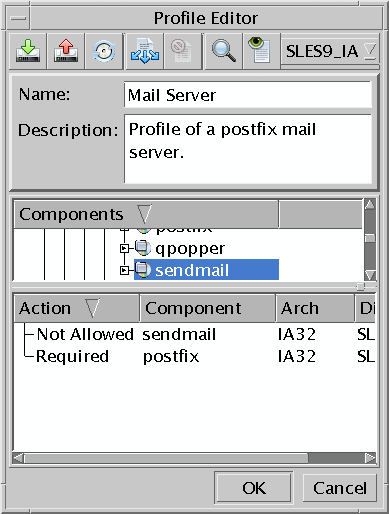
From the drop-down list on the tool bar, select a distribution-architecture.
The Components list shows the components of the selected distribution.
-
Type a name for the profile and an optional free-text description.
-
In the Components list, select a component.
-
Assign a profile action to the selected component.
Do one of the following:
-
From the tool bar, click the Required, Not Allowed, or Upgrade button.
-
Right-click the selected component and choose Required, Not Allowed, or Upgrade.
The component setting appears in the Actions list of the Profile Editor.
To make the profile applicable to hosts of different distributions:
-
To select specific components from different distributions, change the selection of the drop-down list of distributions in the tool bar. Find the relevant components and add the action settings to the Actions list.
-
To let Sun Update Connection – Enterprise find components from other distributions that are comparable to the ones you have in the Actions list, click the Multi Distribution button. See To Align Component Settings for Multiple Distributions.
-
-
-
Click OK.
The Profile Editor window closes. The profile is created and appears in the Profiles window.
Example 9–1 Creating a Profile with the CLI
The CLI command to create a profile allows for only one component and its setting. See Add Profile Attribute (-apa) Command.
#! /bin/bash echo -n “Enter your user name:” read user echo -n “Enter your password:” read password echo -n “Enter a string to search for exact component name:” read comp2find uce_cli -fc -T $comp2find -u $user -p $password echo -n “Copy the exact component name that you want to add to a profile:” read comp2use echo -n “Enter the name of a profile or create a new one:” read profileName echo “What do you want to do with the component?” echo “Make it Required, Not Allowed,” echo “or Upgraded when possible?” echo -n “Enter the setting (-R | -N | -U) (case-sensitive):” read setting uce_cli -apa -P “$profileName” -T “$comp2use” $setting -u “$user” -p “$password” |
- © 2010, Oracle Corporation and/or its affiliates

