Upgrading Sun GlassFish ESB
Sun provides the tools you need to upgrade the GlassFish ESB components and generated artifacts from version 2.0 to 2.1. This topic provides information and instructions for performing the upgrade. If you have any questions, go to the GlassFish ESB web site at http://www.glassfishesb.org.
What You Need To Know
The following topic provides overview information for the GlassFish ESB upgrade process:
What You Need To Do
The following topics provides instructions for upgrading GlassFish ESB:
About the Upgrade Process
To upgrade GlassFish ESB, you need to install an instance of GlassFish ESB v2.1 in a separate directory from your existing 2.0 environment, and then migrate the runtime components from the GlassFish ESB v2.0 environment to the new v2.1 environment. GlassFish provides a tool, asupgrade, to help you migrate the runtime components.
Upgrading to GlassFish ESB v2.1 requires two installers – the full installer and the component installer. The full installer installs a complete GlassFish ESB v2.1 environment. However, when you use the GlassFish upgrade tool to migrate the runtime configuration settings and applications, the default 2.1 domain is deleted and the tool migrates the existing 2.0 domain into the 2.1 environment. In this new domain, the runtime components are still at version 2.0. Running the component installer for the runtime components upgrades the components to v2.1.
Performing the GlassFish ESB Upgrade
To upgrade GlassFish ESB, perform the following steps in the order given:
Downloading the GlassFish ESB Installers
This step downloads the installation tools you will use to perform the GlassFish ESB upgrade.
 To Download the Installers
-
In a web browser, navigate to https://open-esb.dev.java.net/Downloads.html.
-
Next to Full Install, select the operating system to which you are installing GlassFish ESB, and then click Download.
-
Save the file to a temporary folder.
-
Repeat the above steps to download the Components Only installer.
Installing GlassFish ESB v2.1
To begin the upgrade process, install GlassFish ESB v2.1 in a directory separate from your existing GlassFish ESB v2.0 installation. Use the same port numbers as were used in GlassFish ESB v2.0 in order to avoid having to reconfigure port numbers in any of your projects.
 To Install GlassFish ESB
-
Shut down the existing GlassFish server in order to avoid port conflicts.
-
Navigate to the directory where you downloaded the GlassFish ESB installers.
-
Follow the instructions under Installing GlassFish ESB Using the GlassFish ESB Installer in Using the GlassFish ESB Installation GUI, beginning with step 3. The name of the installer file to use is glassfishesb-v2.1-full-installer-OperatingSystem.
 Caution –
 Make sure to install GlassFish ESB v2.1 in a separate directory from your GlassFish ESB v2.0 installation. For example, if you have GlassFish ESB v2.0 installed in C:\GlassFishESB, install the new version in C:\GlassFishESBv21. You specify the location on the NetBeans IDE Installation window and the GlassFish Installation window of the installer.
Migrating the Configuration Settings, Services, and Deployed Applications
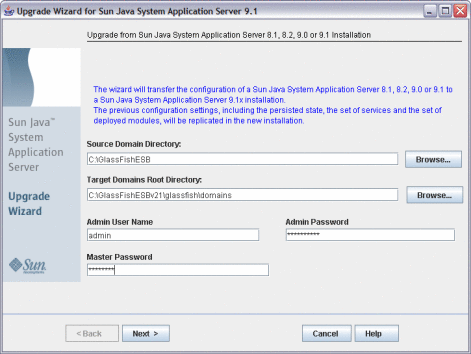
GlassFish provides an upgrade utility, asupgrade, to automatically migrate configuration settings, services, and deployed applications. The following instructions describe how to perform this process from the Upgrade Wizard, but you can also use a command line interface. For more information about asupgrade, see Upgrading Configuration, Deployed Applications, and Certificate Databases in Sun GlassFish Enterprise Server 2.1 Upgrade guide.
Note –
This process does not work for application configurations and variables for the HTTP Binding Component and Java EE Service Engine. These must be migrated manually.
 To Migrate Configuration Settings, Services,
and Deployed Applications
-
From a command prompt, navigate to \glassfish\bin in the new GlassFish ESB v2.1 installation.
-
Type asupgrade.
The Upgrade Wizard appears.
-
In the Source Domain Directory field, browse to and select the existing GlassFish ESB v2.0 directory containing the domain you want to upgrade.
-
Verify the Target Domains Root Directory field, and then enter the login information for the administrator user.
Tip –The default admin user name is admin, the password is adminadmin, and the master password is changeit.

-
Click Next.
The Upgrade Wizard migrates the previous GlassFish configuration settings to the new installation. This may take a while depending on the amount of configuration settings that need to be transferred.
-
When the Upgrade Wizard is finished, click Finish and then review the log file to verify there were no errors.
The log file is located under the GlassFish home directory in \glassfish\domains\upgrade.log.
-
Start the GlassFish 2.1 server, and recreate any application variables or application configurations for the HTTP BC and the Java EE SE.
-
When you are finished, shut down the application server.
Upgrading the Runtime Components
At this point, the GlassFish version is correct and the settings and services are upgraded, but the runtime components are still at version 2.0. You need to run the component installer to upgrade them to version 2.1.
 To Upgrade the Runtime Components
-
Navigate back to the directory where you downloaded the GlassFish ESB installers.
-
Launch the component installer by running the file named glassfishesb-v2.1-installer-OperatingSystem.
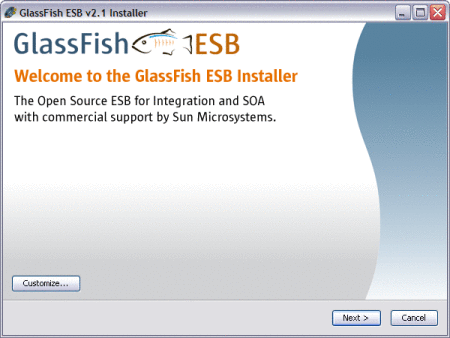
The GlassFish ESB Installer appears.

-
In the lower right, click Customize.
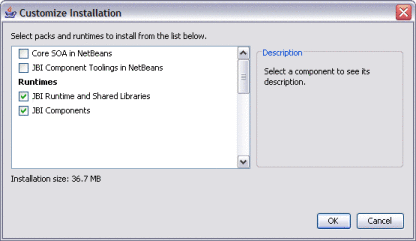
The Customize Installation dialog appears.
-
Deselect Core SOA in NetBeans, and deselect JBI Component Toolings in NetBeans.

-
Click OK, and then click Next.
-
Agree to the terms of the license, and then click Next.
-
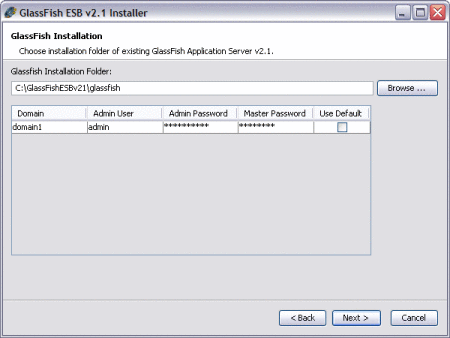
On the GlassFish Installation window, browse to and select the GlassFish home directory in GlassFish ESB v2.1.
-
Enter the Admin login information.

-
Click Next, and then click Install.
-
When the installation is complete, click Finish.
-
To verify the components were upgraded, do the following:
-
Start the upgraded GlassFish 2.1 application server.
-
Start the Admin Console for the upgraded server.
-
In the left navigation bar, expand Components under JBI, and then select any component.
-
Verify that the Version is 2.5.0 and the Build Number is 090515.
-
In the Components list, verify that there are new entries for sun-scheduler-binding and sun-iep-engine.
-
Upgrading the Design-Time Components
The design-time components in the NetBeans IDE are now at the current version, but the projects need to be rebuilt and redeployed to pick up any changes made between GlassFish ESB versions.
 To Upgrade the Design-Time Components
- © 2010, Oracle Corporation and/or its affiliates
