Using Normalized Message Properties in a BPEL Process
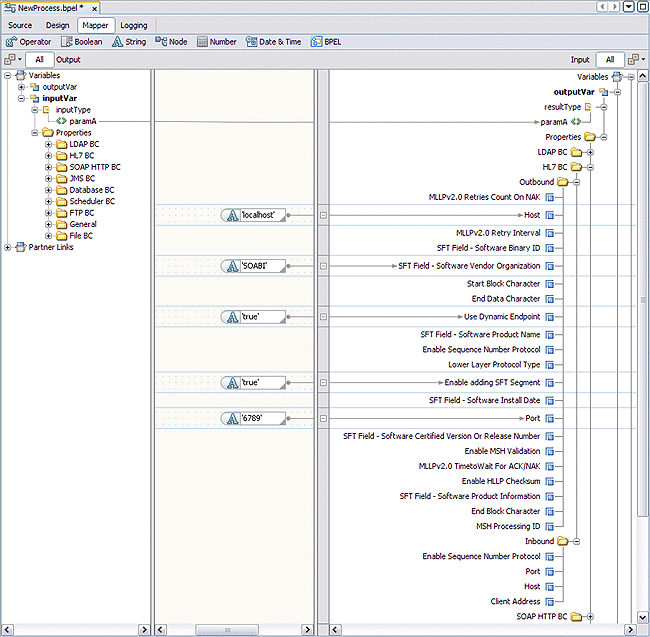
The Normalized Message properties are accessed from the BPEL Designer Mapper view. When you expand a variable's Properties folder it exposes the variable's predefined NM properties, as well as the regular BPEL specific WSDL properties used in correlation sets, assigns, and to build expressions .
Using Predefined Normalized Message Properties in a BPEL Process
Predefined Normalized Message properties are ready for use, from a variable's Properties file.
 To Use Predefined Normalized Message Properties
in a BPEL Process
-
From the Design View diagram, select the activity with the process you want to edit.
-
Click Mapper to switch to the Mapper view of the BPEL process.
-
Expand the Variable you want to edit and its Properties file.
-
To dynamically configure an endpoint, first expand the /Properties/General node to expose the General Normalized Message Properties.
-
Enter values for the Message ID property and the Endpoint Name property.
-
To enter a java.lang.String value for the General or HL7 Normalized Message Properties, do the following:
-
From the BPEL Designer's Mapper window, select the Normalized Message Property you want to configure.
The property is highlighted with a blue field indicating that you are applying an action to this item.
-
From the String menu in the Mapper's toolbar select String Literal.
A String Literal method box is added to the properties action field.
-
Double-click the value field of the String Literal box and enter the appropriate value.
-
Map the String Literal box to the property. To do this, click on the outbound handle of the String Literal box, and drag your cursor to the Normalized Message Property.
A line now links the String Literal box to the property.
-
-
Expand the /Properties/HL7 node to expose the HL7 Normalized Message Properties.
-
Set the String value of the Use Dynamic Endpoint property to true. Also add String values to any other HL7 properties you want to dynamically configure.

-
Save your changes.
- © 2010, Oracle Corporation and/or its affiliates
