Creating the Web Application and Composite Application
TaskCommon.wsdl is an abstract WSDL document with no bindings or services. You need to make the WSDL document concrete by adding bindings and services for the document. The following procedure does not provide detailed information for adding bindings and services. Refer to the user documentation for the type of binding you are adding for more information.
 To Configure the Web Application
Before You Begin
This task requires that you have already created and built the Worklist Module project that defines the tasks.
-
Create a web application project in the NetBeans IDE that defines the Worklist Manager Console.
-
Copy the TaskCommon.wsdl file from the Worklist Module project build directory into the web application project.
This file is located in the Worklist Module project home directory under the /build folder.
-
From the web application project, open the newly copied TaskCommon.wsdl file in the WSDL Editor.
-
In WSDL view, right-click Bindings and select Add Binding to add any necessary bindings and services to the file.
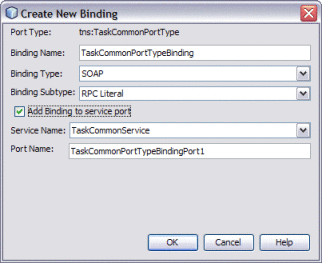
Note –When you add the bindings from the WSDL view, the binding operations are created automatically.
-
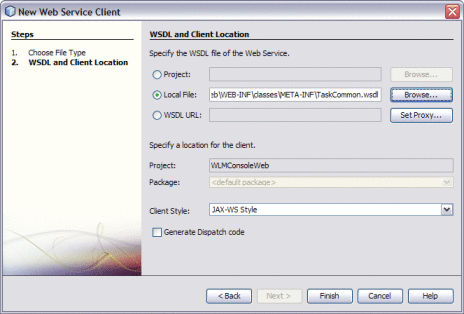
Do the following to create a Web Service Client in the web application that invokes TaskCommonService in TaskCommon.wsdl.
-
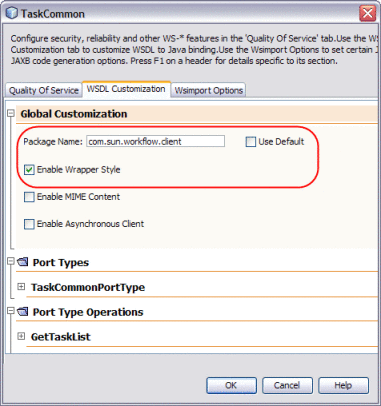
You can specify the package name for the Web Service Client rather than using a wrapper. To specify the package name, do the following:
-
Expand Web Service Reference, right-click TaskCommon, and then select Edit Web Service Attributes.
The attribute editor appears.
-
Click the WSDL Customization tab, and then expand Global Customization.
-
Deselect the Use Default check box, and enter the following class as the package name:
com.sun.workflow.client
-
Click OK, and then click OK on the information dialog box.
-
-
Clean and build the web application project.
This generates the client stub classes in the build/generated folder.
-
Define you custom Worklist Manager Console web pages. Use the generated classes in your web application to invoke operations from TaskCommon.wsdl.
For a reference of the client API, see WLM Client WSDL API.
 To Create the Composite Application
-
In the NetBeans Projects window, create a new composite application project.
-
Drag the web application project you created above to the JBI Module section of the CASA Editor.
-
Build the composite application.
A SOAP endpoint is added, along with a connector to JBI module.
-
Delete the connector between the endpoint and JBI module.
-
Right-click the SOAP provide endpoint, and select Properties. On the Properties window that appears, click Disable in BC, and then click Close.
-
Drag an External Service Unit from the palette to the External Modules section (left panel) of the CASA Editor.
-
Name the External Service Unit WLMSE-TaskCommon.
-
Drag a Provide endpoint to the new service unit. Right-click the endpoint and click Properties. Configure the endpoint as follows:
-
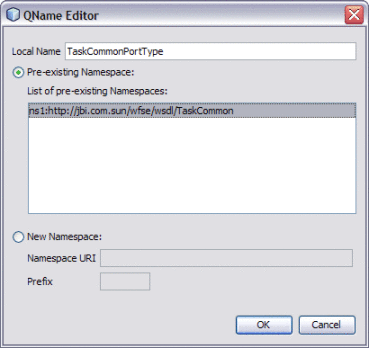
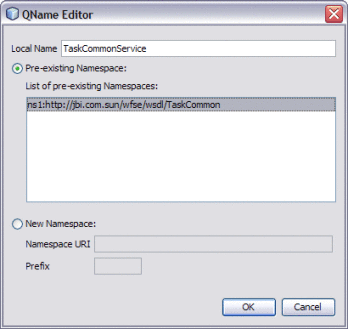
Click the ellipsis next to the Interface Name property. On the Editor that appears, enter TaskCommonPortType as the Local Name and enter ns1:http://jbi.com.sun/wfse/wsdl/TaskCommon as the Namespace.
-
Click the ellipsis next to the Service Name property. On the Editor that appears, enter TaskCommonService as the Local Name and enter ns1:http://jbi.com.sun/wfse/wsdl/TaskCommon as the Namespace.
-
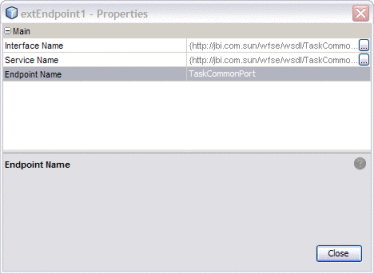
Name the endpoint TaskCommonPort.
The completed properties should look similar to the following figure.
-
-
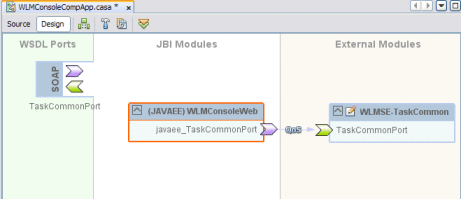
Link the JBI Module with the External Service Unit.
-
Build and deploy the composite application.
The composite application should appear similar to the following figure.
- © 2010, Oracle Corporation and/or its affiliates

