Certificate Formats
A public key certificate is an electronic message issued by a CA that matches the value of the public key to the identity of the person, device, or service that holds the corresponding private key.AS2 only accepts certificates in PKCS#7 format and DER-encoded binary X.509.
 To Create a Certificate File
After you pay a fee, your certificate is transmitted to you as an email or file attachment. Then, you copy the contents from the CA certificate into a text file to create your own certificate file.
-
Open the certificate email or file.
-
Select the file contents between the header and trailer text.
Note –Make sure you exclude the header and trailer.
-
Copy the contents of the certificate to the buffer.
-
Create a new text file.
-
Paste the certificate file contents into the empty file.
-
Save the file as machine name.cert.
Where:
machine name is the name of the computer that is hosting the SME/KS files.
Note –The .cert extension is arbitrary. Certificate and key files can have any extension, but the extension you use should imply the contents of the file.
 To Convert Certificates With Internet Explorer
Microsoft Internet Explorer provides a Certificate wizard tool to convert between formats. For more information, see To Convert Certificates With Internet Explorer.
-
Double-click the certificate file.
The Certificate Information window appears. See Figure 3–4.
Figure 3–4 Certificate Information Window

-
Click the Details tab.
See Figure 3–5.
Figure 3–5 Certificate Details Tab

-
Click Copy to File.
The Certificate Export wizard appears. See Figure 3–6.
Figure 3–6 Certificate Export Wizard

-
Click Next.
The Export File Format window appears. See Figure 3–7
Figure 3–7 Export File Format Window

-
Click Next.
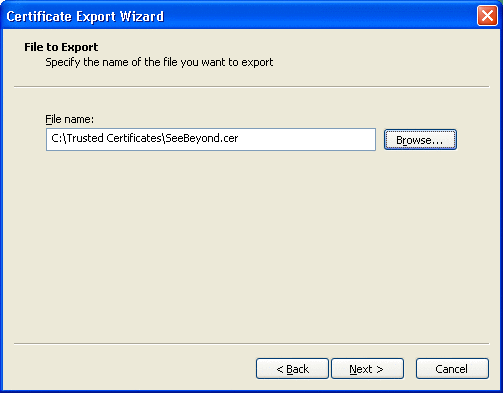
The File to Export window appears. See Figure 3–8.
Figure 3–8 File To Export Window
-
Browse to the certificate file name.
-
Select the certificate file and click Next.
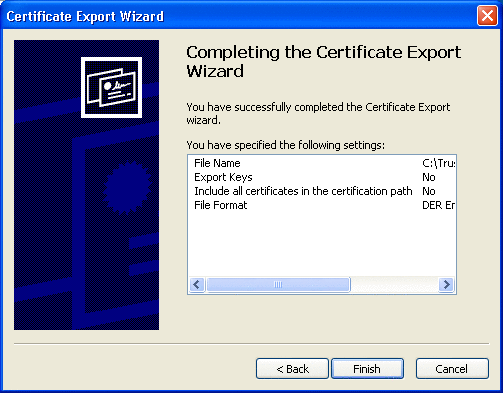
The certificate details are displayed in the window. See Figure 3–9.
Figure 3–9 Certificate Details
-
Click Finish to exit the wizard.
 To Use Internet Explorer To Transfer Certificate
Formats
-
From the Tools menu, click Internet Options.
-
Click the Content tab and then click Certificates.
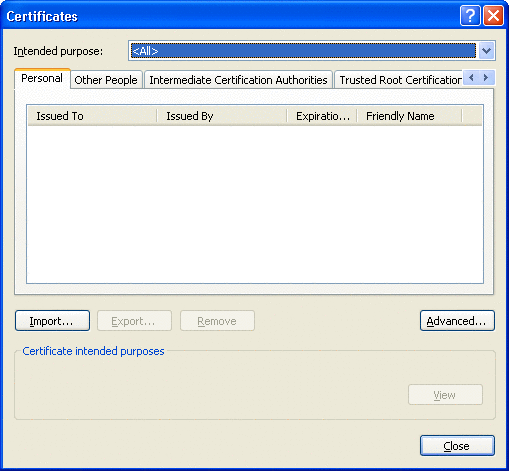
The Certificates dialog box appears. See Figure 3–10.
Figure 3–10 Internet Explorer Certificates Dialog Box
-
Click Import.
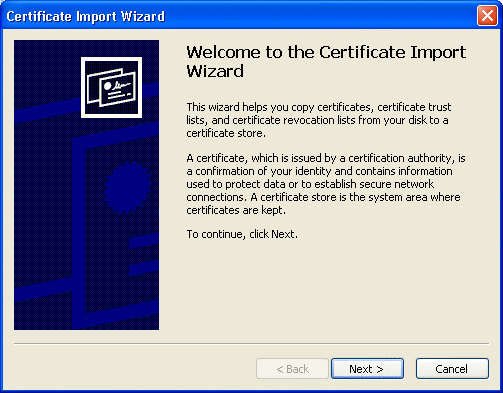
The Certificate Import wizard appears. See Figure 3–11.
Figure 3–11 Certificate Import Wizard
-
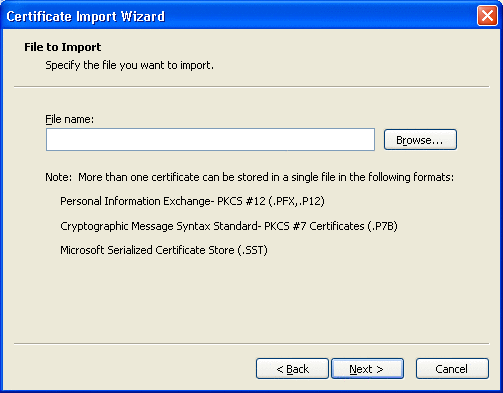
Click Next.
The File to Import window appears. See Figure 3–12.
Figure 3–12 File to Import Window
-
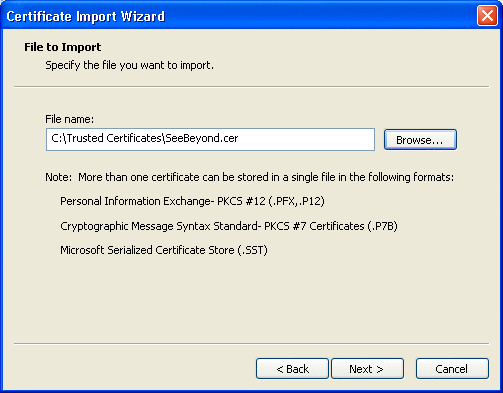
Browse to the certificate file you want to open.
See Figure 3–13.
Figure 3–13 Certificate File To Open
-
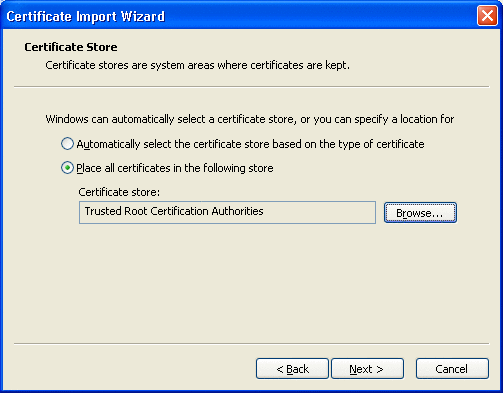
Click Next.
The Certificate Store window appears. See Figure 3–14.
Figure 3–14 Certificate Store Window
-
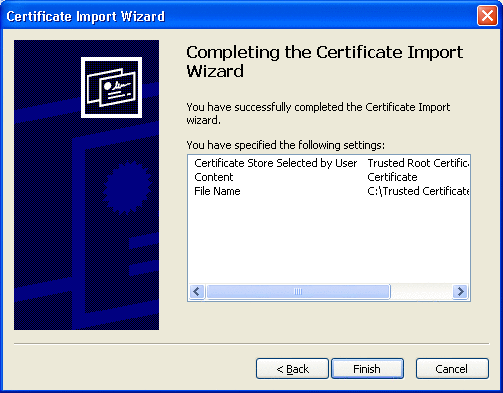
Browse to the location where you want to store the certificate and click Next.
Details of the completed certificate import appear. See Figure 3–15.
Figure 3–15 Completed Certificate Details
-
Click Finish to exit the wizard.
- © 2010, Oracle Corporation and/or its affiliates
