Chapter 4 Using ASC X12 OTDs
This chapter describes how you use ASC X12 OTDs provided in the ASC X12 OTD Library, such as customizing OTDs and building ASC X12 Collaborations.
This chapter contains the following topics:
Displaying ASC X12 OTDs
After installing the ASC X12 OTDs, you can view the OTDs in the OTD Editor.
 To Display ASC X12 OTDs
-
If you are not already in the Enterprise Designer, access it by running the following script:
c:\...\edesigner\bin\runed.bat
-
Click the Project Explorer tab.
-
Expand the following folders:
-
Sun SeeBeyond
-
OTD Library
-
X12
-
Folder containing the X12 version
The Project Explorer tab displays the installed OTDs per ASC X12 version, for example v4010.
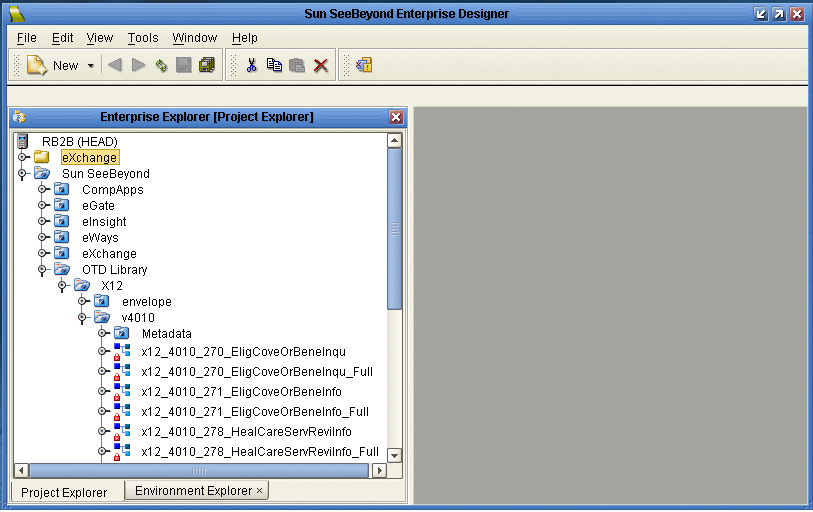
The Project Explorer tab displays the OTDs available for the ASC X12 version folder selected. The following table describes the OTD naming conventions.
- x12_
-
Protocol name
- vnnnn_
-
ASC X12 version
- 997_FuncAckn
-
Transaction code and transaction name abbreviation
- _Full
-
Fully enveloped OTD version that includes the inner and outer envelopes
The folder also includes a Metadata folder, which holds the SEF file for the OTDs. You can use the SEF file to customize the OTD as described in Customizing the ASC X12 OTDs.
-
Building ASC X12 OTD Collaborations
This section describes how you build Java Collaborations that use the ASC X12 OTDs provided in the ASC X12 OTD Library.
To customize the OTDs before building the Collaboration, refer to Customizing the ASC X12 OTDs.
Before you can build the Collaboration, you must have installed the .sar file for the particular OTD to be used. For information, see Installing the ASC X12 OTD Library.
 To Build ASC X12 OTD Collaborations
-
Access the Enterprise Designer.
-
Click the Project Explorer tab.
-
Click mouse button three on the Project for which you want to create a Collaboration, click New, and click Collaboration Definition (Java).
The Collaboration Definition Wizard dialog box appears.
-
Type the name of the Collaboration and click Next.
The Select Web Service Operation page appears.
-
Select the Web service to be used for this Collaboration, for example, Sun SeeBeyond⇒eGate⇒JMS>receive, and click Next.
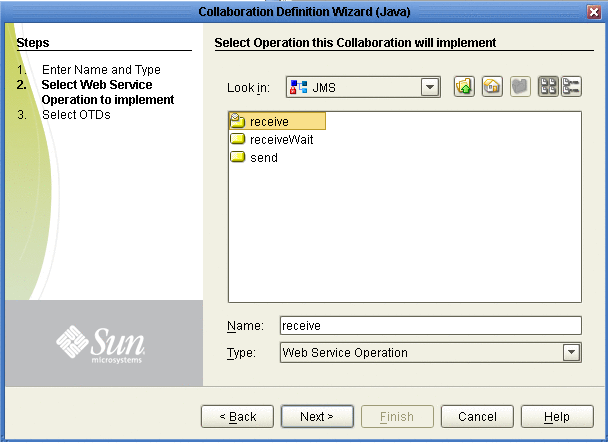
The Select OTDs page appears.
-
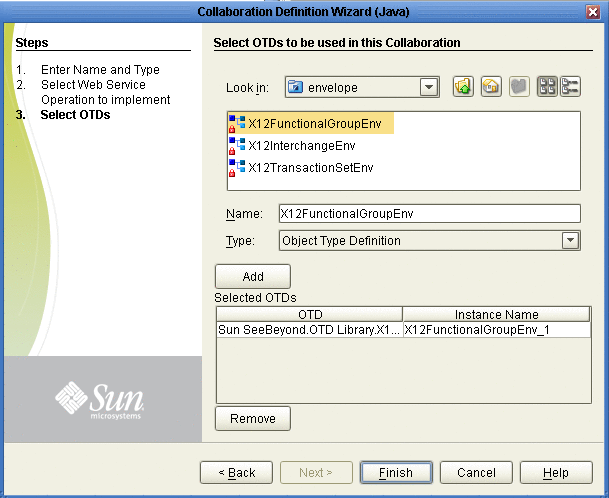
To use envelopes OTDs, under Look In, navigate to the envelopes by double-clicking SeeBeyond⇒OTD Library⇒X12⇒envelope . If the Collaboration does not use enveloping, continue withStep 8.
The Look In area displays the envelope OTDs.
-
Double-click the envelope(s) to be used. This adds the envelopes under Selected OTDs.
-
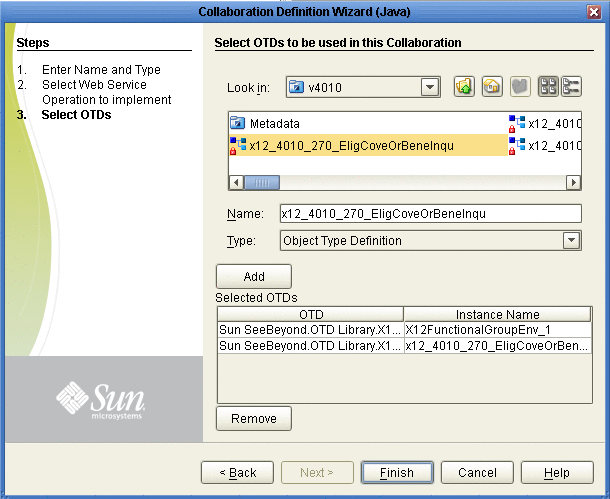
Under Look In, navigate to the OTDs by double-clicking Sun SeeBeyond⇒OTD Library⇒X12⇒Folder indicating the ASC X12 version, such as v4010.
The Look In area displays the OTDs for the selected ASC X12 directories. The following table describes the naming convention for the OTDs.
- x12_
-
Protocol name
- vnnnn_
-
ASC X12 version
- 997_FuncAckn
-
Transaction code and transaction name abbreviation
- _Full
-
Fully enveloped OTD version that includes the inner and outer envelopes
-
Double-click the OTDs to be used.
The OTDs are added to the Selected OTDs list.
-
Click Finish.
The Collaboration appears in the Collaboration Editor. You can now use the eGate and OTD methods to build the business logic for the Collaboration. For information about the ASC X12 OTD methods, refer to Chapter 5, Java Methods for ASC X12 OTDs.
Customizing the ASC X12 OTDs
OTDs provided in the OTD Library cannot be customized. However, the SEF file in the OTD Library enables you to modify the file and then rebuild it. The SEF file contains definitions for all transaction sets of the ASC X12 version.
You can then rebuild the OTD with the customized SEF file as described in the following section. The procedure describes how to save the SEF file locally for editing.
 To Customize the SEF Files for ASC X12 OTDs
-
In the Project Explorer tab of Enterprise Designer, expand the following folders:
-
Sun SeeBeyond
-
OTD Library
-
X12
-
Folder indicating the ASC X12 version, such as v4010
-
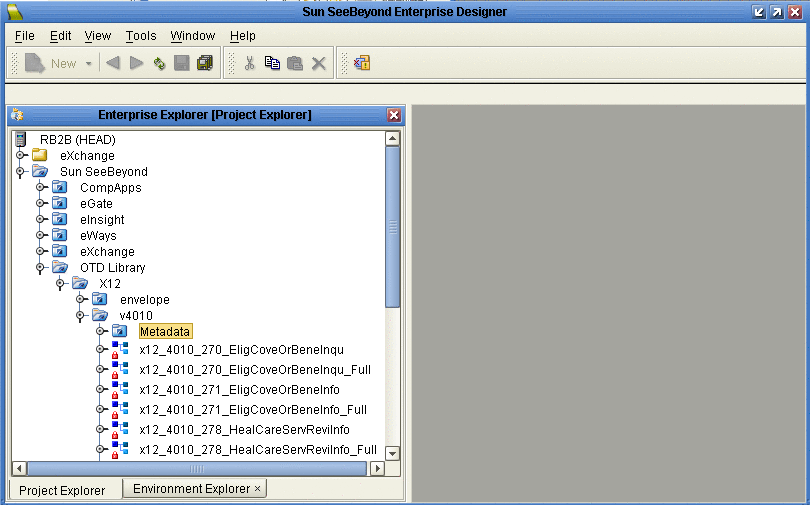
Metadata
The metadata folder displays the available SEF file.
-
-
Right-click the SEF file to be customized and click Export.
The Save As dialog box appears.
-
Select a location for the SEF file and click Save.
-
Use a SEF editor to customize the SEF file.
-
Use the SEF OTD wizard to create the OTD .
Creating ASC X12 OTDs from SEF Files Using the SEF OTD Wizard
This section describes how you create ASC X12 OTDs using SEF files. The ASC X12 OTD Library includes the SEF files for the OTDs to enable you to customize the OTD . Once you have tailored the SEF file to your business requirements, you can re-create the OTD.
To create OTDs from SEF files, you use the SEF OTD wizard to build the OTD using selected SEF files. The SEF OTD wizard is packaged separately from the OTD Library, so make sure that you uploaded the SEF_OTD_Wizard.sar to the eGate Repository, and used the Update Center in Enterprise Designer to install it. For information, refer to Chapter 3, Installing the ASC X12 OTD Library.
 To Create ASC X12 OTDs from SEF Files Using the SEF OTD Wizard
-
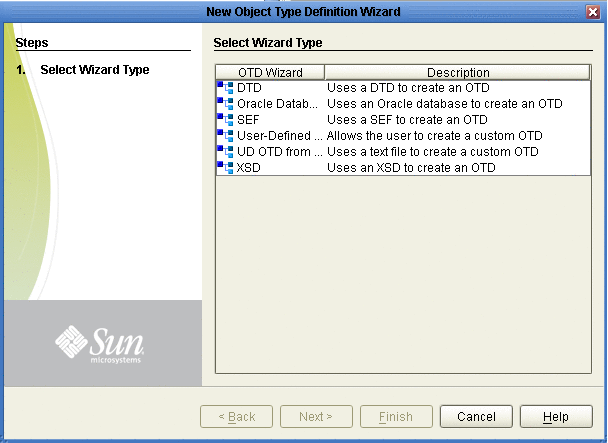
In the Explorer tab of the Enterprise Designer, right click the Project. Click New. Click Object Type Definition.
The New Object Type Definition dialog box appears.
-
Click SEF and click Next. .
The Select SEF File(s) page appears
-
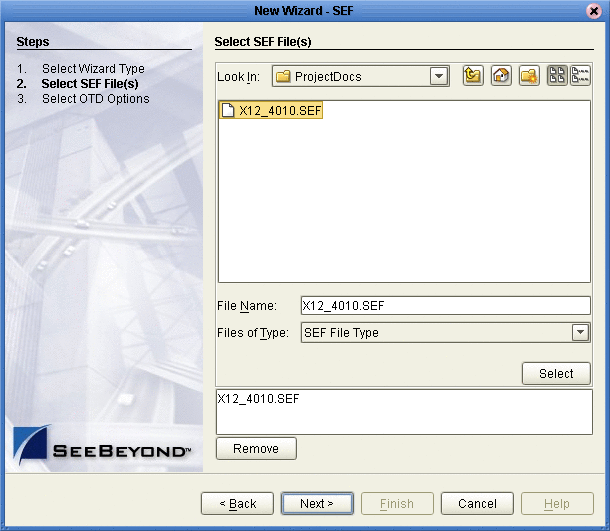
In the Look In box, navigate to the folder where the SEF file for this OTD resides, and then double-click the SEF file.
The SEF file is added to the selection box as shown in the figure.
-
Click Next.
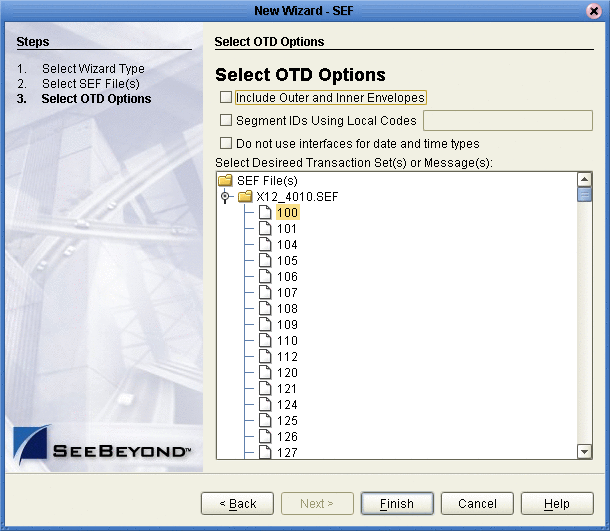
The Select OTD Options page appears.
-
To include the inner and outer envelopes, select the Include Outer and Inner Envelopes option.
-
To use local codes for segment IDs, select the Segment IDs Using Local Codes option and type the segment IDs separated by commas.
For example, if REF segments and N1 segments require local codes for parsing the message after your customization, then type REF,N1.
To identify segment IDs that require local codes for parsing after customization, see Sample for Identifying Segment IDs Using Local Codes.
-
To avoid the OTD using eInsight interfaces for date and time types, select the Do Not Use Interfaces for Date and Time Types option.
Select this option to make the OTD compatible with Collaborations that were created with earlier X12 OTD Library versions.
Selecting this option creates OTDs that do not support mapping a date or time node to another node of eInsight’s date and time type in a Business Process.
-
Click Finish.
The OTD Editor appears, displaying the OTD.
Possible Differences in Output When Using Pass-Through
If you are using pass-through, the output file contains essentially the same data as the input file.
Certain differences in output, based on variations in acceptable interpretation of the information, are acceptable, provided that the data conforms to the formats specified for the elements. For example:
-
If the input file includes a six-digit date, the output file might represent this as an eight-digit value. For example, 070215 in the input file might be represented as 20070215 in the output file.
-
The number of trailing zeros after a decimal point might vary. For example, an input value of 10.000 might be represented as 10 in the output file.
The reason these changes occur is that, during pass-through, certain data fields are parsed and stored as Java objects other than strings, for example, Date or Double.
The actual value of all the information must remain the same.
- © 2010, Oracle Corporation and/or its affiliates
