Chapter 4 Upgrading a System
This chapter describes how to upgrade an existing Solaris Intel Platform Edition system.
Note -
Before using Solaris Web Start to update or upgrade a system, refer to the Solaris 8 (Intel Platform Edition) Release Notes and Solaris 8 Installation Supplement.
Ways to Upgrade a System
When you install a new version of Solaris software on an existing Solaris system, you can choose one of the following ways to upgrade the Solaris operating environment:
-
Upgrade - This option merges the new version of the Solaris operating environment with the existing files on the system's disks. It saves as many modifications as possible that you have made to the previous version of the Solaris operating environment.
-
Initial - This option overwrites the system's disk with the new version of the Solaris operating environment. You must back up any local modifications that you have made to the previous version of the Solaris operating environment before you begin the installation and restore the local modifications after the installation is finished.
Frequently Asked Questions About Upgrading
-
Can I use the upgrade option on my system?
You cannot use Solaris Web Start to upgrade to Solaris 8 from Solaris 7 or earlier versions of the Solaris operating environment because it uses a different method to install Solaris software (a separate 10-Mbyte IA boot partition). You can, however, upgrade from Solaris 8 to a Solaris 8 Update or a Solaris 8 Maintenance Update.
To upgrade to Solaris 8 from an earlier version of Solaris, you must instead use the Solaris 8 Interactive Installation Program, which is described in "Using the Solaris 8 Interactive Installation Program" in Solaris 8 Advanced Installation Guide.
To determine the version of the Solaris operating environment your system is running, type:
$ uname -a
-
How do I know I can upgrade my system?
You can upgrade a system provided there is a separate 10-Mbyte IA boot partition on the disk. Solaris Web Start creates an IA boot partition automatically. The Solaris 8 Interactive Installation Program does not.
You also need a slice on the disk that isn't needed to upgrade that disk. swap is preferred, but any slice will suffice as long as it is not located in any of the "upgradeable" root slices listed in /etc/vfstab. The size of this slice must also exceed or equal the minimum required size, which is dynamic.
The minimum required sizes for the Solaris 8 Installation English Intel Platform Edition and Solaris 8 Installation Multilingual Intel Platform Edition CDs are shown in Table 4-1:
Table 4-1 Minimum Required Sizes for Slices64 Mbytes Memory
128 Mbytes Memory
256 Mbytes or More Memory
Solaris 8 Installation English Intel Platform Edition CD
256 Mbytes
256 Mbytes
256 Mbytes
Solaris 8 Installation Multilingual Intel Platform Edition CD
404 Mbytes
340 Mbytes
308 Mbytes
-
Do I have to back out patches before I use the upgrade option?
No, backing out packages is not required.
-
What if Solaris Web Start doesn't provide the upgrade option, but the system can be upgraded?
See Chapter 6, Troubleshooting for information.
-
What if the system's file systems don't have enough space for the upgrade?
You can reallocate disk space with Solaris Web Start if the current file systems don't have enough space for the upgrade. Solaris Web Start attempts to determine how to reallocate the disk space so the upgrade can succeed. If Solaris Web Start cannot determine how to reallocate disk space, you must manually modify the layout of the file systems.
-
Can I automatically upgrade to another software group?
No. For example, if you previously installed the End User System Support software group on your system, you cannot use the upgrade option to upgrade to the Developer System Support software group. However, you can always add software to the system during the upgrade that is not part of the currently installed software group.
-
Where does Solaris Web Start describe the local modifications that could not be preserved?
-
Where does the installation program place upgrade log files?
Upgrading Your System
To Get Started
-
Check the documentation:
-
Check the Solaris 8 (Intel Platform Edition) Release Notes and vendor release notes to ensure that the software you use is still supported in the new release.
-
Check the Solaris 8 (Intel Platform Edition) Hardware Compatibility List to make sure your hardware is still supported.
-
See the documentation that came with your system to make sure your system and devices are still supported by the new release.
-
Check for all the available patches you might need. The most recent patch list is provided at http://sunsolve.sun.com.
-
Check Table 4-2 for known problems. This list is not complete. Always check vendor and third-party software documentation for additional upgrade instructions.
Table 4-2 Software That Requires Changes Before UpgradingSoftware
Problem Summary
Prestoserve
If you start the upgrade process by shutting down the system using init 0, you can lose data. See the Prestoserve documentation for shutdown instructions.
-
-
Determine the language you want to use to upgrade Solaris. If you use the CD labeled:
-
Solaris 8 Installation English Intel Platform Edition--all prompts, messages, and other upgrade information are displayed in English only.
-
Solaris 8 Installation Multilingual Intel Platform Edition--you can select one of the following languages in which to display all prompts, messages, and other upgrade information:
-
English
-
French
-
German
-
Italian
-
Japanese
-
Korean
-
Spanish
-
Swedish
-
Simplified Chinese
-
Traditional Chinese
-
-
-
Make sure you have at least the following CDs:
-
Solaris 8 Installation English Intel Platform Edition or Solaris 8 Installation Multilingual Intel Platform Edition
-
Solaris 8 Software 1 of 2 Intel Platform Edition and Solaris 8 Software 2 of 2 Intel Platform Edition
-
Solaris 8 Languages Intel Platform Edition (if you use the Multilingual CD)
-
To Back Up a System
Back up existing file systems before upgrading the Solaris operating environment. Copying them to removable media (such as tape) safeguards data against loss, damage, or corruption.
You can use the Solaris Web Start Specify Backup Media dialog box to back up a system on a local disk, local tape, or remote file system.
If you do not have a backup procedure in place, follow these steps to perform a full backup of file systems on tape. Backing up a system and setting up scheduled backups are described in more detail in System Administration Guide, Volume I.
-
Become superuser.
-
Shut down the system:
# init 0
-
Boot the system in single-user mode:
ok boot -s
-
Do you want to check the file systems for consistency?
Note -Checking the file systems for consistency ensures you back up uncorrupted data. A power failure, for example, can leave files in an inconsistent state.
-
If no, go to the next step.
-
If yes, use the fsck command with the -m option:
# fsck -m /dev/rdsk/device-name
-
-
Do you intend to back up the file systems onto a remote tape drive?
-
If no, go to the next step.
-
If yes:
-
-
Identify the device name of the tape drive.
The default tape drive is /dev/rmt/0.
-
Insert a tape that is not write-protected into the tape drive.
-
Back up file systems using one of the ufsdump commands listed in Table 4-3.
Table 4-3 Full Backup CommandsTo make a full backup on a
Use this command
Local cartridge tape drive
ufsdump9ucf /dev/rmt files_to_backup
Remote cartridge tape drive
ufsdump0ucf remote_host:/ files_to_backup
-
When prompted, remove the tape and replace it with the next volume.
-
Label each tape with the volume number, level, date, system name, and file system.
-
Press Control-D.
The system is returned to run level 3.
-
Verify that you successfully backed up the system:
# ufsrestore -t
To Plan for Upgrading
-
Use this decision table to determine what to do first.
If you intend to upgrade from a
Then go to
CD-ROM drive attached to your system
The next step. Remote CD-ROM drive on a network
-
If your system is attached to a network, gather the following information about the system that contains the Solaris operating environment you intend to upgrade.
Information
Example
To find the information (with Solaris installed), use
Host name
crater
uname -n
Host IP address
129.221.2.1
ypmatch system_name hosts or
nismatch system_name hosts.org_dir
Subnet mask
255.255.255.0
more /etc/netmasks
Type of name service (DNS, NIS, or NIS+)
passwd:     files nis
group:      files nis

hosts:      xfn nis [NOTFOUND=return] files
networks:   nis [NOTFOUND=return] files
protocols:  nis [NOTFOUND=return] files
rpc:        nis [NOTFOUND=return] files
ethers:     nis [NOTFOUND=return] files
netmasks:   nis [NOTFOUND=return] files
bootparams: nis [NOTFOUND=return] files
publickey:  nis [NOTFOUND=return] files

netgroup:   nis

automount:  files nis
aliases:    files nis

services:   files nis
sendmailvars:   files
cat /etc/nsswitch.conf
Domain name
lbloom.West.Arp.COM
domainname
Host name of name server
thor75
ypwhich
Host IP address of name server
129.153.75.20
ypmatch nameserver_name hosts or
nismatch nameserver_name hosts.org_dir
To Set Up for Upgrading
-
Do you intend to install the Solaris software through a tip(1) line?
-
If no, go to the next step.
-
If yes, make sure your window display is at least 80 columns wide and 24 rows long.
Note -To determine the current dimensions of your tip window, use the stty(1) command.
-
-
Is your system capable of booting from a CD?
-
If yes, ensure that the capability is turned on by using your system's BIOS setup tool.
-
If no, insert the diskette labeled Solaris 8 Device Configuration Assistant Intel Platform Edition into the system's diskette drive.
Note -You can also download the Solaris 8 Device Configuration Assistant from the Solaris Driver Connection at http://soldc.sun.com/support/drivers.
-
-
Insert the CD labeled Solaris 8 Installation English Intel Platform Edition or Solaris 8 Installation Multilingual Intel Platform Edition into the system's CD-ROM drive.
-
Boot the system by shutting it down and then turning it off and on.
A memory test and hardware detection are executed. The screen refreshes.
-
If you're using the diskette labeled Solaris 8 Device Configuration Assistant Intel Platform Edition, the message:
Solaris Boot Sector Version 1
is displayed at the top of your screen. Then, information similar to this is displayed:
Solaris for x86 - Generic DCB                 Version 1.234


                       loading /solaris/boot.bin
The screen refreshes and information similar to this is displayed:
SunOS Secondary Boot version 3.00 Solaris Intel Platform Edition Booting System Running Configuration Assistant... -
If you're using only the CD labeled Solaris 8 Installation English Intel Platform Edition or Solaris 8 Installation Multilingual Intel Platform Edition, the message:
SunOS - Intel Platform Edition Primary Boot Subsystem, vsn 2.0
is displayed at the top of the screen. Then, information similar to this is displayed:
SunOS Secondary Boot version 3.00

             Solaris Intel Platform Edition Booting System


Running Configuration Assistant...
-
-
When the Solaris Device Configuration Assistant screen is displayed, press F2_Continue.
The Bus Enumeration screen is displayed with the message:
Determining bus types and gathering hardware configuration data ...
The Scanning Devices screen is then displayed. System devices are scanned. When scanning is complete, the Identified Devices screen is displayed.
-
Press F2_Continue.
The Loading screen is displayed with messages about drivers that are loaded to boot your system. After a few seconds, the Boot Solaris screen is displayed.
-
On the Boot Solaris screen, select CD and press F2_Continue.
-
If you're using the CD labeled Solaris 8 Installation English Intel Platform Edition, the Running Driver screen is displayed briefly, followed by information similar to this:
<<< Current Boot Parameters >>> Boot path: /pci@0,0/pci-ide@7,1/ide@1/sd@0,0:a Boot args: kernel/unix <<< Starting Installation >>> SunOS Release 5.8 Version Generic 32-bit Copyright 1983-2000 Sun Microsystems, Inc. All rights reserved. Configuring /dev and /devices Using RPC Bootparams for network configuration information. Solaris Web Start 3.0 installer English has been selected as the language in which to perform the install. Starting the Web Start 3.0 Solaris installer Solaris installer is searching the system's hard disks for a location to place the Solaris installer software. Your system appears to be upgradeable. Do you want to do a Initial Install or Upgrade? 1) Initial Install 2) Upgrade Please Enter 1 or 2 > -
If you're using the CD labeled Solaris 8 Installation Multilingual Intel Platform Edition, information similar to this is displayed:
                        <<< Current Boot Parameters >>>
Boot path: /pci@0,0/pci-ide@7,1/ide@1/sd@0,0:a
Boot args: kernel/unix


                        <<< Starting Installation >>>

SunOS Release 5.8 Version Generic 32-bit
Copyright 1983-2000 Sun Microsystems, Inc.  All rights reserved.
Configuring /dev and /devices
Using RPC Bootparams for network configuration information.
Solaris Web Start 3.0 installer
The Solaris Installer can be run in English, or any of the following languages:

  1) English           6) Japanese
  2) German            7) Korean
  3) Spanish           8) Swedish
  4) French            9) Simplified_Chinese
  5) Italian          10) Traditional_Chinese
Select the language you want to use to run the installer:
-
-
Which installation CD are you using?
-
If the Solaris 8 Installation English Intel Platform Edition CD, go to the next step.
-
If the Solaris 8 Installation Multilingual Intel Platform Edition CD, type the number to select the language in which to display prompts, messages, and other installation information.
Information similar to this is displayed (in the language you selected):
language_you_selected has been selected as the language in which to perform the install.
Starting the Web Start 3.0 Solaris installer

Solaris installer is searching the system's hard disks for a
location to place the Solaris installer software.

Your system appears to be upgradeable.
Do you want to do a Initial Install or Upgrade?

  1) Initial Install
  2) Upgrade
  Please Enter 1 or 2 >
-
-
At the prompt, type 2 for upgrade and press Enter.
Solaris Web Start searches the disk for swap slices that meet the minimum size requirements. Information similar to this is then displayed:
Since swap slices are usually erased at each reboot,
the Solaris Installer would prefer to place the Solaris install image
on a slice labeled swap.


The Installer would like to use the disk slice c0d0s1, labeled as swap.

WARNING: All information will be lost.

Can the Solaris Installer use this slice?  [y,n,?,q]
-
Do you want to use the disk slice shown on your screen?
-
If yes, type y and go to Step 18.
-
If no, type n and press Enter.
1) c0d0s1
2) Find Another

"Find Another" allows the Solaris Installer to find other
slices that may meet the criteria found in the Solaris
install guide.
Please make a selection. >
-
-
Do you want to use the disk slice shown on your screen?
-
If yes, type 1 and go to Step 18.
-
If no, type 2 and press Return.
Solaris Web Start continues looking for another disk slice. If another disk slice is not found, the original swap shown on your screen is used by default. If another disk slice is found, information similar to this is displayed:
The following slices were found to meet the criteria in the Solaris Install Guide. WARNING: If one of the listed slices is chosen to be used by the Solaris Installer all information on the slice will be erased 1) c0d0s7 last mounted on /export/home 2) None "None" will skip these disk slices and present you with a listing of all disks on the system Please make a selection from the choices above > -
-
Do you want to use one of the slices shown or None?
Note -If you select None and a disk identifier, you can no longer upgrade the system. You must perform an initial installation.
-
If you want to use one of the slices shown, type the number of the slice you want and go to Step 18.
-
If None, type 2 and press Return.
Information similar to this is displayed:
The default root disk is /dev/dsk/c0d0.
The Solaris installer needs to format
/dev/dsk/c0d0 to install Solaris.

WARNING: ALL INFORMATION ON THE DISK WILL BE ERASED!


Do you want to format /dev/dsk/c0d0?  [y,n,?,q]
-
-
At the prompt, type y and press Enter.
Information similar to this is displayed:
NOTE: The swap size cannot be changed during filesystem layout.


Enter a swap slice size between 384MB and 1865M, default = 512MB [?]
-
At the prompt, press Enter to enter the default swap slice size, or type the swap slice size you want and press Enter.
Information similar to this is displayed:
The Installer prefers that the swap slice is at the beginning of the
disk. This will allow the most flexible filesystem partitioning later in the installation.

Can the swap slice start at the beginning of the disk  [y,n,?,q]
-
Do you want to place the swap space at the beginning of the disk (and thus improve the flexibility of partitioning the file systems and the efficiency with which the disk is accessed)?
-
If yes, type y and go to Step 18.
-
If no, type n and press Enter.
Information similar to this is displayed:
WARNING: Placing the swap slice at a cylinder location other than cylinder 3
requires expert knowledge about disk layout. This choice may affect
disk layout choices later in the installation.

Enter a starting cylinder between 3 and 687, default = 3 [?]
-
-
Press Enter to enter the default starting cylinder (0), or type the starting cylinder you want and press Enter.
Information similar to this is displayed:
You have selected the following to be used by the Solaris installer: Disk Slice : /dev/dsk/c0d0 Size : 512 MB Start Cyl. : 3 WARNING: ALL INFORMATION ON THE DISK WILL BE ERASED! Is this OK [y,n,?,q] -
At the prompt, type y.
-
Press Enter.
Information similar to this is displayed:
The Solaris installer will use disk slice, /dev/dsk/c0d0s1.
After files are copied, the system will automatically reboot, and
installation will continue.
Please Wait...

Copying mini-root to local disk....done.


Copying platform specific files....done.

Preparing to reboot and continue installation.
Need to reboot to continue the installation
Please remove the boot media (floppy or cdrom) and press Enter
Note: If the boot media is cdrom, you must wait for the system
to reset in order to eject.
-
Did you insert the diskette labeled Solaris 8 Device Configuration Assistant Intel Platform Edition into the system's diskette drive in Step 2?
-
If yes, eject the diskette from the system's diskette drive and press Enter.
-
If no, press Enter.
Information similar to this is displayed:
Syncing file systems... 49 done
rebooting...
The system resets, and a memory test and hardware detection are executed.
-
-
Quickly, eject the Solaris 8 Installation English Intel Platform Edition or Solaris 8 Installation Multilingual Intel Platform Edition CD from the CD-ROM drive before the system completes the memory test and hardware detection.
Information similar to this is displayed:
SunOS - Intel Platform Edition                   Primary Boot Subsystem, vsn 2.0


                        Current Disk Partition Information

                 Part#   Status    Type      Start       Length
                ================================================
                   1              DOS12          63       32193
                   2     Active   X86 BOOT    32256       36288
                   3              SOLARIS     68544     3842496
                   4              <unused>


               Please select the partition you wish to boot:
After a few seconds, the screen refreshes and information similar to this is displayed:
SunOS Secondary Boot version 3.00


             Solaris Intel Platform Edition Booting System


Running Configuration Assistant...
Autobooting from bootpath /pci@0,0/pci-ide@7,1/ata@1/cmdk@0,0:b

If the system hardware has changed, or to boot from a different
device, interrupt the autoboot process by pressing ESC.


Initializing system
Please wait...


                      <<< Current Boot Parameters >>>
Boot path: /pci@0,0/pci-ide@7,1/ata@1/cmdk@0,0:b
Boot args:

Type    b [file-name] [boot-flags] <ENTER>      to boot with options
or      i <ENTER>                               to enter boot interpreter
or      <ENTER>                                 to boot with defaults

                  <<< timeout in 5 seconds >>>

Select (b)oot or (i)nterpreter:
SunOS Release 5.8 Version Generic 32-bit
Copyright 1983-2000 Sun Microsystems, Inc.  All rights reserved.
Configuring /dev and /devices
Using RPC Bootparams for network configuration information.
The Solaris Installation Program screen is then displayed.
-
Press F2_Continue.
The kdmconfig - Introduction screen is displayed.
-
Press F2_Continue.
The kdmconfig - View and Edit Window System Configuration screen is displayed.
-
Examine the configuration information on the kdmconfig - View and Edit Window System Configuration screen and make any changes you need.
-
When you're done, select No changes needed - Test/Save and Exit, and press F2_Continue.
The kdmconfig Window System Configuration Test screen is displayed.
-
Press F2_Continue.
-
On the screen that is displayed, try to move the pointer and examine the colors shown on the palette to ensure that they're displayed accurately.
-
Are the colors displayed accurately and can you move the pointer?
-
If no, either click No (if possible), press any key on the keyboard, or wait until kdmconfig exits the kdmconfig Window System Configuration Test screen automatically, and then repeat Step 23 through Step 27 until the colors are displayed accurately and you can move the pointer as expected.
-
If yes, click Yes.
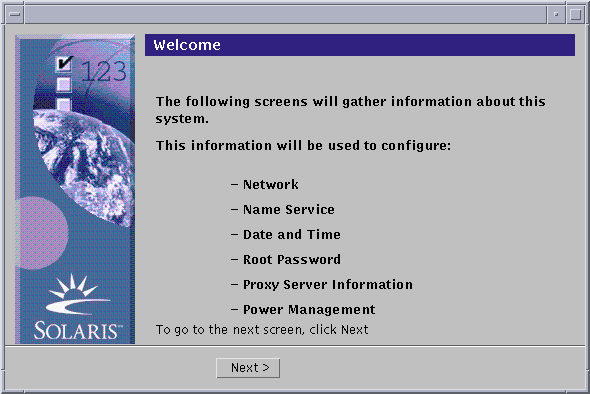
After a few seconds, the Welcome screen is displayed:
-
To Configure Your System for Upgrading
-
On the Welcome screen, click Next >.
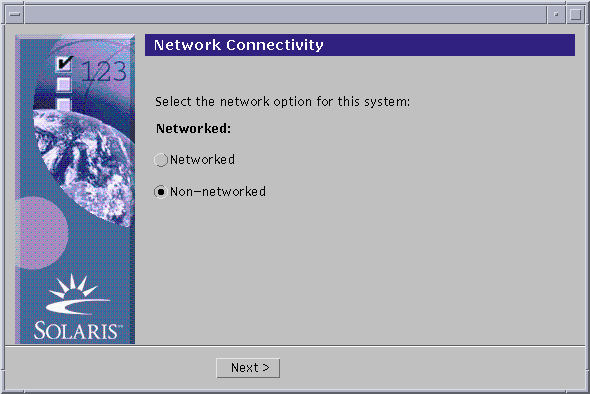
Solaris Web Start attempts to gather information about your system. The Network Connectivity dialog box is then displayed:
-
-
If no, select Non-networked and click Next >.
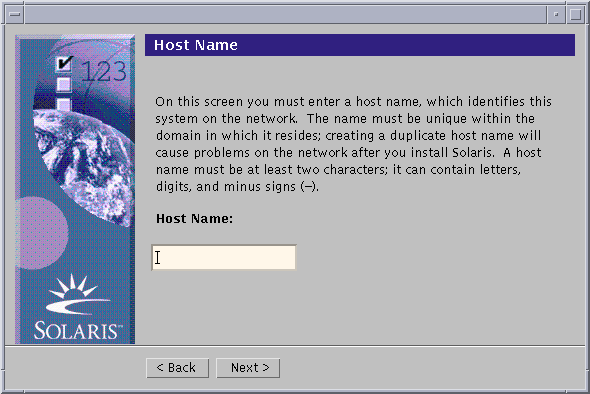
The Host Name dialog box is displayed:
-
If yes, select Networked and click Next >.
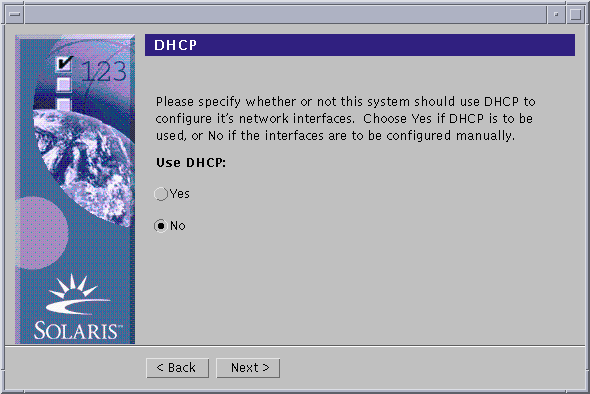
The DHCP dialog box is displayed:
-
-
Did you select Networked in Step 2?
-
If no, go to Step 6.
-
If yes, go to the next step.
-
-
Do you want to use DHCP for the network interface configuration?
-
If no, select No, click Next >, and go to Step 6.
-
If yes, click Yes and click Next >.
The IPv6 dialog box is displayed:
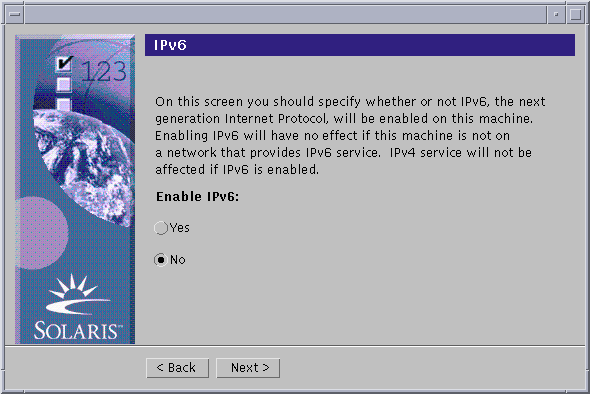
-
-
On the Host Name dialog box, type the host name you want and click Next >.
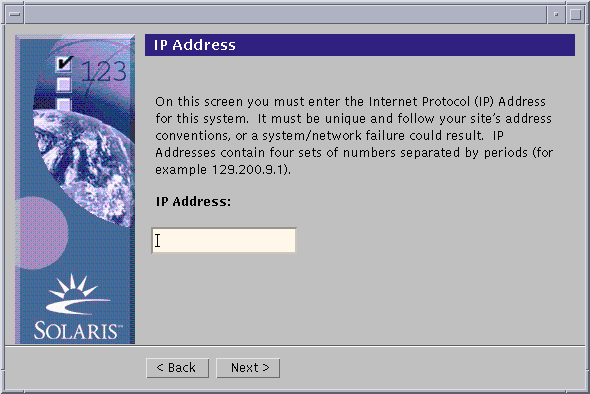
If you selected Networked on the Network Connectivity dialog box shown in Step 2, the IP Address dialog box is displayed:
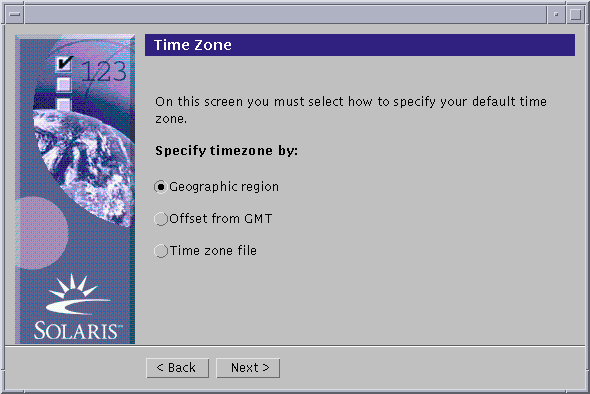
If you selected Non-networked on the Network Connectivity dialog box shown in Step 2, the Time Zone dialog box is displayed:
-
Is your system networked (that is, did you select Networked on the Network Connectivity dialog box)?
-
If no, go to Step 14.
-
If yes, did you specify that you want DHCP used for the network interface configuration (that is, did you select Yes on the DHCP dialog box)?
-
If yes, go to Step 10.
-
If no, on the IP Address dialog box, type the IP address of your networked system and click Next >.
-
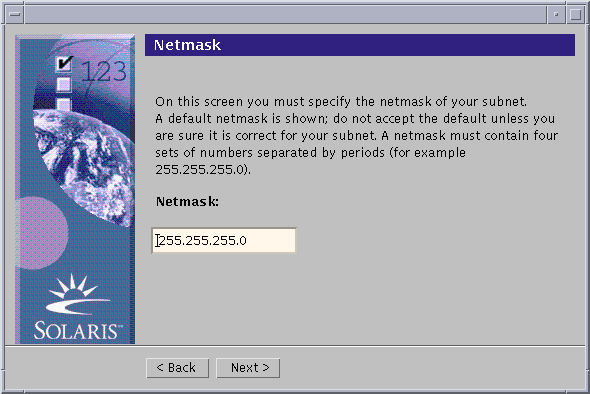
The Netmask dialog box is displayed:
-
-
Type the netmask you want (or leave the default netmask) and click Next >.
The IPv6 dialog box is displayed:

-
-
If no, select No and click Next >.
-
If yes, select Yes and click Next >.
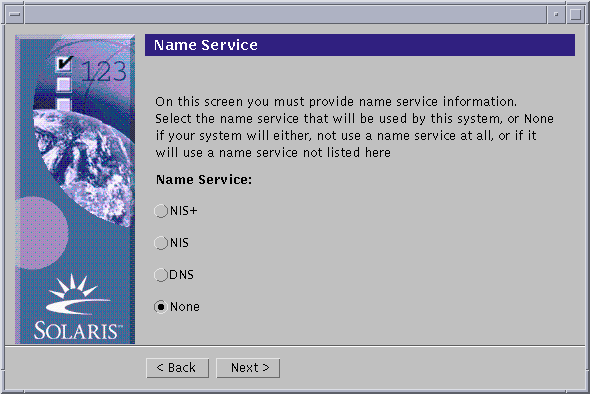
The Name Service dialog box is displayed:
-
-
Select the name service the system will use, or None if you aren't using a name service, and click Next >.
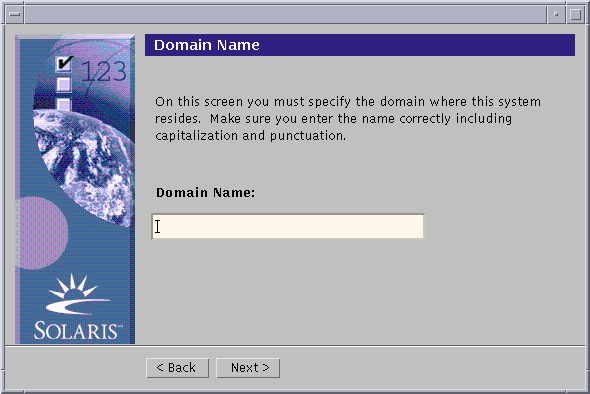
If you selected NIS+, NIS, or DNS, the Domain Name dialog box is displayed:
If you selected None, the Time Zone dialog box is displayed:

-
Did you select None in the preceding step?
-
If yes, go to Step 14.
-
If no, type the name of the domain in which the system is located and click Next >.
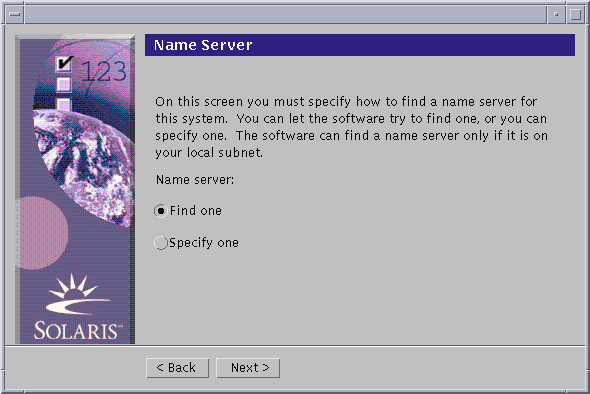
If you selected NIS+ or NIS, the Name Server dialog box is displayed:
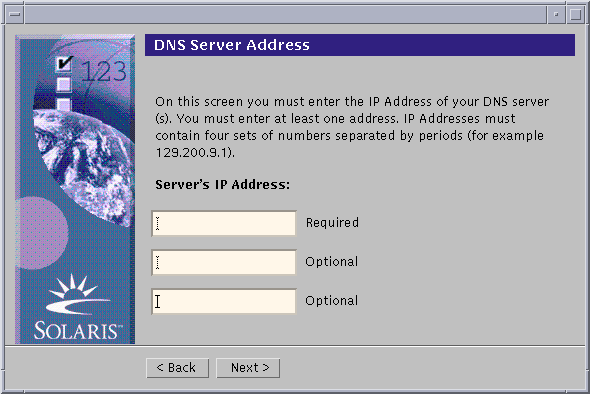
If you selected DNS, the DNS Server Address dialog box is displayed:
-
-
Are you using NIS+/NIS or DNS?
-
If NIS+ or NIS, select "Find one" or "Specify one" and click Next >.
-
If you selected "Find one," the Time Zone dialog box is displayed.
-
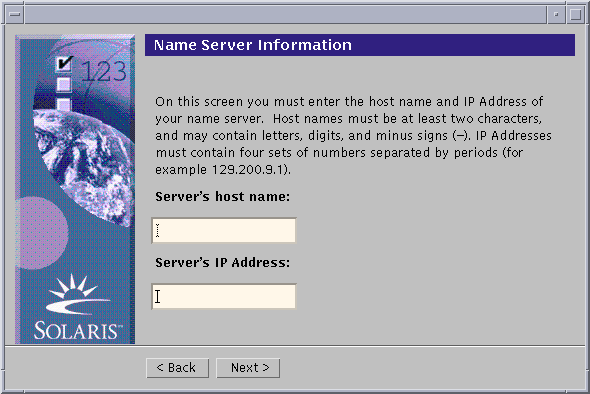
If you selected "Specify one," the Name Server Information dialog box is displayed:
-
-
If DNS, type the IP address of the DNS server or servers you want and click Next >.
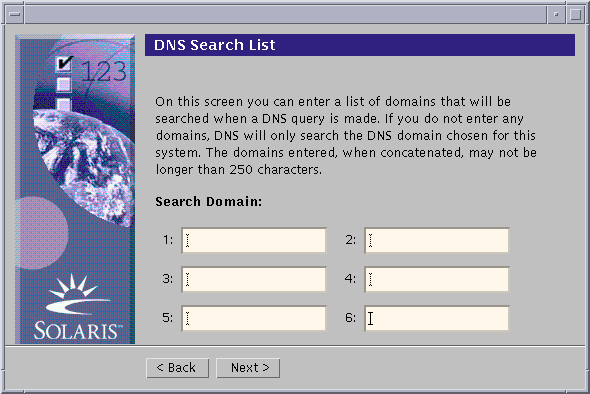
The DNS Search List dialog box is displayed:
-
-
Are you using NIS+/NIS or DNS?
-
If NIS+ or NIS, on the Name Server Information dialog box, type the host name and IP address of your name server and click Next >.
-
If DNS, type the name of the domain or domains you want searched when a DNS query is made, if any, and click Next >.
The Time Zone dialog box is displayed:

-
-
On the Time Zone dialog box, select how you want to set your default time zone and click Next >.
The Geographic Region, Offset From GMT, or Time Zone File dialog box is displayed, depending on the method you chose.
-
Use this decision table to determine what to do next:
If you chose
Then
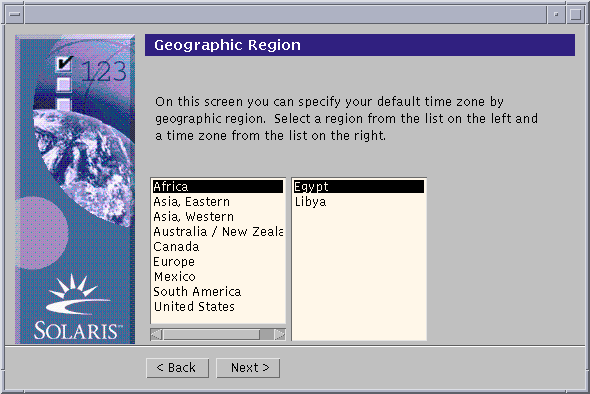
Select the region you want in the left window and the time zone in the right, and click Next >.
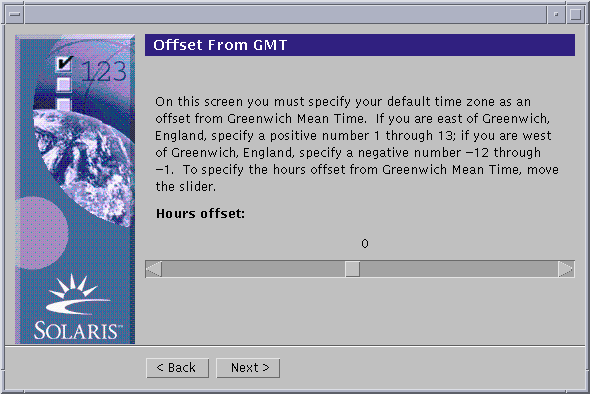
Drag the slider toward the left (for west of Greenwich, England) or right (for east of Greenwich, England), and click Next >.
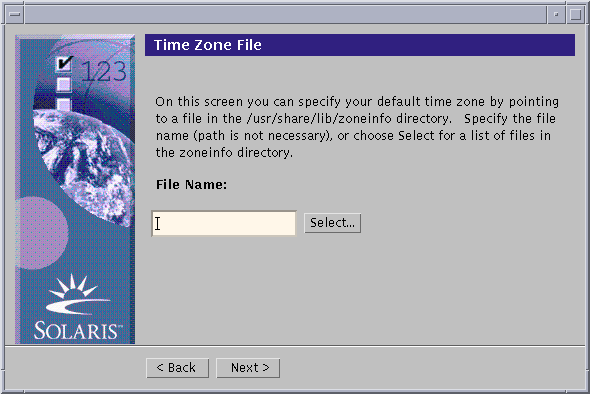
Specify the name of any file in /usr/share/lib/zoneinfo, or click Select to choose a file in this directory, and click Next >.
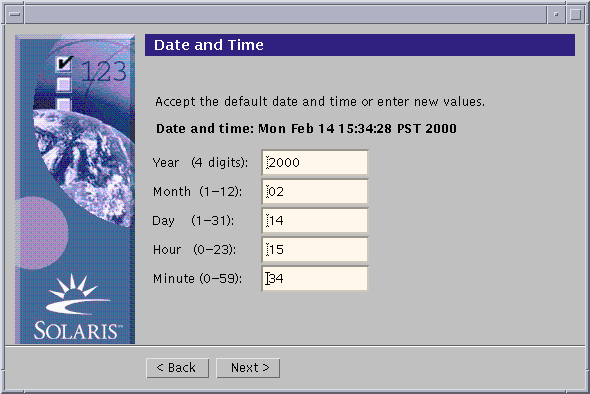
The Date and Time dialog box is displayed:
-
If necessary, correct the date and time, and click Next >.
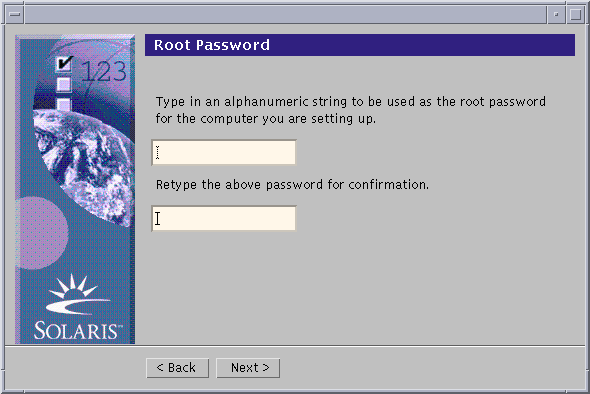
The Root Password dialog box is displayed:
-
Type the alphanumeric string you want to use for the superuser password in both fields, and click Next >.
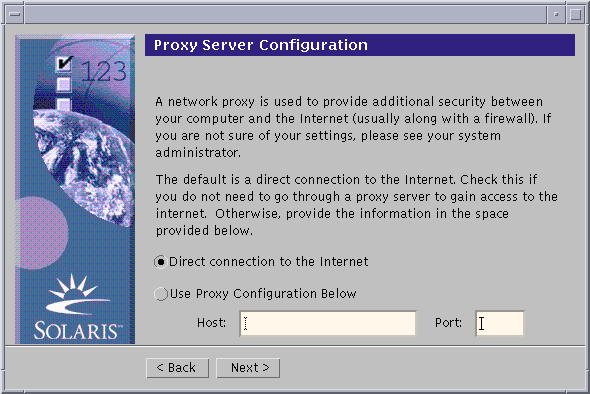
The Proxy Server Configuration dialog box is displayed:
-
Does the system go through a proxy server to access the Internet?
-
If no, select Direct connection to the Internet and click Next >.
-
If yes, select Use Proxy Configuration Below, specify the host name and port of the proxy server for the system, and click Next >.
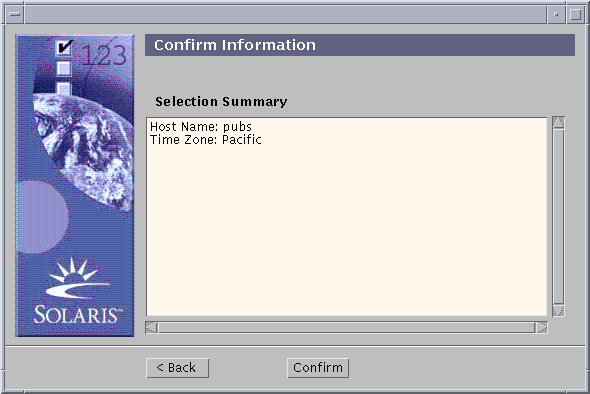
The Confirm Information dialog box is displayed:
-
-
Is the information on the Confirm Information dialog box correct?
-
If no, click < Back until you display the dialog box you need to correct the information.
-
If yes, click Confirm.
The message:
Please wait while the system is configured with your settings...
is displayed in the Confirm Information dialog box. The Extracting dialog box is displayed momentarily. Then the Solaris Web Start Installation Kiosk and Welcome to Solaris dialog box are displayed:
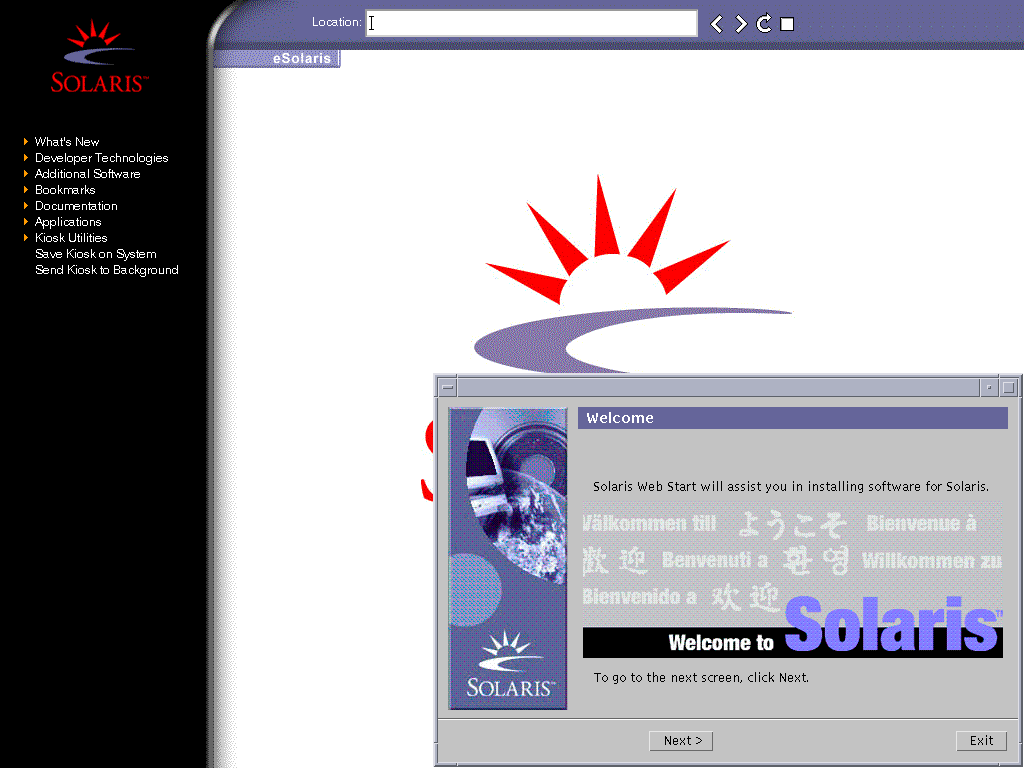
Note -In some cases, the Kiosk might obscure a dialog box. To display an obscured dialog box, on the Kiosk menu, click Send Kiosk to Background.
-
To Upgrade Solaris
-
On the Welcome to Solaris dialog box, click Next >.
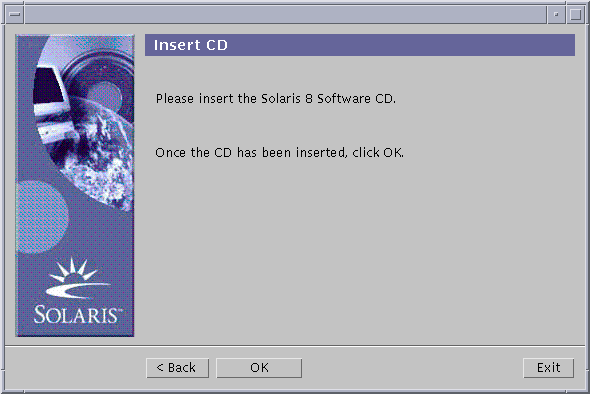
The Solaris 8 Installation English Intel Platform Edition or Solaris 8 Installation Multilingual Intel Platform Edition CD is ejected and the Insert CD dialog box is displayed:
-
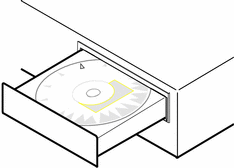
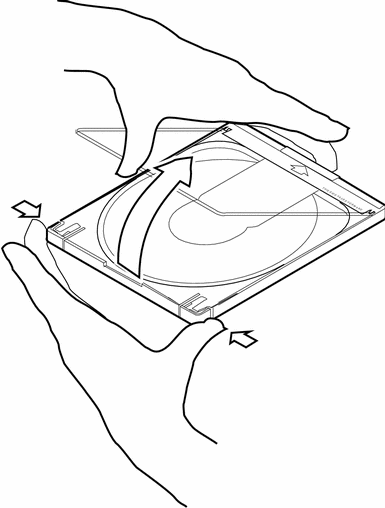
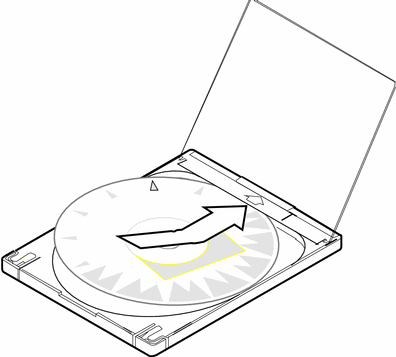
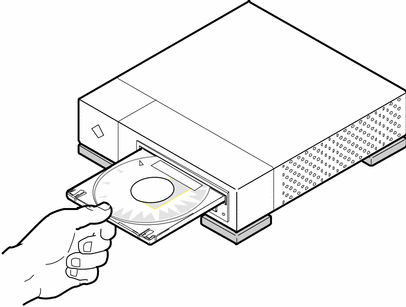
Remove the CD from the tray or caddy, and insert the CD that contains the upgraded Solaris 8 software.
-
Push the tray in or insert the caddy and click OK on the Insert CD dialog box.
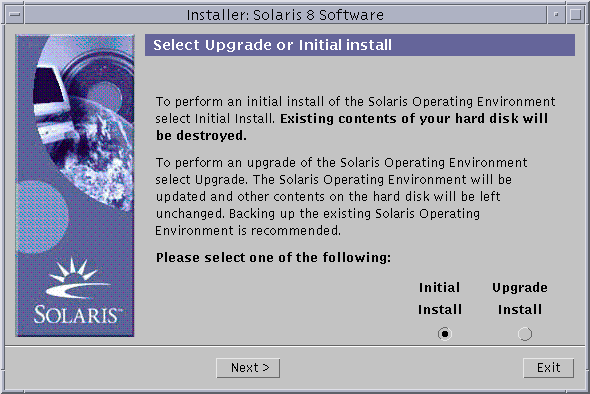
The Reading CD and Initializing dialog boxes are displayed. Then, the Select Upgrade or Initial Install dialog box is displayed:
-
Which type of upgrade do you want to perform?
-
If initial, select Initial Install and click Next >.
-
If upgrade, select Upgrade Install and click Next >.
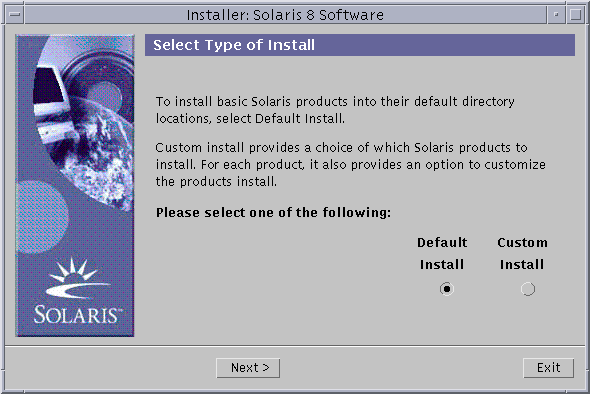
If you chose Initial Install, the Initializing dialog box is displayed, followed by the Select Type of Install dialog box:
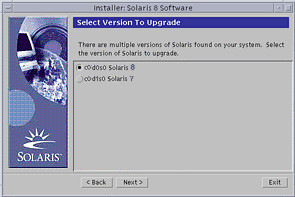
If you chose Upgrade Install and there is more than one version of the Solaris operating environment already installed on the system, the Select Version To Upgrade dialog box is displayed:
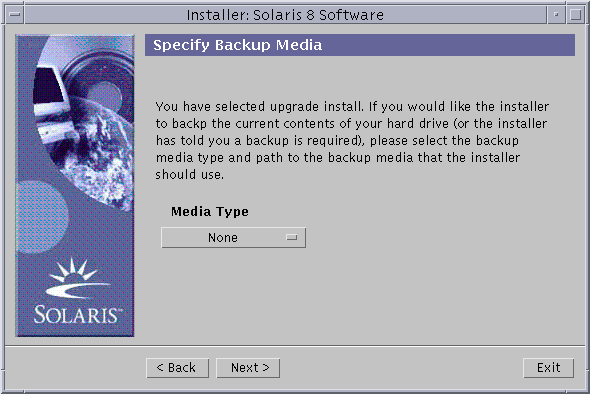
If you chose Upgrade Install and there is only one version of the Solaris operating environment on the system, the Specify Backup Media dialog box is displayed:
-
-
How many versions of Solaris are already installed on the system?
-
If none, go to Step 7.
-
If only one version of Solaris is installed on the system, go to the next step.
-
If more than one version of Solaris is installed on the system, on the Select Version To Upgrade dialog box, select the version you want to upgrade and click Next >.
The Specify Backup Media dialog box is displayed.
-
-
On the Specify Backup Media dialog box, select the media type you want (by pulling down the Media Type pop-up menu, selecting Local Disk, Local Tape, or Remote Filesystem, and specifying the path name) and click Next >.
The Testing Upgrade Profile dialog box is displayed.
Note -At this point, Solaris Web Start tests the system you're upgrading to ensure that enough disk space is available for the upgraded Solaris software. If there is not enough disk space available, Solaris Web Start displays a message suggesting that you perform an initial upgrade.
The Select Type of Install dialog box is then displayed:

-
Which type of installation do you want to perform?
-
If Default Install, select Default Install, click Next >, and go to Step 16.
-
If Custom Install, select Custom Install and click Next >.
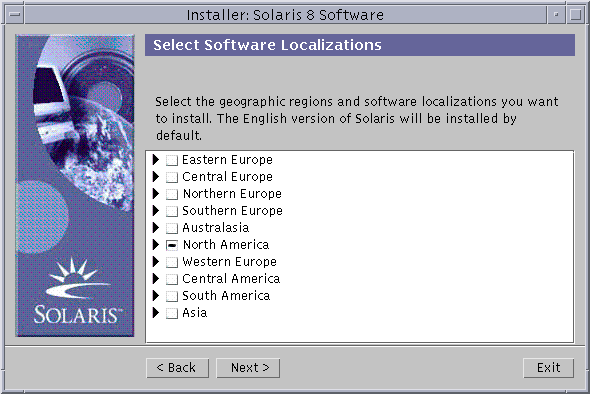
The Select Software Localizations dialog box is displayed:
-
-
Select the geographic regions and localizations you want to install in addition to English and click Next >.
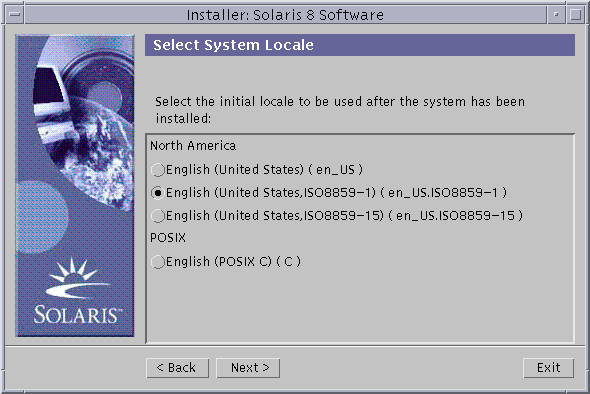
The Select System Locale dialog box is displayed:
-
Select the initial locale you want to be used after the upgraded Solaris software is installed on the system and click Next >.
Note -English (United States, en_US) is selected by default.
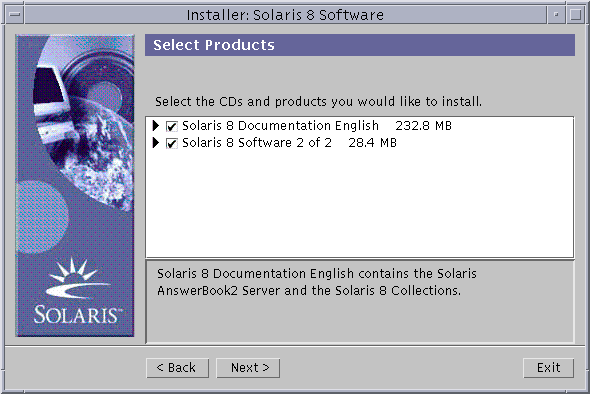
The Select Products dialog box is displayed:
-
Select the product or products you want to install in addition to the upgraded Solaris 8 software and click Next >.
Note -A description of each product, if available, is displayed when you select it.
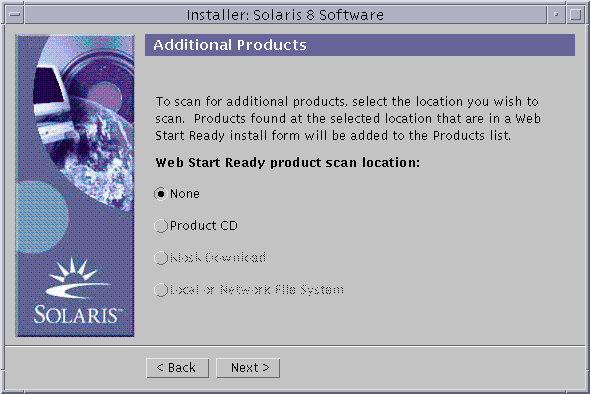
The Additional Products dialog box is displayed:
-
Do you want to install additional third-party or other software products (that can be installed with Solaris Web Start)?
-
If no, select None, click Next >, and go to Step 16.
-
If yes, select Product CD, Kiosk Download, or Local or Network File System, and click Next >.
-
If you selected Product CD, the Solaris 8 Software 1 of 2 Intel Platform Edition CD is ejected and the Insert CD dialog box is displayed.
-
If you selected Kiosk Download, the Scanning dialog box is displayed. When Solaris Web Start is done scanning the Kiosk download area (/webstart/kiosk/download), the Select Products dialog box is displayed. The products you can install with Solaris Web Start are listed in the windows.
-
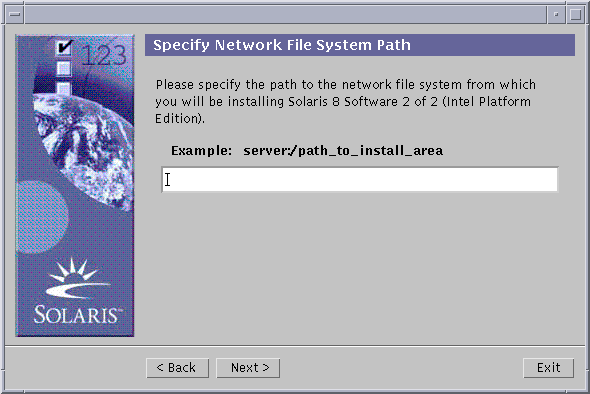
If you selected Local or Network File System, the Specify Network File System Path dialog box is displayed:
-
-
-
Which product source did you specify previously?
-
If Product CD, remove the Solaris 8 Software 1 of 2 Intel Platform Edition CD from the tray or caddy, insert the product CD you want, and click OK on the Insert CD dialog box.
The Scanning CD dialog box is displayed. When Solaris Web Start is done scanning the product CD, the Select Products dialog box is displayed. The contents of the product CD you can install with Solaris Web Start are listed in the windows.
-
If Kiosk Download, go to the next step.
-
If Local or Network File System, on the Specify Network File System Path dialog box, type the path to the file system and click Next >.
The Scanning dialog box is displayed. When Solaris Web Start is done scanning the file system, the Select Products dialog box is displayed. The products you can install with Solaris Web Start are listed in the windows.
-
-
On the Select Products dialog box, select the products you want to install and click Next >.
Note -A description of each product, if available, is displayed when you select it.
The Additional Products dialog box is displayed.
-
Do you want to install additional third-party or other software products (that can be installed with Solaris Web Start)?
-
If yes, select Product CD, Kiosk Download, or Local or Network File System, click Next >, and repeat the preceding steps starting at Step 12.
-
If no, select None and click Next >.
If you previously inserted and scanned an additional products CD, the CD is ejected and an Insert CD dialog box prompts you to insert the Solaris 8 Software 1 of 2 Intel Platform Edition CD.
-
-
Did you specify that you want to install additional products from a CD?
-
If no, go to the next step.
-
If yes, remove the product CD from the tray or caddy, insert the Solaris 8 Software 1 of 2 Intel Platform Edition CD, and click OK.
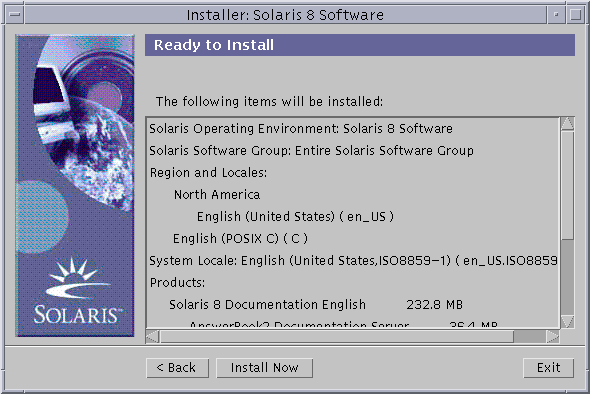
The Reading CD dialog box is displayed. If you chose upgrade, the Testing Upgrade Profile dialog box is also displayed for a few seconds. The Ready to Install dialog box is then displayed:
-
-
On the Ready to Install dialog box, click Install Now.
The Installing dialog box is displayed.
Status messages and the name of each package that's added to the Solaris software are displayed in brackets above the top progress bar. The status of the entire installation is shown on the bottom progress bar.
A complete list of Solaris 8 packages is included in Appendix A, Packages on the Solaris 8 Software 1 of 2 Intel Platform Edition CD, Appendix B, Packages on the Solaris 8 Software 2 of 2 Intel Platform Edition CD, and Appendix C, Packages on the Solaris 8 Languages Intel Platform Edition CD.
Note -Upgrading can take a while, but the actual time depends on the software group you chose to install, the reallocation of any space if needed, and the speed of the network or local CD-ROM drive you use.
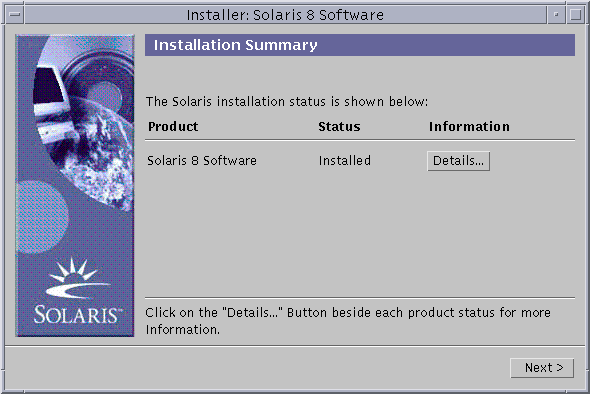
When installation of the software on the Solaris 8 Software 1 of 2 Intel Platform Edition CD is finished, the CD is ejected and the Installation Summary dialog box is displayed:
-
Do you want to display a log file that describes what was installed on the system?
-
If no, go to Step 20.
-
If yes, click Details for the product you want.
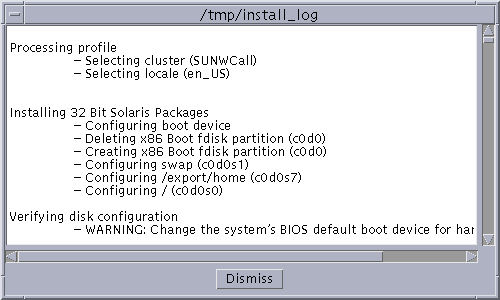
A new dialog box titled Details is displayed over the Installation Summary dialog box:
-
-
When you're done viewing the Details dialog box, click Dismiss.
The Details dialog box is dismissed.
-
On the Installation Summary dialog box, click Next >.
If a CD is inserted in the CD-ROM drive, it's ejected.
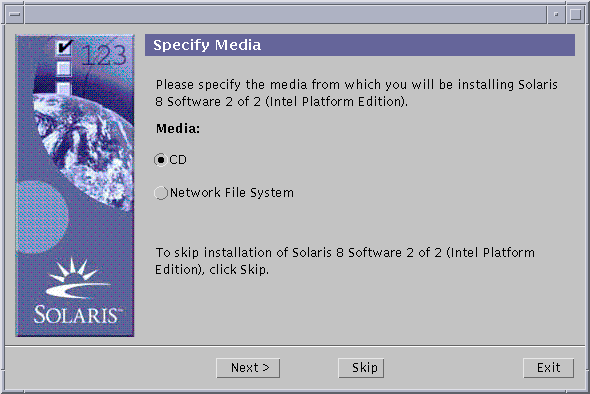
If additional software is required, a Specify Media dialog box like this is displayed:
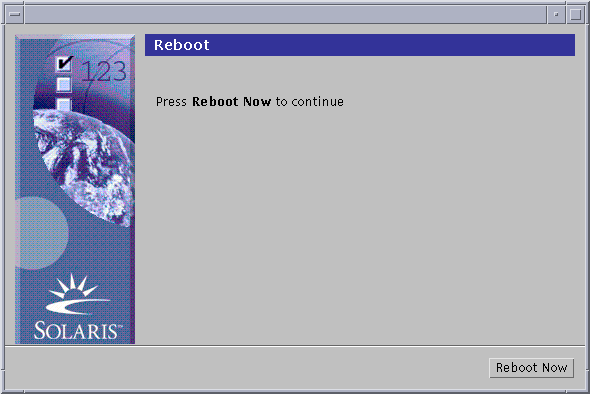
Otherwise, the Reboot dialog box is displayed:
-
Is additional software required?
-
If no, go to Step 23.
-
If yes, do you want to install the additional software from a CD or through a network file system?
-
If CD, select CD and click Next >.
The Insert CD dialog box is displayed.
-
If network file system, select Network File System and click Next >.
A Specify Network File System Path dialog box like this is displayed:

-
-
-
How did you specify you want to install the additional software?
-
If from a CD, insert the CD specified on the Insert CD dialog box and click OK.
The Reading CD, Launching Installer, and Extracting dialog boxes are displayed, followed by the Installing dialog box. When installation of the software on the CD is finished, the CD in the CD-ROM drive is ejected and the Installation Summary dialog box is displayed.
-
If through a network file system, type the path to the network file system on the Specify Network File System Path dialog box and click Next >.
The Launching Installer and Extracting dialog boxes are displayed, followed by the Installing dialog box. When installation of the software through the network is finished, the Installation Summary dialog box is displayed.
-
-
Repeat the previous steps starting at Step 19.
-
On the Reboot dialog box, click Reboot Now.
The system is rebooted. After a few seconds, a dialog box that prompts you to enter the user name and password for the system is displayed.
-
Type the user name and password for the system.
A dialog box that prompts you to select the Solaris desktop you want (either CDE or OpenWindows) is displayed.
-
Select the Solaris desktop you want and click OK.
After a few seconds, the Solaris desktop you selected is displayed.
-
Do you intend to use Netscape Communicator and OpenWindows on the system on which you just installed Solaris 8?
-
If no, you're done.
-
If yes, use a text editor of your choice to open the system's .cshrc file, and add an entry to your path environment variable for the directory in which Netscape Communicator is installed.
For example, if Netscape Communicator is installed in the default directory, add /opt/NSCPcom to your path environment variable.
Note -When running Netscape Communicator with OpenWindows, your path environment variable needs to include a pointer to the NSCPcom directory to find the binaries.
-
Note -
You can see upgrade log files:
-
Before the system reboots at: /a/var/sadm/system/logs/upgrade_log
-
After the system reboots at: /var/sadm/system/logs/upgrade_log
To Clean Up After Upgrading
After you finish upgrading a system, you might need to clean it up. When you upgrade, Solaris Web Start merges local software modifications of the existing system with the new Solaris software; however, in some cases, merging is not possible.
-
See the contents of the following file to determine whether you need to fix local modifications that Solaris Web Start could not preserve:
/a/var/sadm/system/data/upgrade_cleanup
 Caution -
 Check all the contents of upgrade_cleanup carefully. Your system might not boot if you don't fix the unpreserved local modifications.
-
If necessary, fix any unpreserved local modifications.
-
Reboot the system:
# reboot
- © 2010, Oracle Corporation and/or its affiliates

