Editing Images
At any time, you can:
Undo the last change or addition you made by choosing Edit -> Undo from the control area.
The remaining editing commands in the Edit menu behave the same as those in a Text Editor window.
Cutting a Portion of an Image
To cut a portion of the drawing, create a rectangular outline around the area to be cut. To do this:
-
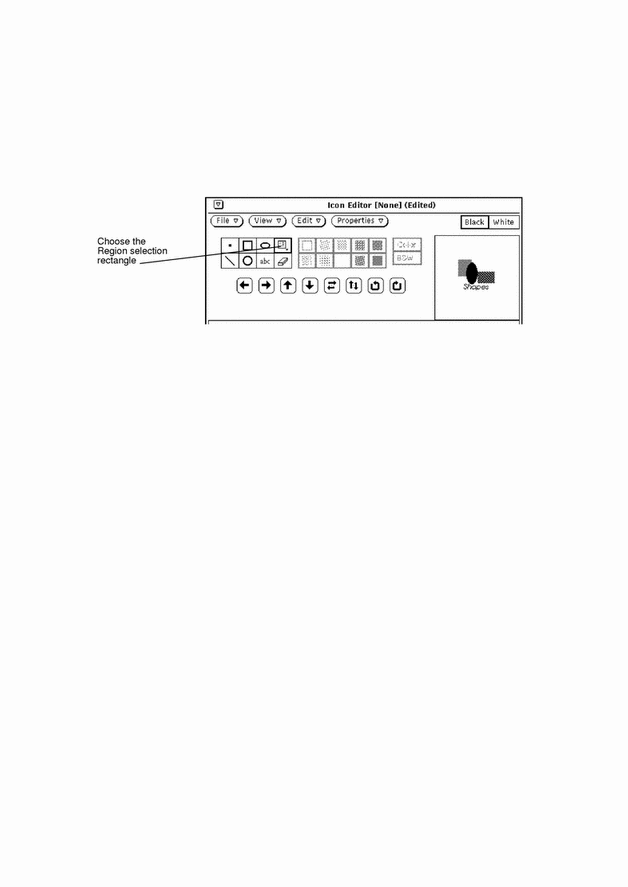
Click SELECT on the rectangular icon next to the oval in the control area.
This enables you to define a region to cut.
Figure 15-8 Region Selection Rectangle

-
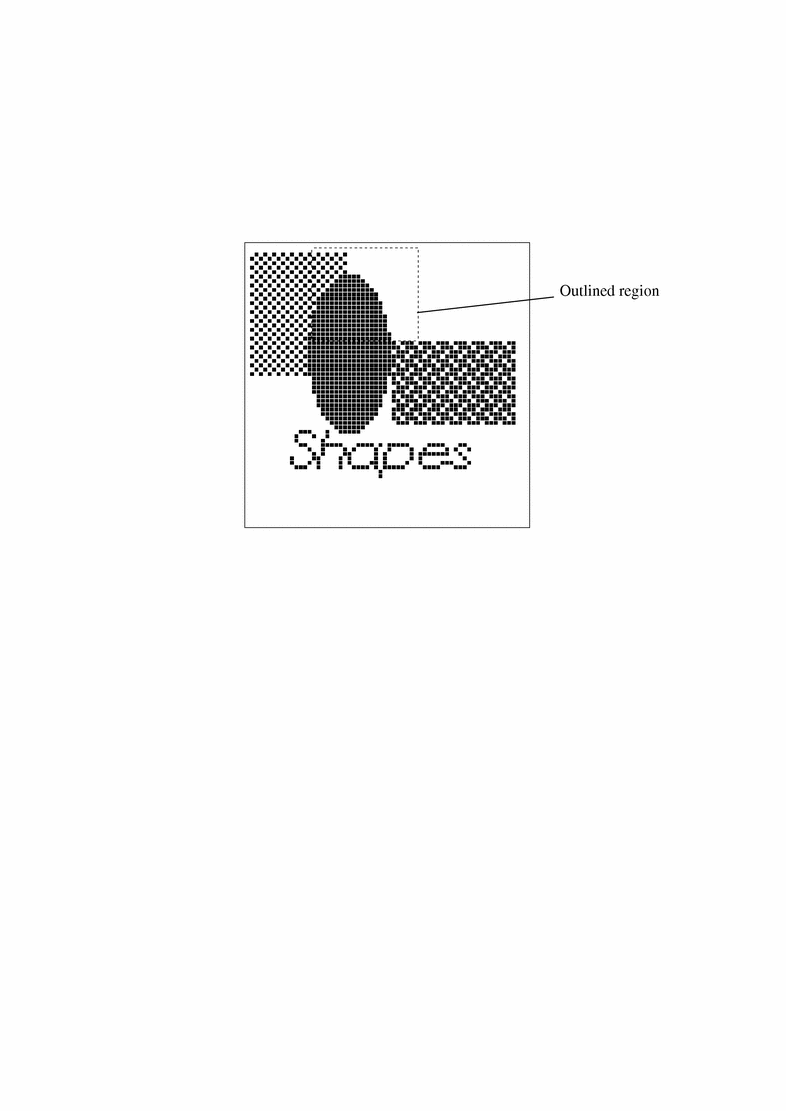
Position the pointer on the canvas window at one corner of the portion to cut, press SELECT and drag the pointer diagonally to the opposite corner, then release the mouse button.
Figure 15-9 shows how the area to be cut is surrounded by a rectangular region.
Figure 15-9 Selecting a Portion of an Icon Image to Cut

-
Choose Edit -> Cut.
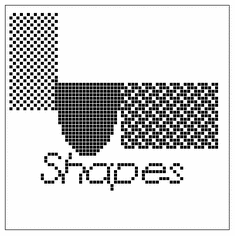
This cuts the outlined portion of the image and places it in a system clipboard. You can then paste it elsewhere, if needed. Figure 15-10 shows the icon image with the portion cut away.
Figure 15-10 Icon Image with a Portion Cut Away

Erase
The small rectangular object next to the abc button on the Icon Editor control area is an eraser. The icon for the eraser is shown in Figure 15-11.
Figure 15-11 Icon for the Eraser
To erase a portion of an image:
-
Click SELECT on the eraser icon.
-
Move the pointer to the area in the canvas window that you want to erase.
-
Press SELECT and drag the pointer over the area you want to erase.
If you lift your finger from the mouse button frequently to end the current input segment, you can undo the last segment at any time without losing all of the changes you've made. You can undo the last input (erase) you made at any time by choosing Undo from the Edit menu, or from the pop-up menu in the Icon Editor window pane (canvas).
Fill Choices
The Fill choices, shown in Figure 15-12, allow you to choose an outline or one of 10 fill patterns for drawing squares, circles, or ellipses. This menu is only active when the current mode is a fillable shape (square, circle, or ellipse).
Figure 15-12 The Icon Editor Fill Choices

The first fill choice, an open square, draws an outline of the chosen shape, using a 1-pixel wide black pattern. The other fill choices represent patterns, from white to black, that you can use to fill the square, circle, or ellipse modes.
Icon Editor Color Controls
You can create color or black-and-white icons by choosing Color or B&W, as shown in Figure 15-13. Color is not available if your workstation is black-and-white.
Figure 15-13 Icon Editor Color Choice

When the Color choice is selected, you can draw using black, white, or any of the colors provided on the Color Chooser window. You display the Color Chooser with the Palette button on the Icon Editor header. When you select a color from the Color Chooser, the cursor changes to that color as a reminder of your current color choice. See the section "Icon Editor Color Chooser Palette" for information about using color.
When the B&W choice is selected, only the colors black-and-white are available. The Palette button on the Icon Editor header changes to a Black or White choice setting. When Black is selected, your icon is drawn with a black pen. When White is selected, your icon is drawn with a white pen.
If the icon you are creating is currently in color when you select B&W, the icon becomes black-and-white.
If you change your icon from color to black-and-white, the colors will not be restored when you switch back to color. If you inadvertently switch from color to black-and-white, use the Undo item on the Edit menu to restore the color.
Move Buttons
Use the move buttons (the arrows shown in Figure 15-14) to adjust the position of the drawing on the canvas, or to move a region within the canvas. To move a selected region, click SELECT on one of the left, right, up, or down arrow buttons to move the region one pixel in the designated direction. If no region is selected, the entire drawing is moved.
Figure 15-14 Icon Editor Move Buttons
Note -
If you move or rotate part of the image off the canvas, the pixels are cropped from the image and are not restored when you move the image in the opposite direction. Use the Undo item on the Edit menu to restore the image.
To move a region:
-
Choose Region from the Mode choices.
Region is the last item on the top row of the Mode choices.
-
Move the pointer to the corner of the region you want to move and press SELECT.
-
Drag the pointer to define the region and release SELECT.
-
Click SELECT on one of the arrow buttons to move the region one pixel in the designated direction.
You can repeat this operation as often as you like.
The fifth and sixth buttons shown in Figure 15-14 flip the selected region from left to right or top to bottom. If no region is selected, the entire image on the canvas is flipped. The right two buttons shown in Figure 15-14 rotate the region or the image 90 degrees in the direction of the arrow.
- © 2010, Oracle Corporation and/or its affiliates
