Editing a BDF Font File
-
Hold down the MENU mouse button on the Font Editor window's File button and select Load... on the pull down menu.
-
Type the name of the BDF file you want to edit, for example myfont14.bdf, in the Font Name field of the Load pop-up window.
-
Click SELECT on the Load button in the pop-up.
This loads the file.
-
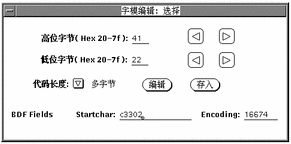
Click SELECT on the Font Editor main window Select button.
This displays the Select window, where you do the following steps.
-
Type the high and low bytes of the font encoding code for the character you want to edit, for example 0x3302.
You can use the Next (right arrow) button or Previous (left arrow) button to increase or decrease the high or low byte.

-
Set Code Length to MultiByte for this Simplified Chinese font.
You would set Code Length to SingleByte for an ASCII/English font.
-
Click on the Edit button (in the Fontedit: Select window) to display the glyph on the main canvas.
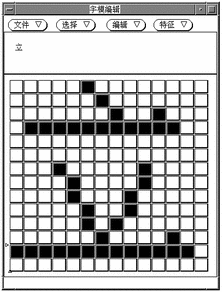
The specified glyph appears in the Font Editor window.

-
Edit the glyph on the main canvas by turning pixels on/off:
-
Click the SELECT mouse button to turn on a pixel.
-
Click the ADJUST mouse button to turn off a pixel.
-
Hold down the MENU mouse button for a menu of additional functions.
Note -The character glyph in the upper left corner of the main window shows the actual appearance of the glyph as you turn its pixels on and off.
-
-
When you finish editing the glyph, click SELECT on the Store button.
-
Repeat the preceding steps Step 5 through Step 9 to edit other glyphs in this font.
-
After you finish editing, hold down MENU on the File button and select Save... to save the edited glyph(s) in the font file.
- © 2010, Oracle Corporation and/or its affiliates
