| Exit Print View | |
Sun Netra X6270 M2 Server Module Installation Guide for Windows Operating Systems |

|
Part I Windows Server Installations
1. Assisted OS Installation With Sun Installation Assistant (SIA)
3. Installing Windows Server 2008
Installing Windows Server Using Local or Remote Media
Install Windows Server 2008 (SP2 or R2) Using Local or Remote Media
4. Post Installation of Windows Server 2008
Part II Windows Server System Administrator References
A. Supported Installation Methods
B. Supported Operating Systems
C. BIOS Defaults for New Installations
D. Downloading the ISO Image for the Tools and Drivers DVD
E. Incorporating Device Drivers Into Windows Server 2008 WIM Images for Windows Deployment Services
This chapter provides information about manually installing the Windows Server 2008 SP2 or Windows Server 2008 R2 operating system.
Note - The term “manually” refers to performing the installation by following the instructions provided
in Chapters 2 through 4 of this guide, and not using the Sun
Installation Assistant (SIA). If you prefer to perform an assisted Windows installation by using
SIA, see ![]() Chapter 1, Assisted OS Installation With Sun Installation Assistant (SIA) of this guide for details.
Chapter 1, Assisted OS Installation With Sun Installation Assistant (SIA) of this guide for details.
This chapter includes the following topics:
Ensure that the following requirements are met before you proceed with the instructions in this chapter for manually installing the Windows Server operating system.
All applicable installation prerequisites for installing an operating system should have been met. For further information about these prerequisites, see ![]() Windows Installation Prerequisites.
Windows Installation Prerequisites.
An installation method (for example: console output, boot media, and install target) should have been chosen and established prior to performing the installation. For more information about these setup requirements, see ![]() Appendix A, Supported Installation Methods.
Appendix A, Supported Installation Methods.
Use the Microsoft Windows Server 2008 (SP2 or R2) operating system documentation in conjunction with the Windows Server operating system instructions provided in this chapter. You can obtain a copy of Microsoft’s Windows Server 2008 installation documentation at: http://www.microsoft.com/windowsserver2008/en/us/product-documentation.aspx
After completing this procedure, you should review and perform the required post installation
tasks described later in this guide. For more details, see ![]() Chapter 4, Post Installation of Windows Server 2008 .
Chapter 4, Post Installation of Windows Server 2008 .
The procedures in this section describe how to boot the Windows Server 2008 (SP2 or R2) operating system from local or remote media. It assumes that you are booting the Windows installation media from one of the following sources:
Windows Server 2008 SP2 or Windows Server 2008 R2 (or subsequent release) CD or DVD
Windows Server 2008 SP2 or Windows Server 2008 R2 (or subsequent release) ISO image
Note - The Windows Server 2008 (SP 2 or R2) ISO image can be used for remote installation or for creating an installation CD or DVD.
Note - If you are booting the installation media from a PXE environment, refer to ![]() Windows Server Installation Using a PXE Network Boot for instructions.
Windows Server Installation Using a PXE Network Boot for instructions.
For example:
Where n is the number of the server module in the chassis.
The BIOS screen appears.
Note - The next events occur very quickly; therefore, focused attention is needed for the following steps. Watch carefully for these messages as they appear on the screen for a brief time. You might want to enlarge the size of your screen to eliminate scroll bars.
The Please Select Boot Device dialog appears.
Note - The dialog that appears in your installation might differ depending on the type of disk controller installed in your server module.
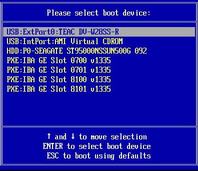
For example:
The Windows installation wizard starts.
Continue the Windows installation wizard until the Installation Type dialog appears.
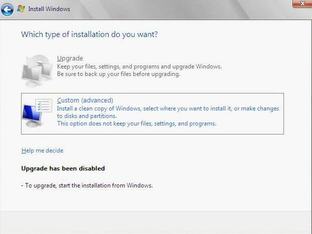
The Where Do You Want to Install Windows dialog appears.
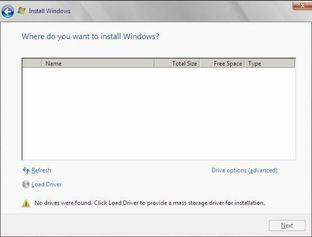
|
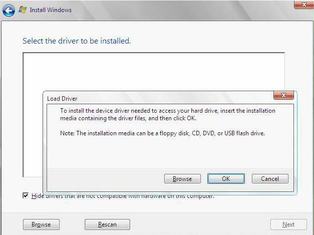
For example:
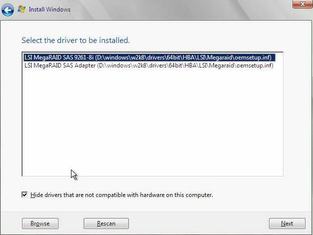
For systems configured with either of these SAS RAID HBA options— SG-SAS6-R-REM-Z/SGX-SAS6-R-REM-Z, or SG-SAS6-R-EM-Z/SGX-SAS6-R-EM-Z—navigate to the following directory on the Tools and Drivers DVD to load the appropriate LSI driver: windows/w2k8/drivers/64bit/hba/lsi/megaraid
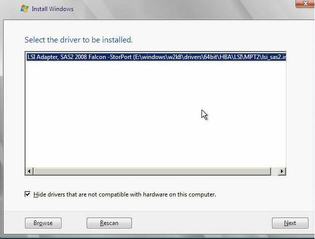
For a system configured with either of these SAS HBA options— SG-SAS6-REM-Z/SGX-SAS6-REM-Z, or SG-SAS6-EM-Z/SGX-SAS6-EM-Z—navigate to the following directory on the Tools and Driver DVD to load the appropriate LSI driver: windows/w2k8/drivers/64bit/hba/lsi/mpt2
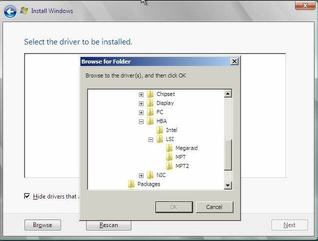
The selected driver appears in the Select the Driver to Be Installed dialog. Example dialogs follow showing a selected mass storage driver for a SAS HBA.
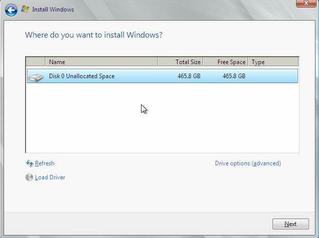
The Where Do You Want to Install Windows dialog appears.
- or -
The partition settings for the selected target appear at the bottom of the Where Do You Want to Install Windows dialog.
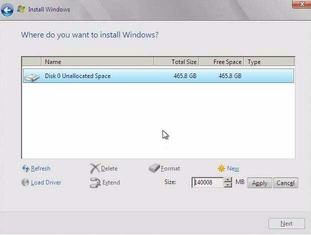
A confirmation window appears.
The partition is created.
Note - Windows Server 2008 enforces stronger password schemes for user accounts. Password standards include restrictions on length, complexity, and history. For more details, click the Accessibility link at the account creation page.
After the initial user account is created, the Windows Server 2008 desktop appears.
This section explains the initial information you will need to install the Windows Server 2008 (SP2 or R2) operating system over an established PXE-based network using a customer-provided Windows Imaging Format (WIM) image.
Topics included in this section:
Note that the procedure presented in this section documents the initial steps to install Windows Server 2008 over the network using a Windows Deployment Services (WDS). Specifically, it explains the steps for selecting the server PXE network interface card that will communicate with your WDS installation server. For further information about using WDS to install the Windows Server 2008 operating system, see Microsoft’s Windows Deployment Services documentation.
To use PXE to boot the installation media over the network, you must:
Configure the network (NFS, FTP, HTTP) server to export the installation tree.
Configure the files on the TFTP server that are necessary for PXE booting.
Configure the server’s MAC network port address to boot from the PXE configuration.
Configure Dynamic Host Configuration Protocol (DHCP).
To use WDS to perform the installation, you must:
Add the required system device drivers to the install.wim image and, if necessary, the boot.wim image.
For guidelines for adding drivers to the WIM installation image(s), see ![]() Appendix E, Incorporating Device Drivers Into Windows Server 2008 WIM Images for Windows Deployment Services.
Appendix E, Incorporating Device Drivers Into Windows Server 2008 WIM Images for Windows Deployment Services.
Obtain the WIM Administrator password.
From the ILOM web interface, select Remote Power --> Remote Power Control tab, then select Reset from the Select Action list box.
From the local server module, press the Power button on the front panel of the server module to turn off the server module, then press the Power button again to power on the server module.
From the ILOM CLI, type: reset /SYS
From the ILOM CLI on a CMM, type: reset /CH/BLn/SYS
Where n is the number of server module in the chassis.
The BIOS screen appears.
Note - The next events occur very quickly; therefore, focused attention is needed for the following steps. Watch carefully for these messages as they appear on the screen for a brief time. You might want to enlarge the size of your screen to eliminate scroll bars.
The Please Select Boot Device menu appears.
Note that the PXE installation boot device is the physical network port configured to communicate with your network installation server.
The Boot Agent dialog appears.
For additional information, consult Microsoft’s Windows Deployment Services product documentation.