How to Set Up Systems to Be Installed Over the Network With Host Manager
You should use Host Manager if you want:
-
A centralized way to set up systems to be installed over the network
-
An easy-to-use graphical user interface
-
To use the NIS or NIS+ name service to store network installation information
Note -
If you want to preconfigure system configuration information by using a remote sysidcfg file, you must use the add_install_client command to set up systems to be installed over the network.
This procedure assumes that you have already installed Host Manager at your site and have the required permissions to use it. For detailed information about setting up Host Manager, refer to the Host Manager documentation.
-
Log in to a system that has access to Host Manager.
-
Start the Solstice AdminSuite with the following command.
$ /usr/bin/solstice &
-
After the Solstice AdminSuite main window appears, click on the Host Manager icon.
-
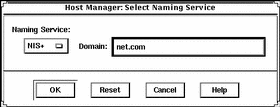
On the Host Manager: Select Naming Service screen, select a naming service and click on the Apply button. See the sample Naming Service screen below.
If the Name Service Is ...
Then Select ...
NIS+
NIS+. Host Manager will update the NIS+ tables.
NIS
NIS. Host Manager will update the NIS maps.
None
None. Host Manager will store the information you provide in the /etc files on the appropriate systems. This will provide enough information for systems to boot and to install Solaris software over the network.

-
On the Host Manager main window, choose Add... from the Edit menu.
-
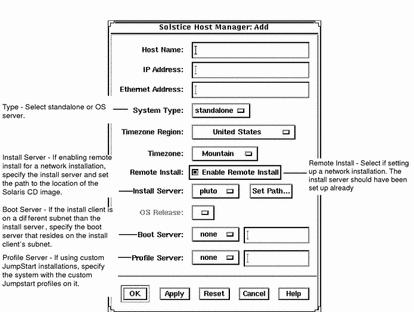
On the Host Manager: Add screen, complete all fields and click on the OK or Apply button.

-
On the Host Manager main window, choose Save Changes from the File menu.
Where to Go Next
The system is now ready to be installed over the network. To install the system, see Chapter 3, Performing a Custom JumpStart Installation.
- © 2010, Oracle Corporation and/or its affiliates
