 To Replace a Message Library Segment
The following example uses the HL7_25_ADT_A02 Message Library segment to illustrate removing a segment Message Library and replacing it with a different segment. For example, if you are working with a V2.6 library and want to use the V2.5 version for one or more segments, you can replace those segments in your Message Library. It is important to retain the original Message Library structure. If you will be doing any cutting, pasting, or deleting of segments, make a note of the Message Library segment order in the Editor’s Object Type Definition pane.
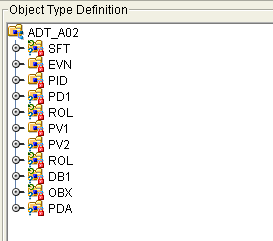
The following steps illustrate deleting a Message Library segment from this list, so it is important to make a note of the original segment location so that you can relocate the edited segment to it’s original position in the Message Library structure as illustrated in the figure.
-
On the Projects window, copy the Message Library you want to use for your Project from CAPS Components Library > Message Library > HL7 and paste it into the Project.
Tip –To copy the Message Library segment, use the copy command from the Tools menu.
-
Repeat the above step for any Message Libraries that contain segments you want to use in the above Message Library.
-
Double-click the pasted Message Library from step 1 above to display it in the Message Library Editor.
-
Make note of the Message Library segment order so you can maintain the structure.
The figure below shows the structure of the HL7_26_ADT_A02 segment.

-
Click the Internal tab in the Reference pane, right-click the segment you want to replace, and then click Delete.
-
In the Internal tab, select the top-level node to display all segments in the Object Type Definition pane.
-
In the Object Type Definition pane, right-click the same segment you deleted above, and click Delete again.
-
In the Reference pane, click External, right-click any of the references to the segment you just removed, and then click Delete.
This removes all other references to the segment Message Library.
-
On the Message Library Editor toolbar, click Import OTD From External Template.
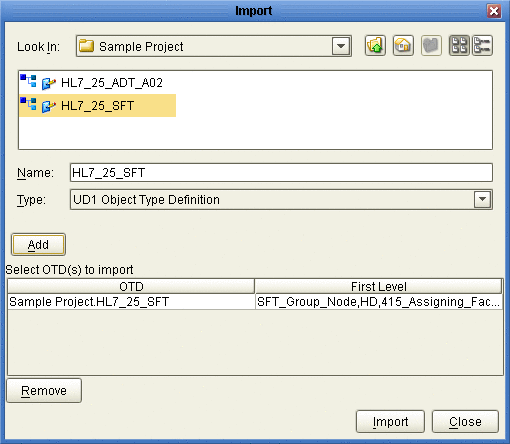
The Import dialog box appears.
-
In the Look In field, navigate to the location of the Message Library that contains the segment that will replace the one you just deleted.
This is one of the Message Libraries you pasted into a Project in step 2 above.
-
Locate and select the Message Library you want to import to your Project file.
-
Click Add to add the Message Library to the Select OTD(s) to Import section. Click Import.
The Message Library is added to the External tab of the Reference pane.

-
Drag the imported segment reference from the External tab and drop it onto the root node of the Object Type Definition pane.
The segment is added to the Object Type Definition tree.
-
Right-click the segment and click Level Up to move the segment up the tree from the Object Type Definition tree.
Repeat this step until the new segment is in the same position as that of the segment being replaced.
-
Repeat this procedure for any additional segments you want to replace.
-
Save the changes to the Repository.
You can now open the segment Message Library and edit the properties.
- © 2010, Oracle Corporation and/or its affiliates
