Creating IDoc OTDs
You create IDoc OTDs with the SAP IDoc wizard in the Netbeans IDE. You can choose to have the wizard connect to the SAP system and retrieve the IDoc message format automatically, or you can have the wizard use an IDoc definition file from a specified location. The IDoc definition file would be saved or downloaded from the SAP system as described in Exporting the IDOC File from SAP.
 To Create IDoc OTDs Directly From SAP
-
In the Explorer tab of the Netbeans IDE, right click a Project, then click New > Object Type Definition. The New Object Type Definition Wizard appears.
-
Click SAP IDoc and click Next. The Select metadata page appears.
-
To retrieve the IDocs message format directly from the connected SAP system, select the From SAP Directly, then click Next.
Note –Refer to SAP JCo and SAP IDoc Class Library Installation for a list of required files that must be installed in order to connect to SAP directly.
-
Click Next. The System Parameters page appears.
-
Enter the information for the SAP system for the IDoc wizard to connect to:
-
Click Next. The Login Parameters page appears.
-
Enter the information to log into the SAP system:
For This Option
Enter
Client Number
Client number of the SAP system.
User name
User name.
Password
Login password.
-
Click Next. The IDoc Metadata Parameters page appears.
-
Enter the following information about the IDoc:
For This Option
Enter
System Release
The SAP System release for this IDoc. All IDocs up to this release number are displayed in the list of available IDocs.
IDoc type
IDoc type, for example, CREMAS03. You cannot use a wild card.
IDoc type extension
Extension for this IDoc type (optional).
Record Type Version
Select the version of the IDoc record type. The default value is 3.
Message format
Blank padded for ALE format or CR-LF for EDI format.
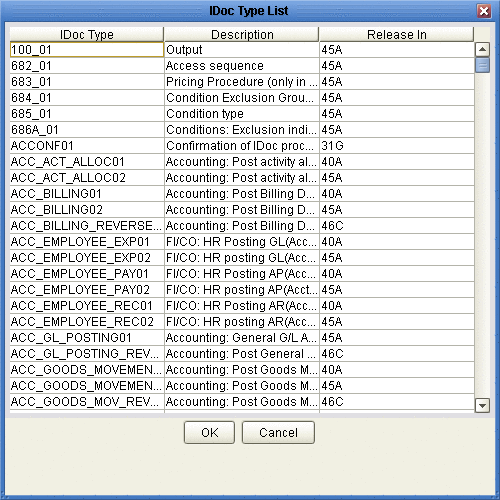
For IDoc type, click the List IDocs button to display a list of available IDocs supported by SAP, as seen in the figure below.
Figure 1–1 IDoc Type List

-
Select your needed IDoc type and click OK.
-
Click Next. The Review Selection page appears.
-
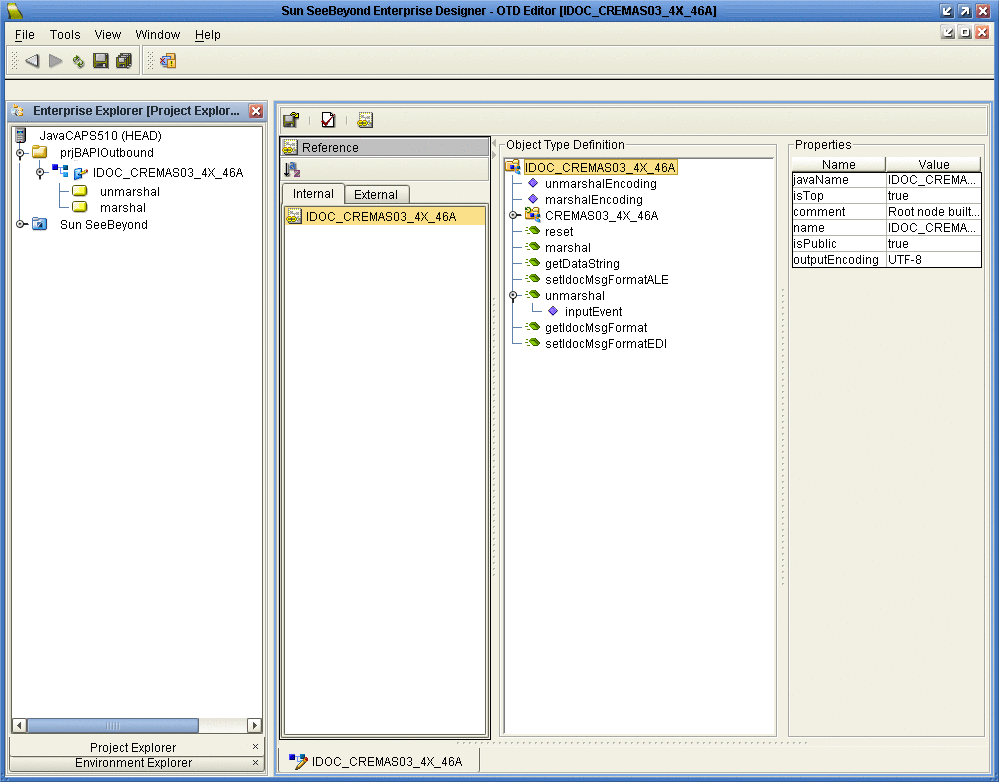
Review your selections and click Finish. The OTD Editor window appears, displaying the OTD.
Figure 1–2 CREMAS IDOC OTD

The figure above shows a CREMAS IDoc OTD in the OTD editor. The OTD has various methods which you can use in Java Collaborations for processing IDoc data.
The CREMAS IDoc OTD also has marshal and unmarshal Web Service operations as seen in the Project tree. You can use these operations when using the OTD in eInsight business processes.
The figure below shows the unmarshal operation in the eInsight Business Process editor. You can unmarshal byte or string data onto the IDoc OTDs bytes and contents nodes respectively. The bytes node takes in only UTF-8 encoded data. That is, if you want to perform an unmarshal operation using bytes as the input source, then you must ensure that the data is in UTF-8 before utilizing this node.
In this example we are unmarshaling byte data which is not UTF-8 encoded; therefore, you must perform a bytes to text conversion in editor, and then unmarshal string data to the contents node.
Figure 1–3 CREMAS unmarshal

If required, you can also use the Relaunch option of the OTD to relaunch the IDoc OTD wizard and rebuild the IDoc OTD for the same IDoc Type built with a particular system release.
On relaunch, the OTD is rebuilt again with the changed meta data. Any Java Collaborations and Business Processes using this IDoc OTD are also synchronized with the new changes.
If your Java Collaborations or business Processes are using OTD nodes that are now absent in the relaunched OTD, you will be prompted to correct the business rules by validation errors.
 To Create IDOC OTDs From a Description File
-
In the Explorer tab of the Netbeans IDE, right click the Project, click New, and click Object Type Definition.
The New Object Type Definition dialog box appears.
-
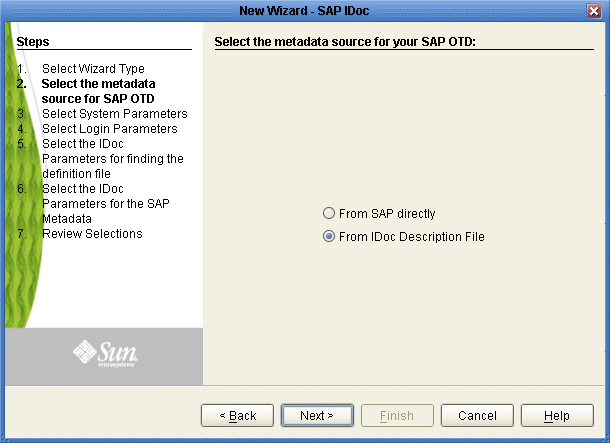
Click SAP IDoc and click Next. The Select metadata source page appears.
Figure 1–4 IDoc Wizard—Metadata Selection

-
To retrieve the IDocs from a description file, select the From Description File.
-
Click Next.
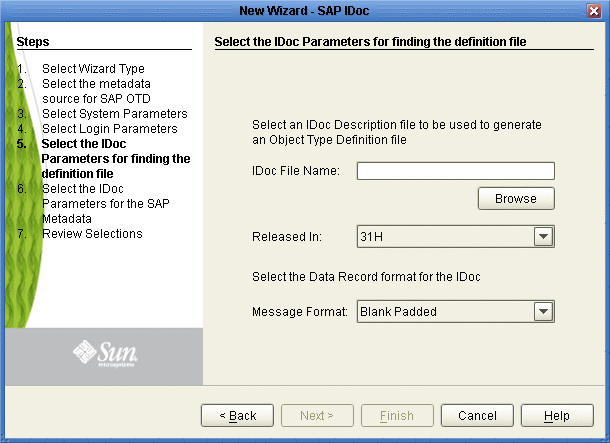
The Definition File Parameters page appears.
Figure 1–5 IDoc Wizard—Definition File Parameters

-
Enter the following information about the IDoc definition file:
For This Option
Enter
IDoc File Name
The path and filename for the IDoc description file to be used.
Released In
SAP IDoc release for this IDoc, for example, 4.6C.
Message format
Blank padded for ALE format or CR-LF for EDI format.
-
Click Next. The Review Selection page appears.
-
Review your selections and click Finish. The OTD Editor window appears, displaying the OTD.
- © 2010, Oracle Corporation and/or its affiliates
