Creating a New JDBC OTD
The following steps are required to create a new OTD for the JDBC Adapter.
Select Wizard Type
Select the type of wizard required to build an OTD in the New Object Type Definition Wizard.
 To Select the JDBC Database OTD Wizard
-
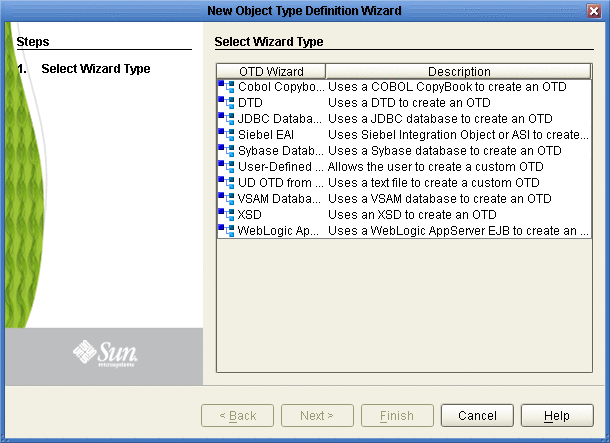
On the Project tree, right click the Project and select New ⇒ Object Type Definition from the shortcut menu. The Select Wizard Type page appears, displaying the available OTD wizards. See the following figure.
 To Connect To Database
-
From the New Object Type Definition Wizard window, select JDBC Database and click the Next button. The New Wizard - JDBC Database window appears.
-
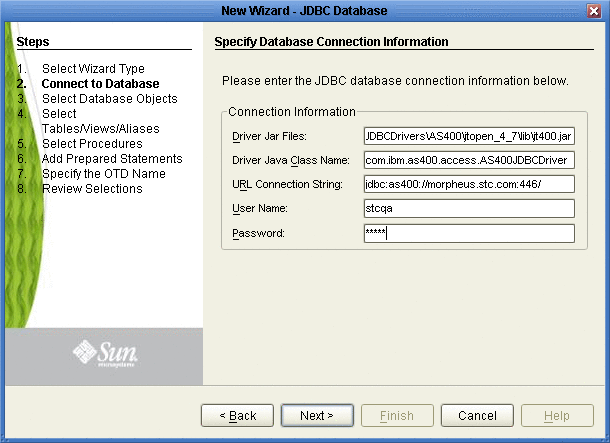
Enter the JDBC database connection information in the Connection Information frame.
Required Database Connection Fields include:
-
Driver Jar Files– the location of the driver JAR file.
-
Driver Java Class Name– the name of the Driver Manager Class.
-
URL Connection String– the URL connection string for the driver.
-
User name– a valid JDBC database username.
-
Password– a password for the user name noted above.
-
Select Database Objects
Select the type of JDBC database objects you want included in the OTD.
 To Select Database Objects
-
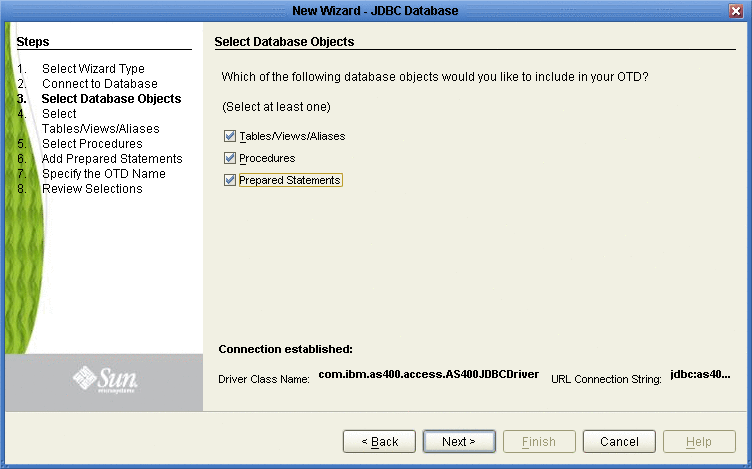
When selecting Database Objects, you can select any combination of Tables, Views, Procedures, or Prepared Statements you would like to include in the OTD file. Click Next to continue. See the following figure.
Note –Views are read-only and are for informational purposes only.
Select Tables/Views/Aliases
Select the types of tables, views, or aliases required in the OTD.
 To Select Table/Views/Aliases
-
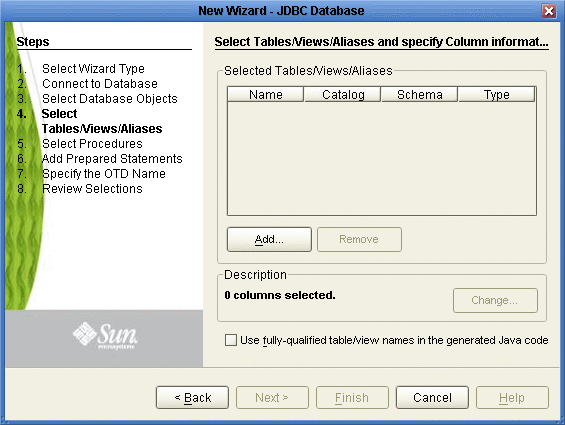
In the Select Tables/Views/Aliases window, click Add. See the following figure.
-
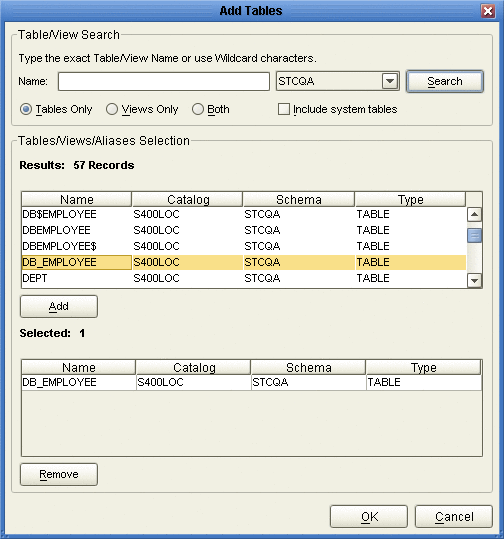
In the Add Tables window, select if your selection criteria will include table data, view only data, both, and/or system tables.
-
From the Table/View Name drop down list, select the location of your database table and click Search. See the following figure.
-
Select the table of choice and click OK.
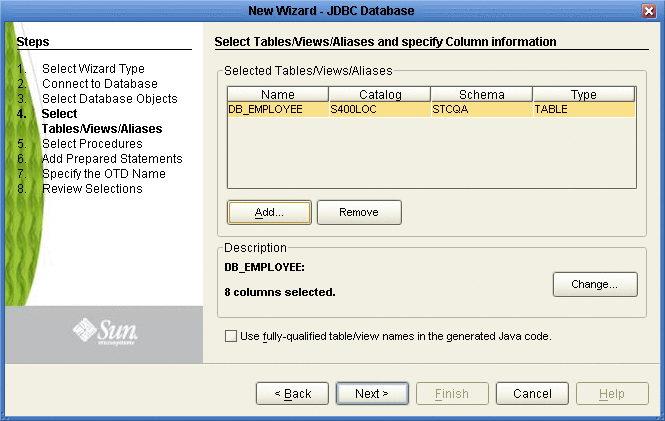
The table selected is added to the Selected Tables/Views/Aliases section. See the following figure.
-
In the Selected Tables/Views/Aliases section, review the table(s) you have selected. To make changes to the selected Table or View, click Change. If you do not wish to make any additional changes, click Next to continue.
-
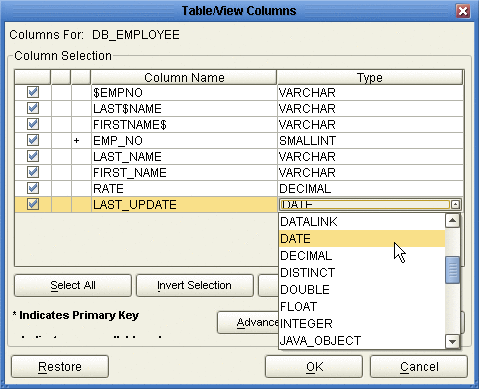
In the Table/View Columns window, you can select or deselect your table columns. You can also change the data type for each table by highlighting the data type and selecting a different one from the drop down list. If you would like to change any of the tables columns, click Change. See the following figure.
The data type is usually listed as Other when the driver cannot detect the data type. In these situations we recommend changing the data type to one that is more appropriate for the type of column data.
-
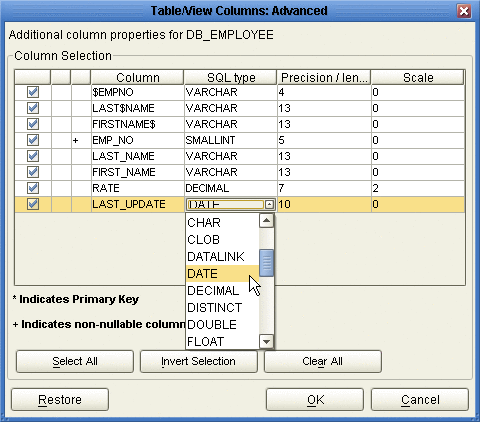
Click Advanced to change the data type, precision/length, or scale. Once you have finished your table choices, click OK. In general, you will not need to make any changes. See the following figure.
Select Procedures
Select the type of stored procedures required in your OTD.
 To Select Stored Procedures
-
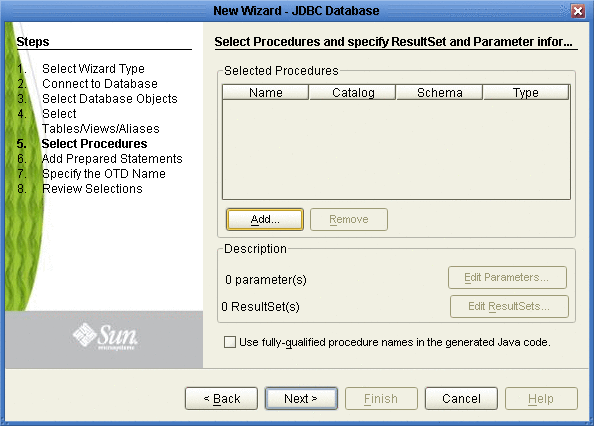
On the Select Procedures and specify Resultset and Parameter Information window, click Add.
-
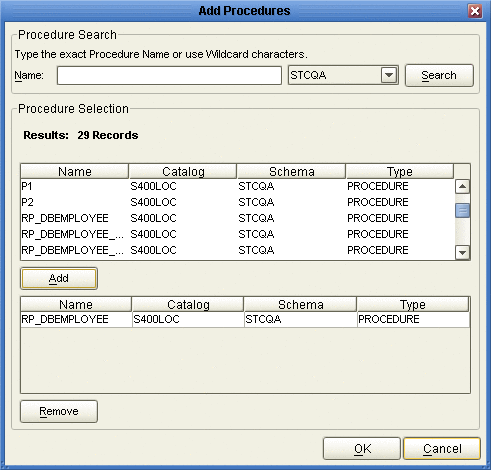
On the Select Procedures window, enter the name of a Procedure or select a schema from the drop down list. Click Search. Wildcard characters can also be used.
-
In the resulting Procedure Selection list box, select a Procedure. Click OK.
-
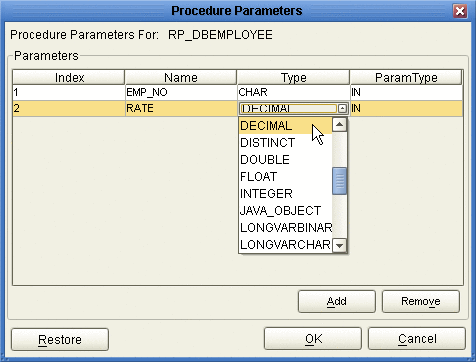
On the Select Procedures and specify Resultset and Parameter Information window click Edit Parameters to make any changes to the selected Procedure. See the following figure.
-
To restore the data type, click Restore. When finished, click OK.
-
To select how you would like the OTD to generate the nodes for the Resultset click Edit Resultsets.
-
Click Add to add the type of Resultset node you would like to generate.
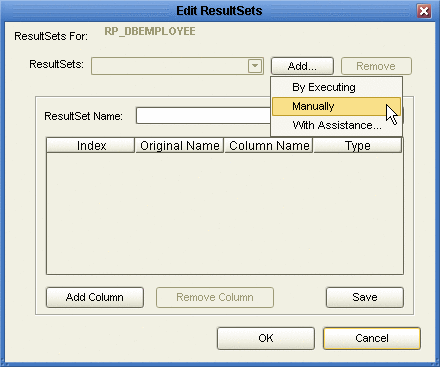
The DBWizard provides three different ways to generate the ResultSet nodes of a Stored Procedure. They are "By Executing", "Manually", and "With Assistance" modes.
By Executing Mode
“By Executing” mode executes the specified Stored Procedure with default values to generate the ResultSet(s). Depending on the business logic of the Stored Procedure, zero or more ResultSets can be returned from the execution. In the case that there are multiple ResultSets and "By Executing" mode does not return all ResultSets, one should use the other modes to generate the ResultSet nodes.
With Assistance Mode
"With Assistance" mode allows users to specify a query and execute it to generate the ResultSet node. To facilitate this operation, the DBWizard tries to retrieve the content of the specified Stored Procedure and display it. However, content retrieval is not supported by all types of Stored Procedures. We can roughly classify Stored Procedures into two types: SQL and external. SQL Stored Procedures are created using CREATE PROCEDURE SQL statements while external Stored Procedures are created using host languages (e.g. Java). Since external Stored Procedures do not store their execution plans in the database, content retrieval is impossible. When using "Assist" mode, highlight the execute statement up to and including the table name(s) before executing the query.
Manually Mode
"Manually" mode is the most flexible way to generate the result set nodes. It allows users to specify the node name, original column name and data type manually. One drawback of this method is that users need to know the original column names and data types. This is not always possible. For example, the column name of 3*C in this query.
SELECT A, B, 3*C FROM table T
is generated by the database. In this case, "With Assistance" mode is a better choice.
If you modify the ResultSet generated by the “Execute” mode of the Database Wizard you need to make sure the indexes match the Stored Procedure. This assures your ResultSet indexes are preserved.
-
On the Select Procedures and specify Resultset and Parameter Information window click Next to continue.
Note –Not all drivers and databases support stored procedures or stored procedures with ResultSets. You may contact the driver’s vendor for more information.
Add Prepared Statement
Add a Prepared Statement object to your OTD.
 To Add Prepared Statements
Note –
When using a Prepared Statement, the ResultsAvailable() method will always return true. Although this method is available, you should not use it with a while loop. Doing so would result in an infinite loop at runtime and will stop all of the system’s CPU. If it is used, it should only be used with the if statement.
-
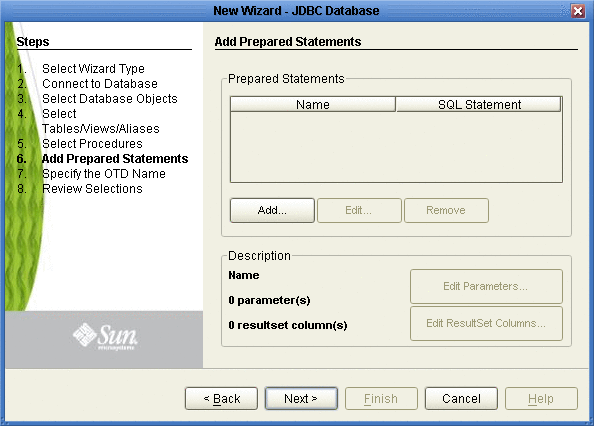
On the Add Prepared Statements window, click Add.
-
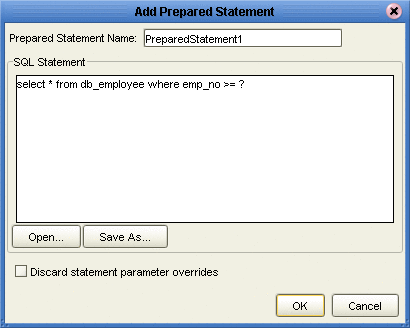
Enter the name of a Prepared Statement or create a SQL statement by clicking in the SQL Statement window. When finished creating the statement, click Save As giving the statement a name. This name will appear as a node in the OTD. Click OK. See the following figure.
-
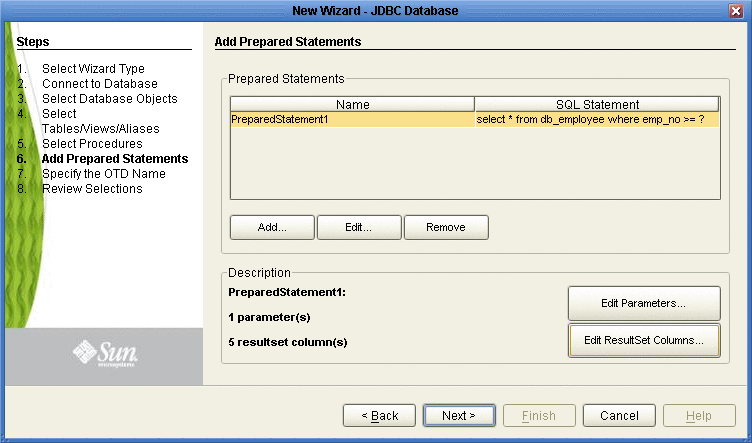
On the Add Prepared Statement window, the name you assigned to the Prepared Statement appears. To edit the parameters, click Edit Parameters. You can change the datatype by clicking in the Type field and selecting a different type from the list.
-
Click Add if you want to add additional parameters to the Statement or highlight a row and click Remove to remove it. Click OK. See the following figure.
-
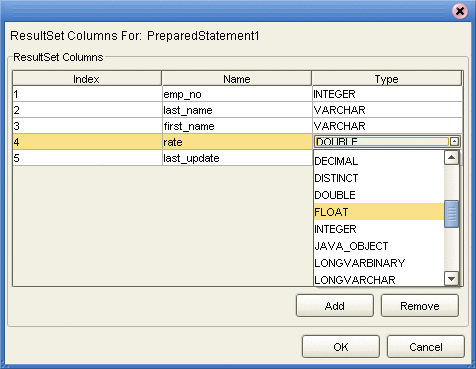
To edit Resultset Columns, click Edit Resultset Columns. The ResultSet Columns window appears. See the following figure.
-
Click Add to add a new ResultSet column. Both the Name and Type are editable.
-
Click OK to return to the Add Prepared Statements window.
Specify the OTD Name
Specify the name that your OTD will display in the Java CAPS IDE.
 To Specify the OTD Name
-
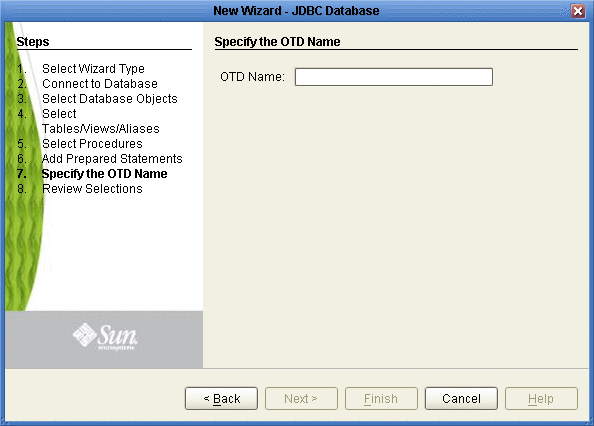
Enter a name for the OTD. The OTD contains the selected tables and the package name of the generated classes. See the following figure.
-
Click Next.
Review Selections
Review the selections made for the new OTD.
 To Review Your OTD Selections
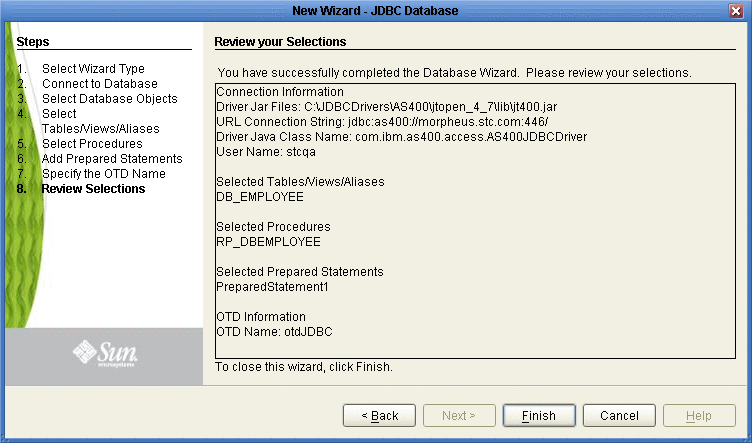
- © 2010, Oracle Corporation and/or its affiliates

