 Create the Deployment Profile
-
From the NetBeans IDE Projects window, right-click the project and select New -> Deployment Profile from the popup menu.
-
Enter a name for the Deployment Profile (dpSQLServerJCD for the JCD project, or dpSQLServerBPEL for the BPEL project). Click OK.
The Deployment Editor opens.
-
From the Deployment Editor, click the Automap button.
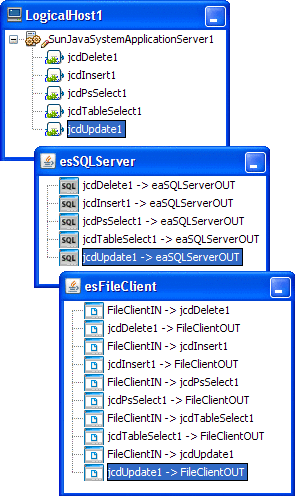
The Project's components are automatically mapped to their respective system windows.
Note –If any of your Project components do not successfully map to an external system, open each of your Adapter's configuration properties (Connectivity Map and Environment) and click OK to close and save the current configuration, then click Automap again.
The image below displays the Deployment Profile for the JCD sample Project.

-
Save your project.
Next Steps
For your next step, see Building and Deploying the Project.
- © 2010, Oracle Corporation and/or its affiliates
