Increasing the Heap Size
Because of the size of the SWIFT OTD Library, the Heap Size may need to be increased before using the library. If the heap size is not increased, you may receive an OutOfMemoryError message, when you try to activate a SWIFT OTD Project.
If you receive this message during Project activation, you must increase the heap size before you can activate any SWIFT OTD Projects. This action resets the Enterprise Designer’s maximum memory size.
Increasing the heap size from the Enterprise Designer
-
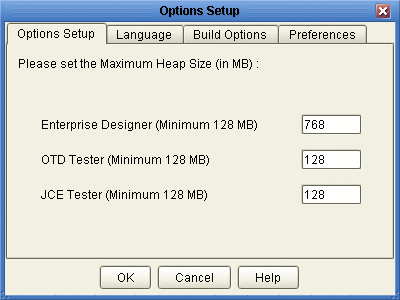
From the Enterprise Designer’s Tools menu select Options. The Options Setup dialog box appears (see Increasing the heap size from the Enterprise Designer).
-
Increase the configured heap size for the Enterprise Designer to 768 MB as displayed in Increasing the heap size from the Enterprise Designer. Click OK.

-
Close and restart the Enterprise Designer to allow your changes to take effect.
Increasing the heap size from the heapSize.bat file
If an OutOfMemoryError message occurs while you are trying to open the Enterprise Designer, the heap size settings may be changed before starting the Enterprise Designer. You can increase the heap size values found in the heapSize.bat file.
-
Go to the following directory and file:
<eGate Install Directory>/edesigner/bin/heapSize.bat
-
From the BAT file code, change the following heap size value to read as follows:
-
set eDesigner_heap_size=768
-
-
Save the file and start the Enterprise Designer.
Increasing the heap size from the Logical Host
-
Start the Logical Host.
-
Go to the Logical Host directory and double-click the start_domain1.bat file.
-
Open an internet browser and enter http://<host_name>:18000. The Integration Server Administration window will open.
-
Login to the Integration Server Administration application.
-
On the right side of the window, select the JVM Settings tab.
-
Select the JVM Options link.
-
Change the default Heap Size from —Xmx512m to —Xmx768m.
-
Save the new settings and restart the Logical Host.
- © 2010, Oracle Corporation and/or its affiliates
