Testing the Composite Application
This section lists the procedure to test the deployed application.
 To Test the Composite Application
-
Expand the Composite Application project. Click Test.
For example, AddCompApp
-
Right-click to select New Test Case.
-
Enter the Test Case Name.
For example, AddTest
-
Click Next.
-
Select the WSDL Document.
-
Select one WSDL Document from the BPEL Module.
In the current example, the WSDL Document is TriggerWSDL.wsdl and the BPEL Module is LDAPBpelModule — Process Files.
Note –Select one WSDL Document.
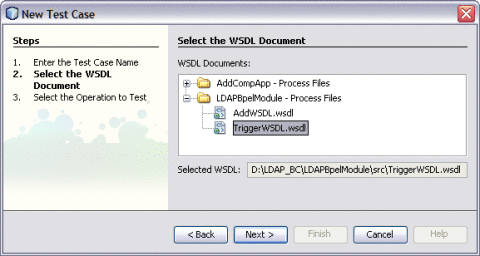
-
Click Next.
-
Select one Operation to text file from the Process Files.
In the current example, the Operation to Text file is TriggerWSDLOperation and the Process File is TriggerWSDLPort (Binding=”TriggerWSDLBinding”).
Note –Select one Operation to Text file.
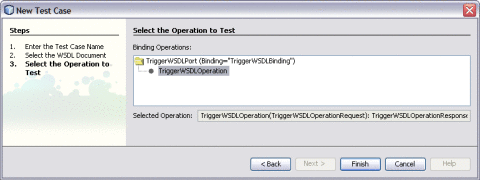
-
-
Click Finish.
This displays the Source code.
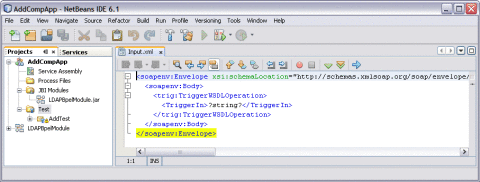
-
Enter the string value.
string = Jane
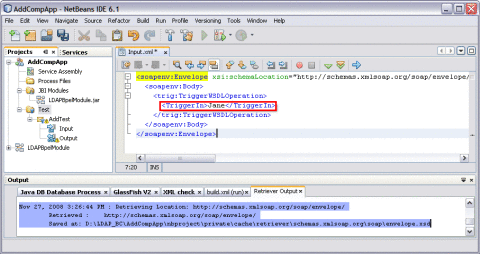
The Output console displays Retrieve.xml when you enter a string value in the input.xml window.
-
Right-click the Test Case and click Run.
For example, AddTest
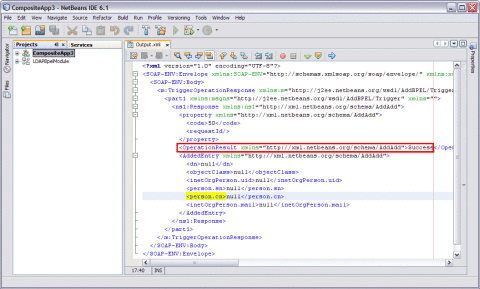
A confirmation dialog box prompts to overwrite an existing Output.
-
Click Yes.
The Output is as shown in the illustration.
For a demo on the Add feature, visit the following URL:
http://wiki.open-esb.java.net/Wiki.jsp?page=LDAPAddFeatureScreencast
Source View
Right-click a node and choose Go To —> Source.
The Source view appears with the cursor positioned at the beginning or end of the component's block.
-
The top of the Source Editor has a tab for each open document. Each tab shows the name of the document.
Note –If the document has been modified and has not been saved, then an asterisk (*) appears after the name. You can right-click a tab to access various commands.
-
A toolbar is located at the top of the Source Editor window.
-
Source code displayed in the Source Editor is syntactically colored.
-
The Source Editor status line is located beneath the horizontal scroll bar. To toggle between insert mode and overwrite mode, use the Insert key.
In the Source view, the underlying XML source code appears. You can directly edit the XML.
- © 2010, Oracle Corporation and/or its affiliates
