Creating an XSLT Service
In this step, you will create a simple request-reply XSLT service, which is a web service that receives input messages, transforms them in accordance with an XSL stylesheet, and sends them back.
 To create and XSLT Service:
-
In the Projects window, right-click the HelloXSLTransformation > Transformation Files node and choose New > XSLT Service.
-
In the Service Type window, ensure that the Request-Reply Service radio button is selected and click Next.
-
In the next step, enter HelloXSLTServiceas the service name and click Choose to select Operation for the service.
-
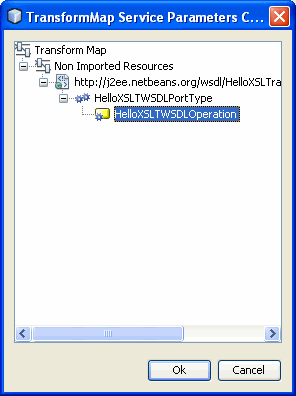
In the TransformMap Service Parameters window, expand the upper node with the target namespace until you see the operation, select HelloXSLTWSDLOperation and click Next.

-
Click Finish. The HelloXSLTService.xslfile opens in the XSLT Editor, where you can only view and edit the source code.
Now you need to populate the XSL stylesheet with the transformation rules. The XSL stylesheet defines how to transform the input XML document. In this version of the XSLT Designer, you can only edit the source code in the Source view.
 To populate the XSL stylesheet:
-
Open the HelloXSLTService.xslfile and type in the following code:
<?xml version="1.0" encoding="UTF-8"?>
<xsl:stylesheet xmlns:xsl="http://www.w3.org/1999/XSL/Transform" version="1.
xmlns:ns1="http://xml.netbeans.org/schema/HelloXSLTIncoming
xmlns:ns="http://xml.netbeans.org/schema/HelloXSLTOutgoing"
<xsl:template match="/">
<xsl:element name="ns:greeting">
<xsl:value-of select="concat('Hello ', /ns1:name)"/>
</xsl:element>
</xsl:template>
</xsl:stylesheet>
-
Press the Validate File (
 ) button on the toolbar to ensure that the code
has no errors.
 -
Right-click the HelloXSLTransformationnode and choose Clean and Build from the drop-down menu to build the project. You should see the BUILD SUCCESSFULmessage after building the project completes.
- © 2010, Oracle Corporation and/or its affiliates
