 To create a test case:
-
In the Projects window, expand the HelloXSLTCAP node and right-click the Test node.
-
From the pop-up menu, select New Test Case.
-
In the Test Case Name field, type JohnSmith. Click Next.
-
Under Select the WSDL Document, expand HelloXSLTransformation - XSLT Process Files and select HelloXSLTWSDL.wsdl. Click Next.
-
Under Select the Operation to Test, expand HelloXSLTWSDLBinding and select HelloXSLTWSDLOperation. Click Finish.
-
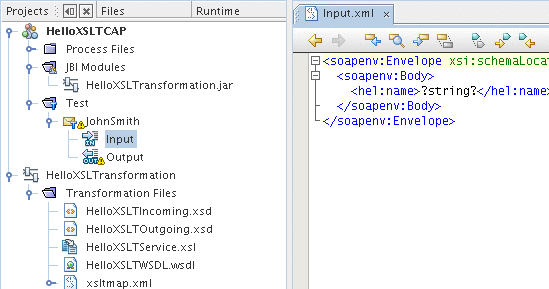
The JohnSmith node appears under HelloXSLTCAP > Test and the input message file—Input.xml —opens in the editor.

-
In the Input.xml, modify the
<hel:name>?string?</hel:name>
line to
<hel:name>John Smith</hel:name>
The Input.xml file should be:
<soapenv:Envelope xsi:schemaLocation= "http://schemas.xmlsoap.org/soap/envelope/ http://schemas.xmlsoap.org/ soap/envelope/" xmlns:xsi="http://www.w3.org/2001/XMLSchema-instance" xmlns:xsd="http://www.w3.org/2001/XMLSchema" xmlns:soapenv= "http://schemas.xmlsoap.org/soap/envelope/" xmlns:hel="http://xml.netbeans.org/schema/HelloXSLTIncoming"> <soapenv:Body> <hel:name>John Smith</hel:name> </soapenv:Body> </soapenv:Envelope> -
Click the Save All button on the toolbar.
The Output node under the test case node refers to the expected reply message that is used for comparison with the actual reply messages. Before we run the test for the first time, the Output.xml file is empty. The first test run will populate Output.xml with the real output. Subsequent test runs will compare the real output against the content of Output.xml
- © 2010, Oracle Corporation and/or its affiliates
