Initiating a Request-Reply Transaction
JMS messaging solutions need to satisfy the requirements of operating on a fire-and-forget or a store-and-forward basis. This messaging infrastructure is used to deliver each message to the intended recipient whether that recipient is active at the time of send or not. In a request-reply pattern, messages are delivered to the messaging system, which immediately acknowledges that it has taken the responsibility for delivery to the ultimate recipient. That delivery might take some time if the recipient is not active for a period or might not take place at all if the recipient never appears.
Perform the following steps to initiate a request-reply transaction:
 To Create the EJB Module Project
-
From the File menu, select New Project.
The New Project dialog box appears.
-
Select Java EE under Categories, and then select EJB Module under Projects.
-
Click Next.
The Name and Location window appears.
-
Enter a unique Project Name and the location to store the project files.
-
Click Next.
The Server and Settings window appears.
-
Accept the default settings for the server and click Finish.
The new project is created.
 To Create a Message Driven Bean
-
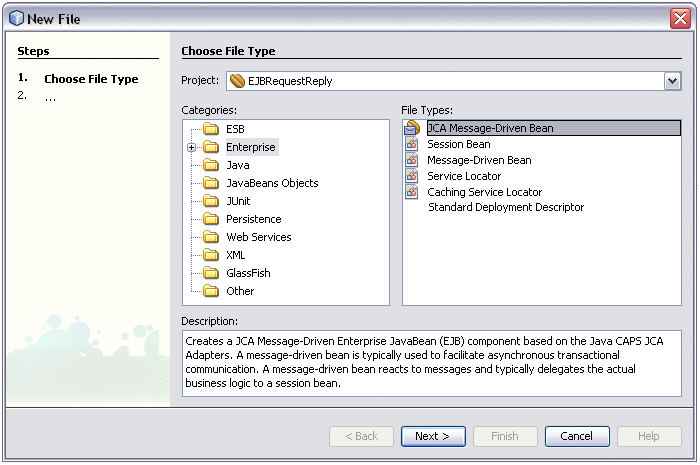
Right-click the new project, and then select New -> Other.
The New File Wizard appears.
Figure 16 New JCA Message-Driven Bean
-
Select Java EE under Categories, and then select JCA Message-Driven Bean under File Types .
-
Click Next.
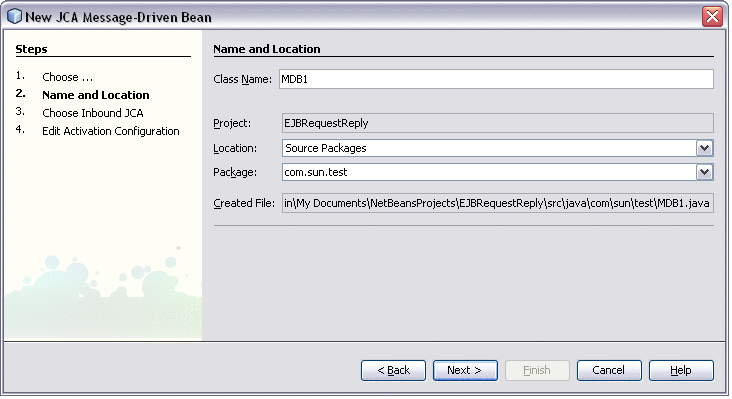
The Name and Location window appears.
Figure 17 Configuring the Message-Driven Bean
-
Enter a unique Class Name and a valid Package name.
-
Click Next.
The Choose Inbound JCA window appears.
-
Select the JMS Adapter and click Next.
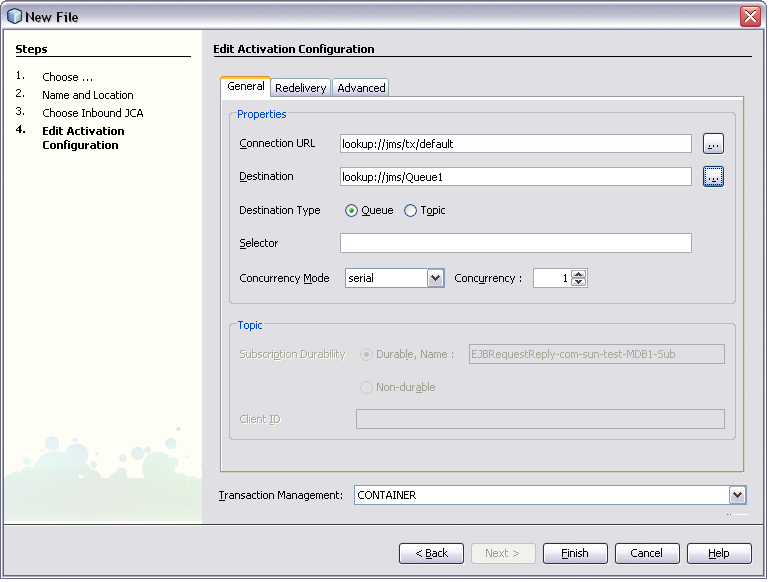
The Edit Activation Configuration window appears.
Figure 18 Edit Activation Configuration
-
Set the Destination lookup to the JNDI Name of the Queue and click Finish.
A new Message-Driven Bean is created.
-
Drag a Queue rom the Palette panel on the right into the Java Editor.
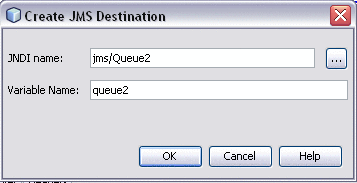
The Create JMS Destination dialog box appears.
Figure 19 JMS Destination
-
Enter a valid JNDI Name, Variable Name, and click OK.
The Java code for the Queue instance is populated into the Java Editor. Repeat the above steps for as many Queues that are needed.
-
Drag a Session from the Palette panel in the right into the onMessage() method in the Java Editor.
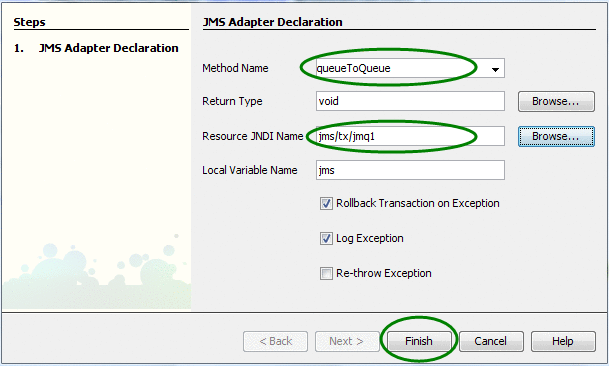
The JMS Adapter Declaration dialog box appears.
Figure 20 JMS Adapter Declaration
-
Enter a valid method name, such as RequestReply and click Finish.
The Java code for the JMS Session is populated into the Java Editor.
-
Drag a Request-Reply from the Palette panel on the right into the new method.
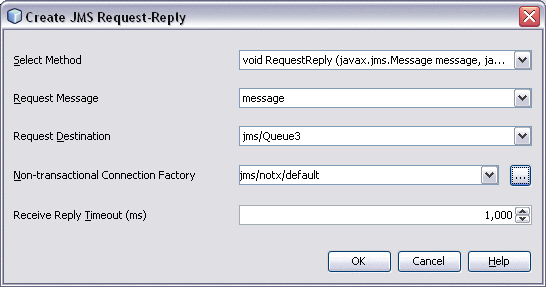
The Create JMS Request-Reply dialog box appears.
Figure 21 JMS Request-Reply
-
Select following values for the fields:
-
Select Method – Select the method you specified earlier on the JMS Adapter Declaration dialog box.
-
Request Message – Select message.
-
Request Destination – Select the JMS queue or topic you created for the adapter.
-
Non-transactional Connection Factory – Select a connection factory that contains “notx” in the name.
-
-
Click OK.
-
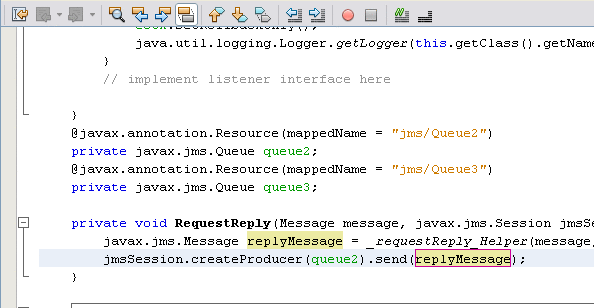
In the Request-Reply method, enter the following code beneath the first line of code:
jmsSession.createProducer(queue2).send(replyMessage);
Figure 22 Request-Reply Method
-
Save the file.
 To Create a JCA Message-Driven Bean for the
Destination
-
From the NetBeans Palette window, drag an instance of the JMS Session into the onMessage() method in the Java Editor.
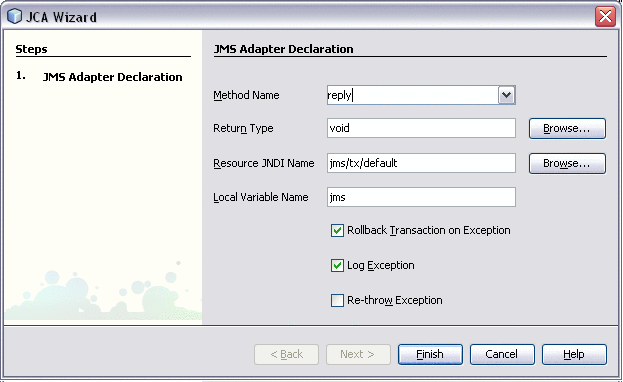
The JMS Adapter Declaration dialog box appears.
Figure 23 Reply Method
-
Enter reply as the method name and click Finish.
The Java code for the JMS Session is populated into the Java Editor.
-
In the reply method enter the following code:
jmsSession.createProducer(message.getJMSReplyTo()).send(message);
Figure 24 Reply Method in the Java Editor
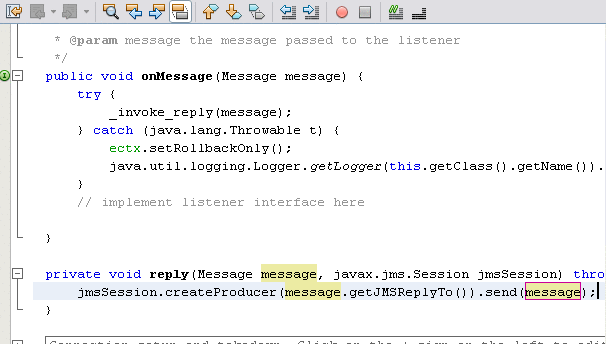
This code sends the incoming message to the reply destination.
-
Save the file.
-
Build and deploy the project.
- © 2010, Oracle Corporation and/or its affiliates
