Designing an EJB Module to Use HL7 JCA Adapter Code
This section provides step-by-step procedures for creating an EJB Module project and populating it with HL7 JCA Adapter code.
 To Create an EJB Module Project
-
In the NetBeans IDE main menu, click File -> New Project.
The New Project wizard appears.
-
Select the following category and project type and then click Next:
-
Category: Java EE
-
Project: EJB Module
-
-
Provide a project name and location and then click Next.
-
Keep the default values for Server and Java EE Version, and click Finish.
The new project is added to the Projects tree.
 To Add a HL7 JCA Adapter to an EJB
Project
-
Right-click the EJB Module project and select New -> JCA Message-Driven Bean:
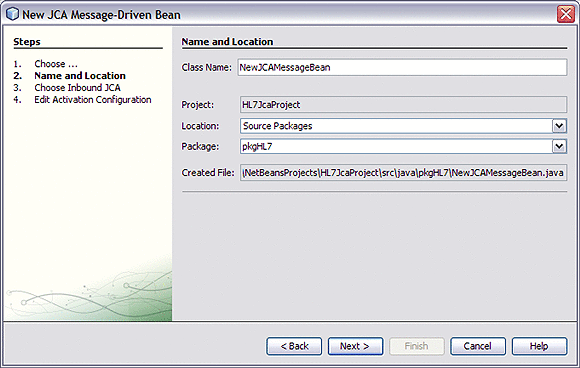
The New JCA Message-Driven Bean wizard appears.
-
Provide a package name and then click Next:
-
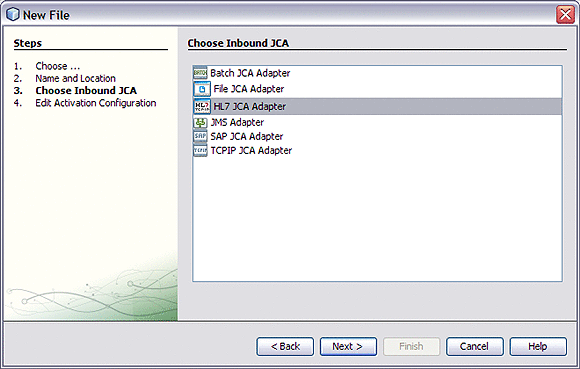
For the Choose Inbound JCA step, select HL7 JCA Adapter and then click Next:
-
In the final step of the wizard, you can optionally edit the instance properties before clicking Finish.
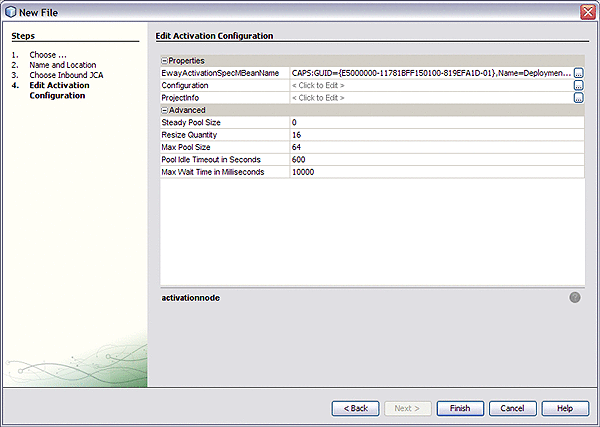
If you click the ellipsis to the right of the Configuration property (as shown above), you can view or edit configuration settings of the HL7 JCA Adapter:
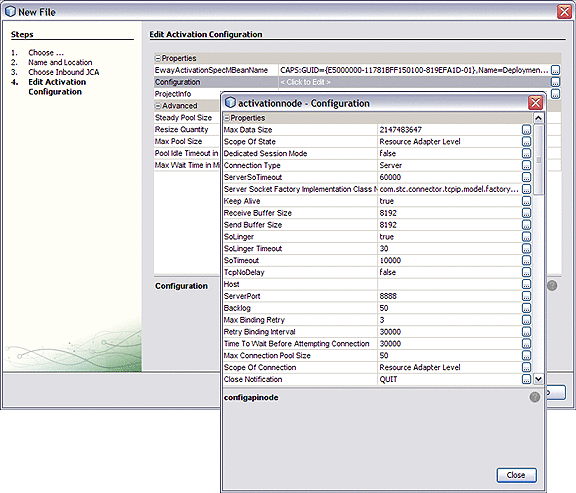
For a complete list and description of configuration properties, see Configuration Settings for the HL7 JCA Adapter.
 To Use HL7-Specific Sample Code
-
In the NetBeans IDE, open the .java file containing the message-driven bean you just created.
-
From the palette, under JCA, drag the HL7 JCA onto the code canvas and drop it between the curly brackets of the receive as shown in the following illustration:
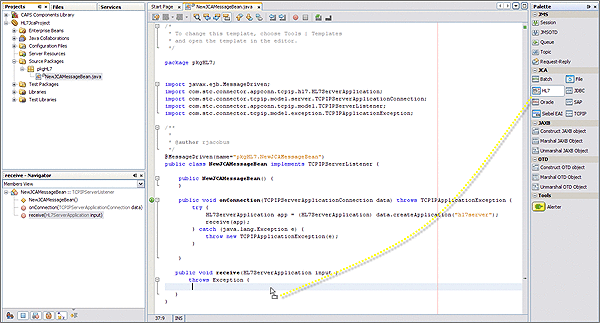
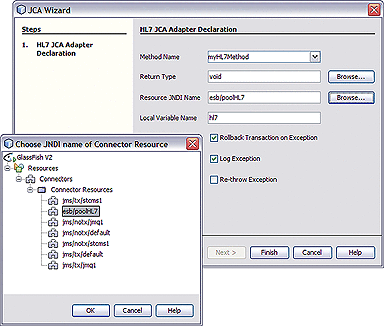
When the HL7 JCA is dropped into the Receive method, the JCA Wizard appears.
-
In the JCA Wizard, provide appropriate values for the HL7 JCA Adapter declaration and then click Finish
Result:HL7 code is added, as shown below. Note that the code in the image below was wrapped for display purposes.
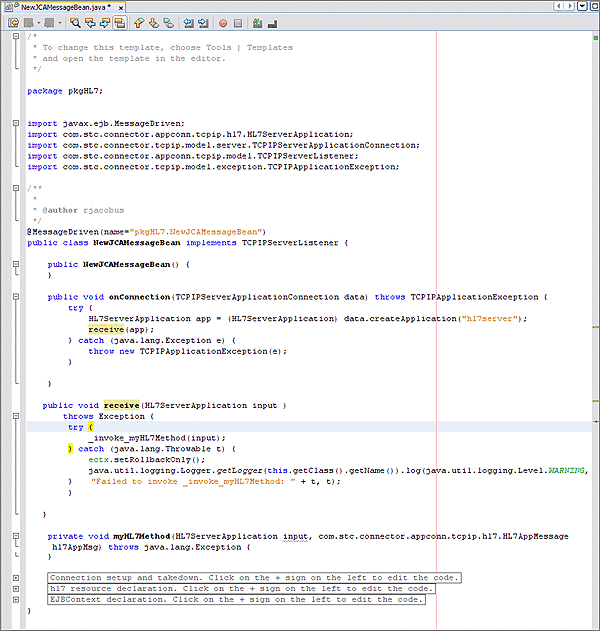
The expanded code appears as follows.
  public void receive(HL7ServerApplication input )
      throws Exception {
       try {
           _invoke_myHL7Method(input);
       } catch (java.lang.Throwable t) {
           ectx.setRollbackOnly();

java.util.logging.Logger.getLogger(this.getClass().getName()).log(java.util.logging.Level.
WARNING, "Failed to invoke _invoke_myHL7Method: " + t, t);
       }
         }

   private void myHL7Method(HL7ServerApplication input, com.stc.connector.appconn.tcpip.
hl7.HL7AppMessage hl7AppMsg) throws java.lang.Exception {
   }

   // <editor-fold defaultstate="collapsed" desc="Connection setup and takedown. Click
on the + sign on the left to edit the code.">
   private void _invoke_myHL7Method(HL7ServerApplication input) throws java.lang.Exception {
       com.stc.connector.appconn.common.ApplicationConnection hl7Connection = null;
       try {
           java.util.Properties hl7Props = new java.util.Properties();
           hl7Props.put("conn-props.collaboration.oid", "placeholder");
           hl7Props.put("conn-props.connection.name", "placeholder");
           hl7Connection = hl7.getConnection(hl7Props);
           com.stc.connector.appconn.tcpip.hl7.HL7ClientApplication hl7OTD = (com.stc.
connector.appconn.tcpip.hl7.HL7ClientApplication) hl7Connection.createApplication("");
           com.stc.connector.appconn.tcpip.hl7.HL7AppMessage hl7AppMsg = hl7OTD.getHL7Message();
           myHL7Method(input, hl7AppMsg);
       } finally {
           try {
               if (hl7Connection != null) {
                   hl7Connection.close();
               }
           } catch (Exception e) {
           }
       }
   } // </editor-fold>
   // <editor-fold defaultstate="collapsed" desc="hl7 resource declaration. Click on the +
sign on the left to edit the code.">
   // comments for inserted variable
   @javax.annotation.Resource(name = "esb/poolHL7", description = "", shareable = false)
   private com.stc.connector.appconn.common.ApplicationConnectionFactory hl7; // </editor-fold>
   // <editor-fold defaultstate="collapsed" desc="EJBContext declaration. Click on the +
sign on the left to edit the code.">
   @javax.annotation.Resource
   private javax.ejb.EJBContext ectx; // </editor-fold>
}
Note –The above code is wrapped for display purposes.
-
Expand each block and edit the code as needed for your implementation.
- © 2010, Oracle Corporation and/or its affiliates
