 To Initiate the Configure Automatically During Installation
Configure automatically during installation installs the components you select and configures them according to the default configuration settings. If you are new to Java ES and undecided about the configuration best suited for your need, this option is good to start with.
-
Click Configure Automatically During Installation option then click Next.
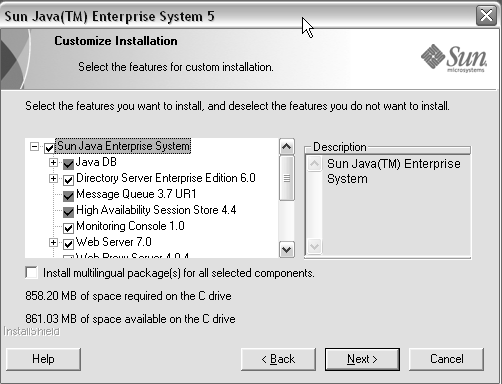
The Customize Installation page is displayed:

-
Choose the components that you want to install and configure automatically, by selecting and deselecting the check boxes. You can select some or all components:
-
Select All Components. By default all the products are selected in the Product Selection page.
-
Select Some Components. First deselect the check box next to Java ES, and then select the check box next to the components you want to install. As you make each selection, the installer automatically selects any other component that the component you selected depends on.
Each selection causes additional files to be installed, adding to more disk space required for installation. The page displays the disk space available on your host and the disk space required by the components you selected.
-
Select Install multilingual package(s) for all selected components option to install language packages.
When a web application is selected (Access Manager or Portal Server) and if no web container is selected, the web container selection page appears.
-
-
Select one of the web containers and Click OK to return to the product selection page.
-
Click Next to continue.
The Administrator Settings page is displayed.
-
Type the Administrative user ID, Administrative user password, and retype the Administrative user password in the respective fields. Click Next.
Note –Though the values typed in this page are set as default values, these default settings can be modified during the postinstallation.
The Start Copying Files page is displayed. This page also confirms the component selections for this installation session.
-
If the product selected lists all the components to be installed and configured, click Next. To make any changes to the component selection, click Back and make the appropriate changes.
The Setup Status page and subsequently the Installation In Progress page are displayed. The Installation in Progress page is followed by the Configuration In Progress page. This display might take some time depending on your server setup.
The Information page is displayed after the installation and configuration of the components have been completed.
-
Click Next to continue.
The Installation Complete page is displayed.
-
Click Finish to exit the setup.
- © 2010, Oracle Corporation and/or its affiliates
