 To Configure the Identity Provider OpenSSO
Enterprise to Use SAMLv2 Identity Provider Protocols
Before you can enable the SAMLv2 Identity Provider protocols, you must generate, customize, and load each of the following:
-
Identity Provider metadata
-
Identity Provider extended metadata
-
Service Provider metadata
-
Service Provider extended metadata.
Before You Begin
-
Read through the following instructions for the changes that you must make to the default metadata. The SAML2 samples contain instructions on how to setup SAML2.
-
You must import Identity Provider metadata and Identity Provider extended metadata as hosted metadata. You must import Service Provider metadata and Service Provider extended metadata as remote entity metadata. To change a configuration from the default hosted to remote, modify the extended metadata XML element <EntityConfig>. Change the default attribute hosted=true to hosted=false.
-
See the OpenSSO Enterprise product documentation for commands and syntax.
-
Generate the metadata templates in both Identity Provider and Service Provider environments.
Use thefamadm command. You can also use the browser-based interface at the following URL:
http:host:port/opensso/famadm.jsp
-
At Identity Provider :
famadm create-metadata-templ -y idp_entity_id -u amadmin
                     -f admin_password_file_name -m idp_standard_metadata
                     -x idp_extended_metadata -i idp_meta_alias
where idp_meta_alias is /idp
-
At Service Provider:
famadm create-metadata-templ -y sp_entity_id -u amadmin
                    -f admin_password_file_name -m sp_standard_metadata
                    -x sp_extended_metadata -s sp_meta_alias
where sp_meta_alias is /sp
-
-
Customize Identity Provider and Service Provider extended metadata.
The Identity Provider extended metadata should be added as an attribute named AuthUrl. This URL attribute is used by the SAML protocols to redirect for authentication purposes. In the following example, AuthUrlredirects to the SiteMinder authentication module.
<Attribute name="AuthUrl">
            <Value>http://host:port/opensso/UI/Login?module=SMAuth</Value>
       </Attribute>
Another option is to make the SiteMinder custom authentication module the default login module in OpenSSO Enterprise. The cost of using this option is that you must specify an LDAP login module for logging in as an administrator.
The Service Provider extended metadata uses the attribute named transientUser. Set this value to your anonymous user:
<Attribute name="transientUser"> <Value>anonymous</Value> </Attribute> -
Load the Identity Provider and Service Provider metadata.
First create a Circle of Trust as mentioned in the URL. The Circle of Trust should also be added in the extended metadata.
In your extended template files, you will see a sample Circle of Trust. Modify the sample to create your Circle of Trust.
<Attribute name="cotlist">
            <Value>samplesaml2cot</Value>
       </Attribute>
Load the hosted metadata in both the Identity Provider and the Service Provider using the famadm command or through OpenSSO Enterprise administration console.
-
Exchange the metadata Service Provider with the Identity Provider metadata.
-
Exchange the Identity Provider metadata with the Service Provider.
-
Load all metadata.
-
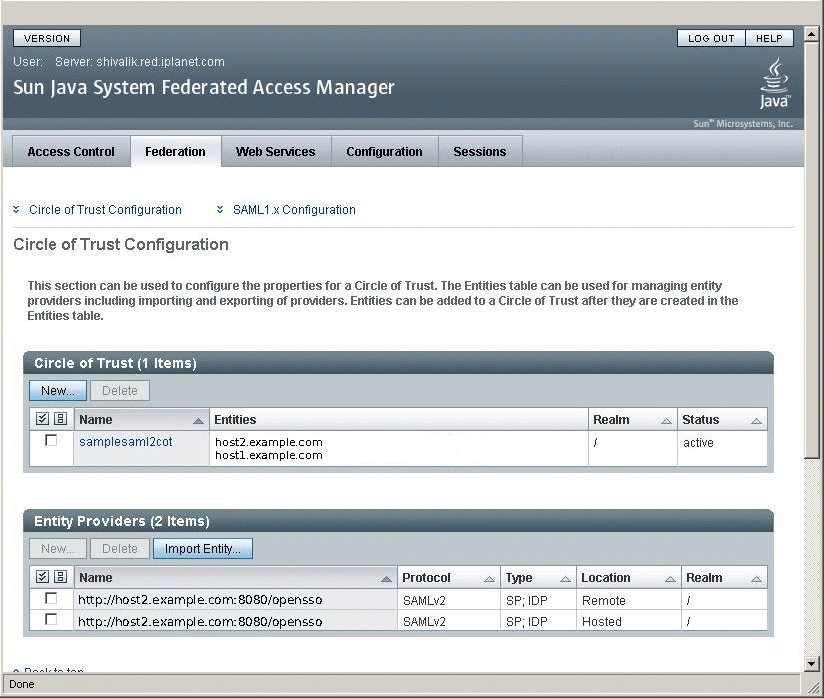
After successful metadata exchange, verify through the OpenSSO Enterprise administration console that SAMLv2 is working properly.
The following shows a sample UI for SAMLv2 configuration.

- © 2010, Oracle Corporation and/or its affiliates
