Chapter 5 Windows Installation
This chapter covers the following topics as they apply to a Windows installation of Message Queue 4.4 Update 1:
Hardware Requirements
In order to install Message Queue 4.4 Update 1, your Windows system should satisfy the minimum hardware requirements shown in Table 5–1. See Supported Platforms and Components for information on software requirements.
Table 5–1 Minimum Hardware Requirements for Windows Installation|
Component |
Minimum Requirements |
|---|---|
|
CPU |
Intel Pentium 3 |
|
RAM |
256 MB (2 GB recommended for high-availability or high-volume deployments) |
|
Disk space |
Compressed installation (.zip) file: approximately 26 MB Temporary working directory (for extracting installation files): approximately 29 MB Installed product: approximately 31 MB. More space may be needed if broker stores persistent messages locally. |
Upgrading from Previous Versions
Because Message Queue is installed with other products (such as Solaris 9, Solaris 10, and Sun GlassFish Enterprise Server), you should check whether it has already been installed on your system. To do so, enter the command
imqbrokerd -version
If you have a version older than Message Queue 4.4, perform the procedures described in To Back Up and Restore Broker Instance Data and Configuration Details and To Upgrade From An Older Version to Message Queue 4.4 Update 1.
If you have Message Queue 4.4 or later, use the Update Tool to get the latest updates. See Updating Message Queue 4.4 Update 1.
 To Back Up and Restore Broker Instance Data and Configuration
Details
To preserve broker instance data and configuration details from your previous Message Queue installation, perform the following procedure before you remove your previous installation.
-
Before you uninstall the previous installation of Message Queue, copy Message Queue data to a temporary location.
-
For Message Queue 4.4 and above, run the following commands:
cp -r mqInstallHome/etc/mq/* MQ_SAVE/etc
cp -r mqInstallHome/var/mq/* MQ_SAVE/var
-
For Message Queue versions older than 4.4, run the following commands:
cp -r mqInstallHome/mq/etc/* MQ_SAVE/etc
cp -r mqInstallHomemq/var/* MQ_SAVE/var
where MQ_SAVE is a temporary directory.
You can proceed to uninstall the older version of Message Queue.
-
-
After installing Message Queue 4.4 Update 1, perform the following steps:
Copy the MQ_SAVE\etc folder tomqInstallHome\etc\mq.
Copy the MQ_SAVE\var folder to mqInstallHome\var\mq.
where MQ_SAVE is the temporary directory you used in Step 1.
 To Upgrade From An Older Version to Message Queue 4.4 Update 1
-
Use the uninstaller of the previous installation to remove Message Queue.
-
Use the Message Queue 4.4 Update 1 Installer to install Message Queue 4.4 Update 1
Installation Procedure
You can run the Message Queue Installer in either of two modes:
-
In GUI (graphical user interface) mode, the Installer presents a series of graphical screens with which you interact using mouse clicks and keyboard text entry.
-
In silent mode, the Installer operates from a predefined answer file representing your responses to the GUI screens. This allows you to script the installation process in advance and then perform it in batch mode without actually displaying the GUI screens and responding to them interactively.
The following sections describe each of these two modes of Installer operation.
Installing in GUI Mode
The following procedure shows how to use the Message Queue Installer in GUI mode to install the Message Queue 4.4 Update 1 product on your Windows system.
 To Install Message Queue in GUI Mode
-
Download the Message Queue Installer.
The Installer is available for download from the Message Queue product Web site at
http://www.sun.com/software/products/message_queue
It is distributed as a compressed archive (.zip) file named
mq4_4-installer-WINNT.zip
-
Decompress the Installer archive.
-
Open the Installer folder.
Double-click on the mq4_4-installer folder to open it in Windows Explorer.
-
Start the Installer.
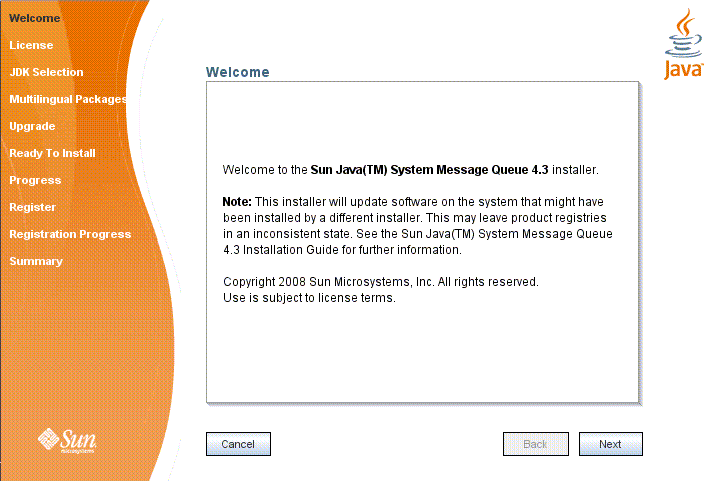
Locate the Installer executable (a VBS script) and double-click to launch it. The Installer’s Welcome screen (Figure 5–1) appears.
Figure 5–1 Installer Welcome Screen
On Windows Vista, Windows 2008, or Windows 7, yo install Message Queue on a directory that requires you to have Administrative Privileges, perform the following steps.
-
Click the Windows Start button.
-
Locate the Command Prompt in the list of programs.
-
Right-click the Command Prompt menu item and choose the Run as Administrator option.
-
From the Command Prompt, change to the Directory where you have unzipped the Installer Archive, type the name of the Installer Executable (the VBS script file) and press Enter to launch the installer's Welcome Screen.
-
-
Click the Next button.
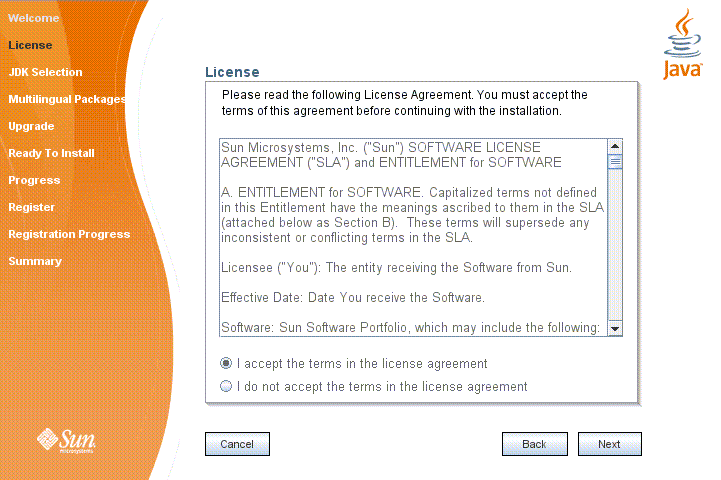
The Installer’s License screen (Figure 5–2) appears.
Figure 5–2 Installer License Screen
-
Read and accept the product license agreement.
Installation and use of the Message Queue product are subject to your acceptance of the license agreement. You must read and accept the terms of the license agreement before installing the product.
-
Read the product license agreement.
-
Make sure the radio button labeled “I accept the terms in the license agreement” is selected.
If you instead select “I do not accept the terms in the license agreement,” the Next button becomes disabled. You cannot proceed with installation without accepting the license terms.
-
Click the Next button.
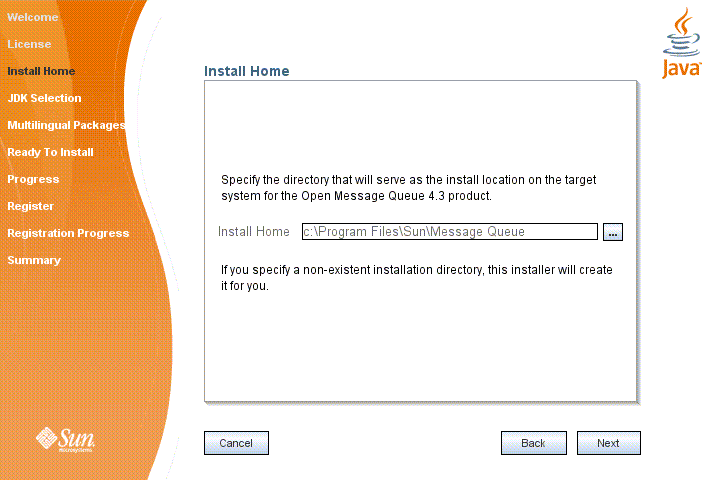
The Installer’s Install Home screen (Figure 5–3) appears.
Figure 5–3 Installer Install Home Screen
-
-
Specify the home directory in which to install Message Queue.
-
Provide the location of the installation home directory.
Enter the path to the installation home directory in the text field, or use the button marked with an ellipsis (…) to browse to it interactively.
Note –If you enter a path to a directory that does not exist on your system, the Installer will create the directory for you automatically.
-
Click the Next button.
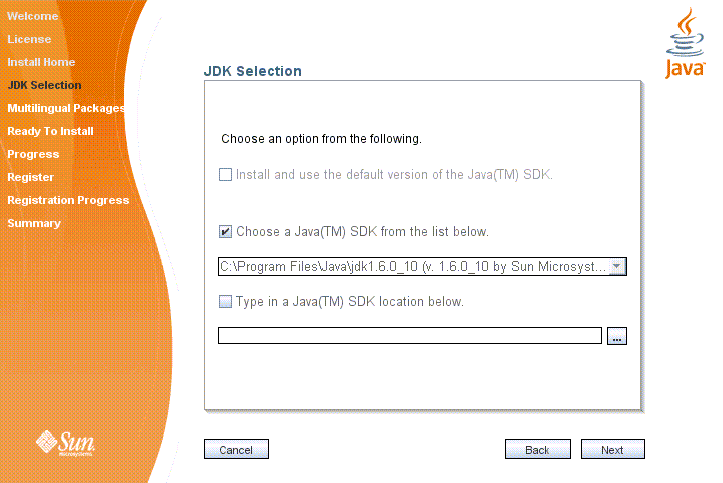
The Installer’s JDK Selection screen (Figure 5–4) appears.
Figure 5–4 Installer JDK Selection Screen
-
-
Specify the version of the JDK for Message Queue to use.
-
Select a JDK.
You can do this in any of these ways:
-
Choose a JDK installation that is already installed on your system.
The drop-down menu under the option “Choose a JavaTM SDK from the list below” lists existing JDKs found in standard locations on your system. You can use this option to specify one of these JDKs for Message Queue to use.
-
Provide an explicit path to an existing JDK.
To use a JDK from a location other than the standard ones, enter its path in the text field under the option “Type in a Java SDK location below,” or use the button marked with an ellipsis (…) to browse to it interactively.
-
-
Click the Next button.
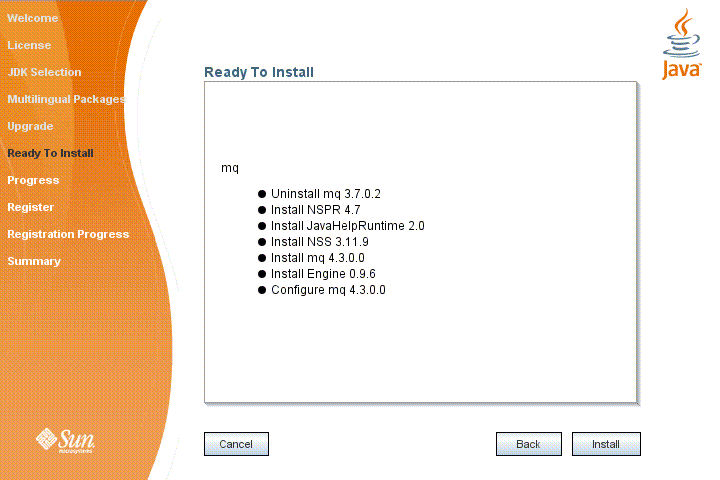
The Installer’s Ready screen (Figure 2–4) appears.
Figure 5–5 Installer Ready Screen
-
-
Click Install to begin the installation.
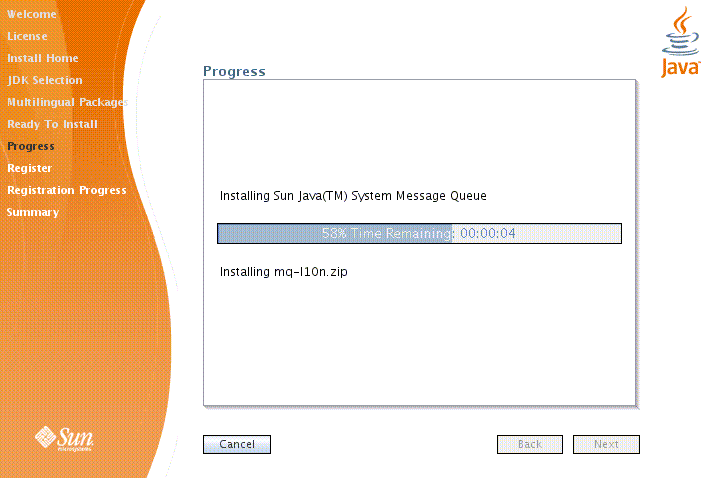
The Installer’s Progress screen (Figure 5–6) appears, tracking the progress of the installation as it proceeds.
Figure 5–6 Installer Progress Screen
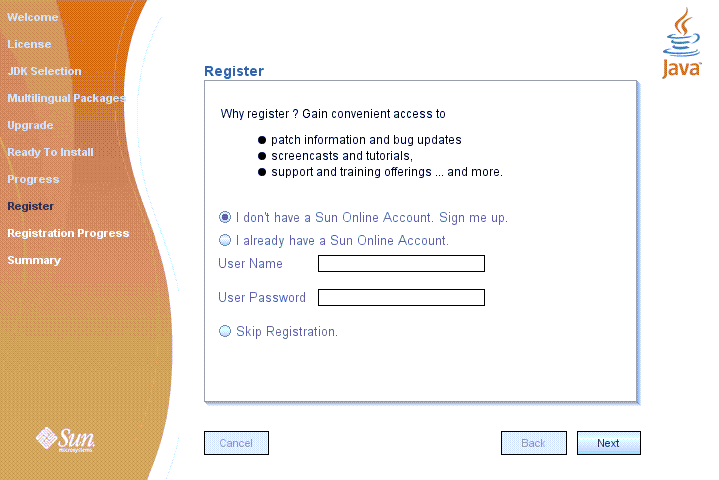
When installation is complete, the Installer's Sun Connection Registration screen (Figure 5–7) appears.
Figure 5–7 Sun Connection Registration Screen
-
Register Message Queue with Sun Connection.
Sun Connection is a Sun-hosted service that helps you track, organize, and maintain Sun hardware and software. When you register a Message Queue installation with Sun Connection, information such as the release version, host name, operating system, installation date, and other such basic information is securely transmitted to the Sun Connection database. The Sun Connection inventory service can help you organize your Sun hardware and software, while the update service can inform you of the latest available security fixes, recommended updates, and feature enhancements.
Registration requires that you have a Sun Online account or create one. If you do not already have an account, the installer provides the following screen (Figure 5–8) for creating a Sun Online account:
Figure 5–8 Create Sun Online Account Screen

Note –If you choose not to register Message Queue during installation, you can subsequently register Message Queue by running the installer in register-only mode, as follows:
% installer -r
The register-only mode requires that Message Queue 4.4 Update 1 already be installed and will display only the installer screens related to registration.
When Sun Connection registration is complete, the Installer’s Summary screen (Figure 5–9) appears, summarizing the steps that were performed during installation.
Figure 5–9 Installer Summary Screen
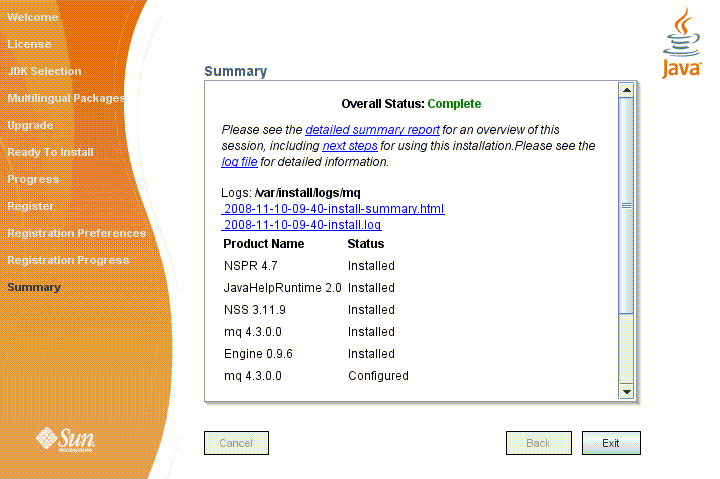
You can click the links on this screen for a detailed summary report and a log file giving more details on the installation.
-
Click the Exit button to dismiss the Summary screen.
Message Queue installation is now complete.
Tip –After installation is complete, you can check that the expected version of Message Queue has been installed by navigating to the mqInstallHome\mq\bin directory and executing the following command:
imqbrokerd -version
The output from this command identifies the versions of Message Queue and the Java SDK that are installed on your system.
Installing in Silent Mode
In silent mode, the Installer operates from a predefined answer file representing your responses to the GUI screens. This allows you to script the installation process in advance and then perform it in batch mode without actually displaying the GUI screens and responding to them interactively.
To create an answer file, start the Installer with the -n option:
installer -n answerFile
where answerFile identifies the file in which to record your responses. This causes the Installer to execute a “dry run,” presenting the sequence of GUI screens without actually performing the installation. Your input responses are recorded in the specified answer file. You can then perform the installation at a later time by starting the Installer with the -s (“silent”) option, specifying the same answer file:
installer -s -a answerFile
This performs a silent installation as defined by the answer file, without visibly displaying the GUI screens.
Manually Configuring the Java Runtime Environment
The Message Queue Installer’s JDK Selection screen is not the only way to specify a version of the Java Runtime Environment for Message Queue to use. The JRE used by the Message Queue command line utilities (imqadmin, imqbrokerd, imqcmd, imqobjmgr, imqdbmgr, imqusermgr, imqkeytool) is determined by the following sources, in order of precedence:
-
The -jrehome or -javahome command line option to the imqbrokerd command. (If both are specified, the one occurring last on the command line takes precedence).
-
The J2SE file location specified in the jdk.env file. (This file is deprecated, but is still supported for backward compatibility. For historical reasons, it has higher priority than anything else except option 1.)
-
The IMQ_JAVAHOME environment variable.
-
The environment variable IMQ_DEFAULT_JAVAHOME in the imqenv.conf file.
-
The system default locations, as specified in the documentation for your platform.
To check which version of the Java runtime Message Queue will use, enter the command
imqbrokerd -version
The output from this command includes the version and pathname of the configured JRE: for example,
Java Runtime: 1.5.0_12 Sun Microsystems Inc. C:\Program Files\Java\jdk1.5.0\jre
When you specify a JRE location through the Installer’s JDK Selection screen, the Installer saves that location as the value of IMQ_DEFAULT_JAVAHOME in the imqenv.conf file (option 4 in the list above). On Windows, this file is located by default at
C:\Program Files\Sun\MessageQueue\etc\mq\imqenv.conf
After a successful Message Queue installation, it should include something like the following:
set IMQ_DEFAULT_JAVAHOME=C:\Program Files\Java\jdk1.5.0_12
You can override this setting, however, either by editing the imqenv.conf file or by setting one of the other options higher in the list. This can be useful, for instance, for testing or reconfiguring the broker when a newer JRE version becomes available. Understanding how the JRE is determined can also help in troubleshooting problems. For instance, if the imqbrokerd -version command shows that Message Queue is using an unexpected JRE, it may be that one of the higher-precedence options has been set inadvertently (such as by an old jdk.env file that should have been deleted).
Configuring Message Queue for Automatic Startup
To start a Message Queue message broker automatically at Windows system startup, you must define the broker as a Windows service. The broker will then start at system startup time and run in the background until system shutdown. Consequently, you will not need to use the Message Queue Broker utility (imqbrokerd) unless you want to start an additional broker.
To install a broker as a Windows service, use the Message Queue Service Administrator utility:
imqsvcadmin install
You can use the imqsvcadmin command’s -args option to pass startup arguments to the broker. For more information, see the sections “Automatic Startup on Windows” in Chapter 3, “Starting Brokers and Clients,” and “Service Administrator Utility” in Chapter 13, “Command Line Reference,” of the Message Queue Administration Guide.
Message Queue IPS Packages
Table 2–3 lists the IPS packages used by Message Queue.
Table 5–2 Message Queue IPS Packages|
Name |
Description |
|---|---|
|
mq-bin-exe |
Message Queue shell scripts for Windows. |
|
mq-branding |
Turns on the Sun GlassFish Message Queue brand name. |
|
mq-capi |
Message Queue C-client development and C client runtime. |
|
mq-config |
Message Queue configuration. |
|
mq-core |
Message Queue Message Queue core/client runtime. |
|
mq-locale |
Message QueueMessage Queue examples and javadoc. |
|
mq-server |
Message Queue Message Queue broker. |
|
mq-server-native |
Message Queue broker native libraries. |
|
mq |
Message Queuemeta package (depends on all required MQ IPS packages). This package is not installed by the installer. |
|
nss-libs |
NSS libraries. |
|
nss-utils |
NSS utilties. |
Installed Directory Structure
Table 5–3 shows the installed directory structure for Message Queue 4.4 Update 1 on the Windows platform. Paths shown are relative to the Message Queue installation home directory, denoted by the directory variable mqInstallHome. This is the directory you specify to the Message Queue Installer in step 7 of the procedure To Install Message Queue in GUI Mode, above (by default, C:\Program Files\Sun\MessageQueue).
Table 5–3 Installed Directory Structure (Windows)|
Directory |
Contents |
|---|---|
|
mqInstallHome\mq\bin(IMQ_HOME\bin) |
Executable files for Message Queue administration tools:
All executable files have the filename extension .exe. This directory also includes other executables (imqbrokersvc). |
|
mqInstallHome\mq\lib(IMQ_HOME\lib) |
Support files for Message Queue Java client runtime:
Note – See Component Dependencies in Sun GlassFish Message Queue 4.4 Update 1 Release Notes for the versions of Netscape Portable Runtime (NSPR) and Network Security Services (NSS) needed to support the C API. |
|
mqInstallHome\mq\lib\props(IMQ_HOME\lib\props) |
Broker’s default configuration files |
|
mqInstallHome\mq\lib\ext(IMQ_HOME\lib\ext) |
.jar or .zip files to be added to broker’s CLASSPATH environment variable Typically used for configuring JDBC-based persistence or Java Authentication and Authorization Service (JAAS) login modules. |
|
mqInstallHome\mq\lib\images(IMQ_HOME\lib\images) |
Administration GUI image files |
|
mqInstallHome\mq\lib\help(IMQ_HOME\lib\help) |
Administration GUI help files |
|
mqInstallHome\mq\javadoc(IMQ_HOME\javadoc) |
Message Queue and JMS API documentation in JavaDoc format |
|
mqInstallHome\mq\examples(IMQ_HOME\examples) |
Example Java client applications |
|
mqInstallHome\mq\examples\C(IMQ_HOME\examples\C) |
Example C client applications |
|
mqInstallHome\mq\include(IMQ_HOME\include) |
Header files to support C client applications |
|
mqInstallHome\var\mq(IMQ_VARHOME) |
Message Queue working storage |
|
mqInstallHome\var\mq\instances(IMQ_VARHOME\instances) |
Configuration properties, file-based persistent data stores, log files, flat-file user repositories, and access control properties files for individual broker instances |
|
mqInstallHome\etc\mq |
Message Queue configuration files, instance template files, sample password file, and so forth |
|
mqInstallHome\var\install |
Message Queue installer implementation, required jar files, and installer log files |
|
mqInstallHome\var\install\contents\mq |
Message Queue uninstall script |
|
mqInstallHome\install |
Message Queue files needed by installer and uninstaller |
Updating Message Queue 4.4 Update 1
Add-on components and related applications that are available for Sun GlassFish Message Queue 4.4 Update 1 can easily be added to an existing installation without installing the software again.
 To Update an Existing Installation of Message Queue
-
Stop all Message Queue processes (broker and client).
-
Change your working directory to mqInstallHome/bin.
-
Run Update Tool.
./updatetool
The first time you run the command, you will be asked if you want to install Update Tool. When prompted, choose to install Update Tool.
-
After successful installation, re-run Update Tool.
./updatetool
-
Expand the Message Queue 4.4 Update 1 node and click the Available Updates tab.
The Available Updates page is displayed.
-
In the table of available updates, select the components that you are updating.
If no updates are available, the table is empty.
-
To select an individual component, select the checkbox adjacent to the name of the component.
-
To select all components, click the Select All icon in the table header.
-
To deselect all components, click the Deselect All icon in the table header.
-
-
Click Install.
-
Accept the license agreement.
Message Queue confirms that the installation is complete. The components are removed from the table of available updates.
Uninstallation Procedure
Like the Installer, the Message Queue Uninstaller can be run in either of two modes of operation:
-
In GUI (graphical user interface) mode, the Uninstaller presents a series of graphical screens with which you interact using mouse clicks and keyboard text entry.
-
In silent mode, the Uninstaller operates from a predefined answer file representing your responses to the GUI screens. This allows you to script the uninstallation process in advance and then perform it in batch mode without actually displaying the GUI screens and responding to them interactively.
The following sections describe each of these three modes of Uninstaller operation.
The Message Queue installation includes several scripts and executables named uninstaller, both in the Installer .zip bundle and on your system after installation. To uninstall Message Queue 4.4 Update 1, it is important that you run the correct uninstaller executable, located at
mqInstallHome\var\install\contents\mq\uninstaller
where mqInstallHome is the installation home directory you specified when you installed Message Queue 4.4 Update 1 (by default, C:\Program Files\Sun\MessageQueue). Be careful not to invoke some other uninstaller by mistake.
Uninstalling in GUI Mode
The following procedure shows how to use the Message Queue Uninstaller in GUI mode to uninstall Message Queue 4.4 Update 1 from your Windows system.
 To Uninstall Message Queue in GUI Mode
-
Start the Windows Command Prompt utility.
Choose Command Prompt from the Programs submenu of the Windows Start menu.
-
Set your working directory to the directory containing the Uninstaller.
Enter the command
cd mqInstallHome\var\install\contents\mq
where mqInstallHome is the installation home directory you specified to the Message Queue Installer’s Install Home screen in step 7 of the procedure To Install Message Queue in GUI Mode, above.
-
Start the Uninstaller.
Enter the command
uninstaller
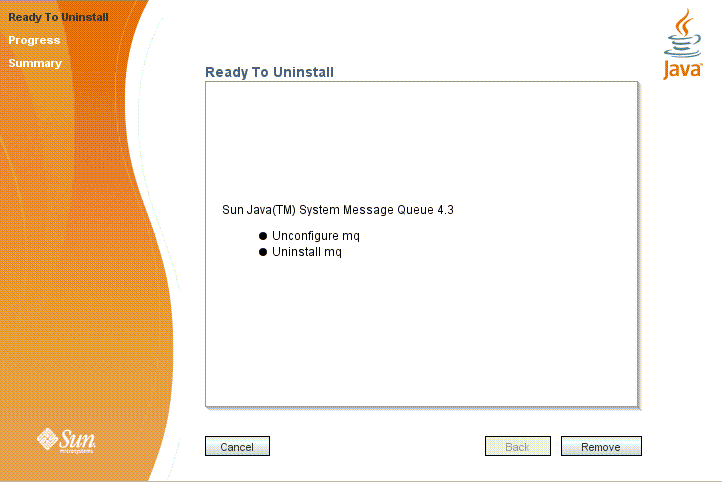
The Uninstaller’s Ready screen (Figure 5–10) appears.
Figure 5–10 Uninstaller Ready Screen
-
Click the Remove button.
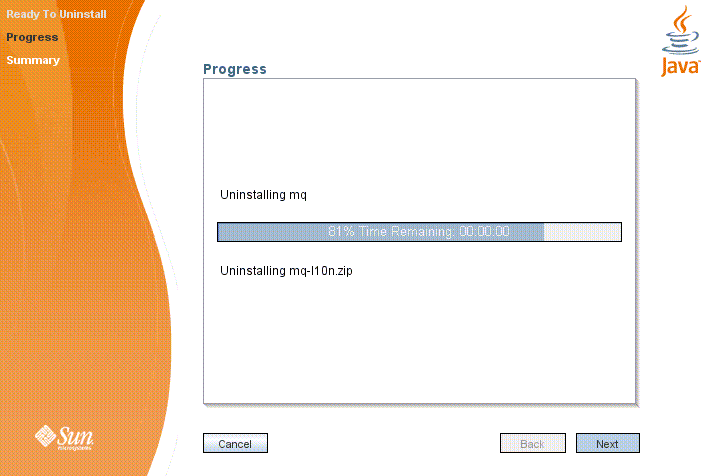
The Uninstaller’s Progress screen (Figure 5–11) appears.
Figure 5–11 Uninstaller Progress Screen
When uninstallation is complete, the Uninstaller’s Summary screen (Figure 5–12) appears, summarizing the steps that were performed during uninstallation. You can click the links on this screen for a detailed summary report and a log file giving more details on the uninstallation.
Figure 5–12 Uninstaller Summary Screen

-
Click the Exit button to dismiss the Summary screen.
Message Queue uninstallation is now complete.
Uninstalling in Silent Mode
In silent mode, the Uninstaller operates from a predefined answer file representing your responses to the GUI screens. This allows you to script the uninstallation process in advance and then perform it in batch mode without actually displaying the GUI screens and responding to them interactively. To create an answer file, start the Uninstaller with the -n option:
uninstaller -n answerFile
where answerFile identifies the file in which to record your responses. This causes the Uninstaller to execute a “dry run,” presenting the sequence of GUI screens without actually performing the uninstallation. Your input responses are recorded in the specified answer file. You can then perform the uninstallation at a later time by starting the Uninstaller with the -s (“silent”) option, specifying the same answer file:
uninstaller -s -a answerFile
This performs a silent uninstallation as defined by the answer file, without visibly displaying the GUI screens.
- © 2010, Oracle Corporation and/or its affiliates
