Adding Text to the Canvas
To add text to the canvas, follow these steps:
-
Click SELECT on the Text drawing mode option.
This displays the Text pop-up window.
-
Choose the font you want to use from the Font menu.
-
Choose the text weight, style, and size from the relevant menus.
The items on the Weight, Style, and Size menus depend on the font that you have chosen. For example, some fonts may have many available choices for size, while others only have one default choice.
-
Type the text you want in the Text field.
-
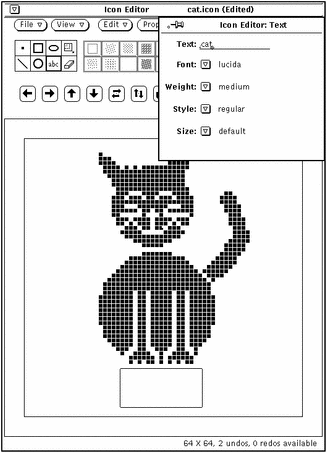
When you have typed the text in the text field, insert it in the icon by moving the pointer onto the desired spot on the canvas and pressing SELECT.
A rectangle is displayed that shows you the size of the text to be inserted, as shown in the example in Figure 15-6. You can move the rectangle anywhere within the canvas to position it as long as you continue to press SELECT.
Figure 15-6 Adding Text to Your Icon

-
Drag the pointer to position the rectangle, and when it is positioned correctly, release SELECT.
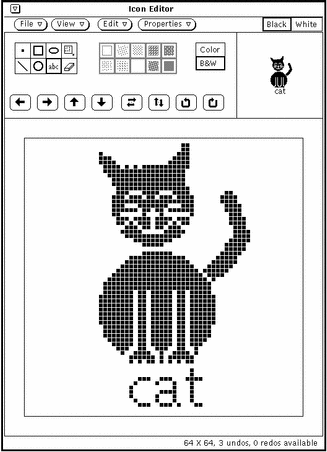
The text is added to the canvas, as shown in the example in Figure 15-7.
Figure 15-7 Text Added to an Icon

Once you have added text to the canvas, you can edit it as you would any other part of the image:
-
Choose Region (the rectangle within a rectangle) to define a rectangular region on the canvas and move, flip, or rotate it by clicking SELECT on any of the Move buttons.
-
Choose Erase to erase any pixels on the canvas by moving the cursor onto the canvas, clicking SELECT, and dragging the eraser cursor over the areas you want to erase. Only the pixel under the front tip of the eraser is actually erased.
-
- © 2010, Oracle Corporation and/or its affiliates
