To Create a New Project
-
Choose New Project from the File menu of the App Builder primary window or New from the Project menu of the Project Organizer.
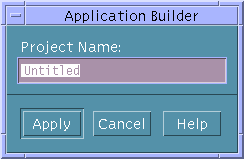
The Project Name dialog box will be displayed. By default, an unnamed project is called Untitled.

If you have made changes to the current project since you last saved it, a message dialog box will be displayed first, giving you the option to discard the changes and create the new project or to cancel the New Project operation.
Click Discard Changes to throw out the changes and close the current project.
Click Cancel if you want to save the current project. Save the current project before creating the new project.
-
Type a name (all lowercase) for the project and click Apply.
The name of the project (with .bip added as a suffix) will be displayed in the title bar at the top of the App Builder primary window. Every module you create or import will be part of the current project until you open another project.
Note -
Project names should be all lowercase so that there is no conflict between the name of the project resource file and the project executable file. The name of the resource file created when you generate code is the same as the name of the project, minus the .bip suffix, but it is given an initial capital letter.
- © 2010, Oracle Corporation and/or its affiliates
