| Exit Print View | |
Sun OpenDS Standard Edition 2.0 Administration Guide |

|
Configuring the Directory Server
Configuring Security in the Directory Server
Running the Directory Server as a Non-Root User
Working With Object Identifiers (OIDs)
Extending the Directory Schema
You can use the Control Panel to manage the directory's schema, as described in these sections:
This procedure shows how to use the Control Panel to display items defined in the schema.
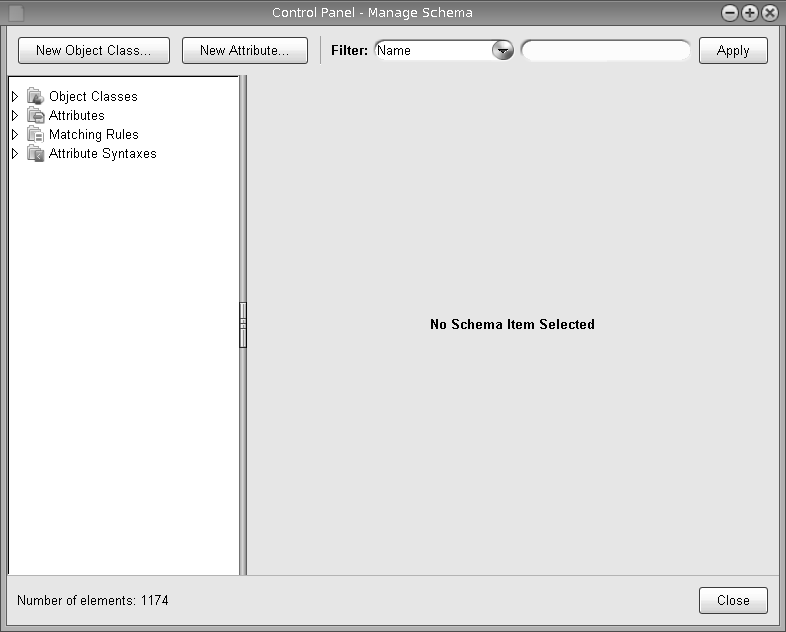
The Manage Schema window appears, displaying all configured schema object classes in a list on its left side.

Double-click on a category in the list to expand it and display the attributes and sub-categories that it contains.
Click on an item in the list to display its specifications.
Filter the objects that are displayed. Select a category to filter on from the drop-down list, type a string in the blank field, and click the Apply button. Only the objects that match the filter are displayed.
Double-click an object or attribute in the right panel of the window to display its configuration.
This procedure shows how to use the Control Panel to add a new object class to the schema.
The Manage Schema window appears
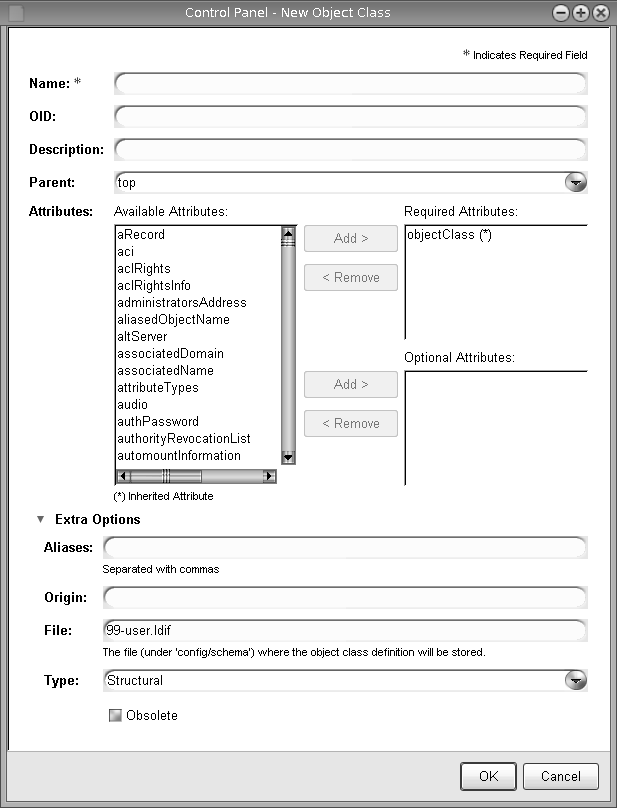
The New Object Class window appears.

A unique name to identify the new object class
An OID that uniquely identifies the object class in the directory server. The LDAP v3 specification requires the OID to be a numeric number, but OpenDS supports the use of non-numeric OIDs for easy identification because the schema is used internally within the organization. The default format is objectClassName-oid, such as person-oid.
A description of the object class
The superior object class from which the new object class inherits elements.
OpenDS allows only one superior object class, although the LDAP v3 specification allows for multiple superior object classes.
The set of attribute types that can be present (that is, have at least one value) in entries with the object class. Required attributes must be present (that is, have at least one value) in entries with that object class. Optional attributes can be present in such entries, but they are not required to be present.
Select an attribute in the Available Attributes list and click one of the Add buttons to add it to either the Required Attributes list or the Optional Attributes list.
Double-click an attribute to move it from the Available Attributes list to the Required Attributes list. double-click an attribute in either the Required Attributes list or the Optional Attributes list to return it to the Available Attributes list.
The New Object Class window displays the progress of the operation.
When the operation is complete, the new object class is created.
This procedure shows how to use the Control Panel to define a new attribute in the schema.
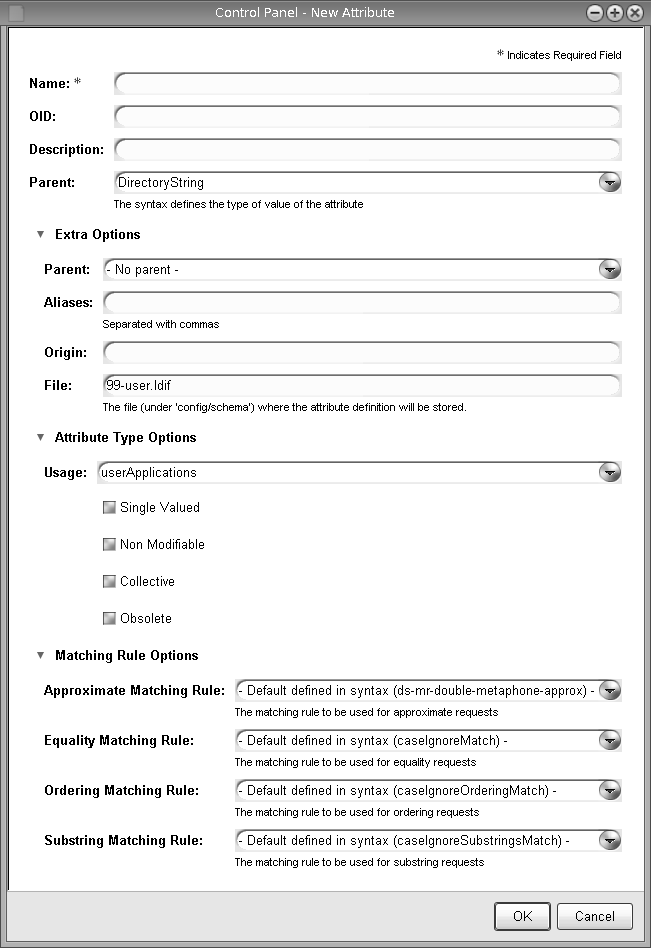
The New Attribute window appears.

A unique name to identify the new attribute
An OID that uniquely identifies the attribute in the directory server. The LDAP v3 specification requires the OID to be a numeric number, but OpenDS supports the use of non-numeric OIDs for easy identification because the schema is used internally within the organization. The default format is attributeName-oid, such as person-oid.
A description of the attribute
The superior object class from which the new attribute inherits elements.
OpenDS allows only one superior object class, although the LDAP v3 specification allows for multiple superior object classes.
Specify additional values in the fields for Extra Options, Attribute Type Options, and Matching Rule Options as needed.
The New Attribute window displays the progress of the operation.
When the operation is complete, the new attribute is created.