Using OpenSSO Enterprise to Enable Oracle Federation in a Service Provider Environment
To enable Oracle Access Manager for Federation in the Service Provider environment, follow these steps:
-
Install OpenSSO Enterprise in the Identity Provider environment.
-
Install OpenSSO Enterprise in the Service Provider environment.
-
Install Oracle Access Manager in the Service Provider domain.
-
Configure Oracle Access Manager for the OpenSSO Enterprise scheme.
-
Configure the OpenSSO Enterprise Identity Provider and Service Provider for SAML2 protocols.
Installing OpenSSO Enterprise in the Identity Provider Environment
The Identity Provider does not have to be an OpenSSO Enterprise deployment. But for optimum protocol interoperability, use OpenSSO Enterprise. See the Sun OpenSSO Enterprise 8.0 Installation and Configuration Guidefor detailed installation and configuration steps.
A good practice is to install the Identity Provider and Server Provider in different domains. If that is not possible, make sure they use different cookie names or cookie domains. This eliminates cookie validation inconsistency.
Installing OpenSSO Enterprise in the Service Provider Environment
See the Sun OpenSSO Enterprise 8.0 Installation and Configuration Guidefor detailed installation and configuration steps.
The OpenSSO Enterprise in the Service Provider environment initiates the SAML2 protocols. The Oracle Access Manager Agent can protect the enterprise application by redirecting to OpenSSO Enterprise for single sign-on purposes.
Installing Oracle Access Manager
Install Oracle Access Manager in the Service Provider domain where enterprise applications are protected by Oracle WebGate agents. See the Oracle Access Manager Installation Guide for detailed installation instructions.
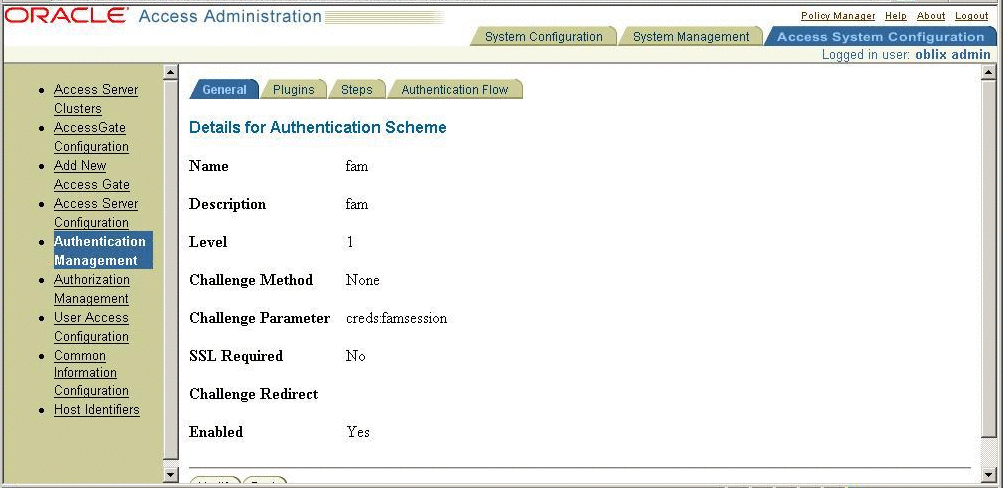
The plug-in name must be same as the name of the shared library.
Figure 3–11 The plug-in name must be same as the name of the shared library

Configuring Oracle Access Manager for an OpenSSO Enterprise Scheme
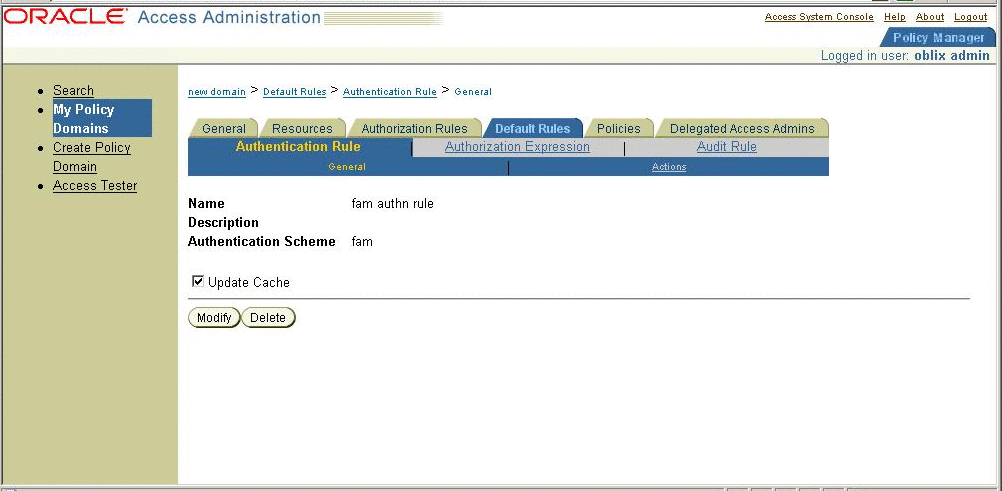
The custom authentication scheme for Oracle Access Manager is a C-based implementation, and the custom authentication scheme should be built like a shared library. The custom authentication scheme in this chapter is a Solaris-based shared library and can be ported onto other platforms with similar semantics. This custom authentication module also uses the OpenSSO Enterprise C-SDK for validating the OpenSSO Enterprise session. When an OpenSSO Enterprise WAR file is exploded, the custom authentication module is located under the base-dir/samples/thirdparty/oblix directory. The README.txt contains instructions for configuring the Oracle Access Manager authentication scheme. The following figure provides some details for configuring OpenSSO Enterprise AuthSchemein Oracle Access Manager.
Figure 3–12 Configuring OpenSSO Enterprise AuthSchemein Oracle Access Manager

Configuring a Resource
For detailed instructions, see the Oracle Containers for J2EE Security Guide
Later you will use the resource name you configure in Oracle Access Manager in the SAML Adapter configuration. The policy will trigger the OpenSSO Enterprise authentication module.
Setting Up SAMLv2
In all, you must have Identity Provider metadata and extended metadata, as well as Service Provider metadata and extended metadata. In the Identity Provider, import Identity Provider metadata and extended metadata as hosted metadata. Import Service Provider metadata and extended metadata as remote entity metadata. To change the hosted or remote attributes, locate the extended metadata XML element <EntityConfig> which contains the following attribute with default value:
hosted=true |
Change the value to false.
 To Configure the OpenSSO Enterprise Identity
and Service Providers for SAML2 Protocols
-
Generate the metadata templates on both Identity Provider and Service Provider environments.
Use the famadm command, or used use a browser to go to the following URL:
http:<host>:<port>/opensso/famadm.jsp
-
At the Identity Provider:
famadm create-metadata-templ -y idp_entity_id
-u amadmin -f admin_password_file_name -m idp_standard_metadata
-x idp_extended_metadata -i idp_meta_alias
where idp_meta_alias is /idp
-
At the Service Provider:
famadm create-metadata-templ -y sp_entity_id
-u amadmin -f admin_password_file_name -m sp_standard_metadata
-x sp_extended_metadata -s sp_meta_alias
where sp_meta_alias is /sp
-
-
Customize the Service Provider extended metadata.
Add the Service Provider extended metadata as an attribute named as spAdapter. This attribute is used by the SAML protocols to do any post single sign-on authentication processes. In the architecture diagram, this the Oracle Access Manager Plug-in. The OAMPlugin uses the OpenSSO Enterprise session to authenticate against Oracle Access Manager and establish ObSSOCookie. The Service Provider metadata must have the following attributes:
<Attribute name="spAdapter"> <Value>com.sun.identity.saml2.plugins.SMAdapter</Value> </Attribute> <Attribute name="spAdapterEnv"> <Value>FAMCookieName=iPlanetDirectoryPro</Value> <Value>OAMCookieName=ObSSOCookie</Value> <Value>CookieDomain=.red.example.com</Value> <Value>Resource=/test/index.html</Value> <Value>ObSDKInstallDir=/export/oam/AccessServerSDK</Value> </Attribute> -
Set the value for transientUser to the anonymous user.
The Service Provider extended metadata has an attribute named as transientUser. Make sure that the OpenSSO Enterprise Service Provider is enabled for Anonymous authentication.
<Attribute name="transientUser">
<Value>anonymous</Value>
</Attribute>
-
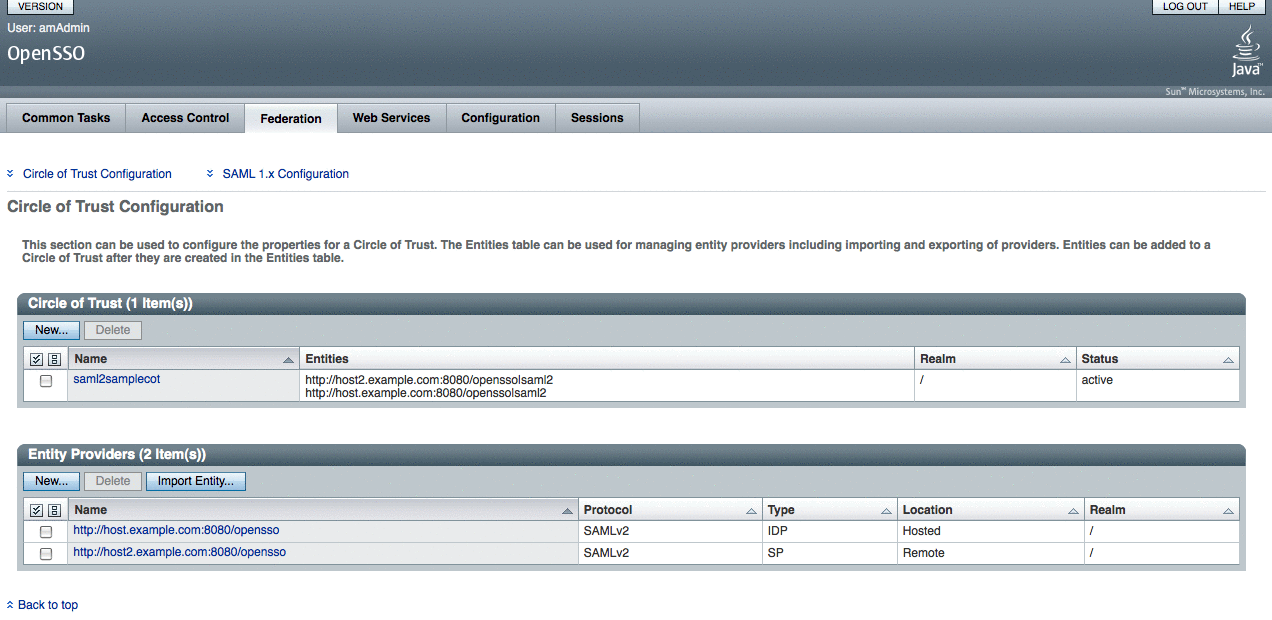
Create a circle of trust.
The circle of trust should also be added in your extended metadata.
-
Load the metadata.
-
Edit the following attribute to one of your circle of trust.
The extended template files contains a sample circle of trust.
<Attribute name="cotlist">
<Value>samplesaml2cot</Value>
</Attribute>
You can also add the circle of trust through the OpenSSO Enterprise administration console.
-
Load the hosted metadata in both the Identity Provider and Service Provider.
You can use the famadm command or the OpenSSO Enterprise administration console.
-
Exchange the metadata between Identity Provider and Service Provider.
and load the metadata.
-
Verify through OpenSSO Enterprise administration console that the metadata is configured properly.

Verifying that Single Sign-On Works Properly
Access the enterprise application protected by Oracle WebGate. Oracle WebGate redirects to OpenSSO Enterprise for authentication where the SAML2 single sign-on is initiated.
- © 2010, Oracle Corporation and/or its affiliates
