Formatting and Printing Documents
Once your editing is complete, format your document by choosing margins and text alignment.
To Format a Document
-
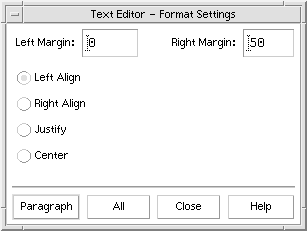
Choose Settings from the Format menu.
Figure 12–13 Format Settings dialog box

-
Enter margins.
The default left margin is 0 and the right margin is dynamically set to the width of the Text Editor window. Margins are specified as a number of character columns.
-
Select left, right, justify (block style), or center alignment.
-
Determine the scope of the formatting:
-
To format a single paragraph, place the cursor in the paragraph, then click Paragraph.
-
To format the entire document, click All.
-
-
After closing the dialog box, choose Paragraph or All from the Format menu to apply the settings.
To Print an Open Document
-
Open the document in Text Editor.
-
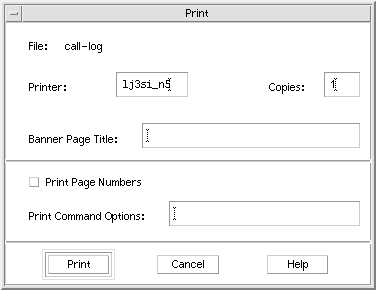
Choose Print from the File menu or press Control+P.
The Print dialog box displays the name of your system's printer and enables you to set printing options. By default, your document is printed on your system printer. If desired, you can direct your job to a different printer.
Figure 12–14 Print dialog box

-
Optional. Set any of these printing options:
-
Type the number of copies to print.
-
Type text to appear on the printer banner page.
-
Click Print Page Numbers if you want to number the pages.
-
Type command-line printer options.
-
-
Click Print.
The Print dialog box closes when you print your document. To close the dialog box without printing your file, click Cancel.
To Print a Closed Document
- © 2010, Oracle Corporation and/or its affiliates
