Setting Up Initial Users
If all users who are assigned to roles are already installed on this system, you can skip this task and go to Setting Up Initial Roles.
How to Create Initial Users by Using the User Accounts Tool
-
Click the User Accounts tool icon in either the navigation pane or the view pane of the User Tool Collection.
The User Accounts tool is started. The Action menu now provides options for this tool.
-
Select Add User->With Wizard from the Action menu.
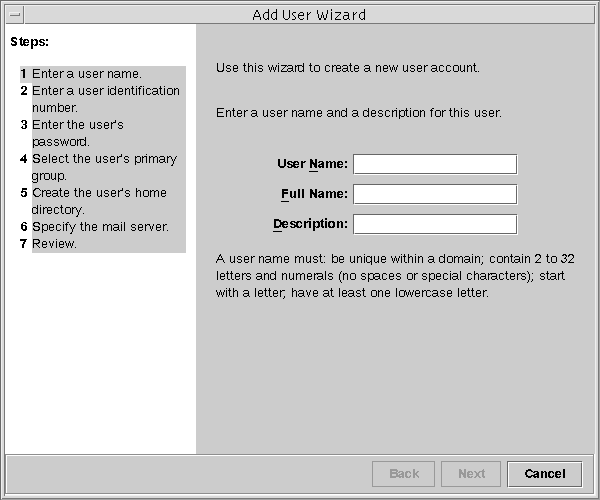
This step starts the Add User wizard, a series of dialog boxes that request information that is necessary for configuring a user. Use the Next and Back buttons to navigate between dialog boxes. Note that the Next button does not become active until all required fields have been filled in. The last dialog box is for reviewing the entered data, at which point you can go back to change entries or click Finish to save the new role.
The following figure shows the first dialog box, Step 1: Enter a user name.
Figure 6–2 Add User Wizard

-
Type the name of the first user and the other identification information.
-
In the Step 2: Enter a User Identification Number dialog box, type the UID.
This entry should match the existing UID for the user.
-
In the Step 3: Enter the User's Password dialog box, indicate whether you or the user will be setting the password.
If you are setting up this account for yourself, click the second option. Then, type and confirm your password.
-
In the Step 4: Select the User's Primary Group dialog box, select the appropriate group.
-
In the Step 5: Create the User's Home Directory dialog box, specify the path for the home directory.
-
In the Step 6: Specify the Mail Server dialog box, check out the default mail server and mailbox.
You can change these settings later in the User Properties dialog box.
-
Check the information in the Review dialog box. Click Finish to save, or click Back to reenter information.
If you discover missing or incorrect information, click the Back button repeatedly to display the dialog box where the incorrect information is displayed. Then, click Next repeatedly to return to the Review dialog box.
- © 2010, Oracle Corporation and/or its affiliates
