Example of Upgrading Using Solaris Live Upgrade (Character Interface)
In this example, a new boot environment is created on a system that is running the Solaris 7 release. The new boot environment is upgraded to the Solaris 9 release. The upgraded boot environment is then activated.
Install Live Upgrade on the Active Boot Environment
-
Insert the Solaris DVD or Solaris Software 2 of 2 CD.
-
Run the installer for the media you are using.
-
If you are using the Solaris DVD, change directories to the installer and run the installer.
# cd /cdrom/cdrom0/Solaris_9/Tools/Installers
# ./liveupgrade20
The Solaris Web Start installer is displayed.
-
If you are using the Solaris Software 2 of 2 CD, run the installer.
% ./installer
The Solaris Web Start installer displays.
-
-
From the Select Type of Install panel, click Custom.
-
On the Locale Selection panel, click the language to be installed.
-
Choose the software to install.
-
For DVD, on the Component Selection panel, click Next to install the packages.
-
For CD, On the Product Selection panel, click Default Install for Solaris Live Upgrade and click on the other software choices to deselect them.
-
-
Follow the directions on the Solaris Web Start installer panels to install the software.
Create a Boot Environment
In this example, the source boot environment is named c0t4d0s0. The root (/) file system is copied to the new boot environment. Also, a new swap slice is created rather than sharing the source boot environment's swap slice.
-
Display the character interface:
# /usr/sbin/lu
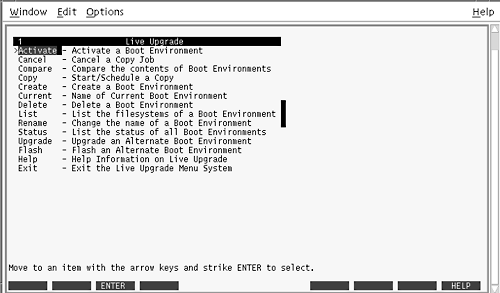
Figure 35–3 Solaris Live Upgrade Main Menu

-
From the main menu, select Create.
Name of Current Boot Environment:    c0t4d0s0
Name of New Boot Environment:   c0t15d0s0
-
Press F3.
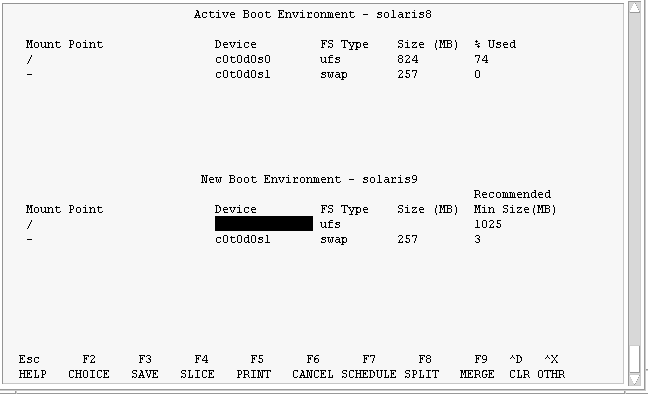
Figure 35–4 Solaris Live Upgrade Configuration Menu

-
From the Configuration menu, press F2 to display the Choices menu.
-
Choose slice 0 from disk c0t15d0 for root (/).
-
From the configuration menu, create a new slice for swap on c0t15d0 by selecting a swap slice to be split.
-
Press F2 to display the Choices menu.
-
Select slice 1 from disk c0t15d0 for the new swap slice.
-
Press F3 to create the new boot environment.
Upgrade the Inactive Boot Environment
The operating system image is taken from the network for the upgrade.
-
From the main menu, select Upgrade.
Name of New Boot Environment:   c0t15d0s0
Package Media: /net/ins3-svr/export/Solaris_9/combined.solaris_wos
-
Press F3.
Activate the Inactive Boot Environment
The c0t15d0s0 boot environment is made bootable. The system is then rebooted and c0t15d0s0 becomes the active boot environment. The c0t4d0s0 boot environment is now inactive.
-
From the main menu, select Activate.
Name of Boot Environment: c0t15d0s0
Do you want to force a Live Upgrade sync operations: no
-
Press F3.
-
Press Return.
-
Type:
# init 6
If a fallback is necessary, use the command-line procedures in the previous example: Fall Back to the Source Boot Environment.
- © 2010, Oracle Corporation and/or its affiliates
