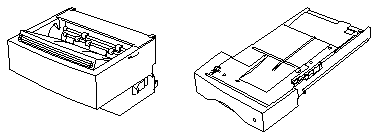

The Duplexer for the SPARCprinterTM E
This document tells you how to install and remove the Duplexer. For more information on using the Duplexer, see the SPARCprinter E Hardware Installation and User's Guide .
The Duplexer attaches to the front of the printer in place of the front exit tray.
The Duplexer paper cassette replaces the 200-sheet cassette and holds
approximately 130 sheets of 16-24 lb (60-90 g/m
With the Duplexer installed, you can print either duplex or singled-sided pages. You can print on the same size, weight, and type of paper as you use with the standard paper cassette (except A5 paper). See the SPARCprinter E Hardware Installation and User's Guide for more information on acceptable print materials.
You can attach the Duplexer without turning the printer power off. The printer automatically recognizes that the Duplexer has been installed and is ready for use.
To install the Duplexer, you will:
After removing the front exit tray, keep it in case you need to operate the printer without the Duplexer installed. The Duplexer has a front exit tray built into the unit.
Caution -
Remove the paper cassette before installing the Duplexer or you may damage the cassette and the Duplexer.
Load the paper cassette the same way as the 200-sheet cassette. See the SPARCprinter E Hardware Installation and User's Guide for details.
Make sure the Duplexer right mounting tab rests in the center notch of the right metal bracket.
Make sure the Duplexer snaps into position so the electrical contact is made.
The cover should snap into place.
Note - For best output quality, use the top output bin when printing duplex.
Push the switch toward the printer to select the top output bin.
Duplex should appear on the display. If not, check to see if the Duplexer is installed correctly. Then reverify the installation. If an error message appears, see the SPARCprinter E Hardware Installation and User's Guide.
You can print duplex pages from any paper source except from the envelope feeder.
You can choose duplex functions from the operator panel or from a software application that supports duplex printing, such as the one provided with the SPARCprinter E software. This software refers to long edge binding as Normal duplex and short edge binding as Tumble duplex. See SPARCprinter E Software Installation and User's Guide for more information.
If the software setting differs from the operator panel setting, the software setting will override the operator panel setting. For example, if you choose duplex printing from the operator panel but the software specifies single-sided printing, the printer will print single-sided pages. See the SPARCprinter E Hardware Installation and User's Guide for more information.
To enable the Duplex option from the operator panel, do the following:
This setting will be saved and the operator panel will return to the previous menu.
This will return you to the Main Menu.
The next step is to set up the software to enable the printer to use the Duplexer option. Refer to the SPARCprinter E Software Installation and User's Guide for more information.
Note - If you did not specify the Duplexer option during initial software setup, you will need to remove and reinstall the printer software configuration and specify the Duplexer option. You will not be able to use this feature until you perform this reconfiguration. Refer to the SPARCprinter E Software Installation and User's Guide for more information.
If you remove the Duplexer, you must reset the printer for single-sided printing.
Make sure the override selection switch on the front exit tray is in the forward position, as shown below.