Chapter 4 Setting Up Printing Services
With a SunLink Server computer installed in your network, it won't matter whether Microsoft Windows or Solaris clients send their jobs to the printers that it serves. The SunLink Server software will recognize and process both types.
This chapter tells you how to set up a SunLink Server computer as a print server, and offers background information that will help you keep printing tasks running smoothly. The process for setting up a Solaris printer to work in the network comprises three groups of tasks.
"Task 1 of 3 - How to Configure a Solaris Printer"
"Task 2 of 3 - How to Set Up the Solaris Printer as a SunLink Server Shared Printer"
"Task 3 of 3 - How to Make the SunLink Server Printer Available to Microsoft Windows Clients"
"How to Remove a SunLink Server Printer"
You need to perform the first two setup tasks only once per printer, and you use the SunLink Server Manager tool for the Solaris portion of the work. For the final two setup tasks, you use Microsoft Windows tools. The final task, making the new printer available to clients, requires that each client machine user add the printer.
About SunLink Server Printing Services
SunLink Server printing offers the following features:
-
Clients can browse the network for available network printers. The browsing function is available from Network Neighborhood, the Add Printer Wizard, and from the Print Setup wizard of Windows NT and Windows 95 applications.
-
As an administrator, you can administer SunLink Server print servers, printers, documents, and printer drivers remotely.
-
As an administrator, after your first client installs the printer, you do not have to install printer driver files on other Windows NT and Windows 95 client computers to enable them to use a SunLink Server print server; this installation happens automatically because the driver is installed on the printer driver share. If all printing clients are running Windows NT or Windows 95, it only is necessary to install printer driver files in one place--at the SunLink Server print server.
-
Clients can print to all networked printers that have their own direct Ethernet interface and have been configured as SunLink Server system printers.
Note -
You cannot share a printer that is connected to a Solaris system that is not running SunLink Server software.
SunLink Server Printing Terms
In SunLink Server terminology, a shared printer queue is the mechanism through which a collection of print devices is accessed by LAN users with appropriate permissions. A print device is the actual hardware that produces printed output. Print devices can be connected directly to the server (via parallel port), to the network (via a network adapter card), or to a client computer on the network.
The Solaris operating environment, which your SunLink Server computer runs, provides LP Printer functionality that mediates between the SunLink Server system, which sends clients' print requests to the LP service, and the print devices to which the LP service directs the requests. Users access print devices by sending their print jobs over the network to shared printer queues, which in turn forward the jobs to print devices.
In Windows NT terminology, a printer is the software interface between the operating system and the print device. The printer defines where the document will go before it reaches the print device (to a local port, to a file, or to a network print share), when it will go, and various other aspects of the printing process.
In SunLink Server terminology, the shared printer queue is the software interface between the application and the print device. When you administer a SunLink Server print server from Windows NT, a "printer" actually represents a shared printer queue.
A printer driver is a program that converts graphics commands into a specific printer language, such as PostScript. When you add a printer, you are installing a printer driver and making the printer (shared printer queue) available on the network by sharing it.
A print server is the computer that receives documents from clients.
Spooling is the process of writing the contents of a document to a file on disk. This file is called a spool file.
The SunLink Server program supports all of the print devices that the local spooling system supports. The local spooling system is the process that runs on the SunLink Server computer's Solaris system, which handles system printing.
Network-interface print devices have their own network cards; they need not be physically connected to a print server because they are connected directly to the network.
SunLink Server Network Printing
The SunLink Server program supports true network printing. When Windows NT and Windows 95 clients connect to a correctly configured SunLink Server print server, the printer driver is automatically installed on the client computer.
If you install a newer or different printer driver on a SunLink Server computer or a Windows NT or Windows 95 client computer, you must update the printer driver manually to have the new version copied on to your computer. You remove and then add the printer to download the printer driver automatically.
Setting Up SunLink Server Printing
Establishing a printer as a SunLink Server shared printer involves three groups of tasks:
-
Configuring the printer as a Solaris printer
-
Designating the printer as a shared SunLink Server printer
-
Making the new printer available to individual clients
The groups of tasks are covered in the sections, "Task 1 of 3 - How to Configure a Solaris Printer", "Task 2 of 3 - How to Set Up the Solaris Printer as a SunLink Server Shared Printer", and "Task 3 of 3 - How to Make the SunLink Server Printer Available to Microsoft Windows Clients".
This chapter presents steps for accomplishing each group of tasks by way of the SunLink Server Manager tool.
Note -
Even though it is possible to configure a printer by way of the Solaris command line, it is recommended for experienced Solaris system administrators only. If you do not fit that description, you are advised to use the SunLink Server Manager method only. Also, if you are using a printer that you have already configured as a Solaris printer with Solaris AdminTool, note that the SunLink Server Manager wizard will replace the printer's configuration by directly editing the printers.conf file.
Task 1 of 3 - How to Configure a Solaris Printer
-
Using the SunLink Server Manager tool, log on to a SunLink Server computer.
In the following examples, the server "akita" is a SunLink Server computer.
-
Double-click Tasks in the View Pane, and then double-click Install Solaris Printer.
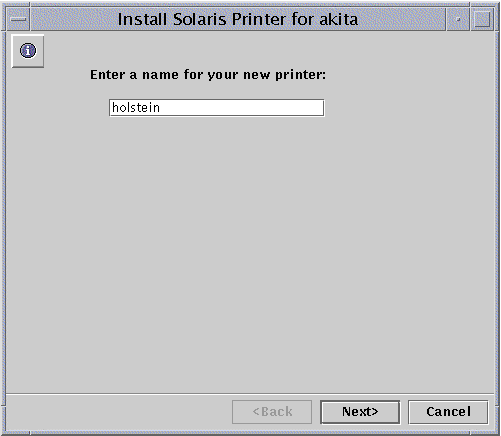
The opening screen of the Install Solaris Printer wizard appears, asking you to designate a name for the new printer.
-
Type a name for the new printer into the provided field.
The name you choose will be its Solaris queue name. A printer name must be between one to 14 characters and can be made up of only the letters A through Z (uppercase, lowercase, or mixed case), the numerals 0 through 9, or an underline (_). The tool will only permit "legal" characters in the text field, and will not permit going on to the next step unless at least one character has been entered.
The printer name you enter is checked against all existing Solaris printer names. If you enter the name of an existing printer, a screen similar to the following (with the actual name you chose inserted after "Printer") will appear asking for confirmation.

(If you do not see the Confirm Printer Configuration Change screen, continue with Step 4.)
-
If you intended to change the configuration of an existing printer, choose Yes. At that point, the rest of the settings of the Install Solaris Printer wizard will default to the settings that the printer currently is using. In this manner, the Install Solaris Printer wizard can be used to change the configuration of an existing Solaris printer.
-
If you did not intend to change the configuration of an existing printer, click the default choice, No. This will return the screen for naming the new printer, and you can enter a different name and proceed to the next step.
-
-
Click Next.
The following screen appears, requesting information about the printer's local or network status.
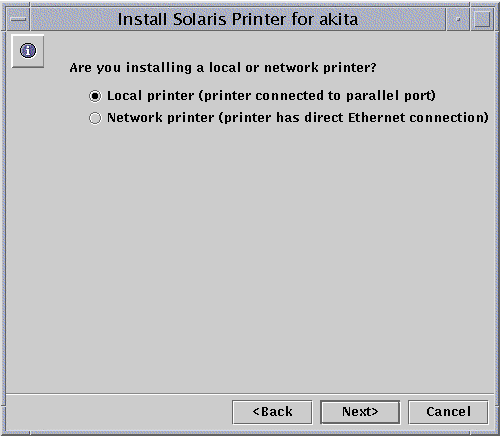
(Note that if you are using version 2.5.1 of the Solaris operating environment, you will not have the option of installing the printer as a network device. You will be able to add the printer as a local device, however.)
-
Choose whether you are installing the printer as a local printer or as a network printer, and then click Next.
Note -If you intend to use this printer as a SunLink Server network printer, it must be equipped with an Ethernet adapter and be plugged directly into the network. A local SunLink Server printer must be plugged directly into the SunLink Server system.
Depending on which choice you make, complete one of the following two steps.
-
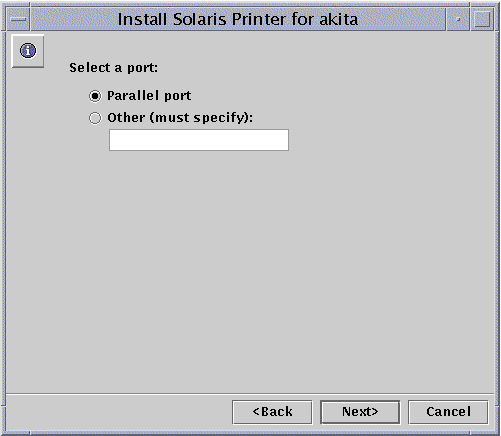
If you chose Network Printer, skip this step and go on to Step 7. If you chose Local Printer, use the ensuing screen to indicate the correct port, then continue with Step 8.
-
If you chose Network Printer, use the ensuing screen to enter the network name by which the printer is known, then continue with Step 8.
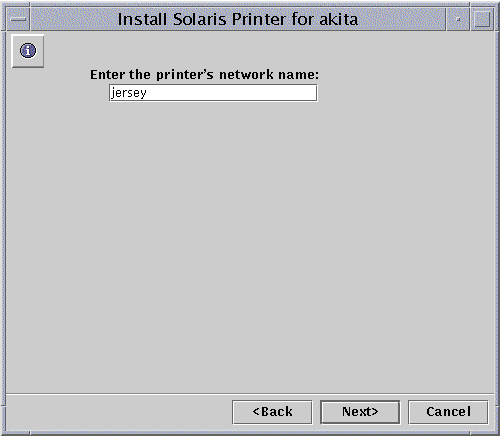
The name that is entered by default into the text field is the same name that you chose in Step 3. If you have reason to identify the printer by a different name on the network, delete the default name and enter the new one.
-
Click Next.
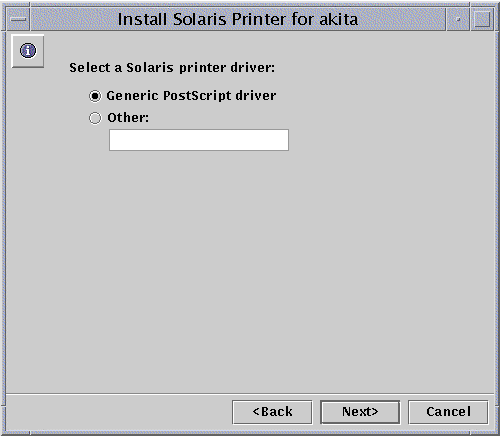
The following screen appears, requesting information about your Solaris printer driver.
-
Designate a Solaris printer driver.
The default choice is Generic PostScript driver, which is suitable for most printers. If you are not sure which driver to choose, consult your printer manufacturer's documentation. The following table may also be useful if you do not want to choose the generic driver. Table 4-1 lists common laser printer drivers.
Table 4-1 Common Laser Printer Drivers|
If it is a... |
Set it up as a... |
Type this into the text field: |
|---|---|---|
|
HPPCL (LaserJet) compatible |
Hewlett-Packard LaserJet Plus |
hplaserjet |
|
35-font Plus font set or superset PostScript |
Generic PostScript |
(Use the default.) |
-
Click Next.
-
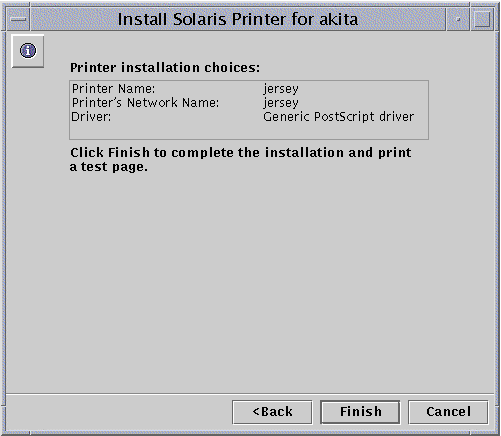
Review and confirm the configuration choices that are summarized in the ensuing screen.
Make sure that your choices are accurately reflected. Click Back to change any of the configuration details that you want.
-
Click Finish.
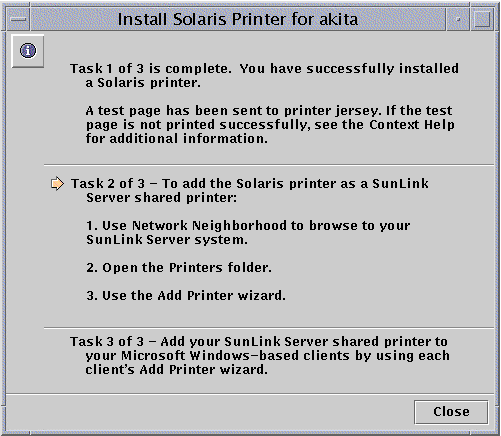
The following screen appears.
-
Check the test page to be sure that the PostScript output is correctly printed.
A test page is sent to the printer after it has been properly installed. If you detect a problem with the test page, it is possible that you have configured the printer incorrectly and you will have to begin the process again--paying particular attention to the printer driver that you have chosen.
If your test page has been printed successfully, you have a correctly installed Solaris printer. You can administer this printer from your Solaris command line using any of the standard Solaris printer commands (lp, lpadmin, lpstat, cancel, and so forth).
Task 2 of 3 - How to Set Up the Solaris Printer as a SunLink Server Shared Printer
-
From a Windows NT workstation, use Network Neighborhood to open the SunLink Server system that you are using as the Solaris print server.
-
Open the Printers folder.
-
Use the Add Printer wizard to add the SunLink Server (Solaris) printer, paying particular attention to the following points that are specific to SunLink Server printers and may diverge from your usual Windows NT Add Printer routine:
-
Drivers for different operating systems - As you use the Add Printer wizard, it presents you with a choice of installing drivers for various operating systems and asks you to choose from the list. You do not need to make a selection unless you want to add a driver for an operating system in addition to the one that you are currently running. The software detects the operating system that you are running and chooses it by default.
-
Printer name - As you use the Add Printer wizard, it prompts you to supply a printer name--with the name of the printer driver displayed as the default. Do not enter the same name that you chose for the printer in Task 1. You must use a different name for the printer. You can go ahead and use the default name, or type in a name of your own.
-
(Note that to share a Windows NT-hosted printer with network computers, you select the Sharing tab in the printer's Properties sheet, click Shared, and then provide a share name. The system displays by default the name of the shared printer queue.)
After you have added the printer in this manner, it is available to your clients.
Task 3 of 3 - How to Make the SunLink Server Printer Available to Microsoft Windows Clients
-
Use each Microsoft Windows-based client's Add Printer wizard to add the SunLink Server shared printer.
Note -After you have successfully set up your Solaris printer, established it as a SunLink Server shared printer, and made it available to your Microsoft Windows clients, do not use the net pause command from your Solaris command line as a method to pause the print queue. That command is interpreted by SunLink Server software as a command to disable the printer rather than merely to pause the queue. Instead, to pause the queue by way of the command line, use the net print /hold command.
How to Remove a SunLink Server Printer
-
At each client, delete the SunLink Server printer from the local Printers folder.
-
Using Windows NT tools, delete the SunLink Server printer share.
Browse via Network Neighborhood to the Printers folder on the server, select the SunLink Server printer, then click Delete.
 Caution -
 Do not attempt to delete the printer share that appears at the root level of the SunLink Server system. You must use Windows NT tools for this step.
-
At the Solaris command prompt, type the following command to delete the Solaris printer entry:
lpadmin -x solarisprintername
Replace solarisprintername with the actual Solaris printer name.
- © 2010, Oracle Corporation and/or its affiliates
