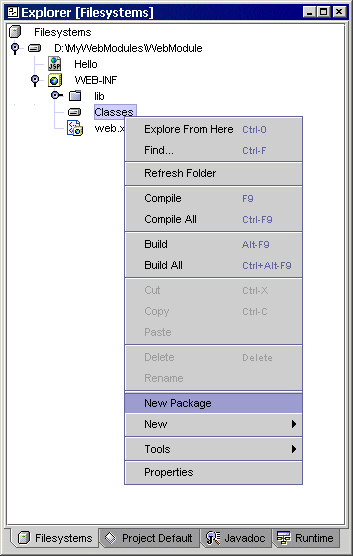
![]() Servlets must be created in a web module and therefore must reside in
a package located under the WEB-INF/Classes directory of the web module.
Servlets must be created in a web module and therefore must reside in
a package located under the WEB-INF/Classes directory of the web module.


The New From Template Wizard appears:

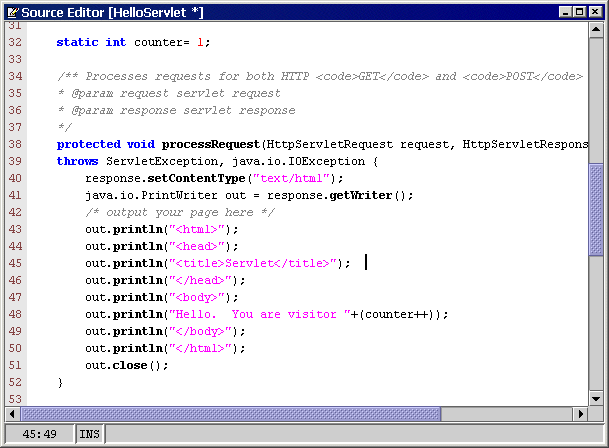
The HelloServlet node appears in the Explorer and opens in the Source Editor.
static int counter= 1; /** Processes requests for both HTTPGETandPOSTmethods. * @param request servlet request * @param response servlet response */ protected void processRequest(HttpServletRequest request, HttpServletResponse response) throws ServletException, java.io.IOException { response.setContentType("text/html"); java.io.PrintWriter out = response.getWriter(); /* output your page here */ out.println("<html>"); out.println("<head>"); out.println("<title>Servlet</title>"); out.println("</head>"); out.println("<body>"); out.println("Hello. You are visitor "+(counter++)); out.println("</body>"); out.println("</html>"); out.close(); }
The IDE content menu status field indicates that the deployment action was successful. You can also see this from the output window.

The execution and output windows appear. In the IDE status bar, messages are displayed to indicate that the iPlanet Web Server is getting started (or restarted), and the Web browser opens.
When the iPlanet Web Server is starting, a WAR file is created and the servlet is deployed to the default virtual server instance.
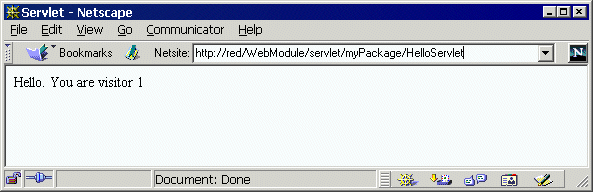
The browser opens to the http://serverinstance/WebModule/servlet/myPackage/HelloServlet URL.
The next step in the iPlanet Web Server Integration Module Tutorial is learning more about executing and debugging.
| © 2002 Sun Microsystems, Inc. | terms of use privacy policy feedback |