| Oracle® Argus Safety Japanese User's Guide Release 6.0.1 E23602-01 |
|
 Previous |
 Next |
This chapter contains detailed information about Argus reports.
Several different kinds of reports are available in Argus. You can access them from the Reports menu. When using reports, be aware of the following:
The system prints a DRAFT watermark across the entire page starting from the bottom left to top right for the following on all pages:
ALL Expedited reports including E2B CIOMS and MedWatch on the E2B Viewer
ALL Periodic Reports including Expedited reports part of the Periodic and Aggregate reports part of Periodic
If you select Internal or a value for Other text for PSUR/CTPR reports, the system prints "Internal" or the other text value as the watermark on the PDF reports that include the expedited reports that are part of the periodic for all pages.
The screen has a Study ID filter option that enables you to filter cases in the list.
When using the Study ID filter, be aware of the following:
The Study ID is a type ahead field the system enables you to enter the study ID values defined for cases.
There can be a maximum of 25 items on the drop-down list.
When you select values from the drop-down list, the system performs a like search.
The system prints the user-defined summaries in the order they are listed in the Periodic report.
This chapter discusses these reports in detail and also about the reports in the following categories. The following is a list of all available Argus reports.
|
|
|
This section lists the different Compliance Reports in Argus and discusses about each of them in detail.
Place the cursor over the Compliance option in the Reports tab to go to any of the Compliance Reports.
Expedited Reports provide access to the list of previously scheduled or generated but not submitted expedited reports.
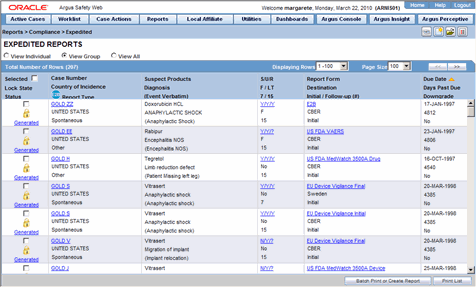
Apart from viewing these reports, you can also schedule a new expedited report from this dialog.
Depending on the regulations set forth by the Regulatory Authorities, expedited reports might need to be submitted for the adverse events pertaining to your company's products.
You can generate several different kinds of expedited reports as follows:
CIOMS-I Form (English)
CIOMS-I Local Form (English)
CERFA 65-0040 (French)
CERFA 65-0044 (French)
MHLW Clinical (Japanese)
MHLW Spontaneous (Japanese)
US FDA MedWatch Form 3500A (English)
US FDA MedWatch Form 3500A (English) Drug Only
MCA Clinical (English)
MCA Spontaneous (English)
US FDA VAERS Form (English)
EU EMEA Clinical Form (English)
EU EMEA Spontaneous Form (English)
EU Device Vigilance Initial Form (English)
EU Device Vigilance Final Form (English)
German BfArM form 643 / PEI Form (German) French CERFA (French)
E2B
Spain Clinical
Spain Spontaneous
Canadian Device Form
Canadian Expedited Form
When using Expedited Reports, be aware of the following:
The following expedited report forms do not print a follow up number when the user selects DRAFT on the Regulatory Reports tab or when he/she selects the Quick Launch Draft option:
US FDA MedWatch Drug/Device
US FDA VAERS
CIOMS I/CIOMS I (Local)
French CERFA
Spanish Spontaneous/Clinical
The system enables you to print draft expedited reports from the Batch Print or Create Reports without printing DRAFT on the reports from the Case Open or the Reports | Compliance | Expedited Reports dialog.
When you select the Draft option, the system enables you to print a DRAFT watermark on the expedited reports.
If you do not enter a value, the system does not print a watermark on the expedited reports.
You can enter a maximum of 10 characters in the text field.
Argus Safety lets you store your Expedited Reports in Documentum.
Mark an Expedited Report as submitted from within Argus. to insert the report into the Documentum system as a PDF.
If the report is to be transmitted via fax or email, Argus Safety Service marks the report as a successful submission in Documentum only after the fax or email transmission has succeeded.
Follow-up reports are created when significant follow-up information is entered for the case. This is indicated by entering follow-up information in the General Information section of the General tab and when one of the following two things happens:
Data for a case changes
Update information for a case has been entered
Depending on the configuration set up by the Administrator, the system analyzes the scheduled reports prior to the data changes to see if they are still required.
If the system determines that they are not required, the report status is marked as "Downgrade". New reports are automatically scheduled, if required.
If the system determines the report is still needed and needs to be updated, one of two functions can take place depending on the configuration done by the Administrator:
The system overwrites the report
The system schedules a new report in addition to the old report
If the system has been configured to overwrite the existing report, the report status becomes "New Data Available."
In the Worklist, the status for this report shows "New Data Available" for this report. When you re-generate the report, you can select whether or not you would like to re-generate the report with the new data.
If the system is configured to create a follow-up report, the previous report remains in its current state and a new report is scheduled with the status of "Scheduled."
If a report has been previously submitted, this report is never deleted under any configuration.
The following table below describes how to view a summary of Expedited Regulatory Reports:
| To.. | Do.. |
|---|---|
| View the regulatory reports for a particular case (scheduled, generated and submitted) | Open the Regulatory Reports tab of the Case Form. |
| View all scheduled, generated, and approved reports, as well as other outstanding action items | Select Reports from the Worklist menu. |
| View a list of all scheduled, generated, and approved reports | Select Compliance | Expedited from the Reports menu. |
| View all the submitted reports in the system | Select Compliance |Submitted from the Reports menu. |
Several common features are available in the Expedited Reports section. These include:
Lock State Header Options
Lock Icons
Lock Icon Options
Lock State Header Options
Click the Lock State header row to sort on the following category of cases. A pop-up appears listing the following sorting options:
Lock State
SUSAR
Exp/Per
Click on the required option to sort cases based on the selected case categorization.
|
Note: The icon displayed in the lock state column in the Reports-> Compliance - Expedited and Submitted screens denotes a SUSAR (Suspected Unexpected Serious Adverse Reaction) case. |
Lock Icons
The following table describes the meaning of each icon when attached to a case.
| Icon... | Identifies... |
|---|---|
 |
A case marked for a Periodic ICSR submission. |
 |
A locked case. |
 |
An unlocked case |
 |
A SUSAR (Suspected Unexpected Serious Adverse Reaction) case. |
Lock Icon Options
Click the lock icon to view the list of options described in the following table:
| Field | Description |
|---|---|
| View Report | Displays the details of the selected report. |
| Report Details | Displays specific information about the report as entered in the Regulatory Reports section.
Note: The information displayed in the fields of the Report Details dialog is fetched from the data entered in the Regulatory Reports section of Case Form. Refer to the About the Report Details Dialog Box section for descriptions of each tab. |
| Case Summary | Displays the Case Summary dialog |
| Remove Report | Deletes the report from the case on being asked for a justification. |
| Mark for Non-Submission | Displays the Submission tab in the Report Details dialog.
Select No for Mark for Non-Submission and enter the reason for the non-submission. |
| Remove Multiple Reports | Deletes multiple reports from the case on being asked a justification. |
| Mark Multiple for Non-Submission | Displays the Submission tab in the Report Details dialog. Select No for Mark Multiple for Non-Submission and enter the reason for the non-submission. This is applied to all selected reports. |
Use the following procedure to schedule reports.
Open the case for which the report has to be scheduled.
When the system displays the Case Form for the selected case, select Regulatory Reports --> Schedule New Reports.
When the system opens the Schedule New Expedited Report dialog box, enter the appropriate information in the fields in the dialog box.
Click OK to schedule the report.
Save the case to save the report.
Schedule New Expedited Reports Dialog Box Fields and Field Descriptions
The following table lists and describes the fields in the Schedule New Expedited Report dialog box. 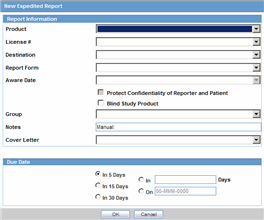
| Field | Description |
|---|---|
| Product | Select the relevant company product from the list. All company products associated with the particular case appear in the list.
Note: The items appearing in the drop-down list are listed in the following format: Trade Name, Product Name, Formulation, Concentration and Indication. |
| License # | Select the appropriate license.
Note: The items appearing in this drop-down list are listed in the following format: Country of License, License Type and License Number |
| Destination | Select the regulatory authority for which the report is to be scheduled. |
| Form | Select the type of the report that is to be created. |
| Message Type | Select the Message Type from the drop-down list. |
| Aware Date | This drop-down list is only populated and enabled after a license has been selected. The Aware Dates are displayed in descending order of the Current Aware Date.
The list of the aware dates is determined based on the license type selected in the following two groups: i. Drug/Vaccine - follow-up dates that are marked significant ii. Device - follow-up dates that are marked as "device" significant If the system is configured to not have separate significant indication for Drug and Device, only the standard (Drug/Vaccine) significant follow-up dates are considered. The resulting expedited report Due Date is based on the selected Aware Date and the duration of the Due Date section. Note: The selected Aware Date has no impact on the Actual Due Date if the user specifies an absolute Due Date. For instance, selecting a date in the Due Date field causes the report to be due on the specified date, regardless of the selected Aware Date. |
| Protect Confidentiality of Patient and Reporter | Select this check box if identifying information about the patient and the reporter must not appear on the report. |
| Notes | Enter any relevant notes in this field. |
| Group | Select the group that will be responsible for the report. |
| Cover Letter | Select a cover letter for the report, if relevant. |
| Due Date | Specify the due date of the report by selecting the number of days after which it will be due, or by specifying the exact date. |
You can generate a report using either of the following procedures.
Method 1: Generating a Report
Verify that the relevant case has been locked and the required report has been scheduled.
Open the selected case to display its associated Case Form.
Open the report from the Regulatory Reports tab of the Case Form.
When the system opens the Regulatory Reports details for the selected case, locate the relevant report and click the Final link to generate the report.
The system generates the selected report.
Method 2: Generating a Report
Verify that the relevant case has been locked and the required report has been scheduled.
Select Case Actions --> Open to view the Case Open form.
Click Search to view cases matching the search criteria.
When the system displays the search results, click the Lock State icon and select Case Details.
When the system opens the Argus Safety Case Details dialog, open the Scheduled Regulatory Reports folder and select the relevant regulatory report.
The system automatically generates the report.
|
Note:
|
Use the following procedure to approve reports.
Open the case associated with the report that needs to be approved.
When the system opens the Case Form, click the Regulatory Reports tab to displays the case details.
Click the icon associated with the report you wish to approve and select View Report Details.
When the system opens the Report Details dialog, click the Routing tab.
When the system opens the Routing tab, select Approved from the State drop-down list and click Route.
When the system opens a dialog box, enter the required information and click OK to approve the report.
|
Note: Refer to Report Routing to understand how you can route a report to another state. |
Use the following procedure to create unscheduled expedited reports.
Select Reports --> Expedited --> Compliance.
Expedited Reports Dialog Box Fields and Fields Descriptions
| Field | Description |
|---|---|
| Selected | Click the checkbox to select the report. |
| Lock State | Displays if the case is locked or un-locked. |
| Status | Displays the Report Status e.g. Scheduled or Generated etc.
Note: Click the link displaying the status to view the report details. |
| Case Number | Displays the Case Number.
Note: Click the link displaying the Case Number to open the selected case. |
| Country of Incidence | Displays the Country of Incidence for the selected case. |
| Report Type | Displays the Report Type of the selected case. |
| Suspect Product | Displays the Trade Name for which the report has been scheduled. A (+) displayed at the end of the Product Name denotes that more than one Suspect Company Product exists.
For Reports which were scheduled for the Device, the Device name gets displayed. |
| Diagnosis | Displays the Primary Event Diagnoses PT |
| Event Verbatim | Displays the (verbatim as reported) of the Primary Event. |
| S/U/R | Displays the Case Level Assessments
Click the SUR link to view the Case Summary. |
| F / LT | Denotes Fatal / Life Threatening
If the case is both F and LT, only F is displayed. If the case is neither F nor LT, No is displayed. |
| 7/15 | Displays 7 if the report is due within 7 days
Displays 15 if the report is due in more than 7 days |
| Report Form | Displays the Description of the report.
Click the link to view the DRAFT Report PDF. |
| Destination | Displays the Report Destination (Agency) for which the report is scheduled. |
| Initial / Follow-up (#) | Displays the status whether it is Initial or Follow-up.
If it is Follow-up, the follow-up number is also displayed. |
| Due Date | Displays the due date. This date is based on the previously submitted report for the MedWatch Reports under the G7 Section for 5, 7, 10, 15 and 30 Days. |
| Days Past Due | Displays the number of days the report is past due date. |
| Downgrade | Displays Yes if the report is a Downgrade Report. |
| View All | Allows the administrator and workflow manager to see all items in the system. |
| View Group | Allows the user to view all items assigned to this user group. |
| Individual | Allows the user to view all items assigned to him. |
| Print List Button | Allows the user to print the current Expedited Reports List for referencing the current view of the Expedited Reports List. |
| Batch Print | Allows the user to batch schedule Expedited Reports for Locked or Unlocked Cases. |
Click Batch Print or Create Report and search for the case for which the expedited report has to be scheduled.
When the system displays the search results, select the locked cases for which the expedited report is to be scheduled.
Click Batch.
When the system opens the Batch Print or Create Reports dialog box, enter the appropriate information and click OK.
The system generates the unscheduled expedited report.
Batch Print or Create Reports Fields and Field Descriptions
The following table lists and describes the Batch Print fields.
| Field | Description |
|---|---|
| Reporting Destination | Displays the different reporting destinations. |
| Report Form | Displays the report form types. |
| License Type | Select the license type as investigational or marketed or any type of license. |
| Message Type | Select the message type from the drop-down list |
| Format | Enables you to print reports As Draft or As Final.
|
| Destination | Click the Printer check box to print the report |
| Protect Confidentiality of Reporter and Patient | Click this check box to hide the Reporter and Patient information on the expedited reports. |
| Scheduling |
|
You can use the Batch Reports function to schedule and generate reports for multiple cases. Before using this function, verify that no cases or reports are open.
Use the following procedure to create batch reports.
Select Expedited Reports from the Reports - Compliance menu.
When the system opens the Expedited Reports dialog box, click Batch Print or Create Report.
Expedited Reports Dialog Box Fields and Field Description
The following table lists and describes the fields in the Expedited Reports dialog box.
| Field | Description |
|---|---|
| Selected | Click the check box to select the report. |
| Lock State | Displays if the case is locked or un-locked. |
| Status | Displays the Report Status e.g. Scheduled or Generated etc.
Note: Click the link displaying the status to view the report details. |
| Case Number | Displays the Case Number.
Note: Click the link displaying the Case Number to open the selected case. |
| Country of Incidence | Displays the Country of Incidence for the selected case. |
| Report Type | Displays the Report Type of the selected case. |
| Suspect Product | Displays the Trade Name for which the report has been scheduled. A (+) displayed at the end of the Product Name denotes that more than one Suspect Company Product exists.
For Reports which were scheduled for the Device, the Device name gets displayed. |
| Diagnosis | Displays the Primary Event Diagnoses PT |
| Event Verbatim | Displays the (verbatim as reported) of the Primary Event. |
| S/U/R | Displays the Case Level Assessments
Click the SUR link to view the Case Summary. |
| F / LT | Denotes Fatal / Life Threatening
If the case is both F and LT, only F is displayed. If the case is neither F nor LT, No is displayed. |
| 7/15 | Displays 7 if the report is due within 7 days
Displays 15 if the report is due in more than 7 days |
| Report Form | Displays the Description of the report
Click the link to view the DRAFT Report PDF. |
| Destination | Displays the Report Destination (Agency) for which the report is scheduled. |
| Initial / Follow-up (#) | Displays the status whether it is Initial or Follow-up
If it is Follow-up, the follow-up number is also displayed. |
| Due Date | Displays the due date. |
| Days Past Due | Displays the number of days the report is past due date. |
| Downgrade | Displays Yes if the report is a Downgrade Report. |
| View All | Allows the administrator and workflow manager to see all items in the system. |
| View Group | Allows the user to view all items assigned to this user group. |
| Individual | Allows the user to view all items assigned to him. |
| Print List Button | Allows the user to print the current Expedited Reports List for referencing the current view of the Expedited Reports List. |
| Batch Print | Allows the user to batch schedule Expedited Reports for Locked or Unlocked Cases. |
When the system opens the Expedited Reports dialog box, search for the cases for which the expedited report needs to be scheduled.
When the system displays the search results, select the appropriate cases and click Batch.
When the system opens the Batch Print or Create Reports dialog box, enter the appropriate information in the fields and click OK
The Expedited Batch Printing dialog supports printing Batch CIOMS, Medwatch, and VAERS on Argus Web locally.
Batch Print or Create Reports Dialog Box Fields and Field Descriptions
The following tables lists and describes the fields in the Batch Print or Create Reports dialog box. 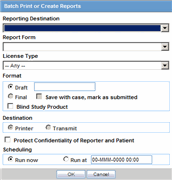
| Field | Description |
|---|---|
| Reporting Destination | Displays the different reporting destinations. |
| Report Form | Displays the report form types. |
| License Type | Select the license type as investigational or marketed or any type of license. |
| Message Type | Select the message type from the drop-down list |
| Format | Enables you to print reports As Draft or As Final.
|
| Destination | Click the Printer check box to print the report |
| Protect Confidentiality of Reporter and Patient | Click this check box to hide the Reporter and Patient information on the expedited reports. |
| Scheduling | 1. If Run Now is selected, all the selected reports run against all selected cases and a PDF is generated.
The Run Now option is visible only when a MedWatch, MedWatch Drug, CIOMS, or VAERS form is selected on the Batch Expedited Report screen. Note: If you select an unlocked case, the report gets printed in draft form only and is not saved. 2. Select Run at and enter the appropriate date and time when the generation of reports should occur. |
The expedited reporting rules algorithm affects the following:
Suppression of Duplicate Reports
Blinded/Forced Distribution
Letter Placeholder for the IND Cover Letter
Suppression of Duplicate Reports
You can suppress duplicate expedited reports to be scheduled at the reporting destination level, according to the following criteria:
The Suppress Duplicate Reports option only applies to drug reports. It does not apply to device reports.
This option does not reduce the number of reporting rules the system evaluates. However, it does prevent the system from scheduling and generating expedited reports that match the duplication criteria.
When you select Suppress Duplicate Reports, the system uses the following attributes to determine whether the reports are duplicates of other reports:
Report Form
Reporting Destination
Aware Date
If two or more duplicate reports have different due dates (regardless of license type), the system schedules the report with the earliest due date.
Blinded/Forced Distribution
The system enables you to configure the Blinding Study option for products in the case.
When the user selects this checkbox, the system blinds the study products for the report being sent to the reporting destination in a manner similar to the Bulk Reporting dialog option.
If the user selects either of the Blind Study product options (Reporting Rules or Bulk Reporting), the system blinds the study product information on the report form.
The system blinds only active blinded studies. It does not blind the following case reports even if the Blind Study product is selected
Open Label Studies
Study is eligible for unblinding
In cases where expedited reports are due, the system permits the user to force-distribute the reports based on user-defined reporting rules, even if case processing is incomplete.
When the user selects the Force Distribution rule, the following occurs:
If a case encounters a rule where a report is due is locked, the system schedules the report based on the rule and does the following:
Generates the report on the due date.
Dynamically replaces the current case comment with the force distribution case comment.
Transmits the report based on the preferences defined by the reporting destinations.
Displays the status in the Worklist Bulk Transmit/Transmit E2B dialogs.
The AG Service Force Reporting process for expedited reports completes the process by:
Checking the reports required for force distribution
Locks the case (if it's not already locked)
Generates the reports and makes sure it is ready for transmission
The system adds case comments to the following reports:
CIOMS I
CIOMS I (Local)
Spanish Spontaneous
Clinical Forms
If a user has a case open, the system skips the case until the user releases the case.
After transmitting the reports (sent to the WL Status dialogs), the system does the following:
Unlocks the case
Uses the justification of the unlock as the case comment (as defined in the Profile switch)
Determines whether there are any unsubmitted reports and, if there are unsubmitted reports, sends the current forced distribute reports to the Bulk Reporting queue for transmission.
The system puts the following in the Notes field of the report:
Auto-scheduled; Forced Distributed: (EU) 15 day EMEA Mkt; Cure All
During the time the case is locked and reports are being generated, the system does not allow the user to edit the case. The system displays the following message:
The case is in use by XXXX user
where:
XXXX is the name of the AG Service user executing the report scheduling.
The notes for the Case Locking/Unlocking are the same as those defined as the common profile value for the Forces Distribution option; System is the user.
Letter Placeholder for the IND Cover Letter
Be aware of the following:
You can define a placeholder for the IND_SIMILAR_EVENTS table. The system uses data from this table to populate the Case Number, Protocol Number, Subject ID, and Adverse Event terms for previously submitted cases reporting the same events.
If the placeholder is used in a letter template, the system prints the information shown in the following table.
| Adverse Event Report No. (AER#) | Protocol Number | Subject ID Number | Adverse Event Term(s) |
| CASE001 | CUREALL | P101 | Verbatim[PT] |
where:
AER# is the case number when an Investigational IND MedWatch was previously submitted and included the same Related Event Term as the current case.
Protocol Number is the Project ID for the case in (a).
Subject ID is the Patient ID for the case in (a).
Adverse Event Terms(s) are the Related Events for the licensed product in case(a).
If no reports were submitted, the system prints None Submitted instead of the table.
The placeholder only prints this information when it is used in the cover letter for the Regulatory Report. The system uses the license associated with the scheduled report to track other cases where the same product license was previously submitted for the same events in the current case.
This section discusses the different fields and features available in Periodic Reports.
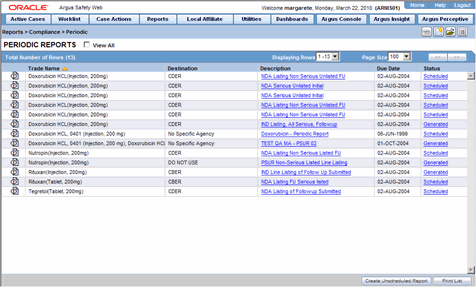
Description of the illustration reportsperiodic.gif
When using periodic reports be aware of the following:
You can filter cases in the following period reports based on the Case Locked/Archived date:
NDA
IND
PSUR
CTPR
When you select the Case Locked/Archived date, the system limits the cases based on whether the case has been locked or archived within the specified time frame.
The locked date is the lock date for the current case.
If there is significant FU in the reporting time frame, the system considers the case a follow-up case in the group options of the PSUR/CTPR reports.
If you specify the time frame for the case locked/archived date, the system disables the following:
Include Follow-up
Exclude Follow-up
Include Summary of Unlocked Cases
Include Unlocked Cases
For the 15 day report section of the NDA Reports, the system uses the timestamp to determine whether there are further follow-up or downgraded cases in that date range.
The following table lists and describes the data that appear in the columns on the Periodic Reports screen:
| Field | Description |
|---|---|
| View All | Enables the user to view all available periodic reports. |
| Trade Name | Displays the Trade Name. |
| Destination | Displays the name of the Destination. |
| Description | Displays the report name. Click this to open the selected report in PDF format. |
| Due Date | Displays the Due Date. |
| Status | Opens the Report Details dialog for the selected report. |
| Print List | Allows the user to print the current Periodic Reporting for referencing the current view of the Periodic Reporting. |
Common features on the Period Reports page. Click the icon associated with each report to view the following options:
| Option | Description |
|---|---|
| View Report | Opens the Individual Periodic Report selected by the user. |
| Report Details | Displays specific information about the report as entered in the Regulatory Reports section.
Note: The information displayed in the fields of the Report Details dialog is fetched from the data entered in the Regulatory Reports section of Case Form. |
The Report Details dialog box includes several tabs.
General Tab
The General tab displays the general information about the report. The information on this tab cannot be modified.
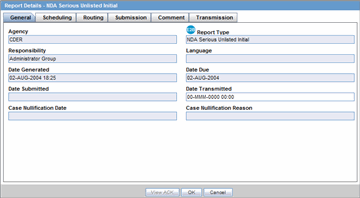
Description of the illustration reportdetailsdb.gif
The following table lists and describes the fields on the General tab.
| Field | Description |
|---|---|
| Agency | Displays the Reporting Destination for which the report is scheduled. |
| Responsibility | Displays the User Group to which the report is assigned. |
| Date Generated | Displays the date when the report was generated. |
| Date Submitted | Displays the date when the report was submitted. |
| Report Type | Displays the Expedited Report Form of the report. |
| Language | Displays the language in which the report has been made. |
| Date Due | Displays the date when the report is due. |
| Date Transmitted | Displays the date when the report was transmitted. |
| Case Nullification Date | Displays the date when the case was nullified. |
| Case Nullification Reason | Displays the reason entered when a case is logically deleted in Argus. |
The Scheduling tab displays a reason for scheduling this report. It also shows the date on which the report was scheduled.
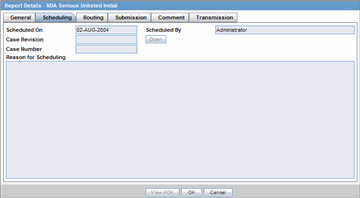
Description of the illustration rptdetailsschedtab.gif
The following table lists and describes the fields on the Scheduling tab.
| Field | Description |
| Scheduled On | Displays the date when the report was scheduled. |
| Scheduled By | Displays the name of the person who schedule the report. |
| Case Revision | Displays the case revision number. |
| Case Number | Displays the case number. |
| Reason for Scheduling | Displays the reason for scheduling the report. |
|
Note: All fields in this tab are auto-populated as per records entered in Argus. |
The Routing tab displays the routing history of the report. To route the report, click Route.
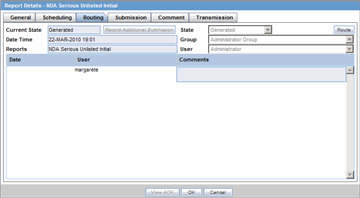
Description of the illustration rptdetailsrouting.gif
The following table lists and describes the fields on the Routing tab.
| Field | Description |
|---|---|
| Current State | Displays the current state of the report. |
| State | Displays the state of the report. This button is enabled when you click the Route button. |
| Date Time | Displays the date and time of the report routing. |
| Group | Displays the group of the report. This button is enabled when you click the Route button. |
| Reports | Displays the type of report it is. |
| User | Displays the state of the report. This button is enabled when you click the Route button. |
| Comments | Displays routing comments entered before routing the report. |
The Submission tab enables you to specify whether submission is required and enter a reason for not submitting the report.
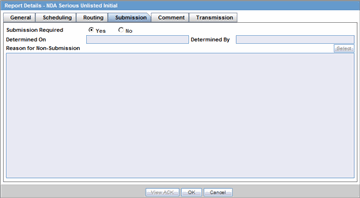
Description of the illustration rptdetailssubmit.gif
The following table lists and describes the fields on the Submission tab.
| Field | Description |
| Submission Required | Enables you to select if this report is not required to be submitted to the regulatory authority. |
| Determined On | Displays the date when the report was considered not required to be submitted. |
| Determined By | Displays the name of the user who decided the report was not required to be submitted. |
| Reason for Non-Submission | Click Select to select the reason for non-submission. |
The Comment tab enables you to enter a local comment that prints out on that specific report when generated. Each report has its own Local Comment section.
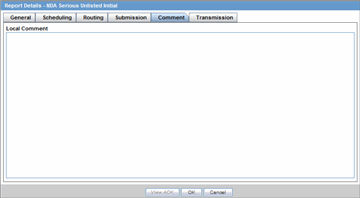
Description of the illustration rptdetailscomment.gif
The following describes the Local Comment field on the Report Details tab.
| Field | Description |
|---|---|
| Local Comment | Enables you to enter any remarks about the report. |
Transmission Tab
To transmit a report
Click the icon associated with a report and select the Transmission tab from Report Details.
When the system opens the Report Details The Report Details dialog opens.
This dialog displays the status of reports that have been transmitted to different recipients.
The following table lists the fields that comprise the Report Details dialog.
| Field | Description |
|---|---|
| Report Form | Displays the name and type of report being transmitted. |
| Agency Name | Displays the agency name for the report. |
| Fax Number / Recipient Name | Displays the Fax Number or name of the recipient of the report. |
| Recipient Company | Displays the name of the company that is receiving the report. |
| Date Created | Displays the date when the report was created. |
| Date Sent | Displays the date when the report was sent. |
| # of Pages | Displays the number of pages present in the report. |
| Attempts | Displays the number of attempts in transmitting the report. |
| Sender | Displays the sender of the report. |
| Status | Displays the transmission status of the report. |
Click OK or Cancel to approve the transmission or discard any changes, respectively.
Click the Transmit button to transmit a report. The Transmit to Recipients dialog is displayed.
Select the recipients of the report, as applicable from the Available Recipients list.
Select the method of transmission from Method, as applicable.
Enter remarks in Comments.
Click Transmit.
The selected report is transmitted to the specified recipients.
To create Unscheduled Periodic Reports
Click the Create Unscheduled Report button
The system opens Periodic Reports dialog box that provides a list of configured reports of the following types:
PSUR - Containing ICH PSUR Line Listing Reports
IND - Containing US IND Periodic Reports
NDA - Containing US NDA Periodic Reports
CTPR - Containing CT Periodic Reports
Click the (+) icon against the desired category to view all the reports within that category.
Select the report you wish to create from this list and click Select.
When the system opens the Report Batch Printing dialog, select Run Now or Run at, as appropriate.
|
Note: If you select Run Now, specify PDF, RTF, or CSV from the drop-down menu for the report output option to generate the PSUR or CTPR report in the selected format.If you select Run at, specify the date/time to schedule the PSUR report to be generated by Argus Safety Service. This enables only Final and disables all other Print As options. |
Select what you want printed on the report: Final, Draft, Internal, or enter Other information.
Click OK.
The system generates the periodic report.
This section provides information about how to submit and view reports. The following is an illustration of the Submitted Reports page.
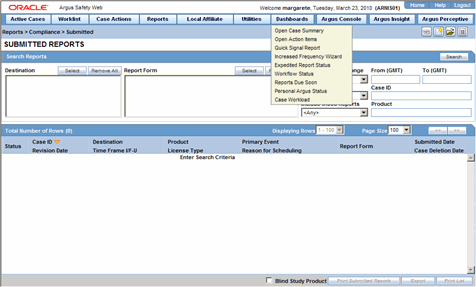
Description of the illustration reportssubmitted.gif
The following table lists and describes the icons that appear on the Submitted Reports page.
| Field | Description |
|---|---|
| View Report | Enables you to view the report. |
| Report Details | Enables you to view the report details. |
| Unsubmit Reports | Enables you to unsubmit reports through a confirmation dialog. If you select the option to send a nullification report before clicking OK, a justification dialog also appears, as shown in the section on Deleting a Case. |
Before you can mark a report as submitted, the report must first be approved.
Use the following procedure the submit an approved report.
Open the case for which the report has to be approved.
Open the Regulatory Reports tab in the Case Form.
When the system opens the Regulatory Reports details for the selected case, click the icon associated with the report you wish to approve.
Select View Report Details.
|
Note: The Case Nullification Date is the date when the case is deleted, the Case Nullification Reason is the comment entered when the case is logically deleted in Argus. |
Select Submitted from the State list in the Routing tab and click Route.
When the system opens a dialog box, enter the required details and click OK.
The report is approved.
|
Note: A user who has "Workflow Manager" rights can undo the submission of a report, if necessary. |
Viewing Submitted Reports
Use the following procedure to view submitted reports.
Select the Reports --> Compliance --> Submitted Reports.
When the system opens the Submitted Reports page, enter the appropriate search criteria and click Search.
The system displays the Search Results.
Submitted Reports Fields and Field Descriptions
The following table lists and describes the search fields on the Submitted Reports page.
| Field | Description |
|---|---|
| Destination | Select one or more Reporting Destination(s). |
| Report Form | Select one or more Report Form(s). |
| Submission Date Range | Specify a specific date range from the drop-down list.
Tip: To specify your own dates use the To and From dates. |
| License Type | Select the License type.
Note: Only reports that have been scheduled based on the selected license type will be displayed. |
| Case ID | Enter the specific case number.
Tip: Use wild cards such as 2007% to search for cases starting with 2007. |
| Include these Reports | Select the required report type or case status to be displayed. |
| Product | Select the product as required. The reports scheduled for these products will be displayed. |
The following table lists and describes the contents of the columns in the Submitted Reports Search Results.
| Field | Description |
|---|---|
| Status | Displays the status of the report. |
| Case ID | Displays the Case Number for the report. |
| Revision Date | Displays the date when the last revision was made. |
| Destination | Displays the destination of the report (agency name). |
| Time Frame (I/F-u) | Displays the whether the report was initial or follow-up. |
| Product | Displays the first suspect product for the case on which the report is based (expedited reports). |
| License Type | Displays the license type of the report. |
| Primary Event | Displays the first event term for the case on which the report is based (expedited reports). |
| Reason for Scheduling | Displays the reason provided for scheduling the report. |
| Report Form | Displays the type of report scheduled (form) and initial/follow-up status (e.g. "Initial Report" or "Follow-up #3"). |
| Submitted Date | Displays the report's submission date. |
| Case Del. Date | Displays the date when the case was deleted. |
| Blind Study Product | Enables you to mark the study product as blinded. |
| Print All Submitted Reports | Enables you to print all the submitted reports. |
| Export | Enables you to export the report. |
| Print List | Enables you to print the report as a PDF. |
Cases that are archived while unsubmitting reports can be reopened from the Archived Case dialog.
Use the following procedure to unsubmit such cases.
Enter the password and notes required in the Archived Case dialog box.
When the system opens the Report Unsubmit dialog box, enter the reason for unsubmitting the report and click OK.
The system unsubmits the report.
|
Tip: The icon (displayed in the lock state column) in the Reports-> Compliance - Expedited and Submitted screens denotes a SUSAR case. |
Argus Safety has powerful system reporting capabilities that enable you to monitor the following:
Product safety profiles
Case progress
Company productivity during the case handling process
This section provides information about the Argus Aggregate Reports.
To view an aggregate report
Select Reports --> Aggregate Reports --> <Report Type>. P
When using Aggregate reports, be aware of the following:
The date and time printed on the following reports are the date and time the query is executed for case qualification. They are not the date/time the query was completed and the report obtained Web Server.
Case Listing Report
Case Data Analysis Report
The system converts the following elements that display in the case form as actual text on the Case Listing and CIOMS II Line Listing reports:
Duration of Administration
Time Between First Dose/Primary Event
Time between Last Dose/Primary Event
Another field has been added to the Regulatory Reports section for the report follow up number. The system prints the report follow-up number on the expedited reports in the following format:
F/U# X
where:
X is the report follow-up number.
For an initial report, the system prints initial in the column.
If there are no reports for the case in the Case Listing/CIOMS II Line Listing, the column is left blank.
This option is available on the CIOMS II Line Listing/Case Listing reports.
The system uses the IE offset of the client workstation to print the date and time component for all system-calculated fields on the Case Listing/CIOMS II Line Listing reports for the following fields
| Table Name | Column Name | Local IE Adjustment |
| case_master | close_date | Yes |
| case_master | date_locked | Yes |
| case_routing | route_date | Yes |
| cmn_reg_reports | date_approved | Yes |
| cmn_reg_reports | DATE_GENERATED | Yes |
| cmn_reg_reports | date_scheduled | No |
| cmn_reg_reports | date_submission_determined | Yes |
| cmn_reg_reports | date_submitted | Yes |
| cmn_reg_reports | date_xmt | Yes |
| rpt_routing | route_date | Yes |
You can filter cases in the following aggregate reports based on the lock/archived date:
Case Listing
Case Data Analysis
CIOMS II Line Listing
When you select Case Locked/Archived date, the system limits the cases based on whether the case is locked/archived within the specified time frame.
The lock date is considered the locked date.
If you select the Case Patient or Reporter Information in the Case Listing or CIOMS II Line Listing reports and the Protect Confidentiality field is checked for the patient or reporter Information, the system does not print the relevant patient or reporter Information selected in the Case Listing or CIOMS II Line Listing report.
If you do not have permission to view the reporter or patient information, the corresponding reporter or patient elements selected on the Case Listing or CIOMS II Line Listing report are blank.
If the report doesn't have cases that meet the criteria, the system prints the PDF with a "No data found" message.
You can access the System Reports Library from Reports --> Aggregate Reports --> System Reports Library.
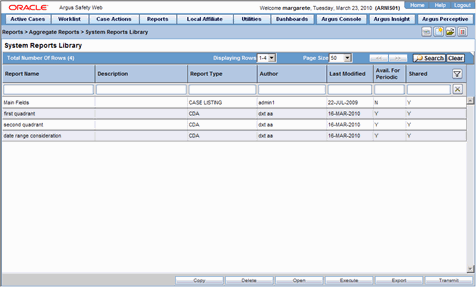
Description of the illustration sysreportslib.gif
When using the System Reports Library, be aware of the following:
The user can use the following fields to query all memorized reports:
Report Name (type ahead)
Description (type ahead)
Report Type (type ahead)
Case Data Analysis
CIOM II Line Listing
Case Listing
Author (type ahead)
Last Modified
Date (date text box)
Upgrade populates this with System Date
Avail. for Periodic (text box)
Blank
Yes
No
Shared (text box)
Blank
Yes
No
The user can enter wildcards in Name and Description fields.
The following are in Search and Navigation bar:
Displaying Records Drop-down list (standard functionality)
Page Size Drop-down list (standard functionality)
Back Button (page back standard functionality)
Forward Button (page forward standard functionality)
Search Button (executes the search with any entered criteria)
Clear Button (clears the search drop-downs or text boxes)
The system displays the following columns on the screen:
Report Name - The report name given by the user.
Description - A description of the report as defined by the user.
Report Type - The report type.
Author - The name of the author of the report.
Last Modified - The date the report was last modified. This is the system date.
Avail. for Periodic - Indicates whether the report is available for Periodic reports
Shared (See System Rule below)
The system displays the following buttons on the page:
Copy
Delete
Open
Execute (standard functionality)
Export
Transmit
When the user clicks the Filter icon, he/she can filter on any element.
The system provides the type ahead feature to enable the users to filter on any text element.
When the user clicks X, the system closes the filtering options.
When the user specifies filtering criteria, the filter icon changes to the paper clip icon to indicate that filtering criteria has been specified.
The system permits the user to conduct a like search, For example, if user searches for "Cure" the system returns all elements beginning with Cure.
The system permits the user to conduct wildcard searches. For example, if the user searches for "%Cure," the system returns all elements containing Cure.
When the user clicks Search, the system filters reports in the report list.
The system saves all user preferences for future use.
The following fields word wrap, but do not scroll:
Report Name
Description (200 Characters)
If a record in a row is available for periodic reporting, the system places a Yes in the Avail. for Periodic column; otherwise the system displays No in the column.
The user must select the available for periodic reporting option when he/she creates the report.
If the system report is shared, the system places a Yes in the Shared column; otherwise it displays No in the column.
The user must set the report creation or modification options when he/she creates the report.
The user can click the column heading to sort the column in ascending or descending order.
Report Name is the default sort column and is sorted in ascending order.
Ascending (A to Z, 1&emdash;10, etc.) is the default sort order.
A sorted column has an up or down arrow to indicate whether the column is sorted in ascending or descending order.
When the user clicks Copy, the system displays a copy of the report in the appropriate popup. The system displays the Case Data Analysis Report, the CIOM II Line Listing Report, or the Case Listing Report.
The system names the copy of the report Copy of xxxxxx
where:
The system displays the following columns on the screen:
xxxxxx is the name of the report the system is copying.
If there are too many characters in the report name, the system truncates the name.
When the user clicks Delete, the system displays the following message:
Are you sure you want to delete?
If the user clicks Yes, the system deletes the selected row.
If the user clicks No, the pop-up window closes and nothing changes.
If the report is in use, the system displays the following message:
The report which is selected is being used and cannot be deleted.
When the user clicks Open, the systems displays the appropriate Report pop-up box:
If the has not selected a row, the system disables the Open button.
The system determines the appropriate dialog box based on the report type.
If the user selects a Case Data Analysis report, the system displays the Case Data Analysis popup.
If the user selects a CIOMS II Line Listing report, the system displays the CIOM II Line Listing popup.
If the user selects a Case Listing report, the system displays the Case Listing popup.
If the selected report is in use, the system displays the following:
The report which is selected is being used by XXXX and cannot be modified.
where:
XXX is the full user name of the person using the report.
When the user clicks Execute, the system generates the selected reports.
If the user has not selected a row, the system disables the Execute button.
The system creates and displays the report in PDF format just as it does when the user clicks OK on the individual report pages.
When the user clicks Export, the system generates the selected report and starts the export process (i.e., CSV file download).
If the user has not selected a row, the system disables the Export button.
If the user clicks Transmits, the system generates the selected report and starts the transmit process.
The system displays the Recipient popup.
If the user has not selected a row, the system disables the Transmit button.
The Memorize button in the System Report dialog enables the user to enter the memorize details in the report configuration options.
If the user fails to enter the Name in the memorize section, the system disables the Memorize button.
Case Listing
CIOMS II Line Listing
Case Data Analysis
The Case Data Analysis Report enables you to view quantities of cases over time in a Cross-Tabular Fashion. Use the following procedure to create a Case Data Analysis report. The following is an illustration of a Case Data Analysis Report.
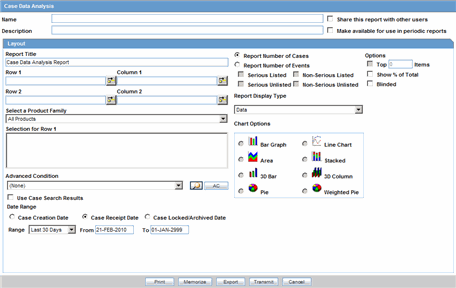
Description of the illustration rptcasedataanalysis.gif
Use the following procedure to create a Case Data Analysis report.
To create a Case Data Analysis Report
Select Reports --> Aggregate Reports --> Case Data Analysis.
In the Case Data Analysis Report view, select the information that must appear in the report.
In Row1, select the field the system uses to group cases by row.
In Column1, select the data the system uses to group cases by column.
In Row2, select the field by which each Row1 item will be categorized.
In Column2, select the field by which each Column1 item will be categorized.
Select a product family to which the report applies, if appropriate.
In Selection for Row1, select the value for row 1 by which the report must be restricted.
Specify an advanced condition, as appropriate.
Select Report Number of Cases or Report Number of Events, depending on the number of cases or the number of events to be entered in the report.
If you select Report Number of Events, you can specify the kind of events (serious listed, non-serious listed, serious non-listed, or non- serious non-listed) that will appear in the report.
Select whether only the top few items should be displayed and enter the number of items that should be displayed.
Select the Show % of Total check box to specify the percentage in each cell in the report.
Select the Blinded check box to hide blinded information in the report.
Select the Use Case Search Results checkbox to limit the Case Data Analysis only to the cases present in the Case Search dialog.
Specify a date range for the cases that will appear in the report.
1In Report Type, select whether the report is to be printed in text (data) format or in graphical (chart) format.
If you select Chart, you can specify the kind of chart (bar graph, line chart, etc.) that will be used to display the information.
Enter a title for the report.
To memorize the criteria for a specific report
Click Memorize to open the Memorized Report dialog box.
Click Save.
Use the following procedure to save, delete, or cancel a report, as applicable.
To save, delete or cancel the report, as applicable
Click OK in the Case Data Analysis screen to generate the report in PDF format.
To export a report in CSV format, click Export.
To transmit a report using Argus Safety Service, click Transmit
The CIOMS II line listing report is a common format desired by Drug Safety professionals for reviewing cases. Create this report from the CIOM II Line Listing dialog box shown in the following illustration.
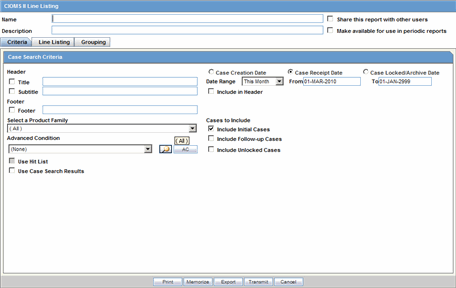
Description of the illustration rptciomslinelisting.gif
Use the following procedure to create a CIOMS II Line Listing report.
To create the CIOMS II Line Listing report
Select CIOMS II Line Listing from Reports -->Aggregate Reports --> CIOMS II Line Listing.
On the CIOMS II Line Listing Criteria tab, select information for the header, footer, product family, advanced condition (if any), cases to include, and date.
Select either the Case Creation Date or Case Receipt Date radio button and specify a date range to run the report.
|
Note: If you perform a search and return a list of cases to the Case Search screen, the Use Case Search Results is visible. Checking this box will disable all selection criteria with the exception of "Include Unlocked Cases". For example, the Advanced Condition and Date Range will be disabled. |
In the Line Listing tab, add or remove the appropriate fields.
In the Grouping tab, add or remove elements, insert a page break and change the sort order (if desired).
Click Memorize to open the Memorized Report dialog box.
Save, Delete or Cancel the report, as applicable.
Click OK in the CIOMS II Line Listing screen to generate the report in PDF format.
Click Export to export a report in CSV format.
Click Transmit, to use Argus Safety Service to transmit a report.
The Case Listing Report enables you to filter cases based on Case Initial Receipt Date and Case Creation Date. You can select multiple entities from the List of available fields using the CTRL+CLICK functionality. The following is an illustration of the Case Listing dialog box.
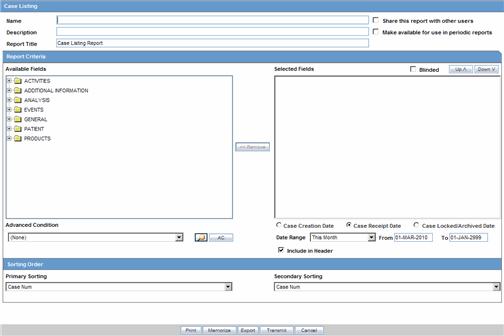
Description of the illustration rptcaselisting.gif
Creating a Case Listing Report
Execute the steps below to create a Case Listing report:
Select Reports --> Aggregate Reports --> Case Listing.
When the system opens the in the Case Listing Reports view select the information to appear on the report.
Select the fields that are to appear in the report from the Available Fields list.
Click Add. Repeat this process for each field that must appear in the report.
Use Move Up and Move Down to arrange the fields in the Selected Fields list.
Select the Blinded checkbox to hide blinded information in the report.
Specify an Advanced Condition, if appropriate.
Specify a date range for the cases to be displayed in the report.
If you select the Include in Header check box, the selected date range is displayed on the report.
Under Sorting Order, select the fields by which the cases will be sorted. The first field allows you to create a list that is sorted with respect to that particular field. Groups of cases that are identical with respect to the first field can be sorted by specifying the second field.
|
Note: You cannot sort the cases by fields that do not appear on the report. |
Enter the title of the report.
Click Memorize to memorize the criteria specified for a particular report. The Memorized Report dialog appears.
Save, Delete or Cancel the report, as applicable.
Click OK in the Case Listing Reports screen to generate the report. The report will be generated in PDF format.
To export a report in CSV format, click Export.
To transmit a report using Argus Safety Service, click Transmit.
The Memorized Reports enables you to recall a memorized Case Listing, CIOMS II Line Listing or Case Data Analysis Report criteria. You can save (memorize) search criteria and reuse these criteria when generating future reports.
The Memorized Reports dialog displays current user reports as well as reports that are shared by all users. Use the following procedure to create Memorized Report.
To create a Memorized report
Select Reports --> Aggregate Reports --> Memorized Reports to open the Memorized Report dialog box.
Select a memorized report and click Open.
Click the Share this report with other users check box to make the report criteria available to all users. Previously memorized reports appear in the Your Memorized Reports list.
Click Delete to delete a selected memorized report.
Select the Make available for use Periodic Reports check box to use this report in periodic reports like PSUR, CTPR, IND, and NDA.
|
Note: A shared report can only be deleted by the Administrator or the user who created it. |
When using the System (Memorized) Reports, be aware of the following.
The following Line Listing Available fields functionality boxes have been updated:
Reports > Aggregate Reports > CIOMS II Line Listing, (Line Listing tab) to allow select fields.
Reports > Aggregate Reports > Case Listing to allow the user to select fields.
Reports > Aggregate Reports > Case Data Analysis.
A tree view, similar to the advanced condition tree view, has been created for the available fields. The fields are the same as those currently displayed and the field text box is read-only.
If you select a field from the tree view and adds it to the Selected Fields list, the system removes the field from the Available Fields list.
If the you try to add the field again, the system displays a message and displays the name of the selected field inside brackets ( [ ] ). If you wish to remove the selected field, click Yes.
This section lists the different Periodic Reports in Argus and discusses about each of them in detail. Place the cursor over the Periodic Reports option in the Reports tab to go to any of the Periodic Reports.
You can create four kinds of periodic report.
Clinical Trial Periodic Reports
ICH PSUR Reports
US IND Periodic Reports
US NDA Periodic Reports
Argus Safety enables you store your Periodic Reports in Documentum.
When you approve an expedited report from within Argus, the system exports the report as a PDF file and saves it in the Documentum database by Argus Safety Service. From this point, you can perform document reviews within the Documentum system.
When the report is ready to be submitted, mark the report as submitted from within Argus. Argus Safety Service updates the status of the report within Documentum to Submitted.
If the report is to be transmitted via fax or email, Argus Safety Service marks the report as a successful submission in Documentum only after the fax or email transmission has succeeded.
You can select any of the following options in viewing the summary of a periodic regulatory report:
To view the regulatory reports for a particular case (scheduled, generated, and submitted), open the Regulatory Reports tab of the Case Form.
To view all scheduled, generated, and approved reports, as well as other outstanding action items assigned to you or your user group, select Reports in the Worklist menu.
To view a list of all scheduled, generated, and approved periodic reports, select Periodic Reports from the Reports | Compliance menu.
The periodic reports have a library page for the following reports:
PSUR
CTPR
IND
NDA
The following table lists and describes the fields on the Library Page
| Field/Control Name | Purpose |
|---|---|
| Category | Enables the user to view the report Category. |
| Sub Category | Enables the user to view the report Sub Category. |
| Report Name | Enables the user to view the name of the Periodic Report |
| Inclusion Star Date/Stop Date | Enables the user to view the report start and stop dates as defined in the configuration. |
| DRAFT/FINAL | Enables the user to view the draft and/or final report |
| Author Created | Enables the user to view the name of the author who created the report. |
| Date Created | Enables the user to view the date the report was created. |
| Date Modified | Enables the user to view the date the report was last modified. |
| Justification | Enables the user to view the justification for updating the report.
The system displays the standard Justifications dialog that contains the lasts justification entered by the user. |
| Search | When the user clicks Search, the system initiates the search operation. When the system displays the search results, the user can enter search parameters in various fields and click Search to narrow the search results. |
| Clear | Enables the user to clear user-entered data from the fields |
When using the Library Page be aware of the following:
The system places the total number of records displayed on the library page in the Total Number of Row (x) read-only field in the Report header.
The user can select the number of cases to display from the Page Size drop-down list.
The page size drop-down list contains the following values:
50
100 (default)
250
500
1000
2000
The system displays the number of reports currently in view and the system automatically updates the range based on the selected page size. For example, if the user selects a page size of 100, the system displays reports in groups of 100.
The user can go directly to a range of cases from the Displaying Rows drop-down option.
The user can scroll through the reports page-by-page in increments as defined in the Page Size drop-down list.
The user can sort on all columns in the Reports view by clicking the column header. The system displays an up arrow or a down arrow depending on whether the column is sorted in ascending (A-Z, 1-10, etc.) or descending order (Z-A, 10-1, etc.).
Initially, the reports are sorted by Category.
The default sort order is ascending.
When you click the Filter icon, the system displays the filtering row to enable you to filter on any element.
The type ahead feature enables you to filter on any element except Draft/Final.
Click the appropriate icon to minimize the filtering options.
Click the X to close the filtering options.
If filtering criteria is defined, the system displays the filtering elements icon to indicate that filtering elements exist.
If filtering criteria is not defined, the system displays the no filtering elements icon to indicate that no filtering elements are defined.
The system enables you to perform a like search. For example, if the user searches for Cure, the system returns all elements that start with Cure.
The system enables you to perform wildcard searches. For example, if the user searches for %Cure, the system returns all elements that contain Cure.
When you click Clear, the system clears the filtering criteria from the fields.
Clicking the filter icon enables you to filter for reports in the list of reports.
The system saves all user preferences for future use. If the user has already entered filter elements, the system displays the filter details for the last search when it displays the dialog.
If another user is modifying a report, the system displays the following:
The report which is being selected is being used by XXXX and cannot be modified.
where:
XXXX is the full user name of the person using the report.
The Clinical Trial Periodic Reports (CTPR) are created to report the IND Annual reports and EU Clinical Trial Directive line listing reports to FDA. 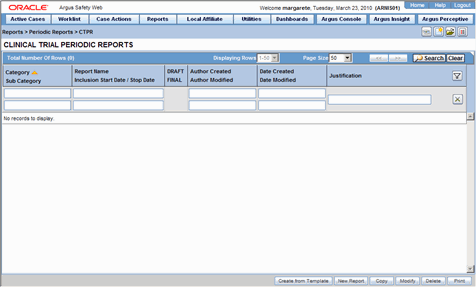
To create Clinical Trial Periodic Reports
Select Reports --> Periodic --> CTPR (Clinical Trial Periodic Reports) to open a list of CTPR Reports.
To create a new report from an existing report in the list, click Copy or Modify.
Click New Report to create an entirely new report. The Clinical Trial Periodic Reports dialog opens.
Enter an appropriate name for the report under Report Name.
Use the tabs in this dialog to configure the CTPR.
When using the CTPR, be aware of the following:
The system enables you to group cases by Product Name and Drug Regimen Frequency:
Product Name
This option enables you to group the Product Name - Formulation - Concentration with Units when the elements are separate with a hyphen ( - ).
If an element is missing, the system does not print the hyphen ( - ).
The system groups the cases based on the primary drug in the report.
Dosage Regimen Frequency
This option enables you to group the frequency of the primary dosage regimen for the primary drug in the report.
The system prints Frequency: followed by the frequency as defined above.
You can select datasheets for specific report types similar to the PSUR Report for the Inclusion criteria. If you select any rows in the inclusion criteria, the system disables the Datasheet selection dialog.
Report Type.This portion lists the report types (configured in Code List | Report Type) the report will be run against (LM_REPORT_TYPE). The user must select a report type so the system knows to save the criteria row.
Serious Criteria.This enables you to specify the seriousness of the cases for the selected report type as follows:
Serious.Case Level or Primary Event is Serious.
Non-Serious.Case Level or Primary Event is Non-Serious.
If you select both Serious and Non-Serious, the system ignores the criteria.
Fatal. At least one event has a Fatal event outcome.
Non-Fatal.No events have a Fatal event outcome.
If you select both Fatal and Non-Fatal, the system ignores the criteria.
Listedness.
When using the case level assessment, the system does not consider the datasheet. Cases appear in the PSUR if the case level assessment matches the selected criteria.
When using the primary event assessment in conjunction with a datasheet, the system uses only the As Determined listedness for the primary event when determining whether a case should be included in the PSUR report.
If both Listed and Unlisted are selected, the system ignores the criteria and includes all listedness values (including Unknown).
Datasheet.This enables you to specify which Datasheet to use when looking for Listedness (LM_DATASHEET). The system uses the datasheet criterion only when you select the primary event assessment as the CMN_PROFILE assessment.
When you select the <ALL> datasheet option, the listedness for the primary event on at least one datasheet must match the selected criteria.
Related/Non-Related.
When using case level assessment, cases appear in the PSUR when the case level causality matches the selected criteria.
When using the Primary Event assessment, cases appear only if the causality for the primary event as reported or as determined matches the selected criteria.
When using the All Events assessment, cases appear if any case events with as reported or as determined causality match the selected criteria.
If you select both Related and Non-Related, the system ignores the related/non-related criteria.
HCP/Non-HCP. To have a case included in the PSUR, you must identify at least one case reporter as a HCP or Non-HCP. If this is being used in conjunction with the Primary Reporter Only checkbox, the system evaluates only the primary reporter for this criterion.
Primary Reporter Only. This enables the system to perform the HCP/Non-HCP check against only the primary reporter. This updates the entire configuration whether checked or unchecked.
You can copy an existing template by clicking the Create from Template button on the CTPR reports list.
When you click Create from Template, the system displays the Create from Template dialog.
You can choose the CTPR Group Name (as configured in the Product Name configuration) from a type ahead field.
When you enter the CTPR Group Name in the Select CTPR Group Name field and the From and To dates in the Create from Template dialog and click OK the system does the following:
Saves the CTPR Configuration with the new dates.
Replaces the products in the list of selected products with all products as defined for the selected CTPR name.
Replaces the periodic report name in the newly configured periodic reports with a new name in the following format:
XXXX: YYYY to ZZZZ
where:
XXXX is the selected CTPR Name.
YYYY is the From Date entered by the user.
ZZZZ is the To Date entered by the user.
Replaces the date ranges for the From and To date fields only for the Periodic Report.
Bases the remaining configuration, including the security permissions, on the selected CTPR template.
When you enter the CTPR Group Name in the Select CTPR Group Name field and the From and To dates in the Create from Template dialog and click Print and Save, the system does the following:
Saves the CTPR Configuration with the new dates.
Replaces the products in the list of selected products with all products as defined for the selected CTPR name.
Replaces the periodic report name in the newly configured periodic reports with a new name in the following format:
XXXX: YYYY to ZZZZ
where:
XXXX is the selected CTPR Name.
YYYY is the From Date entered by the user.
ZZZZ is the To Date entered by the user.
Replaces the date ranges for the from and to date fields only for the Periodic Report.
Calls the Report Batch Printing dialog.
Bases the remaining configuration, including the security permissions, on the selected CTPR template.
The Report Name, Report Category and Report Sub-Category fields are common to all tabs of the Reports.
The following table below describes these fields:
| Field | Description |
|---|---|
| Report Name | Enter a name for the Report. The name entered here is displayed in the Reports menu. |
| Report Category | Select a category for the Report. This is displayed in the Reports menu.
Tip: Select New to define a subcategory within the report category. The Periodic Report Category dialog is displayed. Enter a category name in Category and click OK. The category is entered in the Report Category drop-down list. |
| Report Sub Category | Select a subcategory for the report.
Tip: Select New to define a subcategory within the report sub-category. The Periodic Report Category dialog is displayed. Enter a category name in Category and click OK. The category is entered in the Report Sub-Category drop-down list. |
The Subject of Report tab is used to configure the report header and to specify the agency, products, etc. for which the CTPR is applicable.
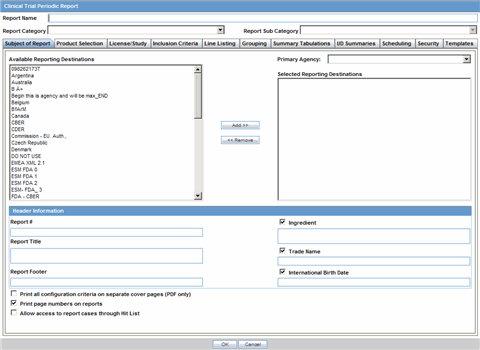
Description of the illustration rptctprdb.gif
The following table lists and describes the fields on this tab.
| Field | Description |
|---|---|
| Available Reporting Destination | Displays the list of configured Regulatory Agencies. Select an agency from the list displayed in Reporting Destination and click Add to add the report to the Selected Destination list.
Select multiple agencies by holding the CTRL key when you click them. Likewise, select an agency from the Selected Destination list and click Remove to remove it from the selected destination. |
| Primary Agency | Select the primary agency for the report.
Note: When you submit a Periodic report, it goes to the selected Primary Agency. |
| Selected Reporting Destination | Displays the list of agencies where the report is being sent. Select an agency from the list displayed in Reporting Destination and click Add to add the report to the Selected Destination list.
Select multiple agencies by holding the CTRL key when you click them. Likewise, select an agency from the Selected Destination list and click Remove to prevent it from being sent to the selected destination. |
| Report # | Enter a report number for this report |
| Report Title | Enter a report title for this report |
| Ingredient | Automatically displays the "Ingredient" as provided in the Subject of Report dialog.
Note: You can choose whether to view this field or not. Click the checkbox displayed with this field to hide or view it. |
| Trade Name | Automatically displays the "Trade Name(s)". Multiple trade names are also displayed together, separated by commas.
Note: You can choose whether to view this field or not. Click the checkbox displayed with this field to hide or view it. |
| International Birth Date | Automatically displays the earliest license awarded date, when a user selects an Ingredient and a Product.
Note: You can choose whether to view this field or not. Click the checkbox displayed with this field to hide or view it. |
| Report Footer | Enter the footer for the report |
| Print all configuration criteria on separate cover page | Mark this box to print out the configuration of this report when the report is printed. This is only available when PDF option is selected during printing. |
| Print page numbers on reports | When checked, this option enables the user to print page numbers on a periodic report. This is the default for all report configurations.
If this checkbox is not checked, the following occur.
|
| Allow access to report cases through Hit List | When the report is run as final, it creates a Hit List, which can be retrieved from other areas of the application where advanced conditions can be selected. Click this checkbox to report cases through the Hit List. |
The Product Selection tab enables you to select the products included in the CTPR report.
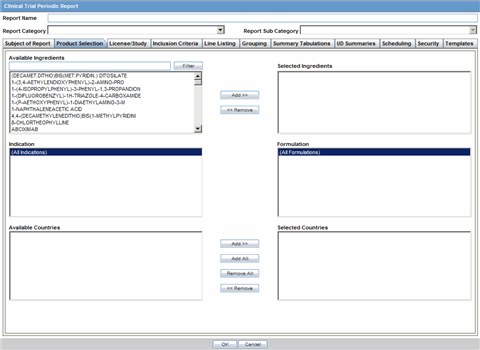
Description of the illustration ctprprodselect.gif
The following table lists and describes the fields on the Product Selection tab.
| Field | Description |
|---|---|
| Available Ingredients | Displays the list containing the Ingredients used for the product configuration. Select an ingredient from the list displayed in Available Ingredients and click Add/Remove to add/remove the ingredient.
You can select multiple ingredients at a time. |
| Filter | Enter an Ingredient name and click Filter to search for the entered ingredient within the Available list of Ingredients. |
| Selected Ingredients | Displays the list of ingredients selected from the Available Ingredients list. |
| Available Countries | This list is auto-populated and displays only the countries with a license containing the ingredient selected from the Available Ingredients list. |
| Selected Countries | Displays the countries selected from the Available Countries list. |
| Indication | This list contains the Indication configured for the product containing the ingredients in the Available Ingredients section. The selections made from this list get displayed in the Available Products section.
Note: You can select multiple Indications from the list at a time by pressing the CTRL key and clicking the different Indication entities. |
| Formulation | This list contains the Formulation configured for the product containing the ingredients in the Available Ingredients section. The selections made from this list get displayed in the Selected Products section.
Note: You can select multiple Formulations from the list at a time by pressing the CTRL key and clicking the different Indication entities. |
The License/Study tab is used to configure the report header and to specify the agency, products, etc. for which the CTPR will be applicable.
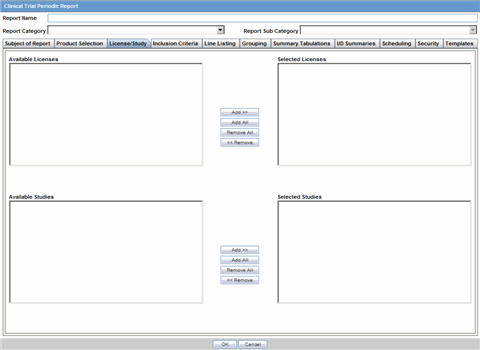
Description of the illustration ctprlicense.gif
The following tables lists and describes the fields on the License/Study tab.
| Field | Description |
| Available Licenses | Contains licenses that use the ingredient selected in the Ingredient field. This field is automatically populated when an ingredient has been selected. |
| Selected Licenses | Displays the licenses selected from the Available Licenses list by clicking Add/Add All. You can select Licenses that are related to different ingredients for a report. |
| Available Studies | Contains studies that use the ingredient selected in the Ingredient field. This field is automatically populated when an ingredient has been selected. |
| Selected Studies | Displays the studies selected in the Available Studies list by clicking Add/Add All. You can select studies that are related to different ingredients for a report. |
The Inclusion Criteria tab allows you to select search parameters for inclusion of cases in a periodic report.
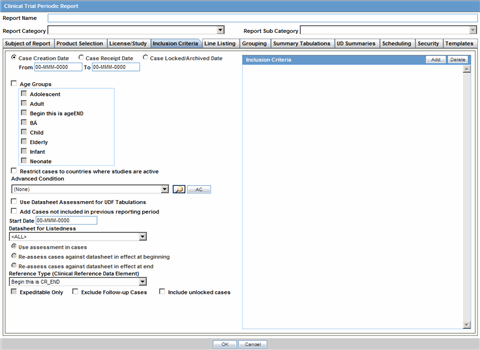
Description of the illustration ctprinclusion.gif
The top section of the dialog allows you to specify the type of cases that will be included in the periodic report.
The following table lists and describes the fields on the Inclusion Criteria tab.
| Field | Description |
|---|---|
| Case Creation Date | Allows you to specify a range of cases by the date when the case was created. |
| Case Receipt Date | Allows you to specify a range of cases by the initial receipt date.
Note: The Date Range is only available when an unscheduled CTPR is being created. You must specify only one date range out of Case Creation Date and Case Receipt Date. |
| Use Current Version | Allows you to use the latest revision to populate the data within the selected reports. |
| Use DLP Version | Allows you to use the case data of the version as of the specified DLP Version. |
| Age Groups | Allows you to include or exclude cases based on the patient's age group. Select all the age group categories that apply. |
| Restrict Cases to countries where studies are active | References study configuration to determine if the case was submitted during the dates the study was active.
Note: This option is available only if a study is selected from the Available Studies section in the License/Study tab. It should not be used for Centrally approved products (CAP), which only have an EU license. |
| Advanced Condition | Allows you to specify an advanced condition that must be satisfied by each case that is included in the report. Ensure that the advanced condition or the advanced condition query set that is specified here does not contradict any other criteria specified in the dialog. |
| Datasheet for Listedness | Select the Datasheet to look against for Listedness when running the report.
Note: Select the ALL datasheet to use the most conservative listedness for the primary event, or the Case Listedness for the tabulation. |
| Use Assessment in Cases | When selected, the CTPR Report will use the Case Event Assessment when performing datasheet listedness calculations. |
| Re-assess cases against datasheet in effect at the beginning | When selected, the CTPR will re-assess the cases in the line listing based on the Active Datasheet on or before the Start Date of the Reporting period. |
| Re-assess cases against datasheet in effect at end | When selected, the CTPR will re-assess the case in the line listing based on the Active Datasheets on or closest to the end date of the CTPR Reporting end date range without exceeding that date. |
| Reference Type (Clinical Reference Data Element) | Select the reference type to be displayed on the Main Listing if Clinical Study Reference is selected as a Data Element in the Available Data Elements section of the Line Listing tab. |
| Expeditable Only | This option is enabled only when an agency has been specified on the Subject of Report tab. Check this option to include only those cases that have submitted expedited reports to the specified Primary Agency. |
| Exclude Follow-up cases | Follow-up cases are cases with a significant follow-up in the Clinical Trial reporting period where the initial receipt date is in a prior period. Check this option to exclude follow-up cases from appearing on the Clinical Trial report. |
| Include Unlocked Cases | Check this option to allow cases that have not been locked for reporting to appear on the report. |
| Use Datasheet Assessment for UDF Tabulations | Allows you to select datasheet for a report to make UDF tabulations.If no datasheet is selected, the most conservative listedness is chosen, i.e. Unlisted followed by Listed. |
| Add Cases not included in previous reporting period | Allows you to add cases which were not included in the previous reporting period.
You can enter the start date of the period in the Start Date field. |
DLP primarily uses two processes:
Next Case Revision
Last Case Revision
DLP Options
Be aware of the following DLP Options.
Last Completed Version -- This option always uses the case version with the last lock that existed prior to the DLP or "As of reporting" date. This option does not enable data cleaning
Note: DLP saves only the last revision when multiple saves are performed in the same job session.
Next Completed Version -- This option uses the current case lock or the next following case lock if the case version was initiated prior to the DLP or the "As of reporting" date with two exceptions:
If there is no case lock for the current version that was received prior to the DLP, the last (current) case revision is used.
If there is a case version after the case lock that was created for the purpose of data cleaning, it is to be used instead of the first locked case revision.
If there are multiple contiguous case versions following the first case lock for the purpose of data cleaning, the last case data cleaning version is used.
|
Note: The Data Cleaning option is only available with the DLP option Use Next Completed Version (Includes Data Cleaning). |
You can perform DLP queries for the following:
Receipt Date -- date entered by the user during case creation
Initial / Follow up Receipt Date
Safety / Safety Follow up Receipt Date
System Date (Case Creation Date) - date the case was physically entered
The as of reporting function returns the same case version results as the DLP Options, with the only difference that the date depends on the "as of date" instead of a DLP date.
The DLP / as of query functionality is available in the following application modules:
Periodic Reports
PSUR including all User defined Tabulations and expedited reports within the Periodic Report
CTPR including all User defined Tabulations and expedited reports within the Periodic Report
IND including all User defined Tabulations
NDA including all User defined Tabulations and expedited reports within the Periodic Report
System Reports
CIOMS II Line Listing
CDA Reports
Case Listing Reports
The Line Listing tab contains the following fields and sections:
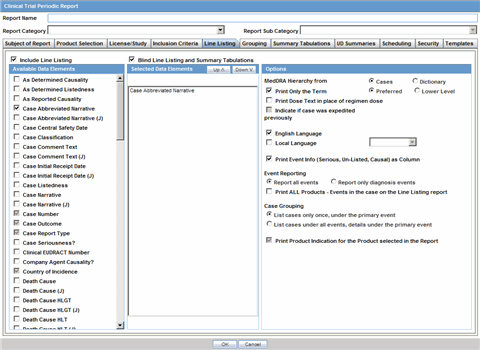
Description of the illustration ctprlinelisting.gif
| Field | Description |
|---|---|
| Include Line Listing | Allows you to select whether you want the Line Listing Data Elements printed with the CTPR Report. |
| Blind Line Listing and Summary Tabulations | Hides the selected listings from being displayed |
A number of optional fields are available in the Available Data Elements frame. Select the check box associated with a data element to add the data element to the report. Be aware of the following:
By default, the system print s unavailable fields on the report, and they cannot be changed.
Required data elements are printed as columns in the report. The optional data elements are printed as separate rows below the column data for each case.
Refer to the following table for a list of data elements on this tab.
| Data Element | Notes |
|---|---|
| As Determined Causality | Optional. |
| As Determined Listedness | Optional. |
| As Reported Causality | Optional. |
| Case Abbreviated Narrative | Required and multi-language available. |
| Case Classifications | Multiple classifications are displayed in separate lines. |
| Case Central Safety Date | Optional. |
| Case Comment Text | Optional. |
| Case Initial Receipt Date | Optional. |
| Case Listedness | Optional. |
| Case Narrative | Optional. |
| Case Number | Required. |
| Case Outcome | Required. |
| Case Report Type | Required. |
| Case Seriousness? | Optional. |
| Clinical EUDRACT # Number | Optional. |
| Clinical Study Reference | Optional. |
| Company Agent Causality | Optional. Displays event causality from product name. Multiple causalities are displayed in separate lines. |
| Country of Incidence | Required. |
| Death Cause | Optional. Multi-language available. |
| Death cause as reported | Optional |
| Death Cause HLGT | Optional. |
| Death Cause HLT | Optional. |
| Death Cause LLT | Optional. |
| Death Cause SOC | Optional. |
| Dosage Regimen Batch/Lot # | Optional. |
| Dosage Regimen Daily Dose | Required. |
| Dosage Regimen Duration | Required. |
| Dosage Regimen Frequency | Required. |
| Dosage Regimen Route of Administration | Required. |
| Dosage Regimen Start Date/Time | Required. For the selected product the report is based on. List for all dose regimens. |
| Drug Dechallenge? | Required. |
| Product Indication | Optional. For the selected product the report is based on. |
| Product Indication HLGT | Optional. For the selected product the report is based on. |
| Product Indication HLT | Optional. For the selected product the report is based on. |
| Product Indication LLT | Optional. For the selected product the report is based on. |
| Product Indication SOC | Optional. For the selected product the report is based on. |
| Drug Rechallenge? | Optional. |
| Event Description as Reported | Required. |
| Event Onset Date/Time | Required. |
| Event Preferred Term | Required. |
| Lab Data - Tabular | Optional. |
| Literature Author | Optional. |
| Literature Journal | Optional. |
| Literature Pages | Optional. |
| Literature Title | Optional. |
| Literature Volume | Optional. |
| Literature Year | Optional. |
| Literature reference | Optional. |
| Outcome of Event | Optional. |
| Patient Age | Required. |
| Patient Gender | Required. |
| Patient Initials | Optional. |
| Patient Relevant History | Optional. Multi-language. |
| Patient Subject # | Optional. |
| Product Name | Optional. Displays "product name (generic name) product type, formulation, concentration unit" "daily dose," "dose dose_freq, route" |
| Product Name Report Inclusion | Optional. Prints the Products that were part of the CTPR Report for the case.
Displays "product name (generic name) product type, formulation, concentration unit" "daily dose," "dose dose_freq, route" |
| Report Comment | Optional. |
| Study ID | Optional. |
| Study Other ID | Optional. |
| Study ID Protocol # | Optional. |
This section lists the selected elements and enables you to arrange the order in which these are to be printed. Click the Up or Down buttons to arrange the listed elements above or below in order of priority.
Options
| Field | Description |
|---|---|
| MedDRA Hierarchy from Cases/Dictionary | Select Cases to populate the data from the case data. Select Dictionary to populate the data from the MedDRA dictionary. |
| Print Only the Term (Preferred Term or Lower Level Term) | Prints only the event Preferred Term (PT) or event Lower Level Term (LLT) as per the selected radio button. Select the PT option to print only the preferred term and not the verbatim description. |
| Print Dose Text in place of regimen dose | Prints the dosage and frequency information from Dose Description field instead of Regimen Dose. |
| Indicate if case was expedited previously | This checkbox is selected if a primary agency has been selected in the Subject of Report tab. Cases for which an expedited report was previously submitted to the selected authority are marked with an asterisk. |
| English Language | Provides the option to print the descriptions in English |
| Local Language | Allows a user to specify which Local language for a multi-language field is to be printed i.e. the Abbreviated Narrative field. |
| Print event info (Serious, Un-listed, Related) as Column | Select this check box to print the Seriousness, Listedness and Causality under the Event Verbatim column.
Note: Events having listedness of "Unknown" are considered "Unlisted." If only diagnoses are assessed for event assessment, the events which are associated with a Diagnosis but have been marked with Diagnosis as "Np" display " - " for both listedness and causality. |
| List cases only once, under the primary event | Select this option to view the details of cases in the Main Line Listing only once under the Primary Event |
| List cases under all events, details under the primary event | Select this option to view the details of cases in the Main Line Listing only once under the Primary Event, while non-primary events are listed under their respective event hierarchy with a reference to the primary event body system. Therefore, use this option when grouping on Main Line Listing is by the Event Body System. |
| Print Product Indication for the product selected in the report | Select this option to print Product Indication for the product selected in the report. |
Refer to the following table for a description of items in the Grouping tab.
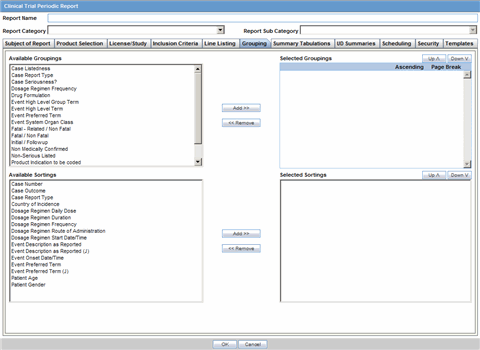
Description of the illustration ctprgrouping.gif
| Field | Description |
|---|---|
| Available Groupings | Allows a user to group cases together from the given list. Select the desired groupings from the list and click Add to move the grouping to the Selected Groupings list. Up to 10 grouping options can be selected. |
| Selected Groupings | Lists the added groupings made available from the Available Groupings list, and reports the groups in the order they were selected. |
| Ascending | Select this check box to sort the selected entities in ascending order. |
| Page Break | Select this check box to start the cases from a new page, while also keeping the sorting together for every selected page break. |
| Available Sortings | Allows a user to sort cases together from the given list. Select the desired sortings from the list and click Add to move the sorting to the Selected Sortings list. |
| Selected Sortings | Allows a user to further sort cases without a total count for each sorted item. Up to 3 levels of sorting can be selected from the Available Sortings list. |
The Summary Tabulations tab enables you to specify which summary tabulations/Listings will appear along with the line listing.
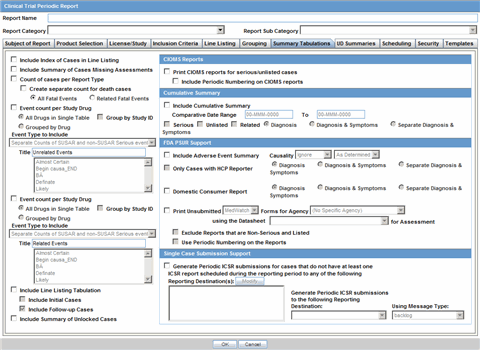
Description of the illustration ctprsummarytab.gif
The following table lists and describes the fields on the tab.
| Field | Description |
|---|---|
| Include Index of Cases in CTPR | Create an index page of case numbers, for all cases included in the CTPR. |
| Include Summary of Cases Missing Assessments | This option creates a sub-report of cases missing one of the following items:
Click this checkbox to create one or both of the following sub reports: Cases Missing Assessments - This sub-report displays cases that have been included in the CTPR line listing, but one or more of the following have not been assessed:
Cases Not Included in Report - This sub-report displays cases that have not been included in the CTPR line listing as a result of missing one or more of the following items:
|
| Count of Cases per Report Type | This option prints a Sub Report that counts the number of cases versus the Report Type, based on the cases within the CTPR.
The Cases per Report Type can be either of the following: Count Cases with Initial Expedited Reports: Counts cases with initial Expedited report. Count of cases with "Follow-up" Expedited report: Counts cases with Follow-up Expedited report. Total Count of "Initial" Cases in the Report: Counts any (serious - non-serious) cases received during the reporting period. Total Count of "Follow-up" Cases in the Report: Counts any (serious - non-serious) follow-up cases entered during the reporting period. Cumulative Count: Count of cases received from the start of the trial. |
| Event Count per Study Drug | Creates a sub-report with Event count per Study Drug based on the selected causality. 2 configurations are possible as to allow for a count of related events vs. non-related events. |
| All Study Drugs in Single table | Suppresses '0' current columns (with their cumulative) and print everything in a single cross tab. |
| Grouped by Study Drug | Prints a cross tab report for every product. Prints the cumulative totals even if the current period has no events. |
| Event Type to Include | Prints SUSAR events on the CTPR Report based on the option selected from the drop-down list:
|
| Title | Enables you to select a title. |
| Include Line Listing Tabulation | Select this check box to view a pre-defined summary tabulation of Report type, Seriousness and Listedness of all cases in the CTPR. |
| Include Initial Cases | Select this check box to include initial cases in the CTPR tabulation. |
| Include Follow-up Cases | Select this check box to include follow-up cases in the CTPR tabulation. |
| Include Summary of Unlocked Cases | Enables you to print the list of Case Numbers that are included in the Periodic Reports but are not locked. |
CIOMS Reports

Description of the illustration ciomsrptsection.gif
| Field | Description |
|---|---|
| Print CIOMS reports for serious/unlisted cases | Allows a user to print CIOMS I forms for all Serious/Unlisted (Case Level) cases appearing in the CTPR.
Note: CIOMS contain Internal or Other text printed on them when the CTPR is printed using the Internal or Other option. |
| Include Periodic Numbering on the CIOMS reports | Numbers the requested CIOMS I with a periodic format. (i.e. A-1-1 of 2, A-1-2 of 2, A-2-1 of 1, A-3-1 of 1 etc.). The index is modified to also contain the Periodic paging of each CIOMS report. |
Cumulative Summary

Description of the illustration cumsummarysection.gif
| Field | Description |
|---|---|
| Include Cumulative Summary | Select the checkbox to create a sub-report count of events, grouped by Product and Body System (SOC) and sorted by Preferred Term. The sub-report contains a previous date range count of events (comparative date range), a current date range count (current CTPR date range) and a cumulative count (all dates) of events assessed against the product(s) of the CTPR and matching the inclusion criteria. |
| Comparative Date Range | Allows a user to specify the previous date range as a comparison date for the events counted, and therefore should not overlap with the current date range specified on the CTPR inclusion criteria tab. |
| Serious | Select this check box to include only serious events. |
| Unlisted | Select this check box to include only unlisted events selected in the Datasheet on the "Inclusion Criteria Tab." If no datasheet is selected, then any Unlisted license is included. |
| Related | Select this check box to include only those events that are assessed as Related or Causal. |
| Diagnosis | Select this radio button to include only those events that are marked as diagnosis "Yes" and are without any symptoms associated with diagnosis. |
| Diagnosis & Symptoms | Select this option to include all events in the sub-report. |
| Separate Diagnosis & Symptoms | Select this option to include all SUSAR events in the CTR Report. |
FDA CTPR Support
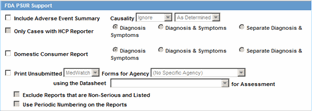
Description of the illustration fdapsursupport.gif
| Field | Description |
|---|---|
| FDA CTPR Support Section | |
| Include Adverse Event Summary | Select this option to generate a sub-report of events from the line listing. This sub report is grouped by Body System and Preferred Term.
Note: This section can be used if the company has obtained an FDA waiver to submit a CTPR instead of an NDA report. |
| Causality | Select the desired causality from the list.
Ignore - Counts events regardless of causality assessment. Causal - Counts events where the causality is considered reportable in the Causality Category configuration in List Maintenance. Not Causal - Counts events where the causality is considered non-reportable in the Causality Category configuration in List Maintenance. As Determined - Counts events where 'As Determined' causality meets the above selected causality criteria. As Reported - Counts events where 'As Reported' causality meets the above selected causality criteria. Both - Counts events where both 'As Reported' and 'As Determined' causality meet the above causality criteria. Either - Counts events where either the "As Reported" or "As Determined" causality meets the causality criteria. |
| Only Cases with HCP Reporter | Select this check box to include events for only those cases that feature an HCP reporter |
| Diagnosis | Select this radio button to ensure that only events marked as diagnosis are counted. |
| Diagnosis & Symptoms | Select this option to ensure that all events are counted in the sub-report. |
| Separate Diagnosis & Symptoms | Select this option to include all SUSAR events in the CTR Report. |
| Domestic Consumer Report | Enables you to select domestic consumer report. |
| Print Unsubmitted | This option allows a user to print MedWatch or VAERS forms for U.S. cases. The following types of cases will be excluded:
|
| Exclude Reports that are Non-Serious and Listed | Allows a user to suppress MedWatch or VAERS forms from printing for Non-Serious listed cases where all events are non-serious and listed for the datasheet specified. |
| Use Periodic numbering on the Reports | Numbers the requested forms with a periodic format. (i.e. Periodic Page 1 - 1, Periodic Page 1 - 2, Periodic Page 2 - 1, Periodic Page 2 - 2, etc.) An index with the Case Number is also included. |

| Field | Description |
|---|---|
| Single Case Submission Support Section | |
| Generate Periodic ICSR Submissions for any cases in this Periodic Report that does not have at least one scheduled single-case report during the reporting period to the following Reporting Destination(s): Modify | Select this check box to generate the E2B Reports only for the cases, where a Periodic E2B Report for the message type chosen, does not exist.
Select one or more trading partners from the list box. Important: Any case that does not have an expedited or single case periodic submission to a trading partner, must have an E2b report scheduled as a part of the Periodic submission. Click Modify to select a different Reporting Destination. |
| Schedule these single-case Periodic Reports to the following Reporting Destination | Select a single-destination trading partner for Periodic Reports from the drop-down list box. |
| Using the Message Type | Select the required message type from the drop-down list box |
The UD Summaries tab allows you to specify which summary listings will appear along with the line listing.
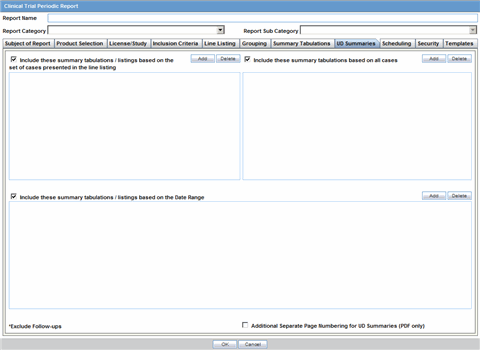
Description of the illustration ctprudsummary.gif
| Field | Description |
|---|---|
| Include these summary tabulations/listings based on the set of cases presented in the line listing | Allows you to select from pre-configured summary tabulations/listings based on Case Data Analysis, Case listing or CIOMS II line listing reports. These tabulations are based only on the data included in the line listing. Select the Exclude Follow-up Cases check box to filter out follow-up cases from the attached report.
Note: If the Exclude Follow-up Cases option is selected on the Inclusion criteria tab, this option is ignored and follow-up cases are always filtered out. |
| Include these summary tabulations based on all cases | Allows for additional sub-reports based on the 'Case Data Analysis' template, to be included as an output for the all cases in the database that meet the CTPR inclusion criterion for all dates. |
| Include these summary tabulations/listings based on the Date Range | This option allows for additional sub-reports based on Case Data Analysis, Case listing or CIOMS II line listing reports to be included as an output for the cases meeting the CTPR inclusion criterion for the Date Range specified when adding the sub-report.
The dates are based on either the "Case Creation Date" or the "Initial Receipt Date" as entered on the CTPR Inclusion Criteria tab. Click the checkbox to the right of the sub-report to ignore considering follow-up cases for the sub-report. |
| Additional Separate Page Numbering for Summaries | Enables you to include additional separate page numbering for summaries. |
The Scheduling tab allows you to specify details of how often the periodic report will be scheduled.
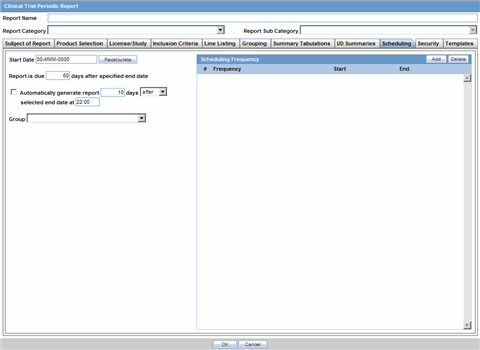
Description of the illustration ctprschedule.gif
The following table lists and describes the fields on the Scheduling tab.
| Field | Description |
|---|---|
| Start Date | This is the International Birth Date for the CTPR product. This date is computed as the earliest Awarded date for any license of any type. |
| Recalculate | Allows a user to recompute the International Birth Date of the CTPR Product. This date can be overwritten/manually entered, if needed. |
| Report is due xx days after selected end date (creation or receipt date) | Enter the number of days when the report will be due after the end date specified for the scheduling period. |
| Automatically generate report xx days before/after selected end date at xx:xx | Allows a user to specify the timing of the automatic report generation, by specifying the number of days before/after the selected end date of the report. |
| Group | Allows the user to select the group to which the automatically generated report is to be assigned |
Description of the illustration schedulefrequency.gif
The following table lists and describes the fields in the Scheduling Frequency section.
| Field | Description |
|---|---|
| Frequency | Allows a user to specify the interval required for this scheduling period. |
| Start | Allows the user to specify when the scheduling period starts. |
| End | Allows the user to specify when the scheduling period starts. |
| Add | Allows a user to add another scheduling interval. |
| Delete | Allows a user to delete a scheduling interval. |
The Security tab is used to configure the security level for the CTPR.
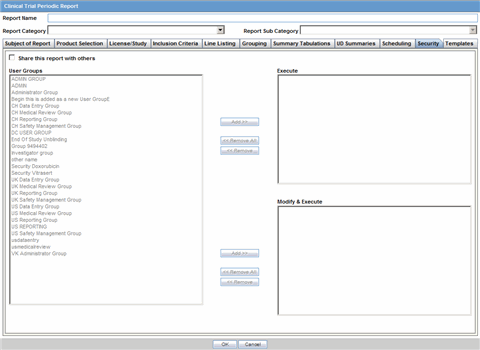
Description of the illustration ctprsecurity.gif
The following table lists and describes the fields on the Security tab.
| Field | Description |
|---|---|
| Share this Report with Other Users | Click this check box to share this report with other users. Specify the privileges to be granted to groups by adding the group name from the Users Groups list to either the "Execute" or "Modify and Execute" list. A user group can exist in only one of these access lists. |
| User Groups | The groups listed here have no access to the CTPR report template. Click Add or Remove to move them to another access list. |
| Execute | The groups listed here have read and execute access to the shared CTPR report template. |
| Modify & Execute | The groups listed here have read, execute and modify access to the shared CTPR report template. |
The Periodic Safety Update Reports (PSURs) are created on a periodic basis to enable regulatory authorities to monitor the safety of a marketed product. This information is used to view new data about the product acquired from appropriate sources. It helps relate this data to the patient exposure and also indicates whether changes should be made to the product information in order to optimize the use of the product. Requirements on the due date of periodic reports may differ for different regulatory authorities.
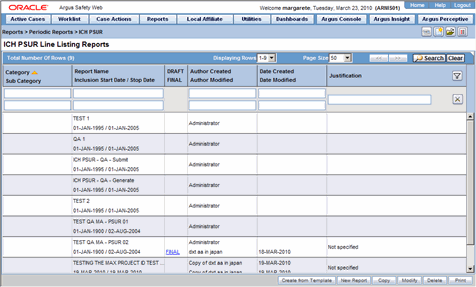
To create Periodic Safety Update Reports (PSURs)
Select Reports --> Periodic --> ICH PSUR Reports. A list of PSUR Reports opens in the right frame.
Click Copy or Modify to create a new reports from an existing report.
OR
Click New Report to create an entirely new report.
When the system opens the ICH PSUR Line Listing Reports dialog box, enter an appropriate report name in the Report Name field.
Use the tabs to configure the PSUR.
You can group cases for the PSUR Report by Product Name and Dosage Regimen Frequency as follows:
Product Name
This option enables you to group the Product Name - Formulation - Concentration concatenated with Units separated by a hyphen ( -).
If any elements are missing, the system does not print the hyphen ( -).
The groups the cases based on the Primary Drug in the report.
Dosage Regimen Frequency
This option enables you to group the frequency of the primary dosage regimen for the primary drug in the report.
The system prints Frequency: followed by the frequency as defined.
You can copy an existing template by clicking the Create from Template button.
When you click Create from Template, the system displays the Create from Template dialog.
You can choose the PSUR Group Name (as configured in the Product Name configuration) from a type ahead field.
When you enter the PSUR Group Name in the Select PSUR Group Name field and the From and To dates in the Create from Template dialog, and click OK the system does the following:
Saves the PSUR Configuration with the new dates.
Replaces the products in the list of selected products with all products as defined for the selected PSUR name.
Replaces the periodic report name in the newly configured periodic reports with a new name in the following format:
XXXX: YYYY to ZZZZ
where:
XXXX is the selected PSUR Name.
YYYY is the From Date entered by the user.
ZZZZ is the To Date entered by the user.
Replaces the From and To date ranges only for the periodic report.
Bases the remaining configuration, including the security permissions, on the selected PSUR template.
When you enter the PSUR Group Name in the Select PSUR Group Name field and the From and To dates in the Create from Template dialog and click Print and Save, the system does the following:
Saves the PSUR Configuration with the new dates.
Replaces the products in the list of selected products with all products as defined for the selected PSUR name.
Replaces the periodic report name in the newly configured periodic reports with a new name in the following format:
XXXX: YYYY to ZZZZ
where:
XXXX is the selected PSUR Name.
YYYY is the From Date entered by the user.
ZZZZ is the To Date entered by the user.
Replaces the From and To date ranges only for the Periodic Report.
Calls the Report Batch Printing dialog.
Bases the remaining configuration, including the security permissions, on the selected PSUR template.
The Report Name, Report Category and Report Sub-Category fields are common to all tabs of the Reports.
The following table below describes these fields:
| Field | Description |
|---|---|
| Report Name | Enter a name for the Report. The name entered here is displayed in the Reports menu. |
| Report Category | Select a category for the Report. This is displayed in the Reports menu.
Tip: Select New to define a subcategory within the report category. The Periodic Report Category dialog is displayed. Enter a category name in Category and click OK. The category is entered in the Report Category drop-down list. |
| Report Sub Category | Select a subcategory for the report.
Tip: Select New to define a subcategory within the report sub-category. The Periodic Report Category dialog is displayed. Enter a category name in Category and click OK. The category is entered in the Report Sub-Category drop-down list. |
The Subject of Report tab is used to configure the report header and to specify the agency, products, etc. for which the PSUR will be applicable.
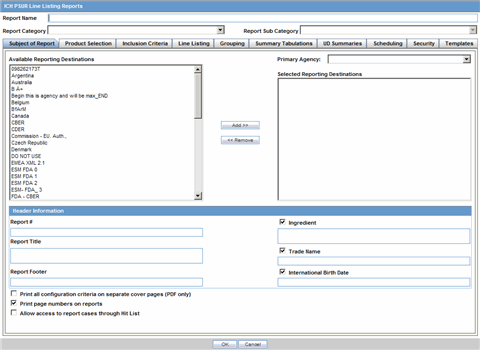
Description of the illustration ichpsursubject.gif
| Field | Description |
|---|---|
| Primary Agency | Select the Primary Agency. |
| Reporting Destination | Displays the list of agencies from where the report is being sent. Select an agency from the list displayed in Reporting Destination and click Add to add the report to the Selected Destination list.
You can select multiple agencies from the list of agencies such that the report can be submitted to multiple agencies at the same time. Likewise, select a report from the Selected Destination list and click Remove to prevent it from being sent to the selected destination. |
| Selected Destination | Displays the list of agencies where the report is being sent. Select an agency from the list displayed in Reporting Destination and click Add to add the report to the Selected Destination list.
You can select multiple agencies from the list of agencies such that the report can be submitted to multiple agencies at the same time. Likewise, select a report from the Selected Destination list and click Remove to prevent it from being sent to the selected destination. |
| Report # | Enter a report number for this report. |
| Report Title | Enter a report title for this report. |
| Ingredient | Automatically displays the "Ingredient" as provided in the Subject of Report dialog.
Note: You can choose whether to view these field or not. Click the checkbox displayed with this field to hide or view it. |
| Trade Name | Automatically displays the "Trade Name(s)" as provided in the Subject of Report dialog. Multiple trade names are also displayed together, separated by commas.
Note: You can choose whether to view this field or not. Click the checkbox displayed with this field to hide or view it. |
| International Birth Date | Automatically displays the earliest license awarded date, when a user selects an Ingredient and a Product.
Note: You can choose whether to view this field or not. Click the checkbox displayed with this field to hide or view it. |
| Report Footer | Enter the footer for the report. |
| Print all configuration criteria on separate cover page | Mark this box to print out the configuration of this report when the report is printed. This is only available when PDF option is selected during printing. |
| Print page numbers on reports | When checked, this option enables the user to print page numbers on a periodic report. This is the default for all report configurations.
If this checkbox is not checked, the following occur.
|
| Allow access to report cases through Hit List | When the report is run as final, it creates a Hit List, which can be retrieved from other areas of the application where advanced conditions can be selected. Click this checkbox to report cases through the Hit List. |
Refer to the table below for a description of fields in the Product Selection tab.
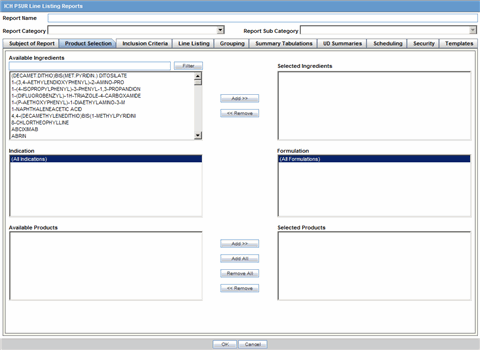
Description of the illustration ichpsurprodselect.gif
| Field | Description |
|---|---|
| Available Ingredients | Displays the list containing the Ingredients used for the product configuration. Select an ingredient from the list displayed in Available Ingredients and click Add/Remove to add/remove the ingredient.
You can select multiple ingredients at a time. |
| Filter | Enter an Ingredient name and click Filter to search for the entered ingredient within the Available list of Ingredients. |
| Selected Ingredients | Displays the list of ingredients selected from the Available Ingredients list. |
| Indication | This list contains the Indication configured for the product containing the ingredients in the Available Ingredients section. The selections made from this list get displayed in the Available Products section.
Note: You can select multiple Indications from the list at a time by pressing the CTRL key and clicking the different Indication entities. |
| Formulation | This list contains the Formulation configured for the product containing the ingredients in the Available Ingredients section. The selections made from this list get displayed in the Selected Products section.
Note: You can select multiple Indications from the list at a time by pressing the CTRL key and clicking the different Indication entities. |
| Available Products | This list is automatically populated with the selections made in the Indication section. |
| Selected Products | This list contains products selected by the user from the Available Products list. When a product is selected, the Trade Name field and International Birth Date fields are auto-populated with the license trade name ("formulation", "concentration") and earliest License Award Date for the product. |
The Inclusion Criteria tab allows you to select search parameters for inclusion of cases in a periodic report. The top section of the dialog allows you to specify the type of cases that are to be included in the periodic report.
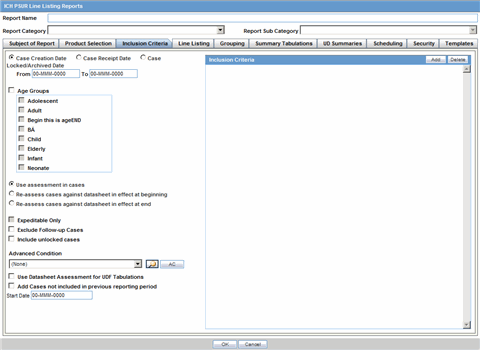
Description of the illustration ichpsurinclusion.gif
Click Add to add a criterion. Select appropriate items from the list of items that appear.
| Field | Description |
|---|---|
| Case Creation Date | Allows you to specify a range of cases by the date when the case was created. |
| Case Receipt Date | Allows you to specify a range of cases by the initial receipt date. |
| Use Current Version | Allows you to use the latest revision to populate the data within the selected reports. |
| Use DLP Version | Allows you to use the case data of the version as of the specified DLP Version. |
| Age Groups | Allows you to include or exclude cases based on the patient's age group. Select Age Groups and then select all the age group categories that apply. |
| Use Assessments in Cases | When selected, the PSUR Report will use the Case Event Assessment when performing datasheet listedness calculations. |
| Re-assess cases against datasheet in effect at the beginning | When selected, the PSUR will re-assess the cases in the line listing based on the Active Datasheet on or before the Start Date of the Reporting period. |
| Re-assess cases against datasheet in effect at end | When selected, the PSUR will re-assess the case in the line listing based on the Active Datasheets on or closest to the end date of the PSUR Reporting end date range without exceeding that date. |
| Expeditable Only | This checkbox is available only when an agency is selected in the Subject of Report tab. If you select this check box, only the cases classified as submitted expedited reports to the specified agency are used. |
| Exclude Follow-up Cases | Filters out follow-up Reports from the PSUR Line Listing Report. |
| Include Unlocked Cases | Allows you to include unlocked cases in the periodic report. |
| Advanced Condition | Allows you to specify an advanced condition that must be satisfied by each case that is included in the report. Ensure that the advanced condition or the advanced condition query set that is specified here does not contradict any other criteria specified in the dialog. |
| Use Datasheet Assessment for UDF Tabulations | Allows you to select datasheet for a report to make UDF tabulations.
If no datasheet is selected, the most conservative listedness is chosen, i.e. Unlisted followed by Listed. |
| Add Cases not included in previous reporting period | Allows you to add cases which were not included in the previous reporting period.
You can enter the start date of the period in the Start Date field. |
When using the Inclusion Criteria tab, the system enables you to exclude blinded cases from the Inclusion criteria section of the report. It also enables you to select All from the Inclusion criteria for the report type. This would include all configure report types in the report.
| Field | Description |
|---|---|
| Dropdown list | Select the appropriate report type from the drop-down list. |
| Datasheet | This list allows you to specify which datasheet is to be checked to determine the listedness (listed or unlisted) of the case. |
| Serious / Non-Serious | If you select Serious and clear Non-serious, only cases having a "serious" event are included and vice-versa. If you select both Serious and Non-Serious the seriousness criteria is ignored. |
| Fatal / Non-Fatal | Select Fatal when at least one event has an event outcome of 'Fatal". If not, select Non-Fatal. If you select both Fatal and Non-Fatal, both types of cases are included. |
| Listed / Unlisted | Select Listed to view only Listedness values. If you select both Listed and Unlisted, all Listedness values (including Unknown) are included. |
| Related / Non-Related | Relatedness refers to the more conservative of reported or company causality. Select Related for any reportable causality type, and Non-Related for any non-reportable causality type. |
| HCP / Non-HCP | HCP refers to cases that identify a Health Care Professional in the Reporter section within the General tab of the Case Form. |
| Primary Reporter Only | This check box displays whether the Primary Reporter has been selected to determine the HCP status. |
The Line Listing tab contains the following fields and sections:
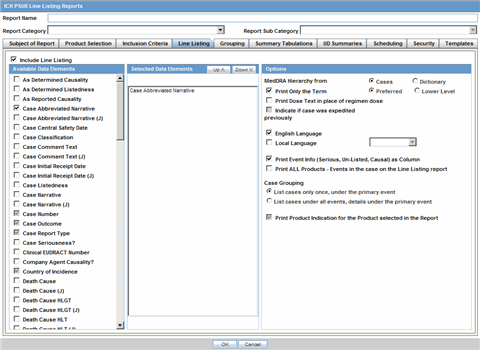
Description of the illustration ichpsurlinelisting.gif
| Field | Description |
|---|---|
| Include Line Listing | |
| Allows you to select whether you want the Line Listing Data Elements printed with the PSUR Report. |
The following illustration shows the optional fields under Available Data Elements.
Select the check box displayed against each data element to add it to the report.
The unavailable fields are printed on the report by default and cannot be changed.
Refer to the table below for a list of the data elements that are included in this tab.
The mandatory data elements are printed as columns in the report.
| Data Element | Notes |
|---|---|
| As Determined Causality | Optional. |
| As Determined Listedness | Optional. |
| As Reported Causality | Optional. |
| Case Abbreviated Narrative | Required and multi-language available. |
| Case Classifications | Required. Multiple classifications are displayed in separate lines. |
| Case Central Safety Date | Optional. |
| Case Comment Text | Optional. |
| Case Initial Receipt Date | Optional. |
| Case Listedness | Optional. |
| Case Narrative | Optional. |
| Case Number | Required. |
| Case Outcome | Required. |
| Case Report Type | Required. |
| Case Seriousness? | Optional. |
| Company Agent Causality | Displays event causality from product name. Multiple causalities are displayed in separate lines. |
| Country of Incidence | Required. |
| Death Cause | Multi-language available. |
| Death Cause HLGT | Optional. |
| Death Cause HLT | Optional. |
| Death Cause LLT | Optional. |
| Death Cause SOC | Optional. |
| Dosage Regimen Batch/Lot # | Optional. |
| Dosage Regimen Daily Dose | Optional. |
| Dosage Regimen Duration | Optional. |
| Dosage Regimen Frequency | Optional. |
| Dosage Regimen Route of Administration | Optional. |
| Dosage Regimen Start Date/Time | Required. For the selected product the report is based on. List for all dose regimens. |
| Drug Dechallenge? | Optional. |
| Drug Primary Indication | Optional. For the selected product the report is based on. |
| Drug Primary Indication HLGT | Optional. For the selected product the report is based on. |
| Drug Primary Indication HLT | Optional. For the selected product the report is based on. |
| Drug Primary Indication LLT | Optional. For the selected product the report is based on. |
| Drug Primary Indication SOC | Optional. For the selected product the report is based on. |
| Drug Rechallenge? | Optional. |
| Event Description as Reported | Required. |
| Event Lack of Efficacy | Optional. |
| Event Onset Date/Time | Required. |
| Event Preferred Term | Required. |
| Lab Data - Tabular | Optional. |
| Literature Author | Optional. |
| Literature Journal | Optional. |
| Literature Pages | Optional. |
| Literature Title | Optional. |
| Literature Volume | Optional. |
| Literature Year | Optional. |
| Indication | Displays indication for product name. |
| Listedness | Displays datasheet, product and listedness event preferred term |
| Literature reference | Optional. |
| Outcome of Event | Optional. |
| Patient Age | Required. |
| Patient Gender | Required. |
| Patient Initials | Optional. |
| Patient Relevant History | Multi-language. |
| Patient Subject # | Optional. |
| Product Name | Displays "product name (generic name) product type, formulation, concentration unit" "daily dose," "dose dose_freq, route" |
| Product Name Report Inclusion | Prints the Products that were part of the CTPR Report for the case.
Displays "product name (generic name) product type, formulation, concentration unit" "daily dose," "dose dose_freq, route" |
| Report Comment | Optional. |
| Reporter Reference Number | Optional. If you select this value the report includes the reporter reference number as specified in the cases included in the Periodic report of All reporters within the case.
If the case does not have values, then label is not printed in the Line Listing for the report. |
| Reporter Type | Optional. |
| Study Blinded Status | Optional. The system enables you to exclude blinded cases from the inclusion criteria. |
| Study Center ID | Optional. |
| Study Drug | Optional. |
| Study ID | Optional. |
| Study ID Protocol # | Optional. |
This section lists the selected elements and enables you to arrange the order in which these are to be printed.
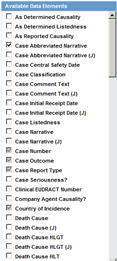
Click the Up or Down buttons to arrange the listed elements above or below in order of priority.
Description of the illustration ichpsurdataelements.gif
Options
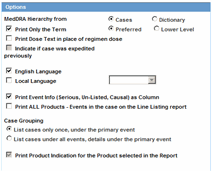
Description of the illustration ichpsuroptions.gif
| Field | Description |
|---|---|
| MedDRA Hierarchy from Cases/Dictionary | Select Cases to populate the data from the case data. Select Dictionary to populate the data from the MedDRA dictionary. |
| Print Only the Term (Preferred Term or Lower Level Term) | Prints only the event Preferred Term (PT) or event Lower Level Term (LLT) as per the selected radio button. Select the PT option to print only the preferred term and not the verbatim description. |
| Print Dose Text in place of regimen dose | Prints the dosage and frequency information from Dose Description field instead of Regimen Dose. |
| Indicate if case was expedited previously | This checkbox is selected if an agency has been selected in the Subject of Report tab. Cases for which an expedited report was previously submitted to the selected authority are marked with an asterisk and the date of submission appears in the line listing.
Any case that has been previously expedited to a selected agency, is listed in the list of Agencies in the Subject of Reports tab. |
| English Language | Provides the option to print the descriptions in English |
| Local Language | Allows a user to specify which Local language for a multi-language field is to be printed i.e. the Abbreviated Narrative field. |
| Print event info (Serious, Un-listed, Related) as Column | Select this checkbox to print the Seriousness, Listedness and Causality under the Event Verbatim column.
Note: Events having listedness of 'Unknown' are considered 'Unlisted'. If only diagnoses are assessed for event assessment, the events which are associated with a Diagnosis but have been marked with Diagnosis as 'No' display '-' for both listedness and causality. |
| List cases only once, under the primary event | Select this option to view the details of cases in the Main Line Listing only once under the Primary Event |
| List cases under all events, details under the primary event | Select this option to view the details of cases in the Main Line Listing only once under the Primary Event, while non-primary events are listed under their respective event hierarchy with a reference to the primary event body system. Therefore, use this option when grouping on Main Line Listing is by the Event Body System. |
| Print Product Indication for the Product selected in the Report | Enables you to print the product indication for the product selected in the report. |
Refer to the following table for a description of items in the Grouping tab.
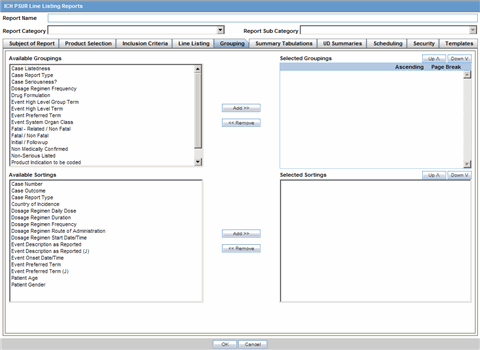
Description of the illustration ichpsurgrouping.gif
| Field | Description |
|---|---|
| Available Groupings | Allows a user to group cases together from the given list. Select the desired groupings from the list and click Add to move the grouping to the Selected Groupings list. |
| Selected Groupings | Lists the added groupings, and reports the groups in the order they were selected. Up to 5 grouping options can be selected from the Available Groupings list. |
| Ascending | Select this checkbox to sort the selected entities in ascending order |
| Page Break | Select this checkbox to start the cases from a new page, while also keeping the sorting together for every selected page break. |
| Available Sortings | Allows a user to sort cases together from the given list. Select the desired sortings from the list and click Add to move the sorting to the Selected Sortings list. |
| Selected Sortings | Allows a user to further sort cases without a total count for each sorted item. Up to 3 sorting options can be selected from the Available Sortings list. This list is populated with the Mandatory Line Listing entities plus any optional data elements chosen for this configuration. |
The Summary Tabulations tab enables you to specify which summary tabulations/listings will appear along with the line listing.The system enables you to separate the cumulative summary by seriousness, relatedness, and listedness. If you choose this option, the system separates the product event detail into the following categories: Serious/Non-Serious, Related/Non-Related, and Unlisted/Listed events.
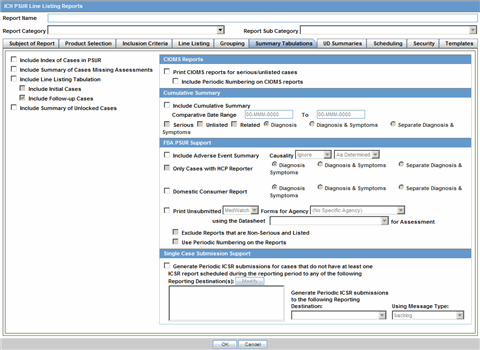
Description of the illustration ichpsursummarytab.gif
It contains the following fields and sections:
| Field | Description |
|---|---|
| Include Index of Cases in PSUR | Create an index page of case numbers, for all cases included in the PSUR. |
| Include Summary of Cases Missing Assessments | This option creates a sub-report of cases missing one of the following items:
Click this checkbox to create one or both of the following sub reports: Cases Missing Assessments - This sub-report displays cases that have been included in the PSUR line listing, but one or more of the following have not been assessed:
Cases Not Included in Report - This sub-report displays cases that have not been included in the PSUR line listing as a result of missing one or more of the following items:
|
| Include Line Listing Tabulation | Select this check box to view a pre-defined summary tabulation of Report type, Seriousness and Listedness of all cases in the PSUR. |
| Include Initial Cases | Select this checkbox to include initial cases in the PSUR tabulation. |
| Include Follow-up Cases | Select this checkbox to include follow-up cases in the PSUR tabulation. |
| Include Summary of Unlocked Cases | Enables you to print the list of Case Numbers that are included in the Periodic Reports but are not locked. |

Description of the illustration ciomsrptsection.gif
| Field | Description |
|---|---|
| Print CIOMS reports for serious/unlisted cases | Allows a user to print CIOMS I forms for all Serious/Unlisted (Case Level) cases appearing in the PSUR.
Note: CIOMS contain Internal or Other text printed on them when the PSUR is printed using the Internal or Other option. |
| Include Periodic Numbering on the CIOMS reports | Numbers the requested CIOMS I with a periodic format. (i.e. A-1-1 of 2, A-1-2 of 2, A-2-1 of 1, A-3-1 of 1 etc.). The index is modified to also contain the Periodic paging of each CIOMS report. |

Description of the illustration cumsummarysection.gif
| Field | Description |
|---|---|
| Include Cumulative Summary | Select the check box to create a sub-report count of events, grouped by Product and Body System (SOC) and sorted by Preferred Term. The sub-report contains a previous date range count of events (comparative date range), a current date range count (current PSUR date range) and a cumulative count (all dates) of events assessed against the product(s) of the PSUR and matching the inclusion criteria. |
| Comparative Date Range | Allows a user to specify the previous date range as a comparison date for the events counted, and therefore should not overlap with the current date range specified on the PSUR inclusion criteria tab. |
| Serious | Select this check box to include only serious events. |
| Unlisted | Select this check box to include only unlisted events selected in the Datasheet on the "Inclusion Criteria Tab." If no datasheet is selected, then any Unlisted license is included. |
| Related | Select this check box to include only those events that are assessed as Related or Causal. |
| Diagnosis | Select this radio button to include only those events that are marked as diagnosis "Yes" and are without any symptoms associated with diagnosis. |
| Diagnosis & Symptoms | Select this radio button to include diagnosis and symptoms together in the sub-report. |
| Separate Diagnosis & Symptoms | Select this radio button to include diagnosis and symptoms separately in the sub-report. Selecting this option means that the case numbers are separated by Diagnosis and Symptoms respectively. |

Description of the illustration fdapsursupport.gif
| Field | Description |
|---|---|
| FDA PSUR Support Section
Note: This section can be used if the company has obtained an FDA waiver to submit a PSUR instead of an NDA report. |
|
| Include Adverse Event Summary | Select this option to generate a sub-report of events from the line listing. This sub report is grouped by Body System and Preferred Term. |
| Causality | Select the desired causality from the list.
Ignore - Counts events regardless of causality assessment. Causal - Counts events where the causality is considered reportable in the Causality Category configuration in List Maintenance. Not Causal - Counts events where the causality is considered non-reportable in the Causality Category configuration in List Maintenance. As Determined - Counts events where 'As Determined' causality meets the above selected causality criteria. As Reported - Counts events where 'As Reported' causality meets the above selected causality criteria. Both - Counts events where both 'As Reported' and 'As Determined' causality meet the above causality criteria. Either - Counts events where either the 'As Reported' or 'As Determined' causality meets the causality criteria. |
| Only Cases with HCP Reporter | Select this checkbox to include events for only those cases that feature an HCP reporter |
| Diagnosis | Select this radio button to ensure that only events marked as diagnosis are counted. |
| Diagnosis & Symptoms | Select this radio button to ensure that all events are counted in the sub-report. |
| Separate Diagnosis & Symptoms | Select this radio button to include diagnosis and symptoms separately in the sub-report. Selecting this option means that the case numbers are separated by Diagnosis and Symptoms respectively. |
| Domestic Consumer Support | Select this radio button to enable domestic consumer support. |
| Print Unsubmitted | This option allows a user to print MedWatch or VAERS forms for U.S. cases |
| Exclude Reports that are Non-Serious and Listed | Allows a user to suppress MedWatch or VAERS forms from printing for Non-Serious listed cases where all events are non-serious and listed for the datasheet specified. |
| Use Periodic numbering on the Reports | Numbers the requested forms with a periodic format. (i.e. Periodic Page 1 - 1, Periodic Page 1 - 2, Periodic Page 2 - 1, Periodic Page 2 - 2, etc.) An index with the Case Number is also included. |

Description of the illustration singlecasesubmit.gif
| Field | Description |
|---|---|
| Single Case Submission Support Section | |
| Generate Periodic ICSR Submissions for any cases in this Periodic Report that does not have at least one scheduled single-case report during the reporting period to the following Reporting Destination(s): Modify | Select this checkbox to generate the E2B Reports only for the cases, where a Periodic E2B Report for the message type chosen, does not exist.
Select one or more trading partners from the list box. Important: Any case that does not have an expedited or single case periodic submission to a trading partner, must have an E2b report scheduled as a part of the Periodic submission. Click Modify to select a different Reporting Destination. |
| Schedule these single-case Periodic Reports to the following Reporting Destination | Select a single-destination trading partner for Periodic Reports from the drop-down list box. |
| Using the Message Type | Select the required message type from the drop-down list box |
The UD Summaries tab allows you to specify which summary listings will appear along with the line listing.
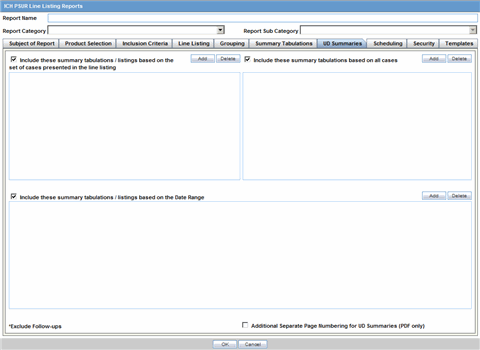
Description of the illustration ichpsurudsummary.gif
The following lists and describes the fields on the UD Summaries tab.
| Field | Description |
|---|---|
| Include these summary tabulations/listings based on the set of cases presented in the line listing | Allows you to select from pre-configured summary tabulations/listings. These tabulations are based only on the data included in the line listing. Selecting the Exclude Follow-up Cases check box filters out follow-up cases from the attached report.
Note: If the Exclude Follow-up Cases option is selected on the Inclusion criteria tab, this option is ignored and follow-up cases are always filtered out. |
| Include these summary tabulations based on all cases | Allows for additional sub-reports based on the 'Case Data Analysis' template, to be included as an output for the all cases in the database that meet the PSUR inclusion criterion for all dates. |
| Include these summary tabulations/listings based on the Date Range | This option allows for additional sub-reports based on Case Data Analysis, Case listing or CIOMS II line listing reports to be included as an output for the cases meeting the PSUR inclusion criterion for the Date Range specified when adding the sub-report.
The dates are based on either the "Case Creation Date" or the "Initial Receipt Date" as entered on the PSUR Inclusion Criteria tab. Click the checkbox to the right of the sub-report to ignore considering follow-up cases for the sub-report. |
| Additional Separate Page Numbering for Summaries | Enables you to include additional separate page numbering for summaries. |
The Scheduling tab enables you to specify details of how often the periodic report will be scheduled.
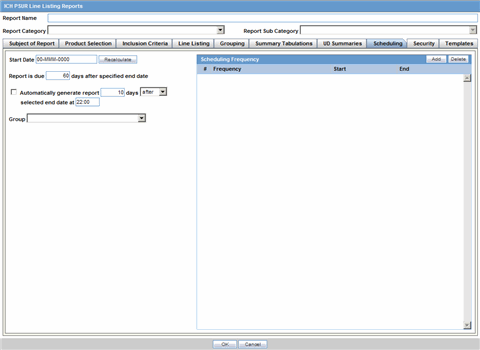
Description of the illustration ichpsurscheduling.gif
| Field | Description |
|---|---|
| Start Date | This is the International Birth Date for the PSUR product. This date is computed as the earliest Awarded date for any license of any type. |
| Recalculate | Allows a user to recompute the International Birth Date of the PSUR Product. This date can be overwritten/manually entered, if needed. |
| Report is due xx days after selected end date (creation or receipt date) | Enter the number of days when the report will be due after the end date specified for the scheduling period. |
| Automatically generate report xx days before/after selected end date at xx:xx | Allows a user to specify the timing of the automatic report generation, by specifying the number of days before/after the selected end date of the report. |
| Group | Allows the user to select the group to which the automatically generated report is to be assigned |

Description of the illustration schedulefrequency.gif
The following table lists and describes the fields in the Scheduling Frequency section.
| Field | Description |
|---|---|
| Frequency | Allows a user to specify the interval required for this scheduling period. |
| Start | Allows the user to specify when the scheduling period starts. |
| End | Allows the user to specify when the scheduling period starts. |
| Add | Allows a user to add another scheduling interval. |
| Delete | Allows a user to delete a scheduling interval. |
The Security tab is used to configure the security level for the PSUR.
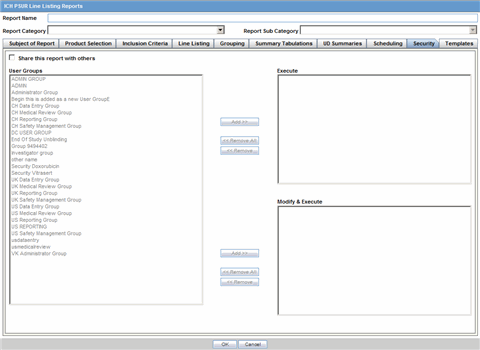
Description of the illustration ichpsursecurity.gif
| Field | Description |
|---|---|
| Share this Report with Other Users | Click this check box to share this report with other users. Specify the privileges to be granted to groups by adding the group name from the Users Groups list to either the "Execute" or "Modify and Execute" list. A user group can exist in only one of these access lists. |
| User Groups | The groups listed here have no access to the PSUR report template. Click Add or Remove to move them to another access list. |
| Execute | The groups listed here have read and execute access to the shared PSUR report template. |
| Modify & Execute | The groups listed here have read, execute and modify access to the shared PSUR report template. |
The system enables you to define an IND summary report. You can add a new report as well as copy, modify and delete existing reports.
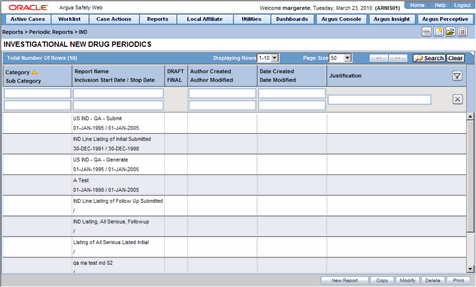
Use the following procedure to create and IND Summary Report
Select Reports --> IND Reports to open IND Subject of Report view.
Click New Report.
OR
Select an existing report from the list and click Copy or Modify.
When you click New Report, the IND Line Listing Reports dialog opens.
Enter an appropriate name for the report under Report Name.
Use the tabs in this dialog to configure the IND Report.
From each tab in the IND Summary Report, you can choose to Print all configuration criteria on separate cover pages (PDF Only).
The Report Name, Report Category and Report Sub-Category fields are common to all tabs of the Reports. The following table describes these fields.
| Field | Description |
|---|---|
| Report Name | Enter a name for the Report. The name entered here is displayed in the Reports menu. |
| Report Category | Select a category for the Report. This is displayed in the Reports menu.
Tip: Select New to define a subcategory within the report category. The Periodic Report Category dialog is displayed. Enter a category name in Category and click OK. The category is entered in the Report Category drop-down list. |
| Report Sub Category | Select a subcategory for the report.
Tip: Select New to define a subcategory within the report sub-category. The Periodic Report Category dialog is displayed. Enter a category name in Category and click OK. The category is entered in the Report Sub-Category drop-down list. |
The Subject of Report tab is used to configure the report header and to specify the agency, products, and other elements. Select multiple ingredients for a configured IND Report to view the multiple licenses to be selected for the report.
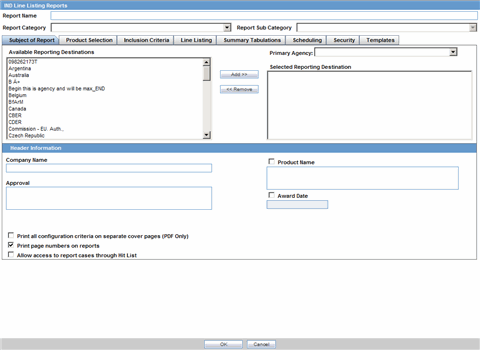
Description of the illustration indsubject.gif
| Field | Description |
|---|---|
| Primary Agency | Select the Primary Agency. |
| Reporting Destination | Displays the list of configured Regulatory Agencies. Select an agency from the list displayed in Reporting Destination and click Add to add the report to the Selected Destination list.
Select multiple agencies by holding the CTRL key when you click them. |
| Selected Destination | Displays the list of agencies where the report is being sent. Select an agency from the list displayed in Reporting Destination and click Add to add the report to the Selected Destination list.
Select multiple agencies by holding the CTRL key when you click them. Likewise, select an agency from the Selected Destination list and click Remove to prevent it from being sent to the selected destination. |
| Company Name | If a regulatory agency is selected in the Subject of Report tab, then the company name associated with the regulatory agency (this association is created by the Administrator) is automatically entered in this field. |
| Product Name | This field is automatically filled as per the Ingredient field.
Note: Click the checkbox corresponding to this field to choose whether you want this field to appear on the report. |
| Approval | This field is automatically filled with License numbers, separated by commas. This is an editable field. |
| Award Date | This field is populated with the earliest awarded Investigational License for US amongst the licenses selected. This field cannot be edited.
Note: Click the checkbox corresponding to this field to choose whether you want this field to appear on the report. |
| Print all configuration criteria on separate cover page | Click this checkbox to print out the configuration of this report when the report is printed. This is only available when the PDF option is selected during printing. |
| Print page numbers on reports | When checked, this option enables the user to print page numbers on a periodic report. This is the default for all report configurations.
If this checkbox is not checked, the following occur.
|
| Allow access to report cases through Hit List | When the report is run as final, it creates a Hit List, which can be retrieved from other areas of the application where advanced conditions can be selected. Click this checkbox to report cases through the Hit List. |
Use the Product Selection tab to select product information to include in the report.
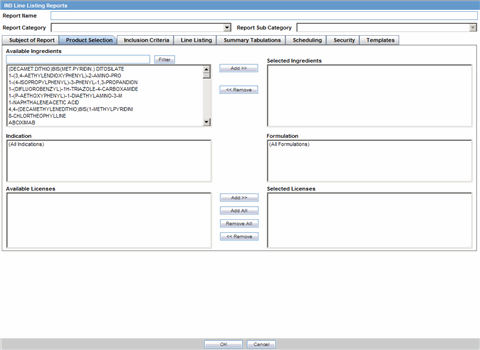
Description of the illustration indprodselect.gif
| Field | Description |
|---|---|
| Available Ingredients | Displays the list containing the Ingredients used for the product configuration. Select an ingredient from the list displayed in Available Ingredients and click Add/Remove to add/remove the ingredient.
You can select multiple ingredients at a time. |
| Filter | Enter an Ingredient name and click Filter to search for the entered ingredient within the Available list of Ingredients. |
| Selected Ingredients | Displays the list of ingredients selected from the Available Ingredients list. |
| Indication | This list contains a list of all the indications for the products containing the selected ingredient. The selections made from this list are displayed in the Available Products section.
Note: You can select multiple Indications from the list at a time by pressing the CTRL key and clicking the different Indication entities. |
| Formulation | This list contains the Formulations configured for the product containing the selected ingredient and indication. The selections made from this list get displayed in the Selected Products section.
Note: You can select multiple Formulations from the list at a time by pressing the CTRL key and clicking the different Indication entities. |
| Available Licenses | This list is automatically populated with the licenses from the Indication section. |
| Selected Licenses | This list contains licenses selected by the user from the Available Licenses list. When a product is selected, the Trade Name and International Birth Date fields are auto-populated with the license trade name ("formulation", "concentration") and earliest License Award Date for the product. |
The Inclusion Criteria tab allows you to select search parameters for inclusion of cases in a periodic report.
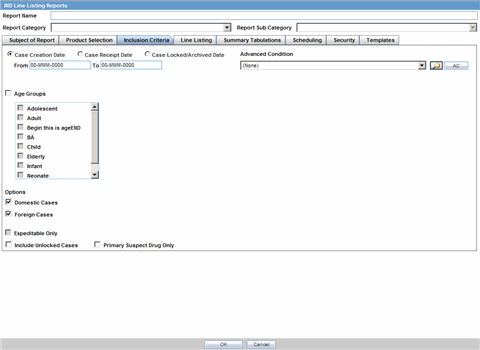
Description of the illustration indinclusion.gif
| Field | Description |
|---|---|
| Case Creation Date | Allows you to specify a range of cases by the date when the case was created. |
| Case Receipt Date | Allows you to specify a range of cases by the initial receipt date. |
| Use Current Version | Allows you to use the latest revision to populate the data within the selected reports. |
| Use DLP Version | Allows you to use the case data of the version as of the specified DLP Version. |
| Age Groups | Allows you to include or exclude cases based on the patient's age group. Select the Age Groups checkbox to activate the age groups and select all the age group categories that apply. |
| Options - Domestic/Foreign Cases | This option allows the user to include domestic and foreign cases within the periodic report. Select Domestic if Country of Incidence is USA and Foreign if Country of Incidence is not USA. |
| Expeditable Only | This checkbox is available only when an agency is selected in the Subject of Report tab. If you select this check box, only the cases classified as submitted expedited reports to the primary agency are used. |
| Include Unlocked Cases | Allows you to include unlocked cases in the periodic report. |
| Advanced Condition | Allows you to specify an advanced condition that must be satisfied by each case that is included in the report. Ensure that the advanced condition or the advanced condition query set that is specified here does not contradict any other criteria specified in the dialog. |
The following table describes the fields in the Line Listing tab.
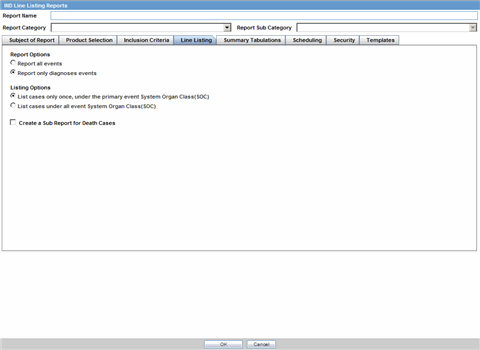
Description of the illustration indlinelisting.gif
| Field | Description |
|---|---|
| Report All Events | Select this option to report all events. |
| Report only Diagnosis Events | Select this option to report only diagnosis events (only the diagnosis events that are either explicitly marked as diagnosis or are non-related symptoms). |
| List cases only once, under the primary event | Select this option to view the details of cases in the Main Line Listing only once under the Primary Event |
| List cases under all events, details under the primary event | Select this option to view the details of cases in the Main Line Listing only once under the Primary Event, while non-primary events are listed under their respective event hierarchy with a reference to the primary event body system. Therefore, use this option when grouping on Main Line Listing is by the Event Body System. |
| Create a Sub Report for Death Cases | Select this check box to separate death cases from the main IND listing. If the check box is checked, all death cases (Identified by any event marked as death in Seriousness Criteria or any event having a Event Outcome as Death) are filtered out from the IND Line Listing. All death case show up in a sub report, called "IND Line Listing (Death Cases)." |
The Summary Tabulations tab enables you to specify which summary tabulations will appear along with the line listing.
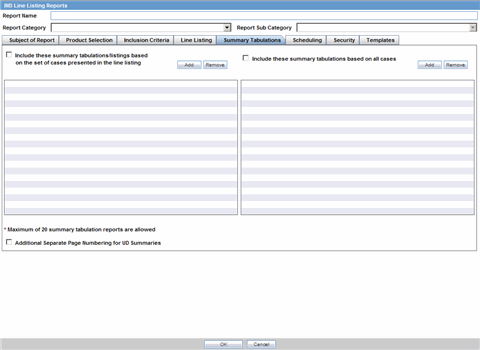
Description of the illustration indsummarytab.gif
| Field | Description |
|---|---|
| Include these summary tabulations/listings based on the set of cases presented in the line listing | Allows you to select from pre-configured summary tabulations/listings. These tabulations are based only on the data included in the line listing. Select the Exclude Follow-up Cases check box to filter out follow-up cases from the attached report.
Note: If the Exclude Follow-up Cases option is selected on the Inclusion criteria tab, this option is ignored and follow-up cases are always filtered out. |
| Include these summary tabulations based on all cases | Allows for additional sub-reports based on the 'Case Data Analysis' template, to be included as an output for the all cases in the database that meet the IND Report inclusion criterion for all dates. |
| Add | Displays a list of memorized Case Data Analysis Reports that have been marked for availability in a periodic report. |
| Remove | Click this button to remove a selected report. |
| Additional Separate Page Numbering for Summaries | Enables you to include additional separate page numbering for summaries. |
| Include Summary of Unlocked Cases | Enables you to print the list of Case Numbers that are included in the Periodic Reports but are not locked. |
The Scheduling tab allows you to specify details of how often the periodic report will be scheduled.
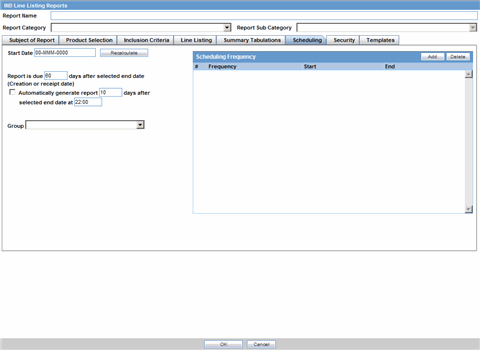
Description of the illustration indschedule.gif
The following table lists and describes the fields on the Scheduling tab.
| Field | Description |
|---|---|
| Start Date | This is the International Birth Date for the IND Report product. This date is computed as the earliest Awarded date for any license of any type. |
| Recalculate | Allows a user to recompute the International Birth Date of the IND Report Product. This date can be overwritten/manually entered, if needed. |
| Report is due xx days after selected end date (creation or receipt date) | Enter the number of days when the report will be due after the end date specified for the scheduling period. |
| Automatically generate report xx days before/after selected end date at xx:xx | Allows a user to specify the timing of the automatic report generation, by specifying the number of days before/after the selected end date of the report. |
| Group | Allows the user to select the group to which the automatically generated report is to be assigned. |
Description of fields in Scheduling Frequency:

Description of the illustration schedulefrequency.gif
| Field | Description |
|---|---|
| Frequency | Allows a user to specify the interval required for this scheduling period. |
| Start | Allows the user to specify when the scheduling period starts. |
| End | Allows the user to specify when the scheduling period starts. |
| Add | Allows a user to add another scheduling interval. |
| Delete | Allows a user to delete a scheduling interval. |
The Security tab is used to configure the security level for the IND Reports.
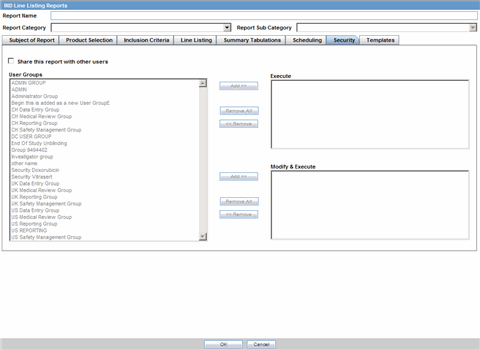
Description of the illustration indsecurity.gif
The following table lists and describes the fields on the Security tab.
| Field | Description |
|---|---|
| Share this Report with Other Users | Click this check box to share this report with other users. Specify the privileges to be granted to groups by adding the group name from the Users Groups list to either the "Execute" or "Modify and Execute" list. A user group can exist in only one of these access lists. |
| User Groups | The groups listed here have no access to the IND Report template. Click Add or Remove to move them to another access list. |
| Execute | The groups listed here have read and execute access to the shared IND Report template. |
| Modify & Execute | The groups listed here have read, execute and modify access to the shared IND Report template. |
The US NDA Periodic Reports enable you to define an NDA Periodic report. You can add a new report as well as copy, modify and delete existing reports.
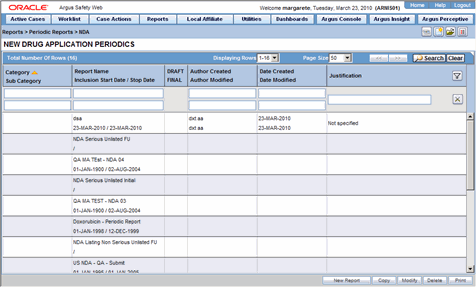
Use the following procedure to create an NDA Periodic report
To create NDA Summary Reports:
Select Reports --> NDA Reports to open the NDA Subject of Report view.
Click New Report to create an entirely new report,
OR
Select an existing report from the list and click Copy or Modify.
When you click New Report, the NDA Line Listing Reports dialog opens.
Enter an appropriate report name in the Report Name field
Use the tabs in this dialog to configure the NDA Report.
From each tab in the NDA Report, you can choose to Print all configuration criteria on separate cover pages (PDF Only).
When using NDA Reports be aware of the following:
You can print an Index of Cases included in the NDA report.
If you select this option, the system lists the cases from the following sections once at the end of the configuration pages:
Sequential List of cases
Serious Listed Initial/Follow up
Non Serious Listed Initial/Follow up
Non Serious Unlisted Initial/Follow up
15 Day Submission
The page numbering for this sub-report continues from the configuration pages.
You can separate initial case events from follow-up case events in the Summary Tabulation tab of the NDA Report.
If you select this option, the system counts events in the Initial section if the case is in the Serious Listed, Non-Serious Listed, or Non-Serious Listed/Unlisted sections.
If you select this option, the system counts events in the Follow-up section if the case is in the Serious Listed or Non-Serious Listed/Unlisted follow-up sections of the NDA report.
For the 15 Day events, if the case has not been previously reported in a NDA, the system counts it in the Initial section then the Follow-up section.
If you select List cases once under the Primary Event System Organ Class (SOC), the system displays a footnote with an asterisk ( * ) printed across all the System Organ Classes on the report and the following statement: Primary Event System Organ Class.
If you select the Print FDA-3500A/VAERS form at the end option, the system prints the report sections in the following order:
Configuration (Including Case Indices (e.g. Sequential Case Listing, Listing by Seriousness/Listedness, Listing of Cases Missing Analysis)
Line Listing
Summary Tabulations
MedWatch/VAERS reports at the end of the report
Page numbering for the MedWatches reports continue from the last page of the NDA report.
The configuration pages have been updated to reflect the updates made to the NDA Reports
The configuration pages are printed at the beginning of the NDA report.
By default, these are unchecked on all the existing configured reports.
The Report Name, Report Category and Report Sub-Category fields are common to all tabs of the Reports. The following table describes these fields:
| Field | Description |
| Report Name | Enter a name for the Report. The name entered here is displayed in the Reports menu. |
| Report Category | Select a category for the Report. This is displayed in the Reports menu.
Tip: Select New to define a subcategory within the report category. The Periodic Report Category dialog is displayed. Enter a category name in Category and click OK. The category is entered in the Report Category drop-down list. |
| Report Sub Category | Select a subcategory for the report.
Tip: Select New to define a subcategory within the report sub-category. The Periodic Report Category dialog is displayed. Enter a category name in Category and click OK. The category is entered in the Report Sub-Category drop-down list. |
On the Subject of Report tab you can select multiple Ingredients for a configured NDA Report per allowable variations of product and license configuration and periodic reporting requirements for the FDA. Select multiple ingredients to view the multiple licenses to be selected for the report.
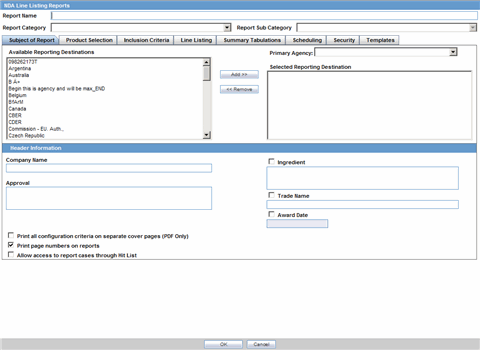
Description of the illustration ndareportsubject.gif
The following table describes the items in the Subject of Report tab.
| Field | Description |
|---|---|
| Primary Agency | Select the Primary Agency. |
| Reporting Destination | Displays the list of configured Regulatory Agencies. Select an agency from the list displayed in Reporting Destination and click Add to add the report to the Selected Destination list.
Select multiple agencies by holding the CTRL key when you click them. |
| Selected Destination | Displays the list of agencies where the report is being sent. Select an agency from the list displayed in Reporting Destination and click Add to add the report to the Selected Destination list.
Select multiple agencies by holding the CTRL key when you click them. Likewise, select an agency from the Selected Destination list and click Remove to prevent it from being sent to the selected destination. |
| Company Name | If a regulatory agency is selected, the company name associated with the regulatory agency (this association is created by the Administrator) is automatically entered in this field. |
| Ingredient | This field is populated with ingredient selected in the Subject of Report tab.
Note: Click the checkbox corresponding to this field to choose whether you want this field to appear on the report. |
| Approval | This field is automatically filled with License numbers, separated by commas. This is an editable field. |
| Trade Name | Automatically displays the Trade Name.
Multiple trade names are also populated from license trade name (formulation, concentration) of selected licenses, separated by commas. Note: Click the checkbox corresponding to this field to choose whether you want this field to appear on the report. |
| Award Date | Automatically displays the earliest license awarded date, when a user selects an Ingredient and a Product.
Note: Click the checkbox corresponding to this field to choose whether you want this field to appear on the report. |
| Print all configuration criteria on separate cover page | Click this checkbox to print out the configuration of this report when the report is printed. This is only available when the PDF option is selected during printing. |
| Print page numbers on reports | When checked, this option enables the user to print page numbers on a periodic report. This is the default for all report configurations.
If this checkbox is not checked, the following occur.
|
| Allow access to report cases through Hit List | When the report is run as final, it creates a Hit List, which can be retrieved from other areas of the application where advanced conditions can be selected. Click this checkbox to report cases through the Hit List. |
The Product Selection tab enables you to select product information to include on the report.
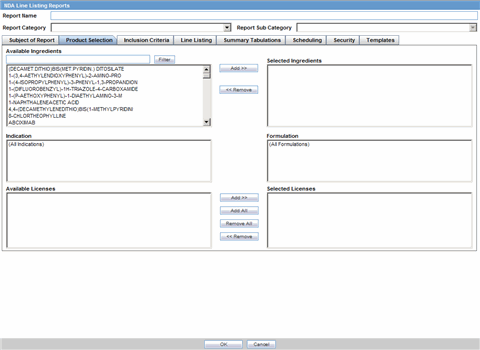
Description of the illustration ndareportprodselect.gif
The following table lists and describes the fields on the tab.
| Field | Description |
|---|---|
| Available Ingredients | Displays the list containing the Ingredients used for the product configuration. Select an ingredient from the list displayed in Available Ingredients and click Add/Remove to add/remove the ingredient.
You can select multiple ingredients at a time. |
| Filter | Enter an Ingredient name and click Filter to search for the entered ingredient within the Available list of Ingredients. |
| Selected Ingredients | Displays the list of ingredients selected from the Available Ingredients list. |
| Indication | This list contains a list of all the indications for the products containing the selected ingredient. The selections made from this list are displayed in the Available Products section.
Note: You can select multiple Indications from the list at a time by pressing the CTRL key and clicking the different Indication entities. |
| Formulation | This list contains the Formulations configured for the product containing the selected ingredient and indication. The selections made from this list get displayed in the Selected Products section.
Note: You can select multiple Formulations from the list at a time by pressing the CTRL key and clicking the different Indication entities. |
| Available Licenses | This list is automatically populated with the licenses from the Indication section. |
| Selected Licenses | This list contains licenses selected by the user from the Available Licenses list. When a product is selected, the Trade Name and Award Date fields are auto-populated with the license trade name ("formulation", "concentration") and earliest License Award Date for the product. |
The following table describes the items in the Inclusion Criteria tab.
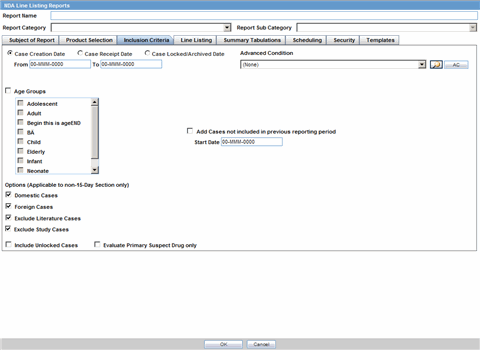
Description of the illustration ndareportinclusion.gif
| Field | Description |
|---|---|
| Case Creation Date | Allows you to specify a range of cases by the date when the case was created. |
| Case Receipt Date | Allows you to specify a range of cases by the initial receipt date. |
| Use Current Version | Allows you to use the latest revision to populate the data within the selected reports. |
| Use DLP Version | Allows you to use the case data of the version as of the specified DLP Version. |
| Age Groups | Allows you to include or exclude cases based on the patient's age group. Select the Age Groups checkbox to activate the age groups and select all the age group categories that apply. |
| Option (Applicable to Non-15-Day Selection Only)- Domestic/Foreign Cases | This option allows the user to include domestic and foreign cases within the periodic report. Select Domestic if Country of Incidence is USA and Foreign if Country of Incidence is not USA. |
| Option (Applicable to Non-15-Day Selection Only)-
Exclude Literature Cases/Study Cases |
This option allows the user to exclude Literature and Study Cases from being considered for the NDA Report. Select Exclude Literature Cases to exclude literature cases and select Exclude Study Cases to exclude study cases. |
| Advanced Condition | Allows you to specify an advanced condition that must be satisfied by each case that is included in the report. Ensure that the advanced condition or the advanced condition query set that is specified here does not contradict any other criteria specified in the dialog. |
| Add Cases not Included in a previous reporting period Start Date | Enter the start date. This adds cases not included in a previous reporting period with the specified start date. |
| Include Unlocked Cases | Allows you to include unlocked cases in the periodic report. |
| Evaluate Primary Suspect Drug Only | Allows you to select only the Primary Suspect Drug. |
The NDA report comprises of three tabs. The options for these tabs can be configured in the Line Listing tab.
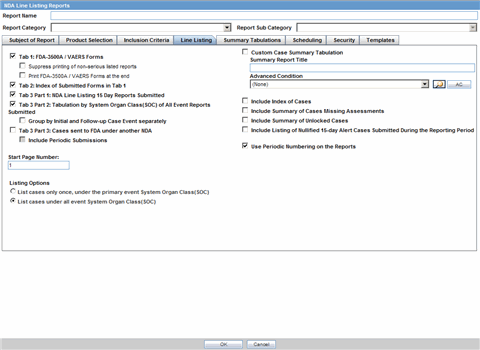
Description of the illustration ndareportlinelisting.gif
The following tables lists and describes the fields on the tab.
| Field | Description |
|---|---|
| Tab 1: FDA - 3500/VAERS Forms | Select this checkbox to generate the MedWatch 3500A (Drug) or VAERS reports which are serious listed or non-serious |
| Suppress printing of non-serious listed reports | Select this checkbox to prevent printing the non-serious listed reports but print their case numbers in the main NDA report indices
Note: Tab 1 of the NDA Line Listing report cannot be generated without Tab 2. However, Tab 2 can be generated without Tab 1 |
| Tab 2: Index of Submitted Forms in Tab 1 | Select this checkbox to generate an index of the forms from Tab 1 It prints all MedWatch/VAERS forms for the following cases:
Note: Previously expedited 15-day reports that are Serious and Unlisted that have already been submitted to the FDA do not need to be re-submitted with this periodic report |
| Tab 3 Part 1: NDA Line Listing of 15 Day Reports Submitted | Select this checkbox to generate a list of all serious unlisted expedited reports within the specified time period.
Note: The dates in these reports are in GMT. |
| TAB 3 Part 2: Tabulation by System Organ Class (SOC) of All Event Reports Submitted | Select this checkbox to generate a tabulation by System Organ Class (SOC) of all events reported during the specified time period. This includes the cases for which expedited reports were previously generated, as well as the cases that are submitted as part of the current report |
| TAB 3 Part 3: Cases sent to FDA under another NDA | Select this checkbox to print a list of all the serious unlisted events for which reports were submitted to the FDA previously
Note: If you select to print out the Tab 3 Part 3 section, the NDA report looks for other submissions (E2B, MW, MW Drug, or VAERS) to the same agency for the same case against other (not included in selection criteria for this report) marketed licenses. Any submission matching this criterion is listed on the Tab 3 Part 3 section of the NDA report. If there are multiple submissions against different licenses, then each one is listed. Each license is listed only once |
| Include Periodic Submissions | Select this checkbox to include all cases that have been sent under another NDA |
| Start Page Number | Select the page number for the first page of the report |
| Listing Options | These options for "List cases only once, under the primary event body system" and "List cases under all events body systems" only apply to the NDA Line Listing of Expedited Reports Submitted report |
| List cases only once, under the primary event System Organ Class | Select this option to list cases only once |
| List cases under all events System Organ Classes | Select this option to list cases under each SOC for each event |
| Include Summary of Cases Missing Assessments | Select this checkbox to include a Summary of Cases missing Assessments at the end of the report |
| Include Summary of Unlocked Cases | Select this option to include a summary of unlocked cases |
| Include Listing of Nullified 15-day Alert Cases Submitted During the Reporting Period | Select this option to include cancelled 15-day alert cases during the reporting period
Note: The dates in these reports are in GMT. |
| Use Periodic numbering on the Reports | Select this option to use periodic numbering on reports |
| Custom Case Summary Tabulation | Enter the Summary Report Title |
| Advanced Condition | Select the Advanced Condition from the drop-down list |
The Summary Tabulations tab allows you to specify which summary tabulations will appear along with the line listing.
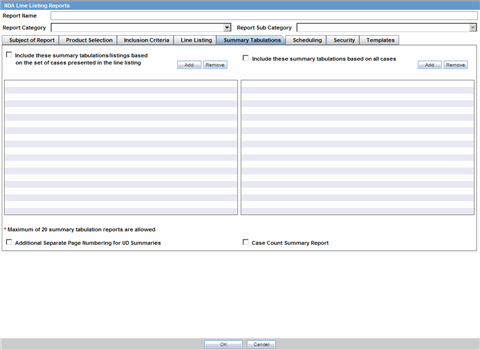
Description of the illustration ndareportsummarytab.gif
The following table lists and describes the fields on the tab.
| Field | Description |
|---|---|
| Include these summary tabulations/listings based on the set of cases presented in the line listing | Allows you to select from pre-configured summary tabulations/listings. These tabulations are based only on the data included in the line listing. Select the Exclude Follow-up Cases check box to filter out follow-up cases from the attached report.
Note: If the Exclude Follow-up Cases option is selected on the Inclusion criteria tab, this option is ignored and follow-up cases are always filtered out. |
| Include these summary tabulations based on all cases | Allows for additional sub-reports based on the 'Case Data Analysis' template, to be included as an output for the all cases in the database that meet the NDA Report inclusion criterion for all dates. |
| Add | Displays a list of memorized Case Data Analysis Reports that have been marked for availability in a periodic report. |
| Remove | Click this button to remove a selected report. |
| Additional Separate Page Numbering for Summaries | Enables you to include additional separate page numbering for summaries. |
| Case Count Summary Report | Enables you to print the list of Case Numbers that are included in the Periodic Reports but are not locked. |
The Scheduling tab allows you to specify details of how often the periodic report will be scheduled.
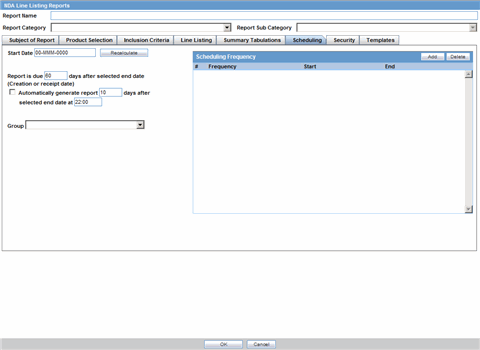
Description of the illustration ndareportscheduling.gif
The following table lists and describes the fields on the tab.
| Field | Description |
|---|---|
| Start Date | This is the International Birth Date for the NDA Report product. This date is computed as the earliest Awarded date for any license of any type. |
| Recalculate | Allows a user to recompute the International Birth Date of the NDA Report Product. This date can be overwritten/manually entered, if needed. |
| Report is due xx days after selected end date (creation or receipt date) | Enter the number of days when the report will be due after the end date specified for the scheduling period. |
| Automatically generate report xx days before/after selected end date at xx:xx | Allows a user to specify the timing of the automatic report generation, by specifying the number of days before/after the selected end date of the report. |
| Group | Allows the user to select the group to which the automatically generated report is to be assigned. |
The following is an illustration of the Scheduling Frequency section.

Description of the illustration schedulefrequency.gif
The following table lists and describes the Scheduling Frequency fields.
| Field | Description |
|---|---|
| Frequency | Allows a user to specify the interval required for this scheduling period. |
| Start | Allows the user to specify when the scheduling period starts. |
| End | Allows the user to specify when the scheduling period starts. |
| Add | Allows a user to add another scheduling interval. |
| Delete | Allows a user to delete a scheduling interval. |
The Security tab is used to configure the security level for the NDA Reports.
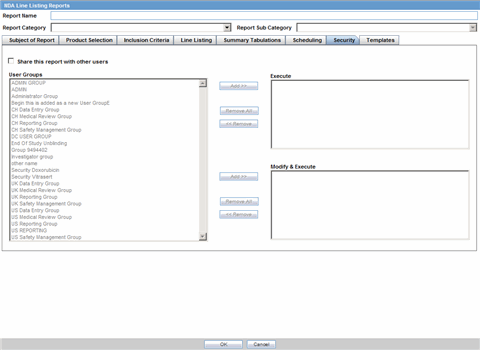
Description of the illustration ndareportsecurity.gif
| Field | Description |
|---|---|
| Share this Report with Other Users | Click this checkbox to share this report with other users. Specify the privileges to be granted to groups by adding the group name from the Users Groups list to either the 'Execute' or 'Modify and Execute' list. A user group can exist in only one of these access lists. |
| User Groups | The groups listed here have no access to the NDA Report template. Click Add or Remove to move them to another access list. |
| Execute | The groups listed here have read and execute access to the shared NDA Report template. |
| Modify & Execute | The groups listed here have read, execute and modify access to the shared NDA Report template. |
Bulk Reporting enables you to print, transmit and/or submit reports in bulk.
Select Reports --> Bulk Reporting to view the Bulk Report screen shown in the following illustration.
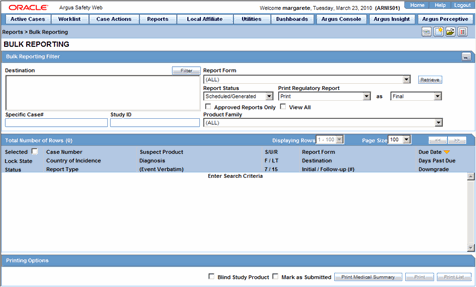
Description of the illustration bulkreporting.gif
The Bulk Reporting Filter sections enables you to filter reports.

Description of the illustration bulkreportingfilter.gif
The following table lists and describes the fields in this section
| Field | Description |
|---|---|
| Destination | Select an Agency to filter reports by that particular agency. Only the agencies that have reports in the Scheduled, Approved and Generated states are displayed. Click Filter to select multiple agencies from the Reporting Destinations dialog. The previous filtering criteria is saved and retained when the user invokes this dialog. By default, all agencies are assumed. |
| Report Form | Select any of the listed report forms to view reports belonging to the selected report form only. |
| Report Status | Choose either Scheduled/Generated, Pending, Failed, or Printed/Transmitted from the drop-down list. |
| Print Regulatory Report | Prints the report as Draft or Final. The Draft option is disabled when the printing option is set to Transmit. Select Medical Summary to view the list of only medical summaries of distinct cases in a PDF. |
| Approved Reports Only | Filters reports for only approved reports. |
| View All | Displays the bulk reports applicable to your filter selections. |
| Product Family | Enter a Product family to view all cases where the scheduled reports belong to the searched Product family. |
| Specific Case # | Searches a specific case. To do so, enter the Case Number of the case you wish to search and click the Retrieve button. This stores the agency selections last made. |
The system displays the search results in the Total Number of Rows section.

Description of the illustration bulkreportingtotalrows.gif
The following table lists and describes the fields and columns in this section.
| Field | Description |
|---|---|
| Selected | Allows the user to select the report. |
| Lock State | Displays the Case status of the case to depict if the case is locked or un-locked. |
| Status | Displays the Report Status e.g. Scheduled or Generated etc.
Click the status to view the report details. |
| Case Number | Displays the Case number.
Click the Case Number link to open the case. |
| Country of Incidence | Displays the view Country of Incidence. |
| Report Type | Displays the Case Report Type |
| Suspect Product | Displays the Trade Name for which the report has been scheduled. If more than one Suspect Company Product exists for the case, an "(+)" is placed at the end of the product name.
For Reports which were scheduled for the Device, the Device name is displayed. |
| Diagnosis | Displays the Primary Event Diagnoses PT |
| (Event Verbatim) | Displays the (Verbatim as reported) of the Primary Event. |
| S/U/R |
|
| F or LT | Fatal / Life Threatening
If any of the events in the case are Fatal or Life Threatening F or LT is displayed. If the case is both F and LT, only F is displayed. If the case is neither F nor LT, only No is displayed. |
| 7/15 | Displays 7 if the report is due within 7 days
Displays 15 if the report is due in more than 7 days |
| Report Form | Displays the Description of the report
Click the Report form link to view the DRAFT Report as a PDF. |
| Destination | Displays the report destination (agency) for which the report is scheduled. |
| Initial / Follow-up (#) | Initial or Follow-up
If Follow-up, the follow-up number is printed |
| Due Date | Displays the due date. |
| Days Past Due | Displays the number of days the report is past due date. |
| Downgrade | Allows the user to view if the report is downgrade.
Displays Yes if the report is a downgrade report else. |
| View All | Allows administrator and workflow manager to see all items in the system. |
|
Tip: The icon (displayed in the lock state) in the Reports-> Bulk Reporting screen denotes a SUSAR (Suspected Unexpected Serious Adverse Reaction) case. |
Several printing options are available to you.
The following table lists and describes the available printing options
| Field | Description |
|---|---|
| Blind Study Product | Select this check box to print study cases with blinded information. |
| Mark as Submitted | Select this check box to mark reports as Submitted when the transmission/e-mail has been sent.
A dialog is displayed is this check box is not selected. This dialog prompts you to confirm if the report is to marked as submitted or not. Select Yes or No, as required. This selection is remembered for the next time when you print a report. |
| Print Medical Summary | Allows the user to print the Medical Summaries. |
| Allows you to choose the printer for the selected report from the Select Site Printer dialog.
Select the Site and Printer Name where you wish to print the report and click OK. |
|
| Print List | Allows the user to print the current view of the Bulk Reporting. |
The following options are available to you.
Lock State Header Options
Lock State Icon Options
To sort the cases based on the following case status, click the Lock State header row. A pop-up appears listing the following sorting options:
Lock State
SUSAR
Exp/Per
These options enable you to sort cases based on the case categorization.
|
Tip: The icon (displayed in the lock state) in the Reports-> Bulk Reporting screen denotes a SUSAR (Suspected Unexpected Serious Adverse Reaction) case. |
Click the Lock State icon to view the list of options.
The following table describes these options:
| Field | Description |
|---|---|
| View Report | Displays the Draft report. |
| Report Details | Displays specific information about the report as entered in the Regulatory Reports section. |
| Case Summary | Displays the Case Summary dialog |
| Remove Report | Deletes the report from the case on being asked for a justification |
| Mark for Non-Submission | Displays the Submission tab in the Report Details dialog.
Select No for Mark for Non-Submission and enter the reason for the non-submission. |
| Remove Multiple Reports | Deletes multiple reports from the case on being asked a justification. |
| Mark Multiple for Non-Submission | Deletes multiple reports from the case on being asked a justification. The notes and date entered for the selected report are applicable for all the reports selected for Non Submission. |
The Incoming E2B Reports page enables you to:
View the E2B reports sent by the agency or the trading partner
Process an incoming E2B report.
You can do the following:
Check all the E2B values of the reports sent and determine whether to accept or reject the reports
Provide a user password and acceptance notes/rejection reason and accept or reject an incoming E2B report
Select Reports --> E2B Pending Reports to view Incoming E2B Reports page show in the following illustration.
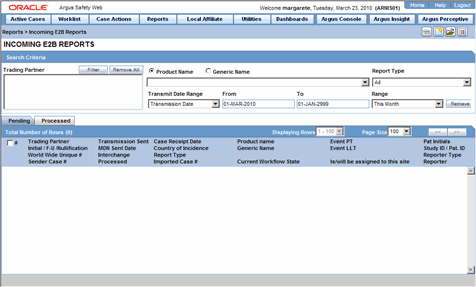
Description of the illustration e2bpending.gif
The following table describes the fields on the IncomingE2B Reports page.
| Field | Description |
|---|---|
| Trading Partner | Enter the trading partner. Click Filter to select an agency to filter by that particular Trading Partner. This allows you to select multiple agencies by clicking Add from the Select Reporting Destinations dialog. |
| Product Name/Generic Name | Enter the product name or generic name, as required. |
| Report Type | Select the report type, as applicable. |
| Transmit Date Range | Enter the range of the Transmit Date from the From and To fields. You can also select the range from the Range drop-down list. |
| Trading Partner | Displays the name of the Trading Partner of the case. |
| Initial / F/U / Null | The report version of the report
|
| World Wide Unique # | The worldwide unique number of the received case. |
| Sender Case # | Displays the case number of the sender. |
| Transmission Sent | Displays when the transmission was sent. |
| MDN Sent Date | Displays the date the MDN was sent. |
| Interchange Processed Date | Displays the date the interchange was processed. |
| Case Receipt Date | Displays the date the case was received. |
| Country of Incidence | Displays the country where the incident occurred. |
| Report Type | Displays the report type of the case. |
| Imported Case # | Displays the number of the imported case. |
| Product Name | Displays the product name. |
| Generic Name | Displays the generic name of the product. |
| Event PT | Displays the Primary Event and Verbatim as Reported. |
| Event LLT | Displays the Event LLT for the Event Information. |
| Is/Will be assigned to this site | Displays the site membership of the case. |
| Pat Initials | Displays the initials of the patient. |
| Study ID/Pat. ID | Displays the Study ID/ the ID of the patient in the case. |
| Reporter Type | Displays the primary reporter's Reporter Type. |
| Reporter | Displays the first and last name of the Primary Reporter. |
The following table describes the different buttons and right-click options available on Incoming E2B Reports page.
| Button | Description |
|---|---|
| ICSR Viewer | Select this right-click option to launch the E2B viewer. For details, refer to the ESM User Help.
Note: At the time of generating an E2B report, some characters entered by the user in the case form may not be displayed the same in the E2B report. For example, the E2B report equivalent of the "&" character entered in the case form is &. Similarly, there are other such characters that are represented differently in the E2b report. The table below contains the list of such characters and their equivalent representations in the E2b report: |
| View Error/Warning Message | Select this right-click option to view all warning messages including M2 validation errors and Multiple E2b Codes log. |
| Duplicate Search | Select this right-click option to perform Duplicate Search for the case being imported with the case present in the system. |
| Accept ISCR | Selects the incoming E2B report
Execute these steps to accept an E2B Case: 1. Click the Accept E2B Case button. The Acceptance of Initial Report Confirmation dialog opens. 2. Enter your user password, date, and select a justification from the pre-defined list of justifications. 3. Click OK. |
| Reject ICSR | Rejects the incoming E2B report
Execute these steps to reject an E2B Case: 1. Click the Reject E2B Case button. The Rejection of Initial Report Confirmation dialog opens. 2. Enter your user password, date, and select a justification from the pre-defined list of justifications. 3. Click OK. |
| Reject ICSRs | Enables you to reject multiple ICSRs by selecting the checkbox against each ICSR to that needs to be rejected. You can select the type of report to be followed up from the Follow Up Report Form screen.
This screen allows you to select a Follow-up Report format for a Report Form. Select the desired option and click OK to print out the CIOMS or the MedWatch Report Form as a PDF report whilst importing the cases. |
| Accept ICSRs | Enables you to accept multiple ICSRs by selecting the checkbox against each ICSR to that needs to be accepted.
You can select the type of report to be followed up from the Follow Up Report Form screen. This screen allows you to select a Follow-up Report format for a Report Form. Select the desired option and click OK to print out the CIOMS or the MedWatch Report Form as a PDF report whilst importing the cases. |
When using E2B Pending reports, be aware of the following:
The system uses the Oracle Text profile settings for the duplicate search in E2B Pending configured in the Argus Schema Creation Tool.
The user can right click on the row and select the following:
Case Summary. This displays the Case Summary (current functionality)
Medical Summary. This displays the Medical Summary report, if the user has permission to access the Medical Review dialog.
Case Form Print. This launches the Case Form Print dialog to enable the user to print the case form in a new IE window.
The Bulk Incoming Reports dialog allows the user to import multiple E2B reports that have been sent by the agency or trading partner.
Be aware of the following:
The reports that are imported can be a combination of Initial, Follow-up and Nullification reports.
The only pre-requisite for this dialogue is that Case numbering should be set to auto-numbering and not manually.
Bulk Incoming Reports does not prevent the duplicate cases to be loaded into the system.
To view Bulk Incoming Reports:
Select multiple reports from the Incoming E2B Reports screen and click Accept ICSRs.
The system opens the Bulk Incoming Reports screen.
The following table lists and describes the fields in the Bulk Incoming Reports dialog box.
| Field | Description |
| Agency Name | This drop down list contains unique trading partner from the E2b reports have been received. You can select a particular agency/trading partner to filter the E2b reports. |
| Product Name | This drop down list contains unique suspect Product Names extracted from the received E2b reports. Select a particular suspect product to filter the E2b reports. If an Agency Name is selected, the Product Name list contains all suspect products belonging to that agency name. |
| Follow Up Output Format | This drop down list contains CIOMS-I, MedWatch and Case Form. You can print all E2b reports in CIOMS-I, MedWatch or Case Form format only if the Follow Up checkbox has been selected. |
| Source Count | Displays the total number of E2b reports with breakdown in 'Initial' 'Follow Up' and 'Nullification' category. |
| Report Type | Displays the report type. |
| Selected Count | Displays the number of E2b selected by the user to load the E2b reports in Argus Safety. Selected count can be changed by checking the 'Initial' or 'Follow Up' or 'Nullification' checkbox. |
| Import | Imports all the reports.
Note: For the Import process, if the system receives an E2B report with the Medically Confirm field set to 1, the Primary reporter is marked as HCP. |
| Cancel | Removes the Import E2B reports window. |
The Duplicate Search dialog for an E2B report enables you to search for possible duplicate cases in the Argus Safety system. You can select different combinations of search criteria. When more than one criterion is selected, only cases that satisfy all criteria are listed. By default, only the fields that are present in the E2B Report are checked for the Duplicate Search.
The following table describes the fields present in the Duplicate Search dialog.
| Field | Description |
|---|---|
| Agency | The name of the primary agency. |
| Original Case Number | The original case number. |
| Message Number | The message number of the case. |
| Product Name | The product name that caused the adverse event. |
| Generic Name | The generally known, popular name of the product. |
| Report Type | The type of report. |
| Study ID | The Study ID. |
| Receipt Date | The date the report was received by Argus and saved in the system. |
| Center ID | The ID of the center. |
| Sal. | The salutation such as Mr. or Mrs. |
| Suffix | The suffix, if applicable, that follows the name. |
| First Name | The first name of the patient. |
| Last Name | The last name of the patient. |
| Country of Incidence | The country where the incident occurred. |
| State | The state where the incident occurred. |
| Postal Code | The postal code of the area where the incident occurred. |
| Patient Name | The name of the patient. |
| Event Desc. | A description of the adverse event. |
| Initials | The initials of the patient. |
| Onset Date | The date from when the first reaction or adverse event occurred. |
| Pat. ID | The ID of the patient. |
| Age/Units | The age of the patient. |
| Pat. DOB | The date of birth of the patient. |
| Gender | The gender of the patient. |
| Reference # | National Regulatory Authority's Report Number, used as a Reference Number. |
| Journal | The journal name related to the adverse event. |
| Nullification Reason | The reason why the case was nullified. |
| Accept Initial E2B as Follow-Up | Enables you to accept initial E2B as a follow-up |
| Search | Finds results matching the specified search criteria. |
| View E2B | Enables you to view the E2B report. |
| Accept E2B Case | Enables you to accept an E2B case. |
| Reject E2B Case | Enables you to reject an E2B case. |
| View Warning | Enables you to view warnings associated with the case. |
| View Differences | Allows viewing differences between the current XML to be imported (a message that is not yet imported into the database), the current case data in the database, and if a case has been imported before, the last imported case.
Note: This button is available only for follow-up and nullification reports. |
| Case Number | Displays the case number of the case matching the search criteria. |
| Pat. Initials | Displays the initials of the patient in the case matching the search criteria. |
| Action | Enables you to view the Case Summary dialog. |
| Project ID | Displays the Project ID of the case matching the search criteria. |
| Study ID | Displays the Study ID of the case matching the search criteria. |
| Date | Displays the date of the case matching the search criteria. |
| Country | Displays the country name of the case matching the search criteria. |
| Product | Displays the product name involved with the case matching the search criteria. |
| Event | Displays the event involved with the case matching the search criteria. |
| Report Type | Displays the report type of the case matching the search criteria. |
| Reporter | Displays the reporter involved with the case matching the search criteria. |
|
Tip: The system displays the search results the Total Number of Rows section. Click the Action icon to view the case summary dialog. |
The Duplicate Search in Argus Central Incoming review enables you to search on Reference ID and Keyword field in Argus cases.
The following table lists and describes the fields on the Duplicate Search screen.
| Field | Description |
|---|---|
| Product Name | The product name that caused the adverse event. |
| Report Type | The type of report. |
| Receipt Date | The date the report was received by Argus and saved in the system. |
| Generic Name | The generally known, popular name of the product. |
| Study ID | The Study ID. |
| Reference ID | Enables you to search for a duplicate case based on reference ID. |
| Keyword | Enables you to search for a duplicate case based on a keyword. |
| Sal. | The salutation such as Mr. or Mrs. |
| Suffix | The suffix, if applicable, that follows the name. |
| First Name | The first name of the patient. |
| Last Name | The last name of the patient. |
| Country of Incidence | The country where the incident occurred. |
| State | The state where the incident occurred. |
| Postal Code | The postal code of the area where the incident occurred. |
| Initials | The initials of the patient. |
| Pat. ID | The ID of the patient. |
| Age/Units | The age of the patient. |
| Gender | The gender of the patient. |
| Onset Date | The date from when the first reaction or adverse event occurred. |
| Event Description. | A description of the adverse event. |
Be aware of the following:
The Reference ID field searches on the following fields in the Argus case:
Additional Info | Case Reference ID
Reporters | Reporter's Reference #
Argus Case Number
By default the system populates the Keyword field with the first value from the incoming affiliate event.
The View Differences Report enables you to view differences between the current XML to be imported (a message that is not yet imported into the database), the current case data in the database, and if a case has been imported before, the last imported case.
Note: View Differences is available for follow-up reports only. This option is enabled only when an initial case or case number is selected in the duplicate search output section.
Click View Differences from the Duplicate Search screen to view the View Difference report. This displays the E2B Difference Report.
The following table describes the fields in the report.
| Field | Description |
|---|---|
| Trading Partner | Allows you to view the Trading Partner name from whom the E2B report is received.
Note: The Lock/Archive icon displayed with this field denotes the status of the case. |
| DTD Version | Allows you to view the DTD version of the follow-up E2B report. |
| Case Number | Displays the original case number of the E2B report. |
| Follow Up # | Displays the sequence number of the follow-up for the E2B report. |
| Total Number of Rows | Allows you to select the type of E2B Difference to view from: Current E2B vs. Current Case in Database
|
| Import | Select this check box to highlight import differences. |
| E2B Element | Select this check box to highlight E2B differences. |
| Current E2B | Select this check box to highlight differences in the current E2B. |
| Current Case in Database | Select this check box to highlight differences in the current case in the database. |
| Last Imported E2B | Select this check box to highlight differences in the last imported E2B. |
| Accept Follow-up | Allows you to update the corresponding fields for the selected E2B elements in the Argus case. |
| Reject Follow-up | Does not update the corresponding fields for the selected E2B elements in the Argus case. |
| Print List | Provides the difference report in a PDF format. |
The system displays the differences in the E2B reports as follows:
Addition -- New elements are highlighted in grey.
Deletion -- Deleted elements are highlighted in red.
Modification -- Modified elements are highlighted in yellow.
This option is enabled only when an initial case or case number is selected in the duplicate search output section.
Click this button to add an ICSR as a follow up to the Case Number, which you have highlighted in the duplicate search output section.
A pop-up dialog appears: "Do you want to add this ICSR as a Follow-up to the Case Number<Num>?"
Click OK to proceed.
|
Tip: Click Cancel to return back to the duplicate search screen. |
The Argus application attaches the incoming ICSR as a follow-up, to the selected case number highlighted in the duplicate search screen.
The Processed E2B Reports page contains a list of all the processed E2B Reports.
Click the Processed E2B Reports tab on the Incoming Reports screen to view the Processed E2B Reports screen.
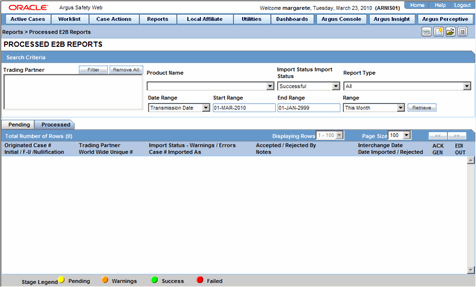
The system enables you to enter search parameters in the Search Criteria section.

The following table lists and describes the fields in the Search Criteria section.
| Field | Description |
|---|---|
| Trading Partner | Enter the trading partner. Click Filter to select an agency to filter by that particular Trading Partner. This allows you to select multiple agencies by clicking Add from the Select Reporting Destinations dialog. |
| Product Name | Enables the user to select a Product Name as a search criterion. |
| Import Status | Enables the user to select Import Status as a search criterion. |
| Report Type | Select the report type, as applicable. |
| Date Range | Enables the user to select and specify the Date Range as the search criteria. |
| Start Date | Enables the user to enter the start date for the search. |
| End Date | Enables the user to enter the end date for the search. |
| Range | Enables the user to select a Range as a search criteria. |
| Retrieve | Enables the user to retrieve any stored search criteria. |
The system places the search results in the Total Number of Rows section.

The following table describes the columns in the Total Number of Rows section.
| Field | Description |
|---|---|
| Originated Case# | Displays the Originated Case Number of the case. |
| Initial/F-U/Nullification | Displays the Initial/F-U/Nullification status. |
| Trading Partner | Displays the name of the trading partner. |
| World Wide Unique# | Displays the World Wide Unique # of the case. |
| Import Status | Displays the import status of the case. |
| Warnings / Errors | Displays warnings/errors associated, if any. |
| Accepted / Rejected By | Displays who accepted or rejected the case. |
| Notes | Displays the notes for the case, if any. |
| Interchange Date | Displays the Case Number with which the case has been imported on the specified interchange date. |
| Date Imported/Rejected | Displays the date the case was imported/rejected. |
| ICK/ACK Sent | Displays the status of the ICK/ACK.
|
| EDI Out | Displays the EDI Out status.
|
You can view or print a submitted report from the Submitted Reports dialog box. Select Reports-->Compliance-->Submitted Reports to access the Submitted Reports.
This section contains information about regulatory reports and includes discussions of the following:
General Usage Information
Scheduling Expedited Reports
Viewing Submitted Reports
Faxing or E-mailing Reports
Viewing Blank Report Forms
This section provides general usage information for expedited reports and includes discussions of the following:
Paper Reports
Report Generation Rules
Case Deletion
Changes to Cases
Manually Schedule Nullification Reports
Downgrading a Report
Draft Reports
The system enables you to generate and submit 12 expedited paper reports: six (6) for marked drugs and six (6) for Investigational Drugs.
PMDA Forms for Marketed Drugs
Drug AE/Infection Case Report -- Form 1
Drug AE/Infections Case -- Form 2 (5 pages)
Surveillance Report on Drug, Quasi, Drug, Cosmetic Case Report -- Form 3
Surveillance Report on Drug, Quasi Drug, Cosmetic Case Report -- Form 4
Surveillance Report on Measures Taken for Drug Outside Japan such as Product Termination, Recall, Rejection, etc. -- Form 5
Surveillance Report on Measures Taken for Drug Outside Japan such as Product Termination, Recall, Rejection, etc. -- Form 6
PMDA Forms for Investigational Drugs
Investigational Product A/E Infection Case Report -- Form 1
Investigational Product AE/Infections Case -- Form 2 (5 pages)
Surveillance Report on Investigational Product Research Report -- Form 3
Surveillance Report on Investigational Product Research Report -- Form 4
Surveillance Report on Measures Taken for Investigational Product Outside Japan such as Product Termination, Recall, Rejection, etc. -- Form 5
Surveillance Report on Measures Taken for Investigational Product Outside Japan such as Product Termination, Recall, Rejection, etc. -- Form 6
The following table shows the relationship between the reporting category and the paper form.
| Category Identifier | E2B Value | Reporting Category | Paper Report |
|---|---|---|---|
| A | 1 | Domestic/Infection Report (marketed drug) | Marketed: Form 1, 2 (5 pages) |
| B | 2 | Domestic/ADR Report (marketed drug) | Marketed: Form 1, 2 (5 pages) |
| C | 3 | Overseas/Infection Report (marketed drug) | Marketed: Form 1, 2 (5 pages) |
| D | 4 | Overseas/ADR Report (marketed drug) | Marketed: Form 1, 2 (5 pages) |
| E | 5 | Research/Infection Report (marketed drug) | Marketed: Form 3, 4 |
| F | 6 | Research/ADR Report (marketed drug) | Marketed: Form 3, 4 |
| G | 7 | Measures in foreign countries including discontinuing manufacture, recall, and withdrawn (marketed drug) | Marketed: Form 5, 6 |
| H | 8 | Domestic Infection Report (investigational drug) | Investigational: Form 1, 2 (5 pages) |
| I | 9 | Domestic/ADR Report (investigational drug) | Investigational: Form 1, 2 (5 pages) |
| J | 10 | Overseas/Infection Report (investigational drug) | Investigational: Form 1, 2 (5 pages) |
| K | 11 | Overseas/ADR Report (investigational drug) | Investigational: Form 1, 2 (5 pages) |
| L | 12 | Research/Infection Report (investigational drug) | Investigational: Form 3, 4 |
| M | 13 | Research/ADR Report (investigational | Investigational: Form 3, 4 |
| N | 14 | Measures in foreign countries including discontinuation of the manufacture, recall, and withdrawn (investigational drug) | Investigational: Form 5,6 |
| O | 15 | Research Report (Quasi Drug) | Marketed: Form 3, 4 |
| P | 16 | Research Report (Cosmetics) | Marketed: Form 3, 4 |
The system displays the following PMDA form list in all the report listing sections of the application:
Marketed Drug Case Report Form 1 and Form 2
Marketed Drug Research Report form 3 and Form 4
Marketed Drug Measures in Foreign Countries Report Form 5 and Form 6
Investigational Drug Case Report Form 1 and Form 2
Investigational Drug Research Report Form 3 and Form 4
Investigation Drug Measures in Foreign Countries Report Form 5 and Form 6
Reports are grouped according to their characteristics. For example, market report 1 and 2 will be generated together on the same PDF.
The names of Japanese forms display in both Japanese and English.
The report form list appears in the following locations in the application:
Console J: Expedited Report Rules, Form Section
Console J: Code List/Batch Report Generation Case Form Regulatory Reporting Tab, Draft
Schedule New Expedited Report Dialog Box: Form Section
Utility Blank Report Form UI
E2B Viewer Report Form Listing UI
Medical Review: Preview of Expedited Report
Create Unscheduled Report
View Submitted Report
Worklist Report Filter
Bulk Report by Form
The regulatory reporting rules and algorithm enable you to create and schedule reports based on the regulatory specifications.
Reporting Rules Configuration Fields
The reporting rules algorithm schedules reports for Japan based on the License caegory and Reporting category fields.
Japanese Aware Date
The reporting rules algorithm caulates the due date for Japanese reports based on the Japanese aware date as follows:
For a domestic case, the Japanese aware date is the same as the latest significant follow-up date or the Initial Receipt date (from the PMDA tab) whichever is latest.
In a foreign case, the Japanese aware date is the same as the Japanese significant follow-up date of the Japanese Receipt Date (from the PMDA tab) whichever is latest.
Multiple Reports for a Case
The reporting rules algorithm schedules multiple report for a cased based on PMDA requirements. PMDA requies submitting multiple reports for multiple marketed and investigational licenses. The number of reports submitted is determined based on the following:
The system submits reports for valid (not withdrawn) marketing or investigational licenses in Japan only for the suspect company products in the case.
The system submits a separate report for each suspect company product with a license in Japan as defined in Argus Console in the "allow multiple reports for single case for Marketed and Investigation" parameter.
The system display a single row for each report on the Case Form Analysis-->PMDA-->General tab.
If the "Allow multiple report for Maketed" parameter is set to No, auto scheduling schedules a report with a direct Japanese license. If there are multiple direct Japanese licenses, the system selects the licese with the earliest award date.
Be aware of the following report generation rules.
You can manually schedule with any available report forms. When the system generates the report form, it checks the association between the reporting category and the report forms If the report forms don't match the selected reporting category, the system presents the following message: "This case does not have a matching reporting category for the selected report forms."
The expedited reports retrieve report data from the E2B XML file. If the system encounters errors during this process it presents an error message.
The following scenarios describe how the nullification reports are scheduled.
Case Deletion
Changes to Cases
Manual Scheduling
Case Deletion
If you delete a case that has submitted rpeorts to the Japanese authority, the system prompts you to provide a justicfication for deleting the case and opens the Action Justification dialog box. the system requires you to enter data in eevery field in the dialog box. You can select the justification from the drop-down list or enter the justification manually. However, if you choose to enter the justification manually, you must enter the justification in both Japanese and English.
Changes to Cases
The application automatically schedules a nullification report when you do any of the following to a case:
Delete a company product
Modify a company product in such a way that it is no longer a company product
Recode a company drug to another company drug
Make a change to patient exposure for a study drug
Change a drug so that it is no longer a suspect drug
Manual Scheduling
You manually schedule and E2B nullification report. This function is available only to Japanese users.
To manually schedule a nullification report
Select Report-->Compliance-->Submitted-->Search Case or select Report-->Unsubmit submitted E2B Report.
Click the Submitted icon to open the Unsubmit Report menu and click Unsubmit Report.
Select Nullification to open the Justification dialog box.
Enter the justification information and click OK.
The system schedules the nullification report.
The application permits you to downgrade a report if necessary. You must perform this action manually using the New Expedited Report dialog box.
To downgrade a report
In the New Expedited Report dialog box, select Downgrade Report from the Report Information drop-down list.
Enter the appropriate information in the fields and click OK.
When the system opens the Justification dialog box, enter the reason for downgrading the report and click OK.
You can go to Case Form --> Regulatory Reports to manually schedule expedited reports from the Expedited Reports dialog box.
The following table lists and describes the fields in the Expedited Reports dialog box.
| Field/Control Name | Description |
|---|---|
| View Individual | Click to view an individual report. |
| View Group | Click to view a group of reports assigned to a specific group. |
| View All | Click to view all reports. |
| Total Number of Rows | The total number of rows in the list. |
| Displaying Rows | The number of rows that display at the same time. |
| Page Size | The number of rows that display on a single page. |
| Selected | Click this checkbox to select a report. |
| Lock State | Identifies the status of the report. Report status can be one of the following:
|
| Case Number | The unique value that identifies a specific case. If the report does not have a Japanese value, the system displays the English value followed by "no translation." |
| Country of Incidence | The name of the country where the adverse event occurred.If there is not a Japanese value for this field, the system displays the English value followed by "no translation." |
| Report Type | Identifies the type of report. This information is from the Case form. |
| Suspect Product | The name of the product suspected to have caused the adverse event. |
| Diagnosis | The diagnosis for the adverse event. |
| Event Verbatim | Can be one of the following:
|
| Report Form | The name of the form used for the report. |
| Destination | The name of the agency the report is being sent to. |
| Initial/Follow-up | Indicates whether the report is the initial report (I) or a follow-up (F/U) report. |
| Due Date | The date the report is due in YYYY/MM/DD format. |
| Days Past Due | The number of days the report is past due. |
| Downgrade | |
| Batch Print or Create Report | Enables you to create a batch for printing or print a single report. |
| Print List | Click this button to print a list of reports. |
This section provides information about Period Reports and includes discussions of the following:
PSR/ReSD Reports
Clinical Study Periodic Safety Reports
Scheduled Periodic Reports
Unscheduled Periodic Reports
The system enables you to define Periodic Safety Reports (PSR) for specific products. The purpose is to define a fixed set of PSR reports for a Primary Agency and associate products with the reports. Once defined, you can have the system schedule automatic delivery of these reports.
The system provides a configuration screen that enables you to define a PSR. Select Reports-->Periodic Reports-->PSR/ReSD to open the Periodic Safety Report window.
Select Reports-->Periodic Reports-->PSR/ReSD to open the Periodic Safety Report Library screen. From this screen, you can open the configuration window that enables you to define a PSR. You need to choose New to create a new configuration or Modify to modify an existing configuration. The system provides a list of reports that includes the following information:
| Field/Control Name | Description |
|---|---|
| Category | Identifies the category the report belongs to. |
| Subcategory | Identifies the subcategory the report belongs to. |
| Report Name | Indicates the name of the report. |
| Inclusion Start Date/Stop Date | Identifies the date range for the report. |
| Draft/Final | Indicates whether this is a draft or final version of the report. |
| Author Created | The name of the person who created the report. |
| Author Modified | The name of the person who modified the report. |
| Date Created | The date the report was created. |
| Date Modified | The date the report was modified. |
| Justification | The reason for creating or modifying the report. |
When viewing this page, be aware of the following:
This page shows a list of PSRs stored in the system. You can do the following:
Click New Report to create a new report.
Click Copy to make a copy of an existing report.
When you copy an existing PSR, the system copies the entire report including the timeframe rows.
The name of the copy has "Copy of" before the report name.
When you copy the report, the system copies the past dates in the schedule frequency, JAD, IBD, and the assigned date as read-only text. You can modify other sections of the report
When you copy an unsubmitted PSR report, the system copies the entire report including the timeframe rows. Because the report was unsubmitted, the timeframe rows, JAD, IBD, and Assigned are editable or non-editable depending on their configuration in the original report.
Click Modify to display the report definition.
Click Delete to delete a report. The system presents the confirmation message. Click "Yes" to delete the report.
Click Print to print the report. The system presents a dialog box to enable you to select from several preview or direct export options.
The Delete function is available only if no final reports have been generated. Clicking Delete hides the report but does not delete it from the system.
In the Periodic Report section, a link is available for the last executed report only if the report is still available on the report server.
When you click New or Modify, the system opens the PSR Configuration window.
When the state of the report changes to "Submitted," the system disables the OK button to prevent you from updating the PSR configuration.
When a report has a Submitted status, the system only prints the configuration page.
You can copy a report as long as the configuration for the report is available.
Before the system permits you to save a PSR configuration, you must enter a value in the Report Name, Primary Agency, Product Selection and time frame fields.
If you fail to enter a Report Name, the system presents the following message: "Report Name is not entered. It is necessary to enter the above information in order to save the configuration."
If you fail to enter the Primary Agency, the system presents the following message: "Primary Agency is not entered. It is necessary to enter the above information in order to save the configuration."
If you fail to select a product, the system presents the following message: "Product is not selected. It is necessary to enter the above information in order to save the configuration."
If you fail to enter at least one time frame, the system presents the following message: "Investigation time frame is not configured. It is necessary to enter the above information in order to save the configuration."
If you fail to enter multiple parameters, the system presents the following error message:
" <Parameter> is not entered.
Parameter> is not entered.
It is necessary to enter the above information in order to save the configuration."
If you click the Modify, Copy, Delete, or Print buttons without selecting a report, the system presents the following error message: "Please select a report." Click OK.
PSR Main Window
Once you select a report, the system opens the PMDA Reports window. The window has the following tabs:
Subject of Report
Product Selection
Periodic Safety Report/ReSD
Scheduling
Security
The Subject of Report tab enables you to define a periodic report. The following is an illustration of the Subject of Report tab.
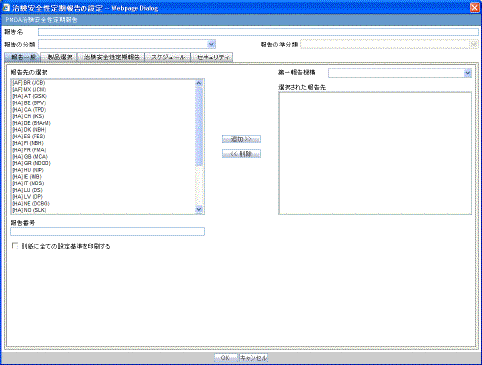
The following tables lists and describes the fields on the Subject of Reports tab.
| Field Name | Description |
|---|---|
| Report Name | Enter the name of the report. The name you enter in this field displays on the Reports-->PSR Reports dialog box. |
| Report Category | Enter the report category name in this field. The name you enter here displays in the Reports-->PSR Reports dialog. |
| Report Subcategory | Enter the report subcategory name in this field. The name you enter here displays in the Reports-->PSR Reports dialog. |
| Selection of Reporting Destination | This is a list of the Regulatory Authorities configured in List Maintenance. If there is no Japanese authority name configured, the system lists the English name.
You can select multiple agencies from the list to enable simultaneous submission to multiple agencies. |
| Primary Reporting Agency | Select the Primary Agency from the drop-down list.
If a message profile is not defined for the Primary Agency, the system presents the following message: "Selected Primary Agency doesn't have configured Message Profile (I or J) in Argus Console/Reporting Destination/EDI. When you click OK, the Primary Agency reverts to the previous selection. |
| Selected Reporting Destination | The list of Regulatory Authorities that receive the report. |
| Report Number | Enter the unique value that identifies the report in this field. |
| Print all configuration criteria on separate cover page | When checked, the system prints the report configuration when it prints the report. The system prints the configuration page at the beginning of the PSR/ReSD report. Page numbering for the report does not include the configuration page. |
Product Selection Tab
The Product Selection tab enables you to select the products to include in the report. The following is an illustration of the product selection tab.
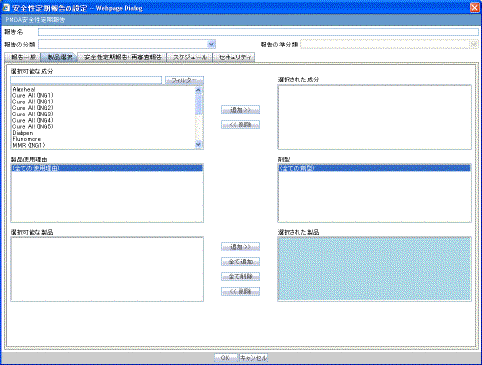
The following table provides information about the fields on the Product Selection tab.
| Field Name | Description |
|---|---|
| Ingredient | When you select a product, the application displays a list of ingredients for the selected product.
You can filter the ingredients in the list of available ingredients by entering the Ingredient name and clicking Filter. |
| Selected Ingredients | The list of selected ingredients for the PSR product family. |
| Indication | A list of indications configured for the product containing the selected ingredient.
To select multiple indications, hold CTRL and click each ingredient you want to include. If a Japanese name is not available for the indication, the system displays the English name. |
| Formulation | A list of formulations configured for the product using the selected ingredient.
To select multiple formulations, hold CTRL and click each ingredient you want to include. If a Japanese name is not available for the formulation, the system displays the English name. |
| Available Products | The system displays a list of products containing the selected ingredient. If a Japanese name is not available, the system displays an English name. |
| Selected Products | A list of products you selected from the Available Products list. When a product is selected, the field has a blue background. |
When a new product containing the same ingredient is released, you must set up the new configuration. Be aware of the following:
If a Japanese ingredient, indication, or formulation is not configured, the system displays the English name.
If you add or delete a product in the product selection field before the PSR/ReSD status is "Submitted," the system displays the following error message: "If the content of the selected product is changed, IBD, JAD, and Assigned date can possibly be changed. Do you want to proceed?"
If you add or delete the products in the Product Selection field before the first PSR report is submitted, the system updates the IDB Japan award date, and the Assigned Date based on the new product set.
If you copy an existing submitted PSR, and the JAD, IBD, and assigned dates are read-only, the subject dates do not change and the system displays the following error message: "Because the configuration has the record of past investigation period, JAD, IBD, and Assigned Date for scheduling configuration will not be changed by modifying the Selected Products. It is necessary to use the "Reset" button and re-configure the investigation period if new PSR needs to be created based on modified product selection."
All forms printed as PSR and ReSD contain only the information about the selected product.
Periodic Safety Report/ReSD Tab
This tab enables you to select and configure either a PSR or an ReSD. The tab contains two radio buttons that enable you to select the type of report you wish to configure. Click Periodic Report to configure a PSR or click ReSD to configure an ReSD report. The following is an illustration of the tab.
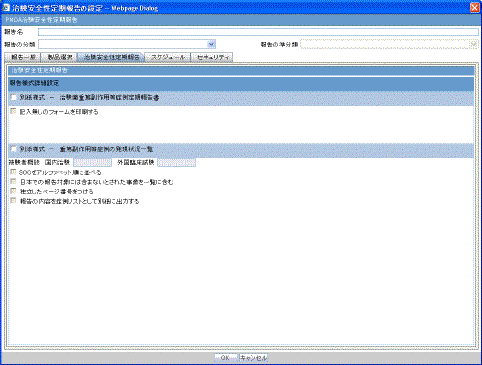
The following table lists and describes the fields on the tab.
| Report Section | Field Name | Field Description |
|---|---|---|
| PMDA | ||
| Forms Configuration | ||
| Periodic Safety Report | Enables you to choose whether to create a PSR or and ReSD report. | |
| Re-examination Submission Dossier | Enables you to choose to create a PSR or and ReSD report. | |
| Data Counting Configuration | ||
| Count Configuration | ||
| Exclude events which don't meet the condition from the past data | Enables you to eliminate events from the report. Reasons for not including an event in a report include the following:
|
|
| Exclude events which were reported on the Paper Report Form |
|
|
| Exclude Incompletion report from output. |
|
|
| PSR Report Form 3 | ||
| Form 3 Selection |
|
|
| Print Only the Term |
|
|
| Classify based on SOC |
|
|
| Print the report content as Case Listing in a separated report. |
|
|
| PSR Report FORM 4 | ||
| Form 4 Select |
|
|
| Print only the term |
|
|
| Order SOC Alphabetically |
|
|
| Non-Serious Unlisted PSR Report | ||
| Paper Report | Click Paper Report to generate the paper report format. This is the default. | |
| FD Report | Click FD Report to generate the report in CSV report format. | |
| PSR Report Form 7-1 | ||
| Form 7-1 |
|
|
| Print a Blank Form |
|
|
| PSR Report Form 7-2 | ||
| Form 7-2 Selection |
|
|
| Print a separate Case Listing report. |
|
|
| Separate Page Numbering |
|
|
| ReSD Report Form 4 | ||
| Form 4 |
|
|
| Print Only the Term |
|
|
| Classify based on SOC |
|
|
| Print a separate Case Listing Report. |
|
|
| ReSD Report Form 5 | ||
| Form 5 |
|
|
| Print Only the Term | Enables you to select which term (PT or LLT) to print on the form.
|
|
| Order SOC Alphabetically |
|
|
| ReSD Report Form 7 | ||
| Form 7 |
|
|
| ReSD Form 8 | ||
| Form 8 |
|
|
| ReSD Form 9 | ||
| Form 9 |
|
|
| Report Tabulations | ||
| Tabulations |
|
|
| Tabulation for Unlisted Events |
|
|
| Tabulation for Listed Events |
|
|
| Case Overview Tabulations |
|
|
| Overdose Tabulation |
|
|
| Accident Exposure Tabulation |
|
Scheduling Tab
This tab enables you to configure report scheduling. The following is an illustration of the Scheduling tab.
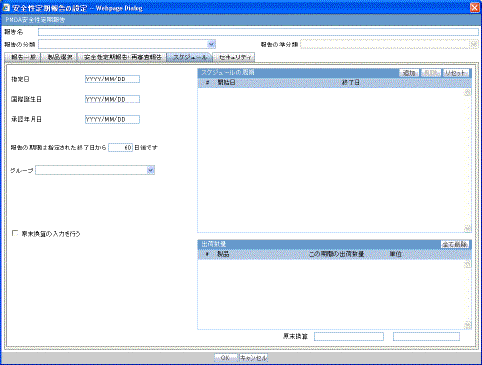
The following table lists and describes the fields on the scheduling tab.
| Field/Control Name | Description |
|---|---|
| Assigned Date | The system automatically populates this field. with the report date based on the values in either the International Birth Date field or the Japan Award date field.
|
| International Birth Date (IBD) | This is the date the product was first licensed.
|
| Japan Award Date (JAD) | The date the product was licensed in Japan.
|
| Report is due xx after the selected end date | This field enables you to set the PSR due date a specific number of days after the end date for the scheduling period. The system adds the value you enter in this field to the current end date and identifies it in the printed report as the report due date. |
| Group | This field enables you to specify which Argus group is responsible for the Periodic report after the application schedules it. This information appears on the group's Report worklist. |
| Start Date | The date the reporting timeframe began. You can enter the start date for each report timeframe starting period.
|
| End Date | The day the reporting timeframe ended. You can enter the end date for each report timeframe.If you enter an End date that is earlier than the start date, the system presents the following message: "End date must be after the Start date." When you click OK, the system removes the incorrect end date. |
| Reset | Click Reset to delete all the existing timeframe rows (editable and non-editable). Clicking "Reset" also enables you to enter values in the Assigned Date, JAD, and IBD fields.
The system presents the following message: "Clicking Reset removes all previous data. Do you want to proceed?" Click OK to continue with the reset. If you click Cancel, the system leaves the past data in the table. |
| Add | Click Add to add a timeframe row.
|
| Delete | Click Delete to delete an editable timeframe row. The system does not permit you to delete a timeframe row that cannot be edited. When you click Delete, the system presents the following message:" Do you want to delete the highlighted row?" |
Configuring Delivery Quantity
The Scheduling tab includes a Delivery Quantity section to enable you to specify the number of reports to print.
The following table lists and describes the fields in the Delivery Quantity section on the Scheduling tab.
| Field Name | Description |
|---|---|
| Clear All |
|
| Products |
|
| Delivery quantity during this period |
|
Security Tab
The Security tab enables you to share a report with other users. The following is an illustration of the Security tab.
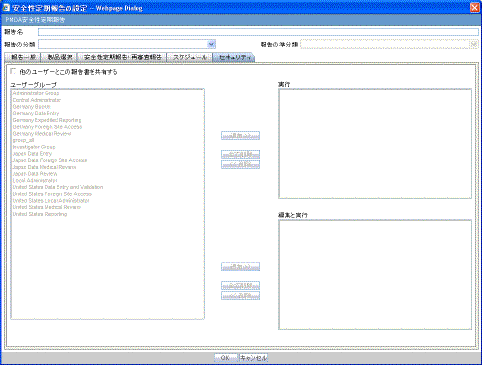
The following tables lists and describes the fields on this tab.
| Field Name | Description |
|---|---|
| Share this report with others? | When clicked, the system shares the reports with selected users and/or user groups. |
| User Groups | Contains a list of users you can share the report with. |
| Selected User Groups | Contains a list of users you selected to share the report with. |
| Modify & Execute | Enables you to modify the members of the groups. |
Printing a PSR/ReSD
The system enables you to print batches of reports. You define the batch print parameters in the Report Batch Printing dialog box . The following table lists and describes the fields in the Report Batch Printing dialog box.
| Field Name | Description |
|---|---|
| Run at | Enables you to specify the date and time to run the report. Date and time entry must be in the following format: YYYY/MM/DD 00:0.
If you fail to enter a date in this field, the system presents the following message: "Please enter a run date." Click OK and enter a run date in the field. |
| Print As | Enables you to specify how you want the report to print. Available options are Final, Draft, Internal, or Other. If you specify Other, you must enter a value in the associated text field. |
| Due Date | Automatically populates the this field based on the due days entered on the scheduling tab. |
To print a report
Select Reports-->Compliance-->Periodic Reports-->View Report.
Check out the report from the "View and edit PSR/ReSD popup.
Edit the document as necessary and check it in.
Publish the resulting PDF file.
Be aware of the following printing information
You can print the report and use Word to update the resulting document.
You can change the configuration for the investigational timeframe multiple times before you submit the report. However, once you submit the report, you cannot change the configuration.
You can view the report by selecting Reports-->Compliance-->Periodic Reports-->View Report.
The following table lists and describes the fields on the Periodic Report list.
| Field Name | Description |
|---|---|
| View All | Enables you to view a list of all periodic reports. |
| Total Number of Rows | Indicates the total number of rows the system displays in the window. |
| Page Size | Enables you to select the number of rows to display on each page of the list. |
| Trade Name | The trade name for the drug. If a Japanese name is available, it displays here. If a Japanese name is not available, the system displays the drug's English trade name. |
| Destination | Displays the destination for the report. If Japanese data is available, the system displays it. If it is not available, the system displays English data.
If a destination is not available, the system displays the following: "No specific receiver." |
| Due Date | The date the report is due. The system displays this information in YYYY/MM/DD format. |
| Status | Identifies the status of the report. Status can be one of the following:
|
Report output is in a Word document to enable you to edit the report before generating a final version. You must check the Word documents in and out.
When you generate a report, the system displays the Check Out button to enable you to revise the document. The "Publish" button is disabled.
Only one user at a time can check a document in or out.
When you check out a document, the button label changes to "Check In." Click this button to check a file in.
You can check a document in and out multiple times. However, more than one user cannot check out the same document simultaneously.
You can check out and check in unpublished documents. Once a document is published, you can no longer check it out.
The system enables the Publish button the first time a document is checked in.
When you check in a document, the system opens a dialog box to enable you to specify a file name.
The system disables the publish button when a document is checked out.
Once a document is published, it cannot be checked out.
When you Publish a document, the system converts the document to PDF format and the Word version of the document is no longer available to you.
|
Note: If the generated report has a row spanning the whole height of the page and there seems to be data missing in that row, the user needs to select the table, do a right click, select Table Properties and in the Rows tab in the properties dialog, check the checkbox for “Allow row to break across pages”. This will allow the row to span across multiple pages and the truncated data will be shown on the next page.” |
Deleting a PSR/ReSD
The system enables you to delete a PSR/ReSD. When you select a report and click Delete, the system presents the following message: "Are you sure you want to remove this report configuration?" Click "Yes" to continue with the delete operation; otherwise, click No.
The system enables you to schedule Periodic Reports from the Periodic Reports window. Select Reports-->Regulatory Reports--> Periodic Reports to open the window.
The following table lists and describes the fields on the Periodic Reports window.
| Field/Control Name | Description |
|---|---|
| View All | Click this checkbox to view a list of all periodic reports |
| Total Number of Rows: 150 | The maximum number of rows that display in the window. |
| Displaying Rows | Identifies the rows currently being displayed. |
| Page Size | Indicates the number of rows that display on each page. |
| Trade Name | The name of the drug. If there is not a Japanese name for the drug, the system displays the name in English followed by "no translation." |
| Destination | The name of the agency receiving the report. |
| Description | The generic name of the drug. |
| Due Date | The date the report is due in YYYY/MM/DD format. |
| Status | The status of a report. This can be one of the following:
|
| Create Unscheduled Report | Click to create an unscheduled periodic report. |
| Print List | Click to print the report list. |
The system enables you to create the following kinds of unscheduled periodic reports:
ICH PSUR
IND
NDA
CTPR
PSR/ReSD
Clinical Study PSR (CSPSR)
To create an unscheduled periodic report
Select Reports-->Compliance-->Periodic to review the list of scheduled periodic reports.
Click Create Unscheduled Report.
When the system opens the dialog box, select the type of report to create.
Enter the appropriate information in the dialog box and click OK.
When the system opens the scheduling dialog box, enter the appropriate information and click OK.
You can configure and generate Clinical Study Periodic Safety Reports for various products. Once you define a fixed set of CSPSR for a Primary agency, you can associate products in the reports and schedule the CSPSR so the system generates them automatically.
You can define a CSPSR by selecting Reports-->Periodic Reports-->Clinical Study Periodic Safety Report. The system opens the window that displays a list of all CSPS Reports stored in the system.
When you configure a CSPSR, you must, at a minimum, provide the following information:
Report Name
Primary Agency
Time frame
The following table lists and describes the fields and controls in the Clinical Study Periodic Safety Report window.
| Field/Control Name | Description |
|---|---|
| Category | Identifies the report category. |
| Sub Category | Identifies the sub category the report is associated with. |
| Report Name | The name of the report. |
| Inclusion Start Date/Stop Date | The date range for the report. The date is in the following format:
YYYY/MM/DD -- YYYY/MM/DD. |
| Draft/Final | Indicates whether the report is in a draft or final state. |
| Author Created | The name of the person who created the report. |
| Author Modified | The name of the person who modified the report. |
| Date Created | The date the report was created in the following format: YYYY/MM/DD. |
| Date Modified | The date the report was modified in the following format: YYYY/MM/DD |
| Justification | The reason for creating/modifying the report. |
| Search | Enables you to search for a report. |
| Clear | When clicked, clears all data from the fields on the screen. |
| Total Number of Rows | The total number of rows of report information. |
| Page Size | The number of rows of data that display on each page. |
| New Report | Click this button to create a new CSPSR. The system opens the CSPSR Configuration window. |
| Copy | Click this button to copy a selected CSPSR.
When you copy a CSPSR, the system copies all report configuration information, including timeframe rows. The name of the copied report is Copy of <Report Name>. If you copy a submitted report, the following information is read-only
If you copy an unsubmitted CSPSR, the system copies all the configuration information, including timeframe rows. Depending on how they were configured in the original report, the configuration information may be editable. |
| Modify | Click this button to modify a selected CSPSR. The system displays the report definition.
When you open a report that is currently in use, the system presents the following message: "The report which is selected is being used by <User Name> and cannot be modified." |
| Delete | Click this button to delete a selected CSPSR. The system presents a confirmation dialog box to enable you to confirm or cancel the delete operation.
The delete option is available only if no Final Reports have been generated. The delete operation removes the report from the list, but does not delete it in the database. |
| Click this button to print a selected CSPSR. |
When you submit a report, the system changes the status of the report to "Submitted." Once the status has been changed, you cannot modify the CSPSR configuration. If you try to modify a submitted report, the system presents the following error message: "This configuration is not modifiable because the status of this Clinical Study Periodic Report is Submitted. If you wish to modify a submitted report, you must unsubmit it.
You define a Clinical Study Periodic Safety report by entering report information on the following tabs:
Subject of Report
Product Selection
CSPSR
Scheduling
Security
The system permits you to enter information about the report and its recipients on this tab.
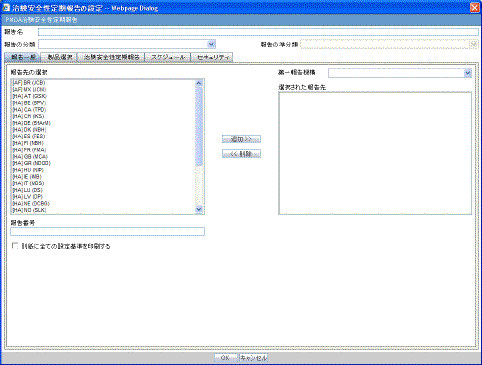
The following table lists and describes the tab fields/controls.
| Field/Control Name | Description |
|---|---|
| Report Name | Enter the name of the report in this field. |
| Report Category | Enter the Report Category name in this field. |
| Report Subcategory | Enter the name of the Report Subcategory in this field. |
| Agency | Select the name of the agency that is to receive the report from the list.If there is no Japanese authority, the system lists the English name.
Select the agency from the list and click >> to move it to the Selected Agencies list on the right. |
| Multiple Agencies | If you need to submit the report to more than one agency, select them from the drop-down list. |
| Report Number | Enter the report number in the field. |
| Print all configuration criteria on separate cover page. | Click the checkbox to print the report configuration at the beginning of the CSPSR. |
| Allow access to report cases through Hit List | Click this checkbox to place a final report on a Hit List. This enables you to retrieve the report from other areas of the application using advanced conditions functions. |
This tab enables you to select ingredients, indications, and product formulations to include on the CSPSR. The following is an illustration of the Product Selection tab.
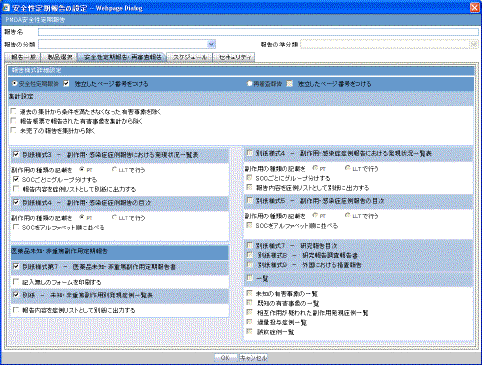
The following tables lists and describes the fields/controls on the Production Selection tab.
| Field/Control | Description |
|---|---|
| Available Ingredients | Select a list of ingredients to include in the report. Click >> to move the selected ingredients from the Available Ingredients list to the Selected Ingredients list. |
| Indication | Select the appropriate indications from the list. |
| Formulation | Select the appropriate formulations from the list. |
| Available Products | The system populates this field with a list with all products that contain the selected ingredients. Select one or more products from this list and click >> to move them to the Selected Products list on the right. |
| Selected Products | This field contains a list of products selected from the Available Products list on the left. |
Be aware of the following:
The system displays English names if Japanese ingredients, indications, or formulations are not configured in the Console.
If you move a product without a compound number to the Selected Products field, the system displays the following error message: "Selected product does not have a clinical compound number. The study product license must have at least one clinical compound number in order to include it in the report."
If you move a product without a matching study to the Selected Products field, the system displays the following message: "Studies that have the selected product's clinical compound number doesn't exist. Do you want to include the product in the report." If the user selects "Yes," the system places the product in the Selected Products field.
This tab enables you to configure the CSPSR. The following is an illustration of the tab. 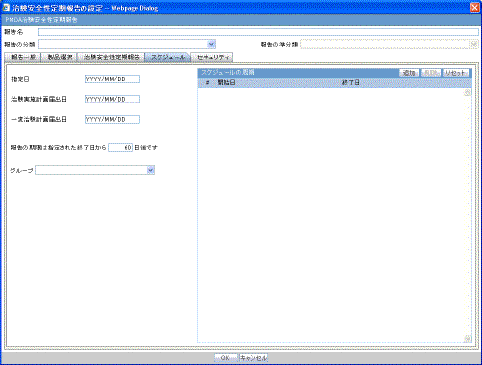
The following table lists and describes the fields on the tab.
| Field/Control Name | Description |
|---|---|
| Report Form -- Clinical Study Serious AE Case Periodic Report | Click this checkbox to configure a report with this name. |
| Print Blank Form | Click this checkbox to print a blank report form. |
| Report Form -- Serious AE Case Occurrence Status Listing | Click this checkbox to print a report with this title. |
| Number of Subject: Domestic Study __ Foreign Study | Enter the total number of subjects for the entire clinical study, domestic and foreign. You can enter a maximum of seven (7) digits in each field. |
| Order SOC Alphabetically | Click this checkbox to print the SOC in alphabetical order based on their English names. If you leave this box unchecked, the system prints the SOC in MedDra browser order. |
| Include Foreign AE marked as "Not include for the report in Japan" | Click this checkbox to include AEs in foreign cases with flags for "Not include for the report in Japan." |
| Separate Page Numbering | Check this checkbox to start page numbering at 1 for each CSPSR Line Listing. |
| Print the content of the report as case listing on separate page. | Click this checkbox to print the case listing on a separate page. |
This tab enables you to schedule reports. The following is an illustration of the Scheduling tab.

The following table lists and describes the fields on the scheduling tab.
| Field/Control Name | Description |
|---|---|
| Assigned Date | The system automatically populates this field. |
| Clinical Study Plan Submit Date (CSPSD) | Enter the date the Clinical Study Plan was submitted.
If the date you enter in this field is greater than the date for the Clinical Trial for Partial Change Plan Submit Date, the system presents the following error message: CSPSD cannot be after CTPCSD. If you change the Clinical Study Plan Submit Date, the system presents the following message: "If CSPSD is changes, assigned date will be changed. Do you want to proceed." If you click OK, the new value remains in the field. You can edit this field only if the a CSPSR is unsubmitted. Once submitted the field is read-only. |
| Clinical Trial for Partial Change Plan Submit Date (CTPCSD) | If you change this date to a date earlier than the CSPSD, the system presents the following error message: "CTPCSD cannot be earlier than CSPSD."
If you change this date the system presents the following message: "If CTPCSD is changed, the assigned date will be changed. Do you want to proceed?" If you click "OK," the new value remains in the field. You can edit this field only if the CSPSR has not been submitted and does not have previous non-editable timeframes. |
| Report is Due xx Days after Selected End Date | Enter the due date of the CSPSR to be xx number of days after the end date specified for the scheduling period. |
| Group | Select the name of the Argus group to be responsible for the Periodic report. |
| Start Date | The date the CSPSR reporting period begins.
If you enter a date that is earlier than the most current end date, the system presents the following message: "Start date must be the same day or after the latest end date." When the system auto-updates the start date, it presents the following message: "Start date for the reporting period has changed. Please update the End date accordingly." |
| End Date | Enter the date the reporting period ends.
If you enter an end date that is earlier than the start date, the system presents the following message: "End date must be after the start date. |
| Reset | Click Reset to delete all existing timeframe editable and non-editable time frame rows.
When you click Reset, the system presents the following message: "By using Reset, all past data will be removed. Do you want to proceed? If you click "OK' the system proceeds with the reset. |
| Add | Click Add to add a single editable row. |
| Delete | Click Delete to delete an editable row. You cannot use this button to delete a non-editable row. |
The security tab enables you to share a report with other users. The following is an illustration of the Security tab.
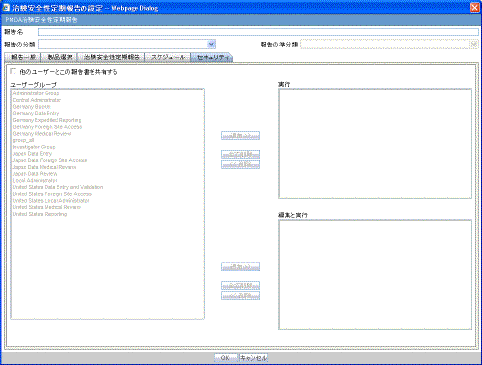
The following table lists and describes the fields on the Security tab.
| Field/Control Name | Description |
|---|---|
| Share this report with other users | Click this checkbox if you want to share the report with other users. |
| User Groups | Select the user groups you want to sent the report to and click Add to move the selected users to the Selected Users field. |
After you configure the CSPSR, click OK to print the report. The system opens the following dialog box.
The following table lists and describes the fields on the Report Batch Printing dialog box.
| Field/Control Name | Description |
|---|---|
| Run at | Enter the date and time to run the report in the following format: YYYY/MM/DD 00:00 |
| Run Now | Click this button to run the print now. |
| Print As | Click the appropriate button to print a Final report, a Draft report, an Internal report, or Other report. |
| Due Date | The system populates this field with report due date. |
When printing a report, be aware of the following:
You can print a report and update the Report output in a Word document.
When you select Draft, Internal, or Other, the system prints a watermark on the report.
You can view a report by selecting Reports-->Compliance-->Periodic Reports-->View Reports. The system put the report in an uploadable Word document.
If an English user has permission to access the CSPSR, the user can perform check-in/check-out, publish, and upload operations. The application UI displays in English. The following table lists and describes the fields on the Periodic Report List screen.
| Field/Control Name | Description |
|---|---|
| View All | Click to view all reports. |
| Total Number of Rows | Indicates the total number of rows to display on the page. |
| Displaying Rows | Lists the number of rows that display on the page. |
| Page Size | The number of rows that display on each page. |
| Trade Name | Displays trade names for a list of selected products.
If the selected product does not have a Japanese trade name, the system displays the English trade name. |
| Destination | Display the destination for the report. |
| Description | Displays a description of the report |
| Due Date | Displays the due date for the report. |
| Status | Displays the status of the report. This can be one of the following:
|
| Create Unscheduled Report | Enables you to create an unscheduled report. |
| Print List | Click this button to print the Periodic Report List. |
| View Report | Click this button to view the Periodic Report List. |
| Report Details | Click to display detailed information about a selected report. |
When viewing Periodic Reports, be aware of the following:
The system outputs the report in a Word document. This enables you to edit the document outside the system and publish a final Word document.
You must check out a report in order to revise it.
The system enables the Publish button after a document has been revised and checked in.
After the final Word document is created, the system saves the document in the repository.
When you click Publish a document, the system creates a PDF file.
You can view a report, check in a report, check out a report, or publish a report from the View and Edit CSPSR dialog box.
Click View to see a report.
Click Publish to publish the report.
Click Check-Out to check out a report.
Click Check-In to check in a report.
The following table lists and describes the fields/controls in the dialog box.
| Field/Control Name | Description |
|---|---|
| View | Click View to look at a Periodic Report. |
| Check In/Check Out | Click Check In to check in a checked out file. Once the document is checked in, the button label changes to Check Out. |
| Publish | Click Publish to convert the checked in document to a PDF. |
When you click Check In, the system presents the CSPSR Check In dialog box.
To check in or check out a report
Click Check in on the View and Edit PSR/ReSD dialog box.
When the system opens the Check In/Check Out dialog box, Enter the name of the file to check in/check out in the File name field.
Click OK.