| Skip Navigation Links | |
| Exit Print View | |

|
Sun Server X2-8 Product Documentation Sun Server X2-8 (formerly Sun Fire X4800 M2) Documentation Library |
| Skip Navigation Links | |
| Exit Print View | |

|
Sun Server X2-8 Product Documentation Sun Server X2-8 (formerly Sun Fire X4800 M2) Documentation Library |
Oracle Hardware Installation Assistant (OHIA)
How to Erase Your Boot Hard Disk
Selecting a Media Delivery Method
Local Installation by Accessing the Console Using the Serial or Video Port
How to Configure the Serial Port
Remote Installation by Accessing the Console Using Oracle ILOM
How to Access the Server Console Using Oracle ILOM Web Interface
How to Access the Server Console Using the Oracle ILOM CLI Interface
Installing Oracle Linux From Distribution Media
How to Download Oracle Linux Media
How to Install Oracle Linux From Distribution Media
How to Update the Oracle Linux Operating System
Installing Red Hat Enterprise Linux
Installing RHEL From Distribution Media
How to Download RHEL Media Kits
How to Install RHEL From Distribution Media
How to Update the RHEL Operating System
How to Update the RHEL Drivers
Installing SUSE Linux Enterprise Server
Installing SLES From Distribution Media
How to Download SLES Media Kits
How to Install SLES From Distribution Media
How to Update the SLES Operating System
How to Update the SLES Drivers
Configuring a Linux Server to Support PXE Installation
How to Install and Configure a DHCP Server for PXE
How to Install Portmap on Your PXE Server
How to Configure the TFTP Service on Your PXE Server
How to Configure PXELINUX on Your PXE Server
How to Configure the NFS Service on Your PXE Server
How to Disable the Firewall for SUSE Linux
How to Disable the Firewall for Oracle Linux or Red Hat Enterprise Linux
How to Create a PXE Installation Image for Oracle Linux
How to Create a PXE Installation Image for RHEL
How to Create a PXE Installation Image for SLES
How to Create a PXE Installation Image for Oracle VM
How to Install Linux From a PXE Server
Identifying Logical and Physical Network Interface Names for Linux OS Configuration
How to Identify Installed Network Ports
How to Identify Logical and Physical Network Interface Names While Installing Oracle Linux or RHEL
How to Identify Logical and Physical Network Interface Names While Installing SLES
This procedure creates a virtual disk where you will install the OS. It uses Manual Configuration to create a virtual drive using only one hard drive.
This is only one of many possible RAID configurations. To install a different RAID configuration, refer to the SGX-SAS6-R-REM-Z: Software User's Guide, available at: http://www.lsi.com/sep/Pages/oracle/sg_x_sas6-r-rem-z.aspx
The Launch Redirection screen appears.
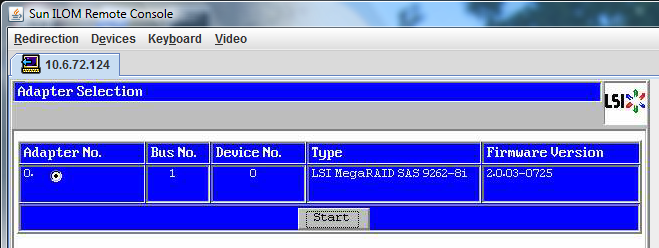
The MegaRaid BIOS Config Utility Virtual Configuration screen appears.
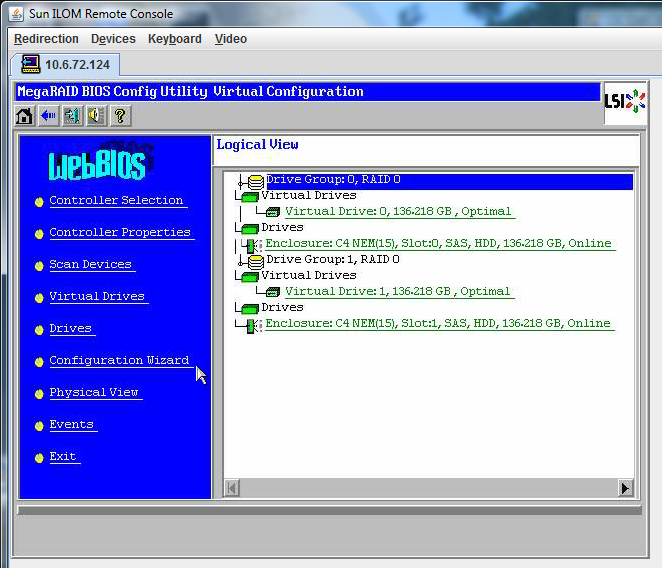
The MegaRaid BIOS Config Utility Virtual Configuration Wizard screen appears.
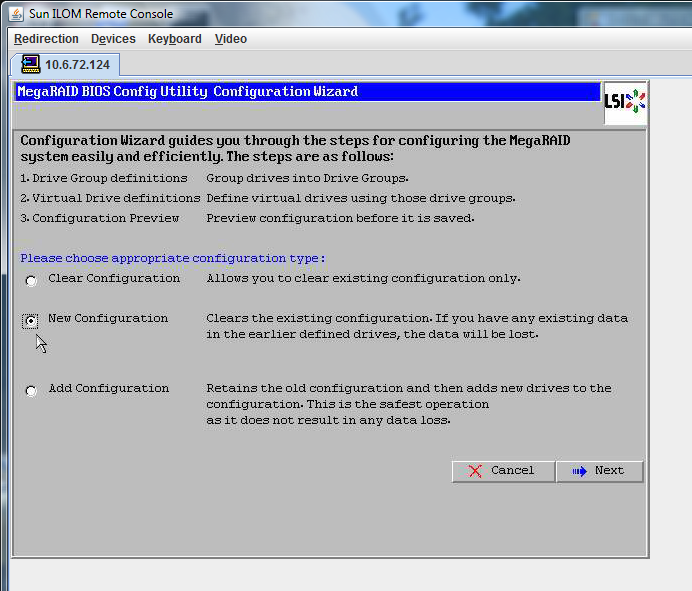
The Select Configuration window appears.
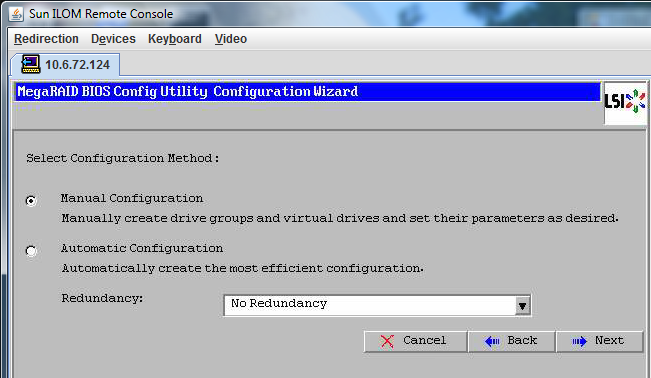
Automatic Configuration creates a single virtual drive that combines all the hard drives on your system into a single virtual drive with all data striped across all the drives.
The rest of this procedure uses Manual Configuration to create a virtual drive using only one hard drive. This is only one of many RAID options. To configure different RAID options, refer to SGX-SAS6-R-REM-Z: Software User's Guide available at http://www.lsi.com/sep/Pages/oracle/sg_x_sas6-r-rem-z.aspx.
.
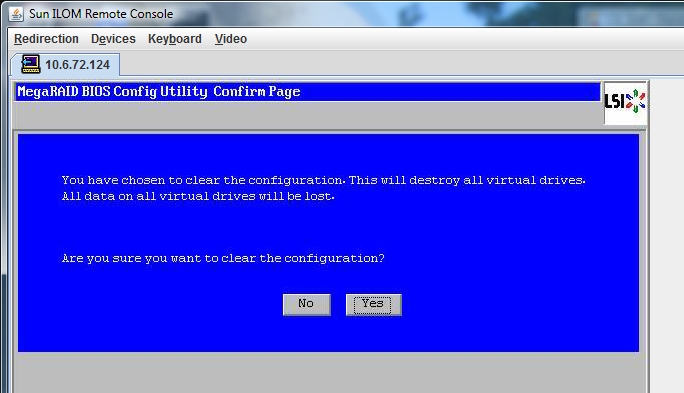
The MegaRAID BIOS Config Utility Config Wizard – Drive Group Definition screen appears, showing the drives in the system and the drive groups.
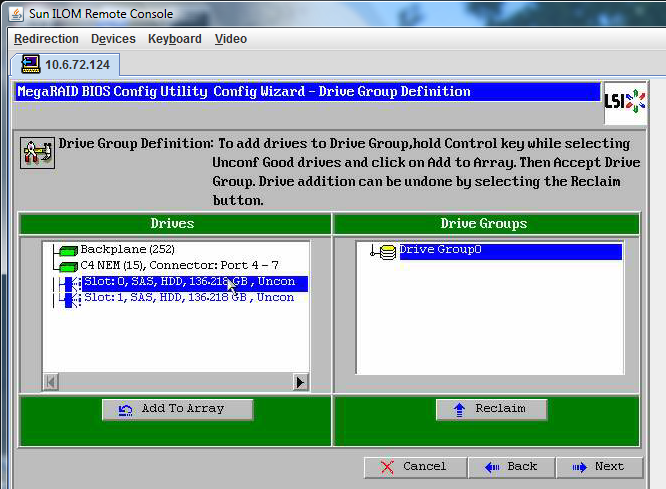
You can now view Drive Group 0.
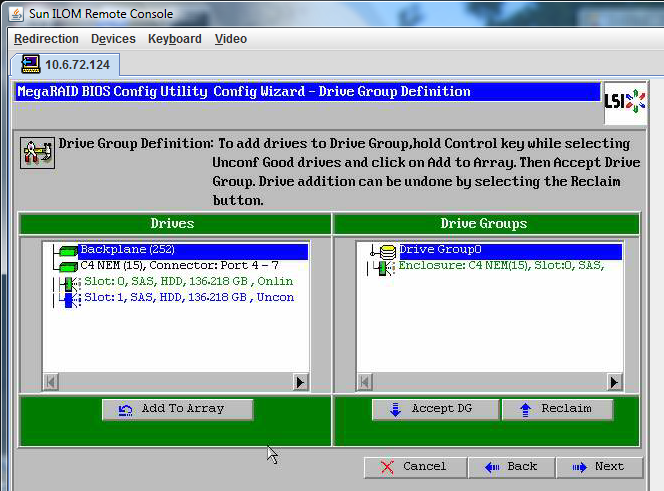
Note - You can undo the drive group selection by clicking the Reclaim button.
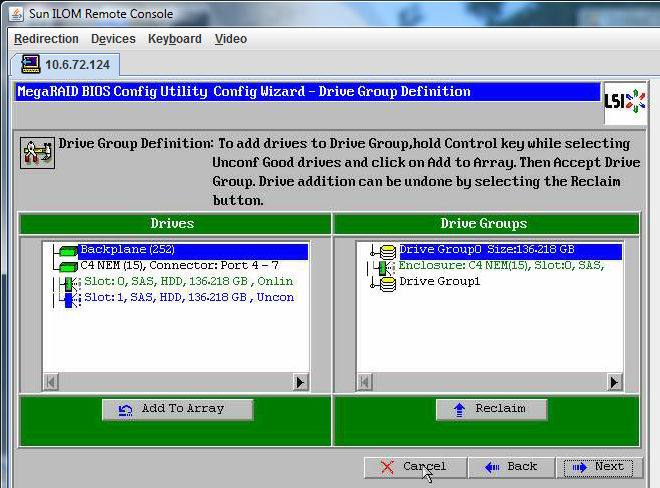
The drive group appears in the Span Definition window.
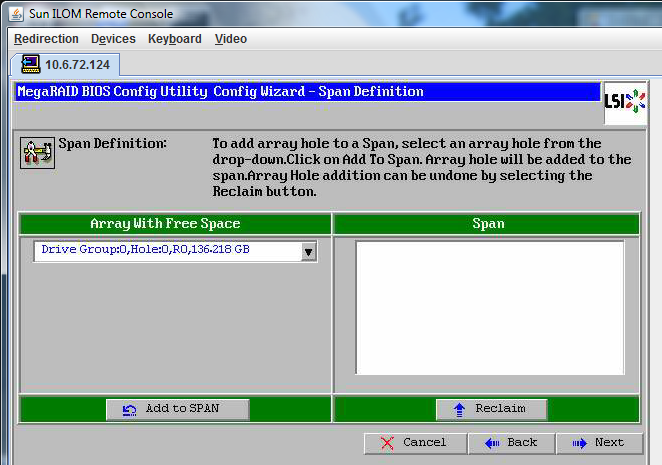
The drive group appears in the span.
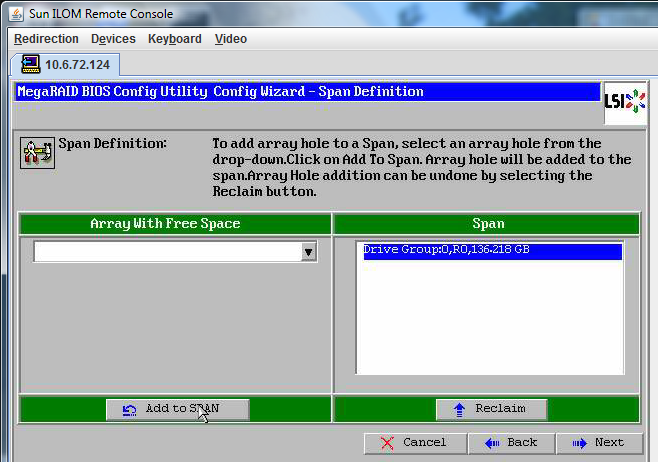
The Virtual Drive Definition screen appears.
For more information about configuring RAID, refer to your server's disk management documentation.
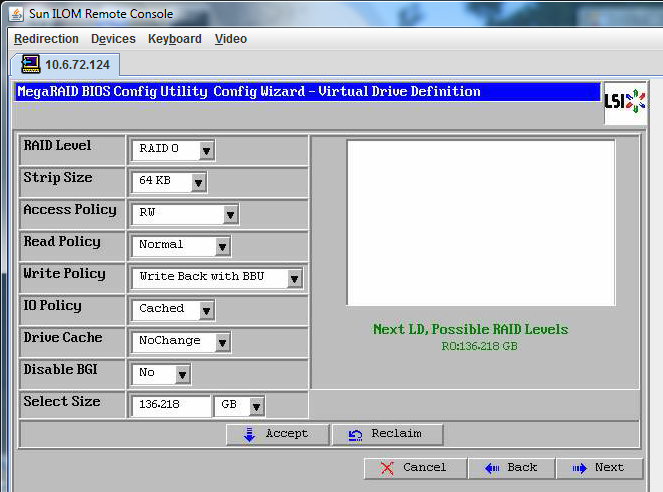
The system prompts you to confirm Write Back with BBU mode.
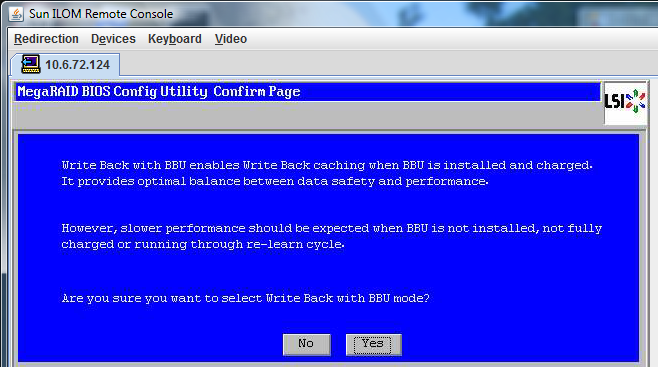
The Config Wizard— Virtual Drive Definition window appears.
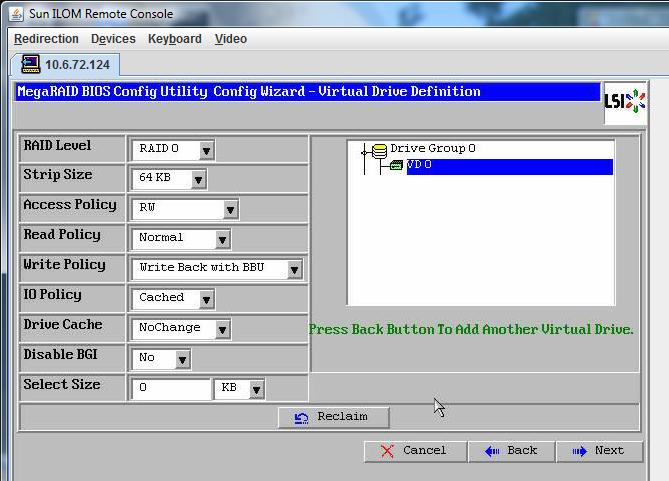
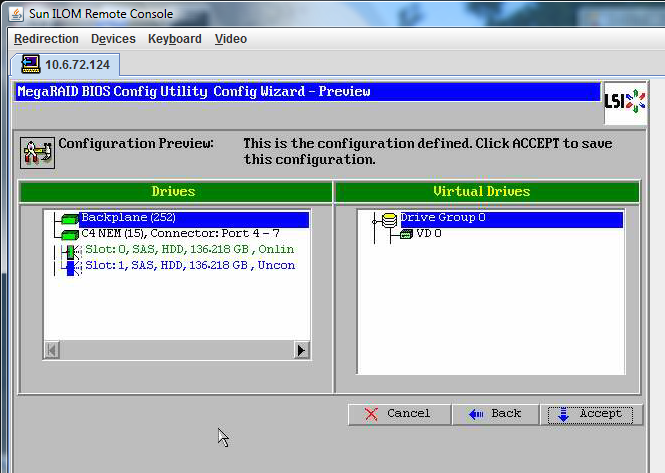
The Preview screen appears.
The example graphic shows a single virtual drive using the Manual Configuration option, then click Accept.
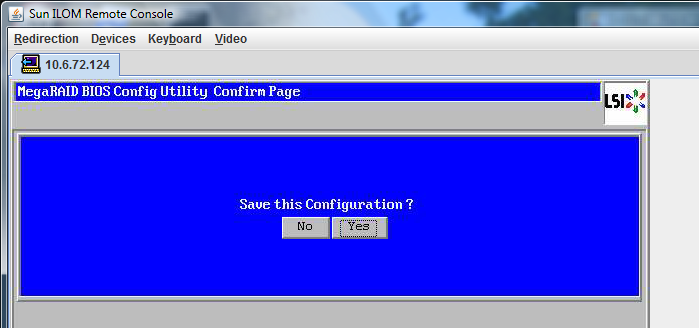
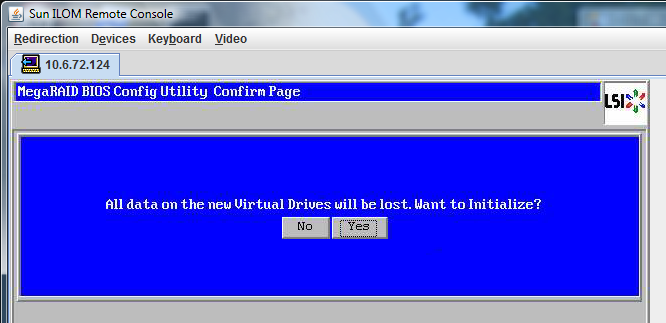
The prompt appears: All data on Virtual Drives will be lost. Want to Initialize?
The Virtual Drives list appears.
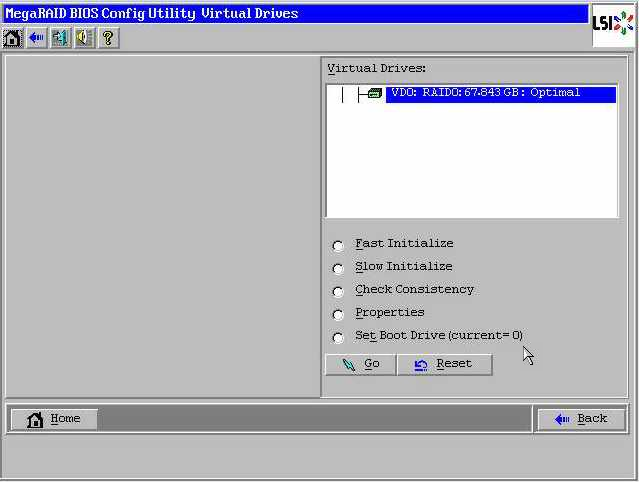
The MegaRaid BIOS Config Utility Virtual Configuration screen appears.

The system reboots.
See Also