| Oracle® On Track Communication Installation Guide Release 1 (1.0) Part Number E20956-03 |
|
|
View PDF |
| Oracle® On Track Communication Installation Guide Release 1 (1.0) Part Number E20956-03 |
|
|
View PDF |
A domain is a logically related group of Oracle WebLogic Server resources. It consists of a special Oracle WebLogic Server instance known as Administration Server, which is the central point. You can configure and manage all resources in the domain from the Administration Server. Any additional Oracle WebLogic instances in a domain are known as Managed Servers. You can run Oracle On Track on the Administration Server or on the Managed Servers.
This chapter discusses the process of creating an Oracle WebLogic domain.
This chapter consists of the following sections:
Note:
If you are using Oracle WebLogic Server for the first time, then follow these steps before you create the domain:Start the Node manager from $Middleware_Home/wlserver_10.3/server/bin/startNodeManager.sh.
Set StartScriptEnabled=true and StopScriptEnabled=true in the nodemanager.properties.File. The location is $Middleware_Home/wlserver_10.3/common/nodemanager/nodemanager.properties
To start the Configuration Wizard, perform the following steps:
The file config.sh is located in the following path in UNIX and Linux operating systems
<MIDDLEWARE HOME>/wlserver_10.3/common/bin
Run config.sh.
sh config.sh
The file config.cmd is located in the following path in Windows operating systems
C:\Oracle\Middleware\wlserver_10.3\common\bin
Run the following command:
config.cmd
You can also start the Configuration Wizard from the Start Menu by clicking on Start, All Programs, Oracle On Track, Home, Configure Application Server.
The Welcome screen is displayed.
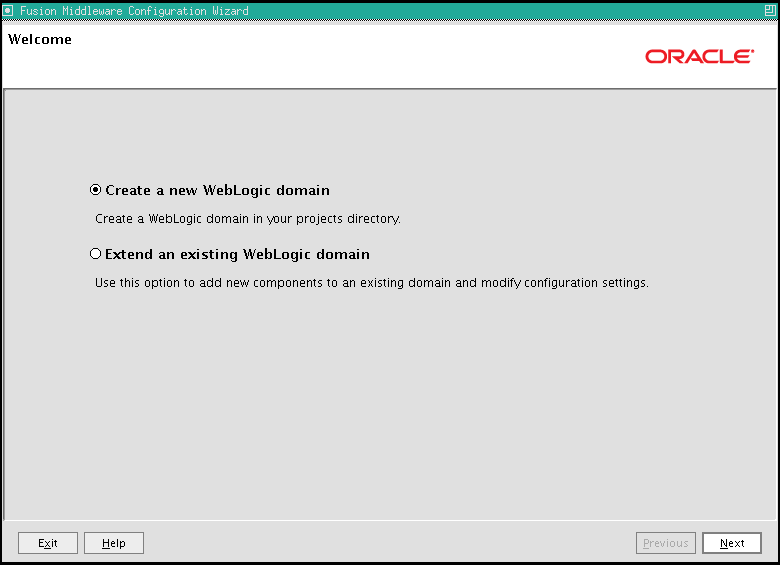
The Welcome screen is displayed each time you start the Configuration Wizard.
If you are performing a fresh installation of Oracle WebLogic Server, then select Create a new WebLogic domain to create a new WebLogic domain in your projects directory.
Select Extend an existing WebLogic Domain if you have an already existing domain with Oracle On Track. If you have selected this option, then see Extend an Existing WebLogic Domain.
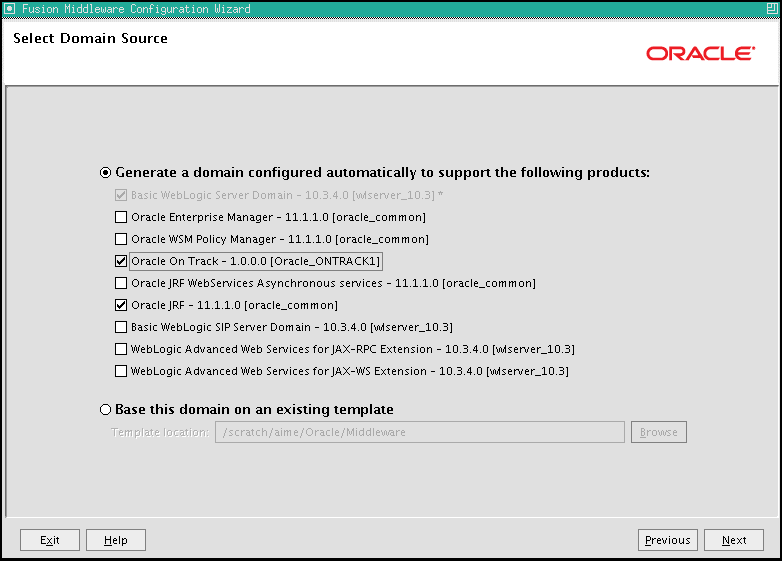
Select the source from which you want to create your new domain.
Select Generate a domain configured automatically to support the following products to create your domain to support selected products. Select Oracle On Track - 1.0.0.0, Oracle JRF - 11.1.1.0, and any other product for which you need the support.
Note:
For the Oracle On Track Communication Release1.0, you should only select Generate a domain configured automatically to support the following products.Select Base this domain on an existing template if you want to create your domain based on an existing domain template. Click Browse to navigate your directories to find an existing template.
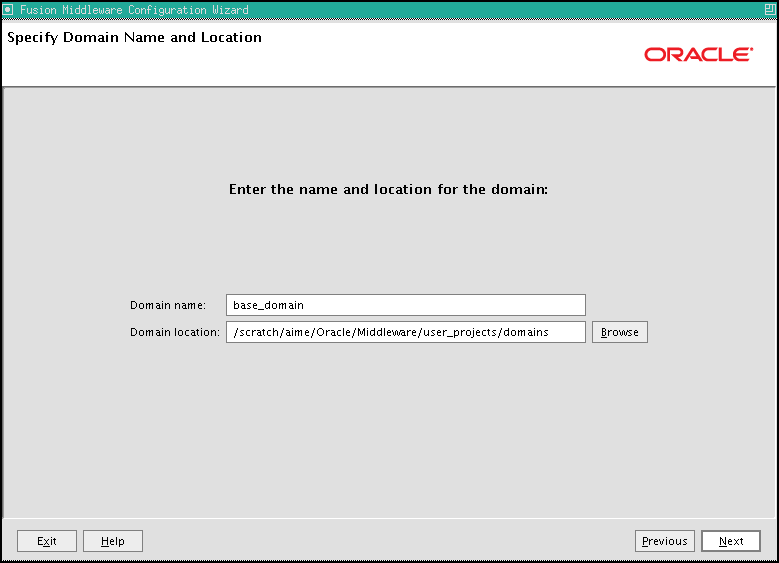
Specify the following information for the domain you are creating:
Domain name: The name of the domain you want to create. The default name is base_domain.
Domain location: The absolute path to the directory where this domain should be created. The default location is MW_HOME/user_projects/domains (on UNIX and Linux ) or MW_HOME\user_projects\domains (on Windows).
Note:
On Windows, be sure to include the drive letter when you specify the domain location.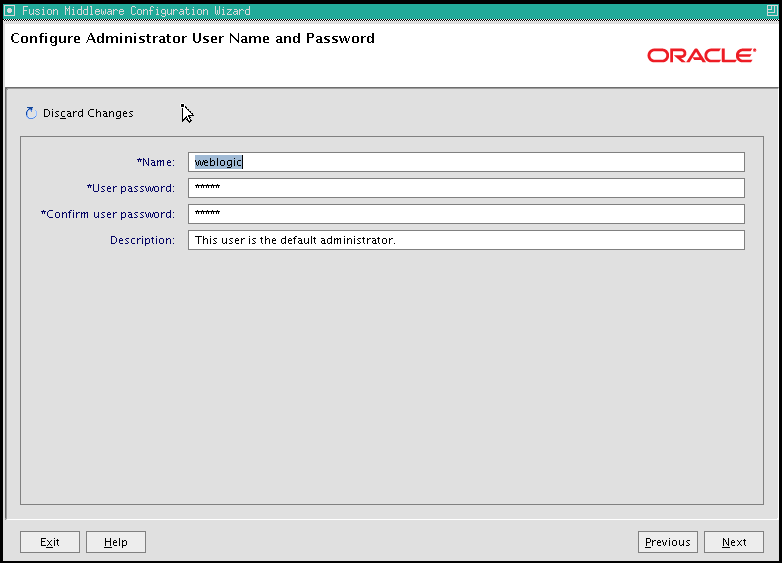
Create a user that will be assigned to the Administrator role of Oracle WebLogic Server.
User name: Specify the administrator name. The default name is weblogic.
User password: Specify the password for the administrator. The password must be at least eight characters long and contain at least one number.
Confirm user password: Re-enter the administrator password.
Description: Enter a description for the user. This field is optional.
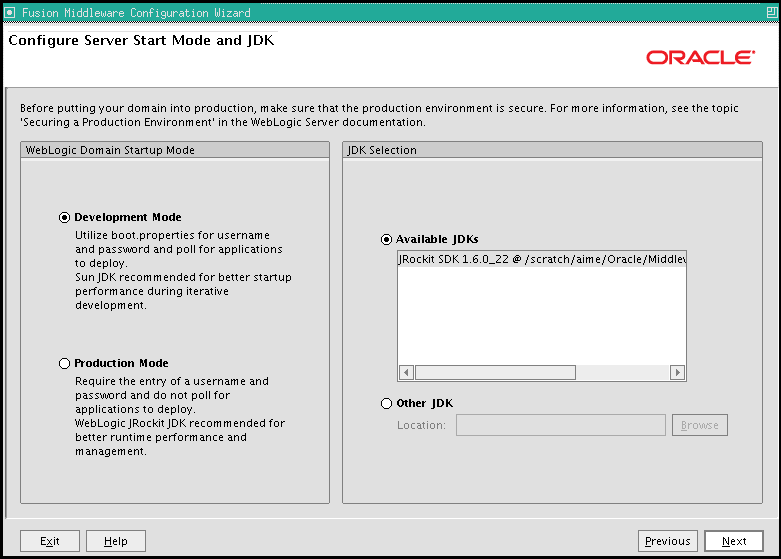
In the WebLogic Domain Startup Mode section, select one of the following startup modes:
Development Mode: This mode should be used while you are developing your applications. Development mode enables you to auto-deploy applications. In this mode, boot.properties is used for username and password. Polling is used for application deployment.
Production Mode: This mode should be used when your application is running in its final form. A production domain uses full security and may use clusters or other advanced features. In this mode, enter the username and password. Polling is not used for application deployment.
In the JDK Selection section, select the recommended JDK for your startup mode from the list of available JDKs, or select Other JDK and click Browse to find another JDK on your system. The recommended JDKs are described in the text for each mode in the WebLogic Domain Startup Mode section.
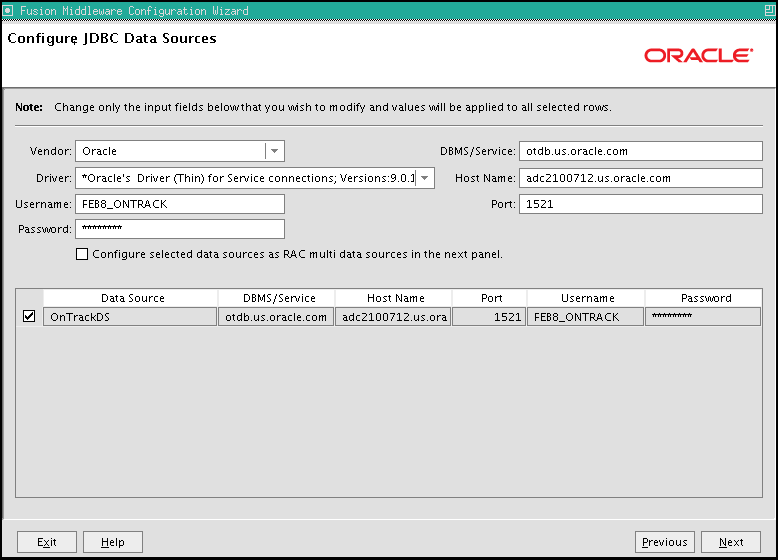
Configure the schema owner and password.
Review the table on this screen and identify which fields you need to modify:
Vendor: Select Oracle from the drop-down list.
Driver: Select Oracle's Driver(Thin) for Service connections; Versions:9.0.1,9.2.0,10,11 from the drop-down list.
Schema Owner: Specify the schema owner for the schema. This schema owner was assigned when you created the schema using RCU. For more information, see Installing Oracle Repository Creation Utility.
Password: Specify the password for the schema. You specified this password when creating the schema using RCU. For more information, see Installing Oracle Repository Creation Utility.
DBMS/Service: Specify the service name for your database. This is the database on which the schema resides.
Host Name: Specify the name of the machine where your database is running.
Port: Specify the database listen port number.
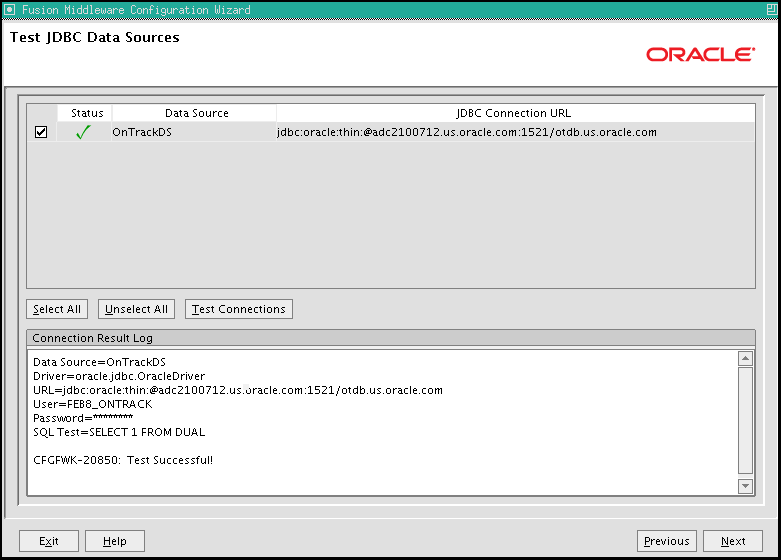
Verify that the connections to your data sources are successful.
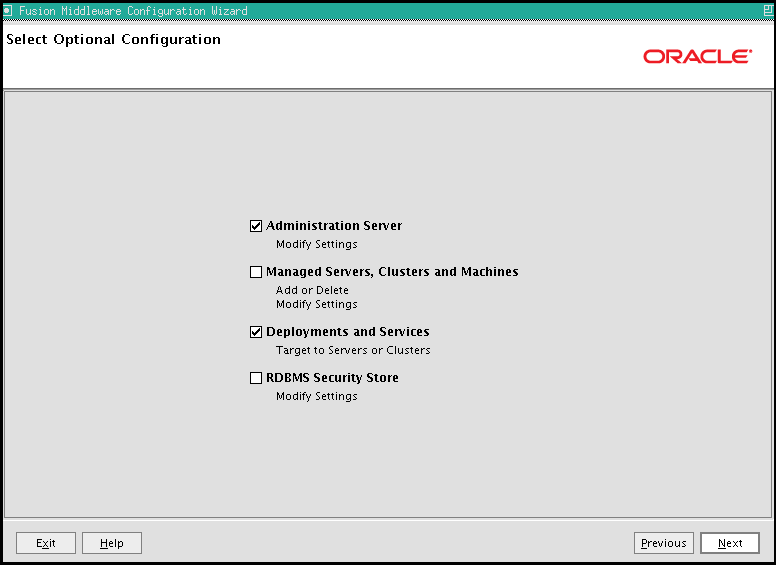
There are many configuration options available depending on the topology. In a simple installation, you select Administration Server as the server for Oracle On Track.
Select any category for which you want to perform custom or advanced configuration. Note that selection of any of these categories is optional, and your domain is created or extended even if you choose not to customize any of these categories.
Administration Server: Select this option to edit your Administration Server settings. You are able to do the following:
Change the name of your Administration Server (default is AdminServer).
Specify custom port numbers.
Configure the Administration Server to accept SSL connections.
Managed Servers, Clusters and Machines: Select this option to add or delete managed servers, clusters, and machines. You can also modify the settings of any existing server, cluster, or machine.
For more information about these concepts, see "Oracle Fusion Middleware Concepts for All Users" in Oracle Fusion Middleware Installation Planning Guide.
Deployments and Services: Select this option to customize how deployments and services are targeted to machines and clusters.
Typically, these screens do not need to be modified unless required. For more information, see Oracle Fusion Middleware Enterprise Deployment Guide for Oracle WebCenter.
If you want to run Oracle On Track on a separate server than the administration server, then select both the Deployment Services and Managed Server and cluster options. For more information on this configuration, see Chapter 4, "Working with Managed Servers and Administrative Server".
Note:
In the Select Optional Configuration screen, if you have selected Managed Servers, Clusters and Machines, then refer Target Deployments to Clusters or Servers Screen.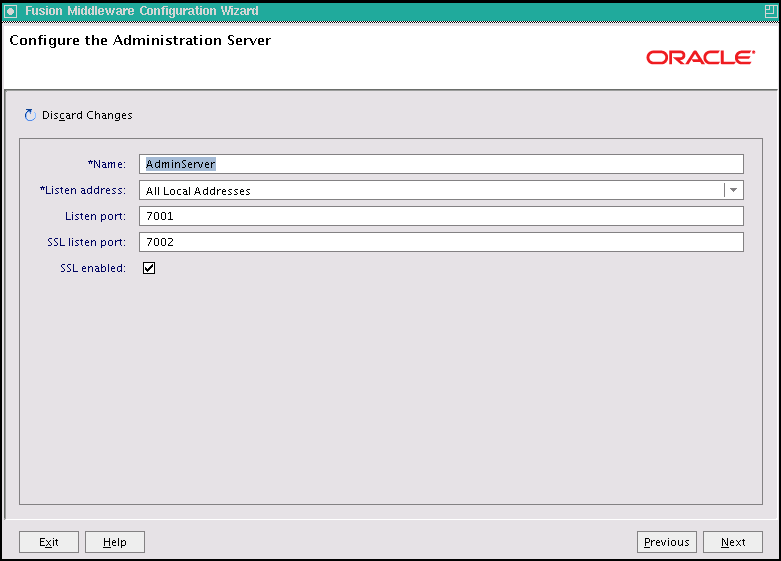
The Administration Server is the primary tool used to manage an Oracle WebLogic Server domain.
One Oracle WebLogic Server instance in each domain is configured as the Administration Server. If you have multiple Oracle WebLogic Server instances, then all the other instances are referred to as Managed Servers. In a domain with only one Oracle WebLogic Server instance, that instance functions both as Administration Server and Managed Server.
Name: Specify the name of your Administration Server. The default name is AdminServer.
Listen Address: Use the list to select an address or range of addresses that the Administration Server listens for events. The default selection is All Local Addresses.
Listen Port: Specify the listen port number. The default port number is 7001. The default port number is 7001.
Ensure that you always select SSL enabled and specify the SSL Listen Port because SSL is essential for the real-time plugin.
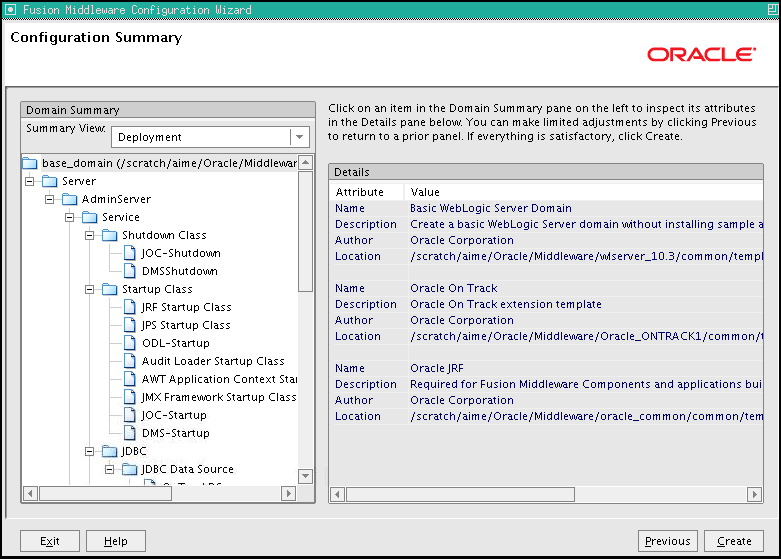
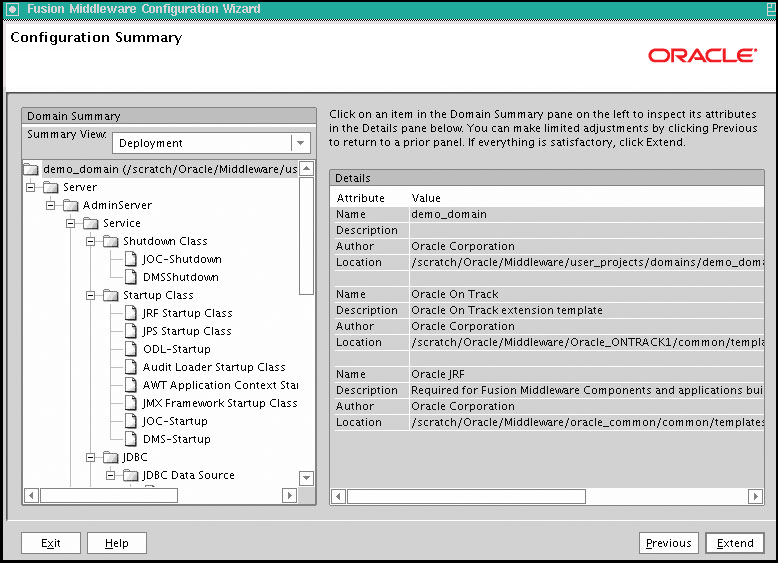
Verify the information on this screen. In the Summary View field, select a category from the list to view information about that category:
Deployment: This option shows the deployments that are configured in each cluster and server. Click the name of a deployment to view detailed information about the selected deployment.
Application: This option shows the applications that are configured in each cluster and server. Click the name of an application to view detailed information about the selected application.
Service: This option shows the services that are configured in each cluster and server. Click the name of a service to view detailed information about the selected service.
Cluster: This option shows the clusters that are configured in this domain and the servers that are configured in each cluster. Click each server name to view information specific to that server.
Machine: This option shows the machines that are configured in this domain and the servers that are configured in each machine. Click each server name to view information specific to that server.
Use the Previous button if you want to return to a previous screen to alter some portion of the configuration.
If everything is correct, then click Create.
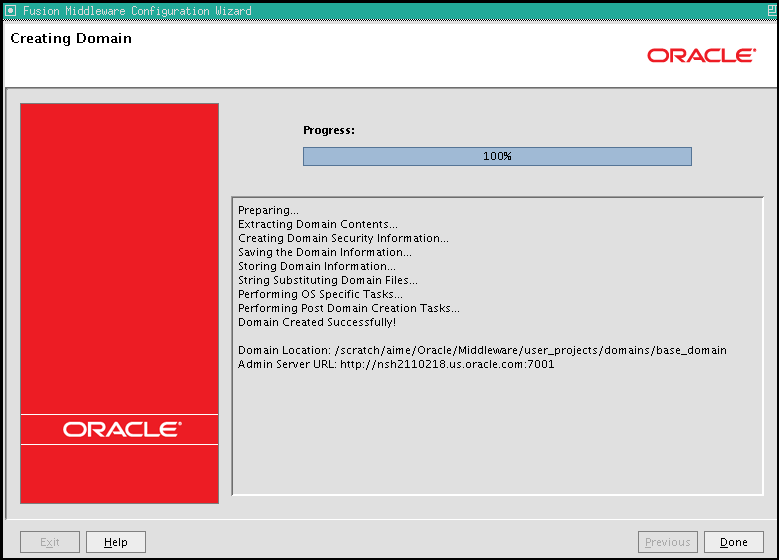
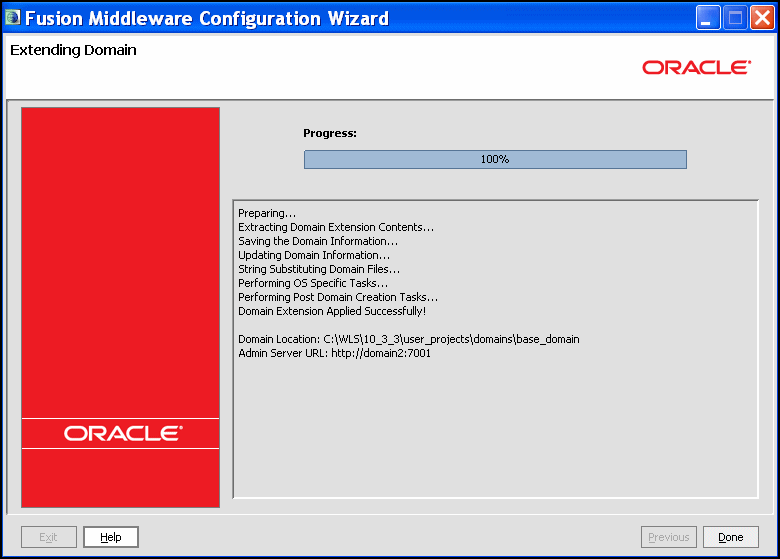
This screen shows the progress of the domain creation.
When it is finished, click Done to dismiss the window.
The following screens open if you have selected Extend an existing Weblogic Domain in the Welcome.
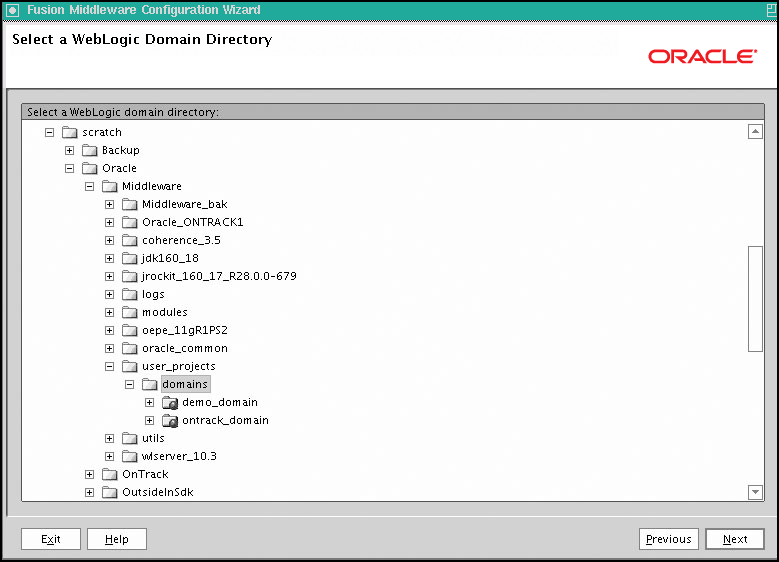
Select the domain that you want to extend in the directory screen.
Click Next.
|
Copyright © 2011, Oracle and/or its affiliates. All rights reserved. Legal Notices |
|