A Oracle Web Tier Installation Screens
This appendix contains screenshots and descriptions for all of the Oracle Web Tier installation screens:
A.1 Specify Inventory Directory Screen (UNIX Only)
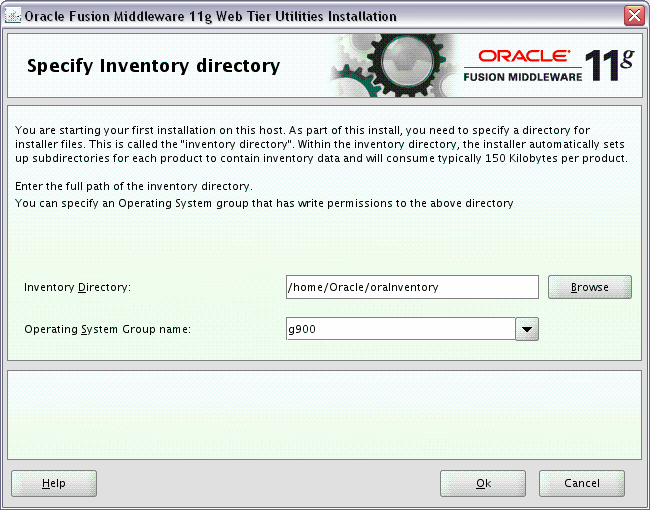
Description of the illustration install_inventory.gif
This screen appears for UNIX systems only; if this is your first Oracle installation on this host, you must specify the location of the inventory directory. This inventory directory is used by the installer to keep track of all Oracle products installed on the computer.
The default inventory location is USER_HOME/oraInventory.
In the Operating System Group name field, select the group whose members you want to grant access to the inventory directory; all members of this group will be able to install products on this machine.
Click OK to continue.
A.2 Inventory Location Confirmation Screen (UNIX Only)
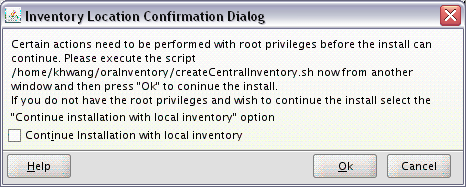
Description of the illustration install_inventory_confirm.gif
This screen appears for UNIX systems only; you are asked to run the inventory_directory/createCentralInventory.sh script as root.
If you do not have root access on this machine but wish to continue with the installation, select Continue installation with local inventory.
Click OK to continue.
A.3 Welcome Screen

Description of the illustration welcome.gif
The Welcome screen is displayed each time you start the installer.
A.4 Select Installation Type Screen
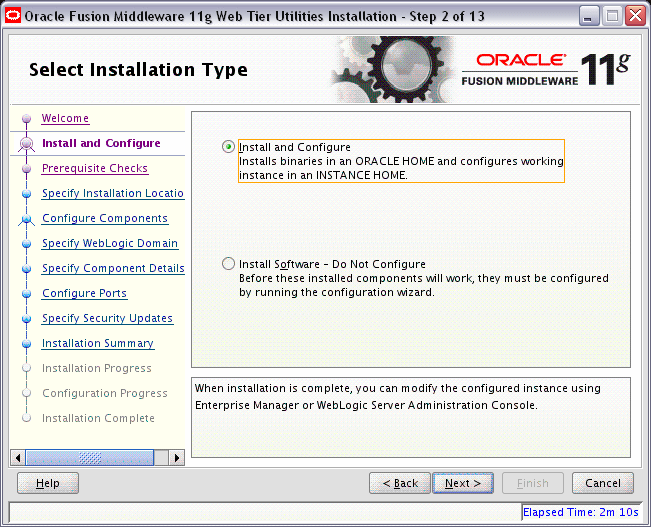
Description of the illustration select_install_type.gif
Select the type of installation you want to perform.
-
Install and Configure
This option will install the product binaries in an Oracle Home directory and create and configure a working instance in an Oracle Instance directory. After this is complete, you should be able to begin configuring and managing your products using the Administration Console or Enterprise Manager.
Note:
For more information about Oracle Home and Oracle Instance directories, refer to "Installation Overview" in Oracle Fusion Middleware Installation Planning Guide. -
Install Software - Do Not Configure
This option only installs the software binaries in an Oracle Home directory. You must then manually run the Configuration Tool from your
Web_Tier_ORACLE_HOME/bin(on UNIX operating systems) orWeb_Tier_ORACLE_HOME\bin(on Windows operating systems) directory to configure your products before you can use them. This option can be used to quickly create multiple instances of the software that share a common disk.
A.5 Prerequisite Checks Screen
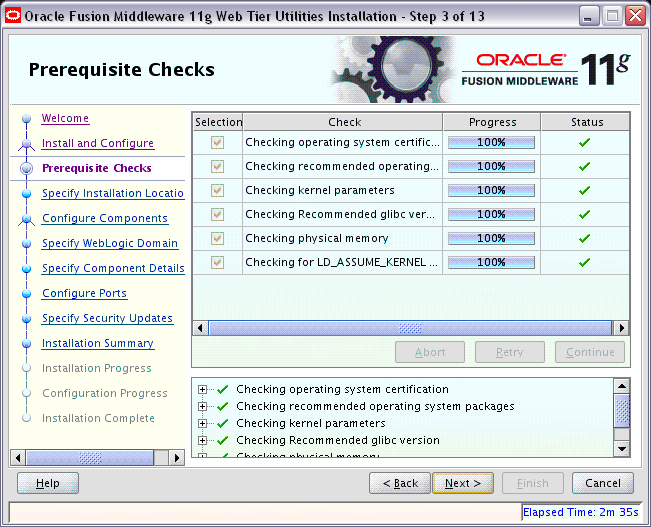
Description of the illustration prereq_check.gif
If there is a problem, a short error message appears in the bottom portion of the screen. Fix the error and click Retry to try again.
If you want to ignore the error or warning messages and continue with the installation, click Continue.
Click Abort to stop prerequisite checking for all components.
A.6 Specify Installation Location Screen
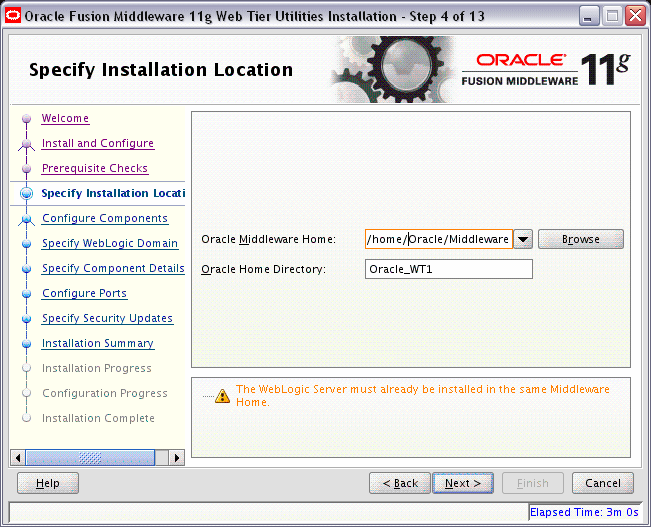
Description of the illustration install_location.gif
Specify the following installation locations:
-
The absolute path to the directory where WebLogic Server was installed.
-
The directory name for your Oracle home:
-
You can specify a pre-existing directory that you want to use as the Oracle home; the directory must be an empty directory.
-
You can specify the name of a new directory that will be created for you inside the Middleware home.
Your Oracle Home directory where your products will be installed. All software binaries will reside in this directory, and no runtime process can write to this directory.
-
Note:
This installation directory will be referred to asWeb_Tier_ORACLE_HOME throughout the remainder of this document.If you are performing an installation on a Windows operating system, be sure that your directory paths are valid and do not contain double backslashes (\\).
For more information about the Middleware Home and Oracle Home directories, refer to "Oracle Fusion Middleware Directory Structure and Concepts" in Oracle Fusion Middleware Installation Planning Guide.
A.7 Configure Components Screen
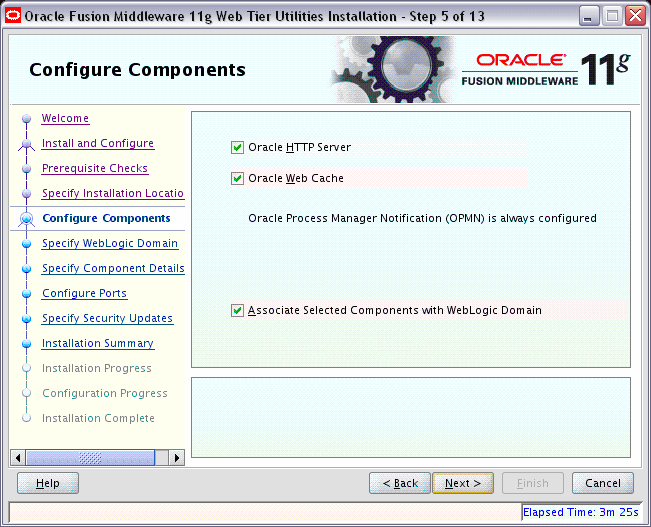
Description of the illustration configure_components.gif
This screen shows the products and components that are available for installation and configuration. Select the component(s) you want to configure. Oracle Process Manager Notification (OPMN) is configured by default.
Select Associate Selected Components with WebLogic Domain if you want to make these components available for use by your applications in an existing WebLogic domain. By doing so, you will be able to manage them using Enterprise Manager (EM).
A.8 Specify WebLogic Domain Screen
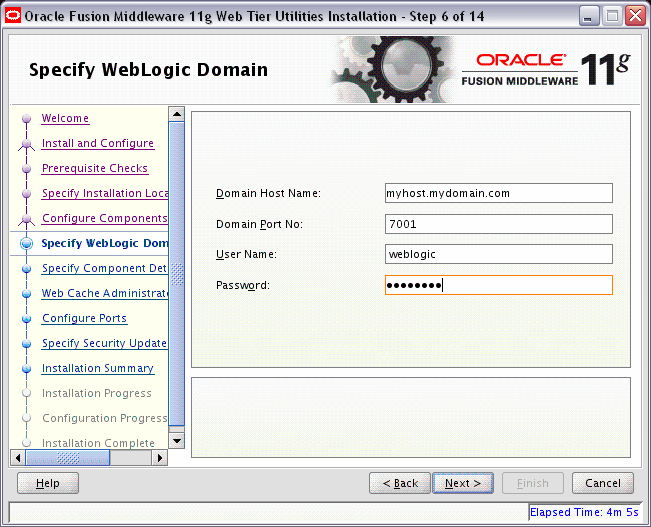
Description of the illustration specify_weblogic_domain.gif
This screen only appears if you selected Associate Selected Components with WebLogic Domain on the Configure Components Screen.
Specify the following WebLogic Domain credentials:
-
Domain Host Name
Specify the WebLogic Domain host name. The default name is
localhost(same system as the one where you are installing Oracle Web Tier). -
Domain Port No
Specify the WebLogic Domain port number. The default port number is
7001. -
User Name
Specify the user name. The default user name is
weblogic. -
Password
Specify the user password. Valid passwords are 5 to 30 characters long, must begin with an alphabetic character, use only alphanumeric, underscore (_), dollar ($) or pound (#) characters and include at least one number.
A.9 Specify Component Details Screen
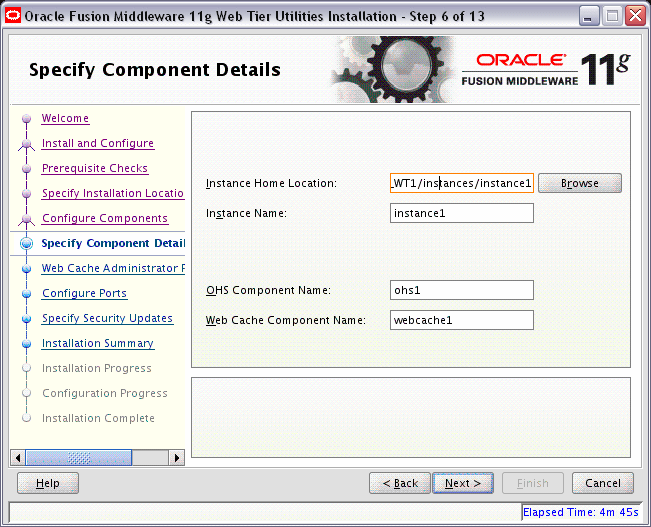
Description of the illustration specify_component_details.gif
Specify the following component details:
-
Instance Home Location
The absolute path to the directory where your Oracle Instance will reside. This is where application configuration files reside and where the application process runs from. Runtime components write only to this location.
-
Instance Name
Specify the unique name of your Oracle Instance. The Oracle Instance name may only contain alphanumeric and underscore (_) characters, it must begin with an alphabetic (a-z or A-Z) character, and must be 4 to 30 characters in length.
-
OHS Component Name
Specify the name for your Oracle HTTP Server (OHS) component. This name may only contain alphanumeric and underscore (_) characters, and must be 4 to 30 characters in length.
-
Web Cache Component Name
Specify the unique name of your Web Cache component. This name may only contain alphanumeric and underscore (_) characters, it must begin with an alphabetic (a-z or A-Z) character, and must be 4 to 30 characters in length.
For more information, see "Oracle Fusion Middleware Concepts for All Users" in Oracle Fusion Middleware Installation Planning Guide.
A.10 Web Cache Administrator Password Screen
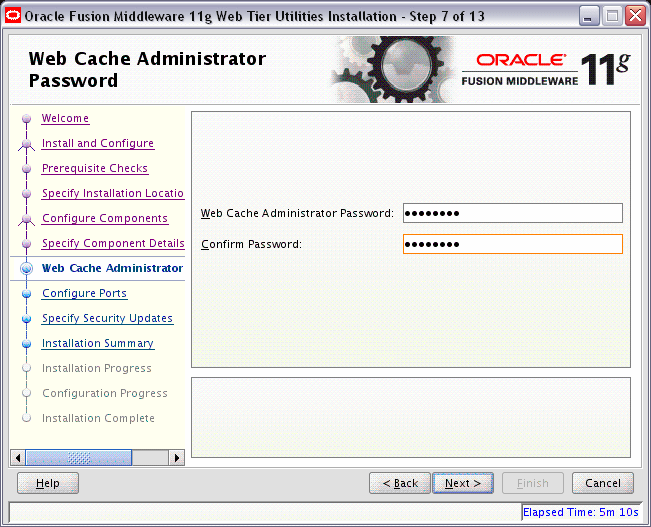
Description of the illustration webcache_admin_password.gif
Specify the password for your Web Cache administrator. Valid passwords are 5 to 30 characters long, must begin with an alphabetic character, use only alphanumeric, underscore (_), dollar ($) or pound (#) characters and include at least one number.
A.11 Configure Ports Screen
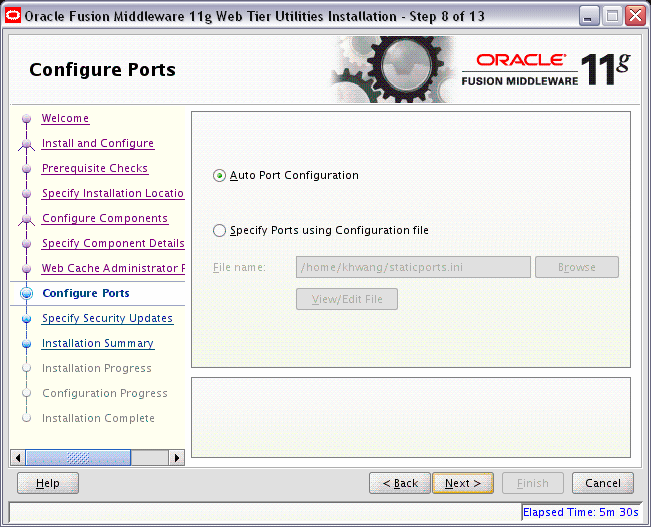
Description of the illustration configure_ports.gif
Select Auto Port Configuration if you want the installer to automatically assign the default ports to the components. For a list of default port numbers, refer to Oracle Fusion Middleware Administrator's Guide.
Select Specify Ports Using File if you have already created a port configuration file that specifies the port numbers that you want to use for each component. Enter the full path and filename of this file in the Filename field, or click Browse to locate an existing file on your system.
A default file called staticports.ini is provided in the Disk1/stage/Response (on UNIX operating systems) or Disk1\stage\Response (on Windows operating systems) directory on the CD-ROM. You can use this file as a template to create your own custom ports file.
Note:
If you choose to use thestaticports.ini (or any custom port file), port numbers less than 1024 will not be validated by the installer. You will, however, be able to proceed with the installation.
See "Port Numbers" in Oracle Fusion Middleware Administrator's Guide for more information.
Note:
If you choose to use thestaticports.ini (or any custom port file), the [OPMN],[OHS], and [Webcache] sections are required for Oracle Web Tier and cannot be removed.After providing the location and name of a valid file, click View/Edit File to view or edit the contents of the file.
A.12 Specify Security Updates Screen
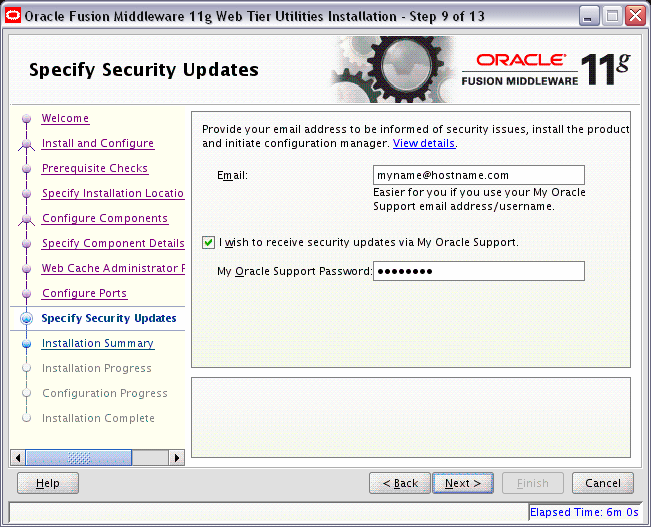
Description of the illustration specify_security_updates.gif
Enter your E-mail address if you want to receive the latest product information and security updates. If you have a My Oracle account and wish to receive updates via this mechanism, select I wish to receive security updates via My Oracle Support, then enter your account password.
If you do not wish to register for security updates, leave all the fields on this screen blank. You will be prompted to confirm your selection with the following screen:
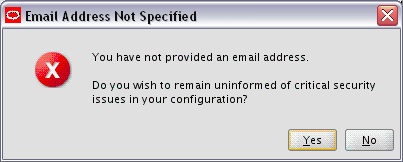
Description of the illustration config_manager_confirm.gif
Click Yes to confirm that you do not want to register for any security updates.
A.13 Installation Summary Screen
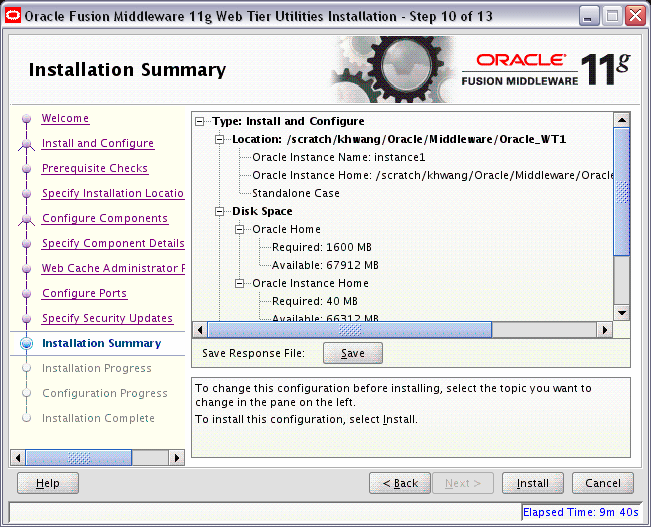
Description of the illustration install_summary.gif
Review the information on this screen, and click Install to begin the installation. The operations summarized on this page will be performed when you click Install.
If you want to make any changes to the configuration before starting the installation, use the navigation pane and select the topic you want to edit.
If you want to save this configuration to a text file (called a response file), click Save. You will be prompted for the location of name of the file you want to create (for example, silent_install.rsp). This file can be used later if you choose to perform the same installation from the command line. Some sample response files are provided on the CD-ROM in the Disk1/stage/Response (on UNIX operating systems) or Disk1\stage\Response (on Windows operating systems) directory. See Appendix C, "Silent Installation and Deinstallation" for more information.
A.14 Installation Progress Screen
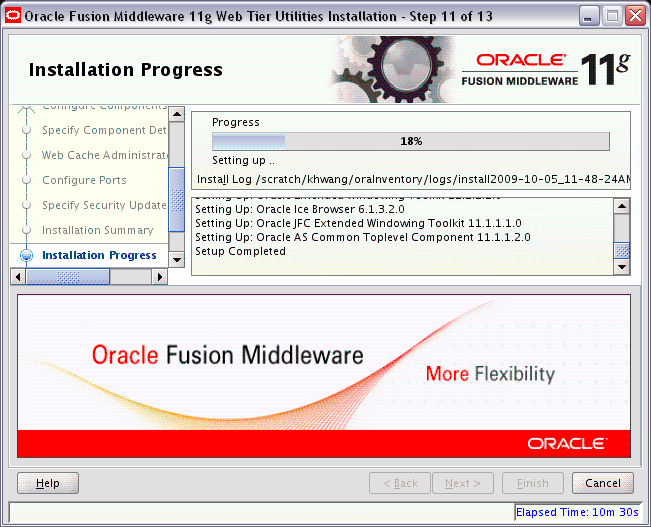
Description of the illustration install_progress.gif
This screen shows you the progress of the installation.
If you are installing on a UNIX system, you may be asked to run the Web_Tier_ORACLE_HOME/oracleRoot.sh script as root user before the installation is completed:
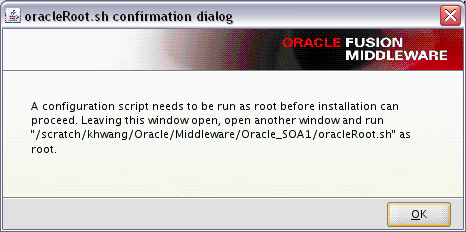
Description of the illustration install_oracleroot_script.gif
This script sets up the proper permissions for the files and directories being installed.
If you want to quit before the installation is completed, click Cancel. Doing so will result in a partial installation; the portion of the software that was installed on your system before you click Cancel will remain on your system, and you will have to remove it manually.
A.15 Configuration Progress Screen
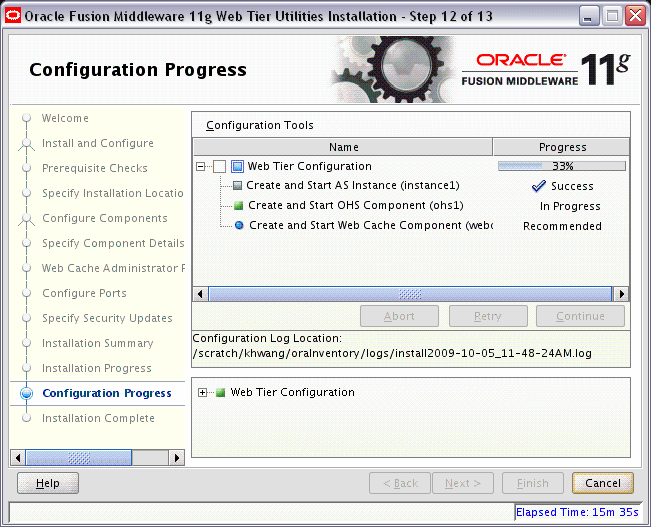
Description of the illustration configuration_progress.gif
This screen shows you the progress of the component configuration.
If there is a problem, a short error message appears in the bottom portion of the screen. Fix the error and click Retry to try again.
If you want to ignore the error or warning and continue with the configuration, click Continue.
Click Abort to stop prerequisite checking for all components.
If you want to quit before the configuration is completed, click Cancel.
A.16 Installation Complete Screen
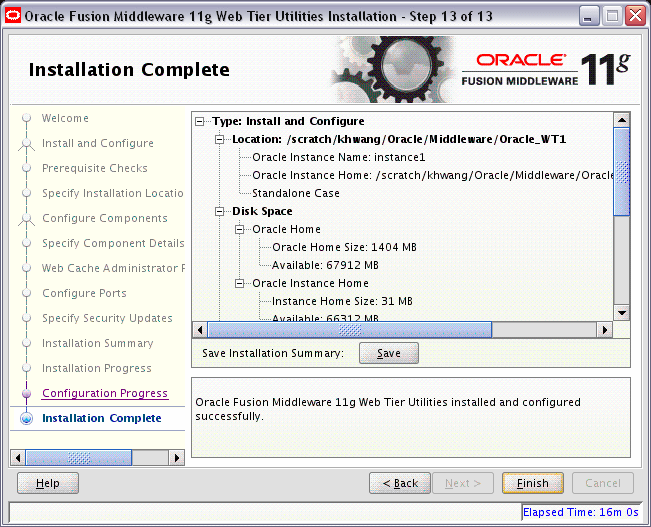
Description of the illustration install_complete.gif
This screen summarizes the installation that was just completed.
At the end of the summary information, there is a section called Accessible URLs which give you the links needed to access the configured Oracle HTTP Server and Oracle Web Cache. You should make a note of these URLs so you can access these pages when you need to.
Note:
This summary information does not appear on the Installation Complete screen if you chose Install Software - Do Not Configure on the Select Installation Type Screen.You can also save this summary information to a file for future reference by clicking Save. You will be prompted to specify a name and location for your summary file.
Click Finish to dismiss the screen.