| Oracle® Argus Insight Administrator's Guide, Release 7.0 E22885-01 |
|
 Previous |
 Next |
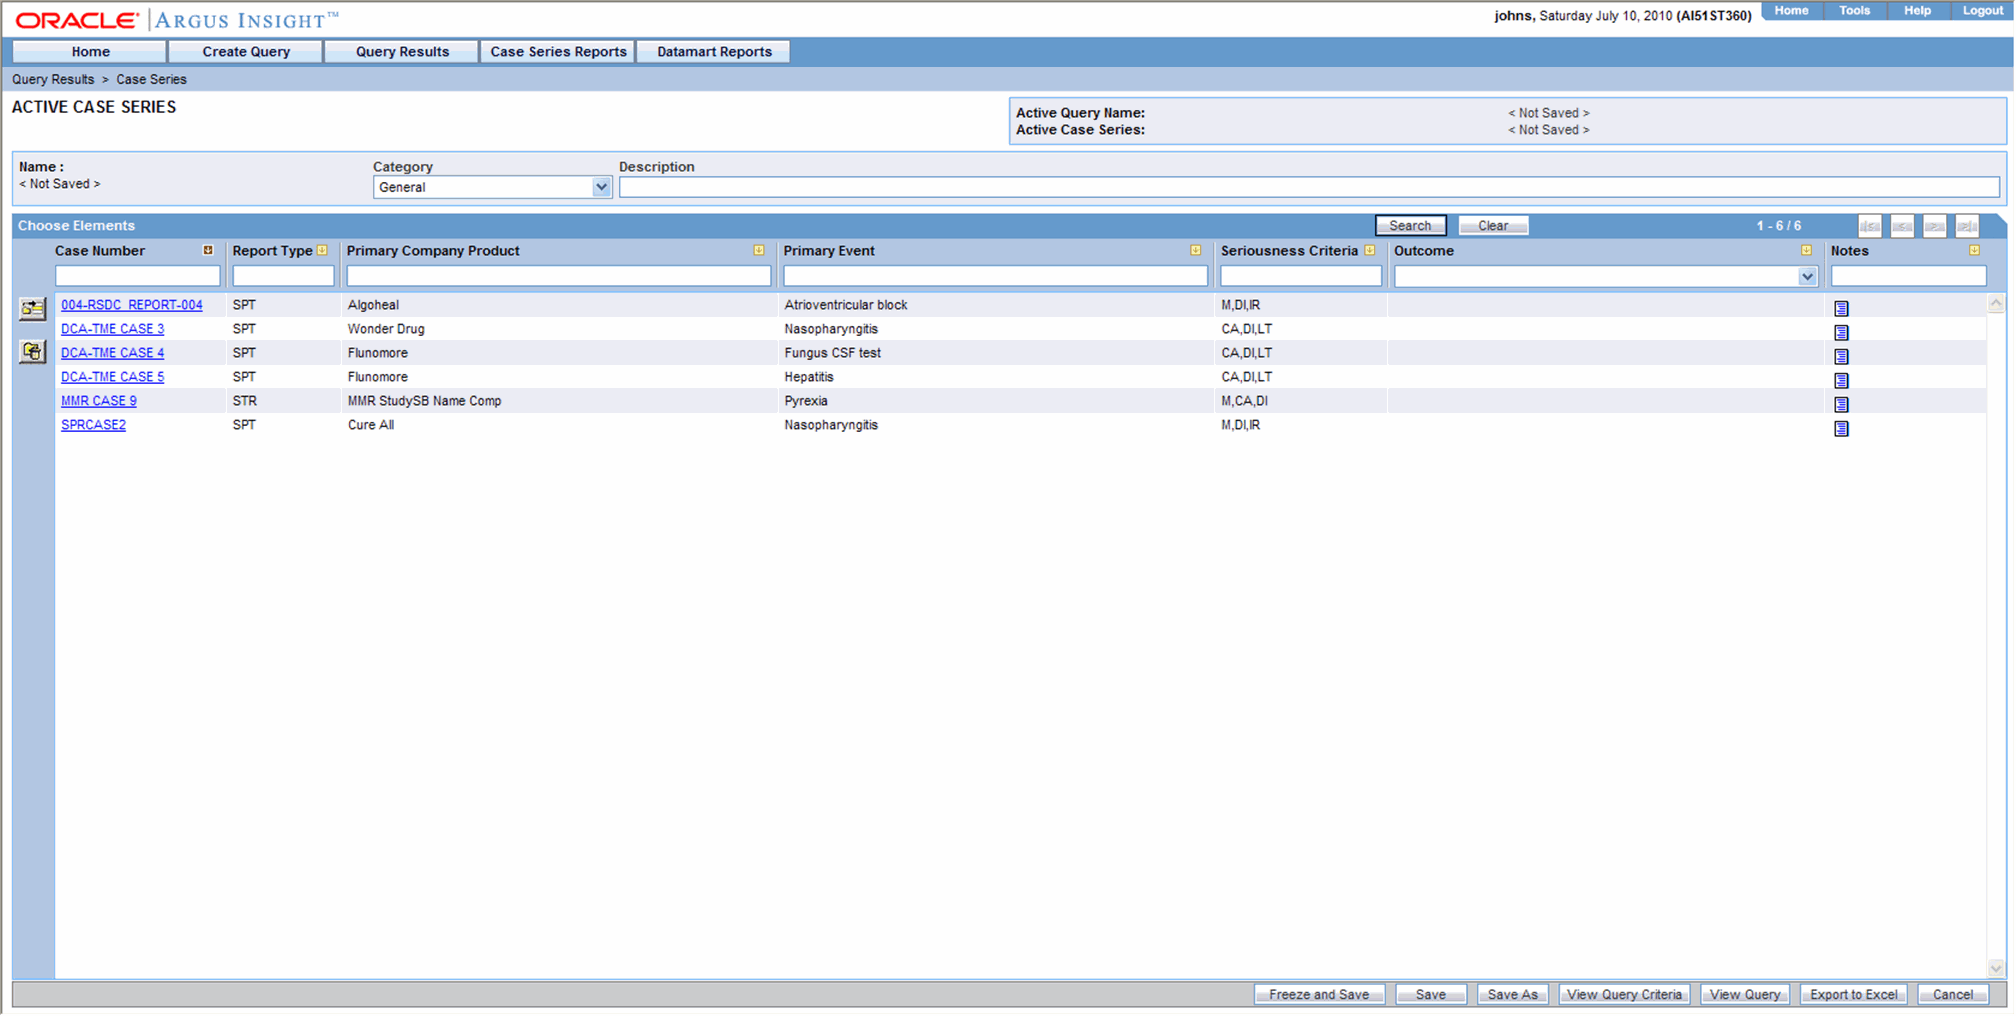
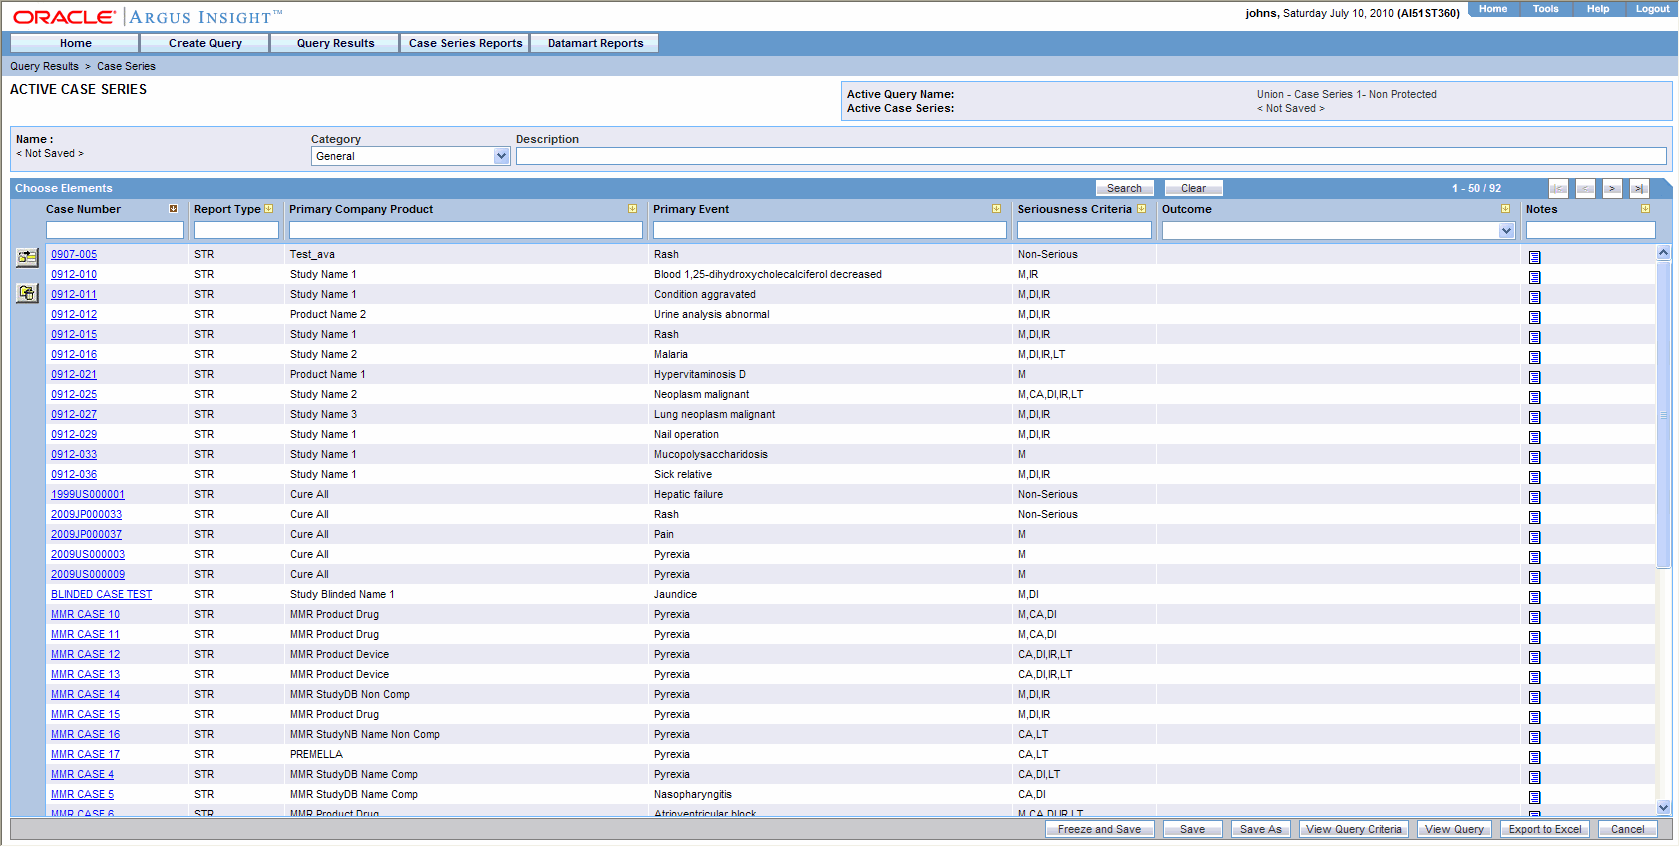
When you execute a QBE, Filter, or an Advanced Condition, Argus Insight generates a list of cases that match the querying criteria. This list of cases is called a Case Series. The Case Series output is displayed in a listing format in the Active Case Series page.
The Case Series is the communication foundation between all modules of Argus Insight. All the predefined reports you generate in Argus Insight are run on the Case Series. This means that the report output contains information from only those cases that are part of the Case Series.
In addition to letting you generate a Case Series by using a query, Argus Insight enables you to:
Save the Case Series with a name and description for future reference.
Search the saved Case Series by their name, description, category, source, date of modification, and author.
Assign group level access permissions on the Case Series.
Combine two Case Series through Union, Intersect, or Minus set operators.
Import a Case Series from external sources such as TXT or CSV files.
Manually modify the Case Series after it has been generated.
|
Note: The Case Series might become obsolete each time the datamart is refreshed by running an ETL. This is because new cases with similar attributes might get added to the datamart. |
Before working with Case Series, you should be aware of information about the following:
Case Series Hyperlink to Medical Review
Freezing Case Series Data
Be aware of the following:
The case series dialog enables the user to open the Medical Review dialog in Read Only mode from the Active case Series dialog.
All of the reports that can be executed from Medical Review are available to the user.
Even if a Single Sign On user has no protection in Argus Safety and Blinded Protection is applied in Argus Insight, the user can still view the Medical Review screen. The Medical Review screen can display all the products of the Blinded security-enabled case.
If the user does not have access to the case from an Argus Safety perspective, the system presents the following message:
" <user> does not have access to the case in Argus Safety".
If the case the user is trying to access has been deleted since the last ETL, the system presents the following message:
"This case has been deleted in Argus Safety since the last ETL".
If the user has logged into Insight without logging through Argus, the system presents the following message:
"<user> is not logged into Argus."
Once the alerts are configured, customers are interested in analyzing the case series that is generated by the alert. The system does the following as part of the analysis:
Freezes the Case Series data that needs to be analyzed
Displays case details using either the standard reports or the CIOMS II line listing (available in Insight) after the regular queries, case series, and their subsets are completed.
Be aware of the following:
The system allows the use to freeze a case series as follows:
The user can freeze a custom case series when editing the case series from the Case Series Library page.
The user can freeze any system-generated case series (active or inactive) (e.g., Using Insight queries, filters and advanced conditions) by clicking the "Freeze and Save" button.
The system freezes the case series and presents the user with the standard Case Series Save dialog. The user must enter the name of the saved case series.

If the user has not yet saved the case series from the active case series screen and clicks the Freeze and Save button, the system saves only one copy of the frozen case in the library. The frozen case series should then be the active case series.
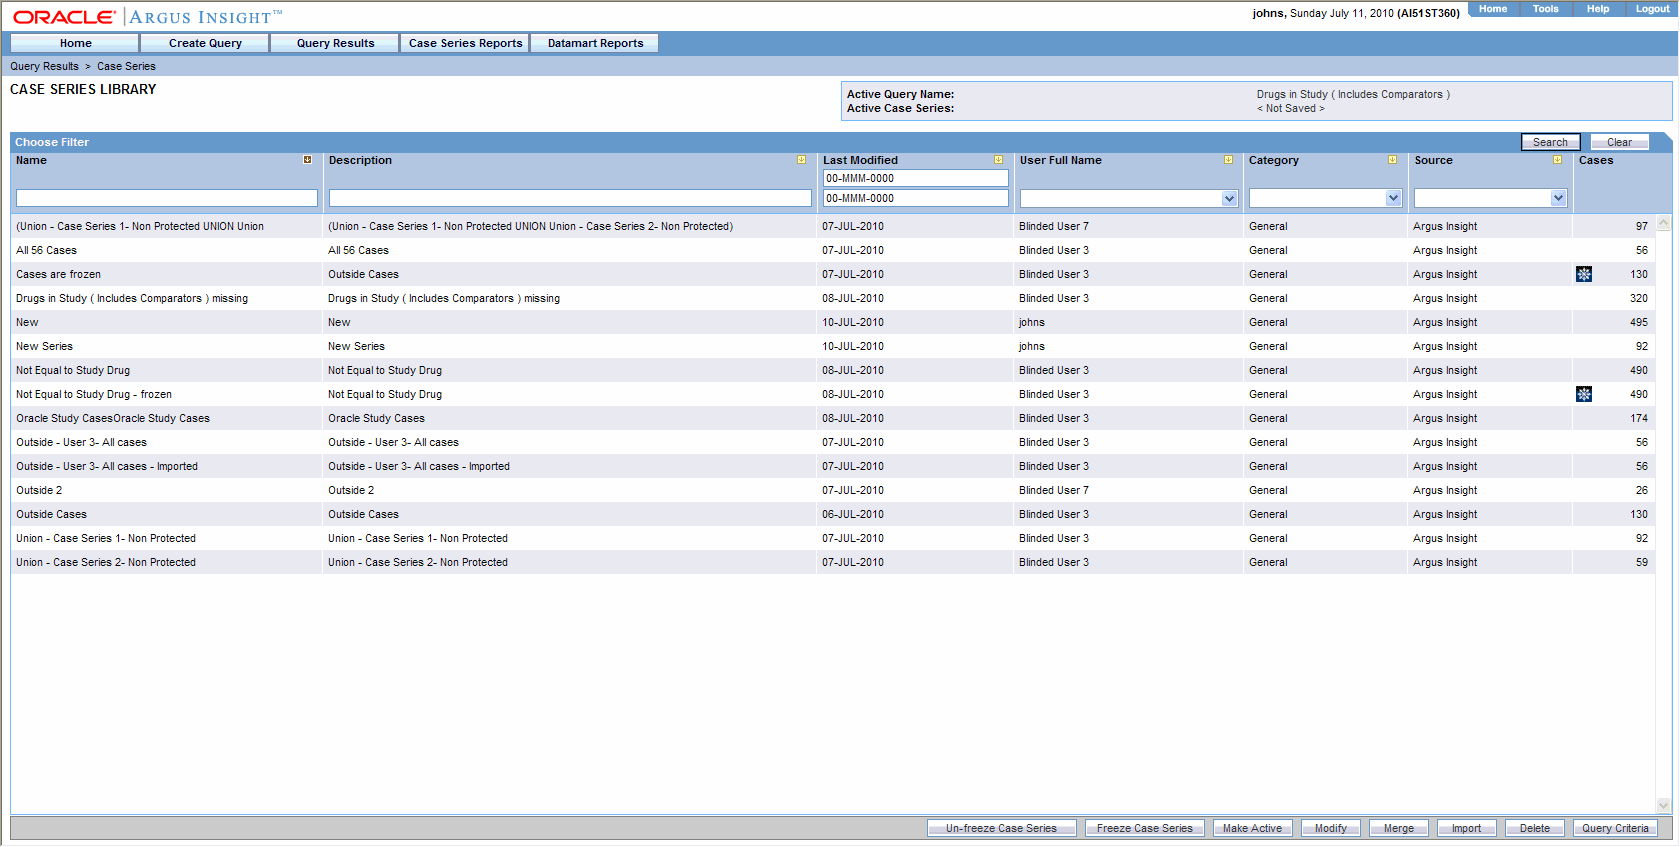
In the Case Series Library the User can view a frozen case series by clicking the icon next to the case number.
Hovering over this icon shows the Date the user froze the case series.
The system enables the user to freeze existing cases in the case series by clicking the "Freeze Case Series button."
When the user clicks this button, the system prompts the user to provide and additional name for the frozen case series.
The Frozen Case Series has icon beside case number to identify it as frozen.
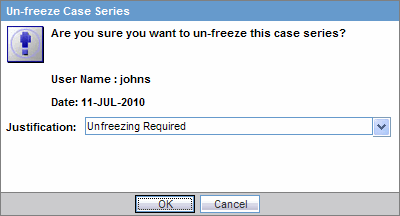
When the user clicks "Un-freeze Case Series," the system removes the icon beside the case number and fetches the latest information for the cases.
The user must provide a justification when unfreezing a case series.
The user adds the justification to the Case Series Criteria.
The user types a new justification when the case series is unfrozen or can user a pre-configured justification.
A list maintenance item, "Case Series Un-freezing Justification," enables the user to configure justifications for use when unfreezing a case series.
The Add, Modify and Delete functionality is the same as that of the Case Series Modification Justification UI.
The administrator can configure the freeze case series function so that it reflects Insight security settings
The user has the option of freezing and unfreezing case series by clicking the appropriate check boxes on the Access Right tab.
The user cannot insert cases into a frozen case series.
The user can delete cases from the frozen case series.
When an Advanced Condition or query is run against a frozen case series, frozen data is used.
By default, the Report Writer displays all the versions (both frozen and current) for a case.
Use the "Display Latest Data" filter if the report needs to contain only the current case version.
If user selects the Active Case Series filter, then report contains only the Frozen case data if active case series is frozen otherwise the report contains the current case version if the active case series is a normal case series.
The frozen case series data is available after reinitializing the ETL.
Reports run on frozen case series data, show the following next to the case series name:
"The data in this report was frozen as of <particular date and time>".
Time is the database system time with the GMT offset.
Reports run on normal case series data, show the follow message next to the case series name: should
"The case series was last modified on <Case series modification date and time>".
List Maintenance items are not frozen. Therefore, some reports will have a mismatch of LM Items and the frozen case series data.
The derivation rules operate against current case data if the LM Rules are being modified. The frozen case series are shown if there is a change in the case data resulting from the derivation rules.
If suppress condition is checked in the derivation rule, then LM records related to the derivation rule will not be deleted in cases used in the frozen case data table.
The hyperlink for the medical review access, links to the latest data for the case.
Frozen case series cannot be shared with Argus Safety.
The following portions of the Argus Insight application do not all case data to be frozen:
Dashboard
Copy Configuration Utility
BO and CO standard cubes
Standard Cubes Drill Through reports
Report scheduling
Derivation Rules
This section provides information for working with the last generate case series and includes discussions of the following:
Saving a Case Series
Viewing Case Series Generation Criteria within the Query Interface
Modifying the Case Series
Deleting a Case from a Case Series
The system assigns the Active status to a Case Series that you generated last by executing a query. Only one Case Series can remain active at a time. Unless you generate another Case Series or save modifications to one, the last Case Series you generated remains active.
|
Note: You can also make a Case Series active by manually assigning it the Active status. This option works only for Case Series you have saved to the system. See theMaking a Case Series Active topic for details. |
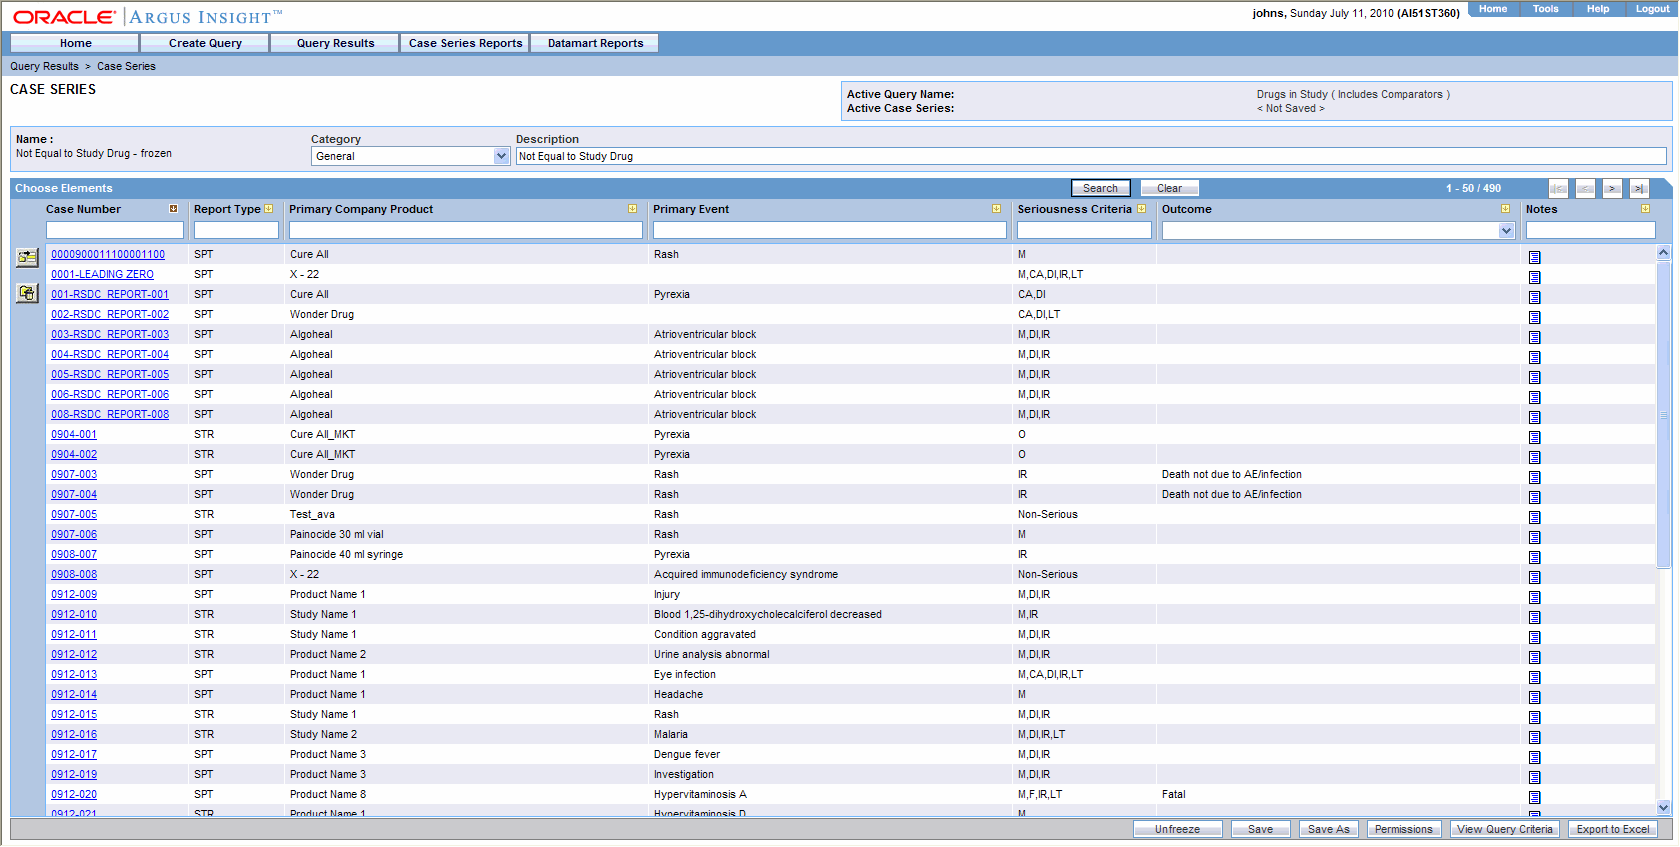
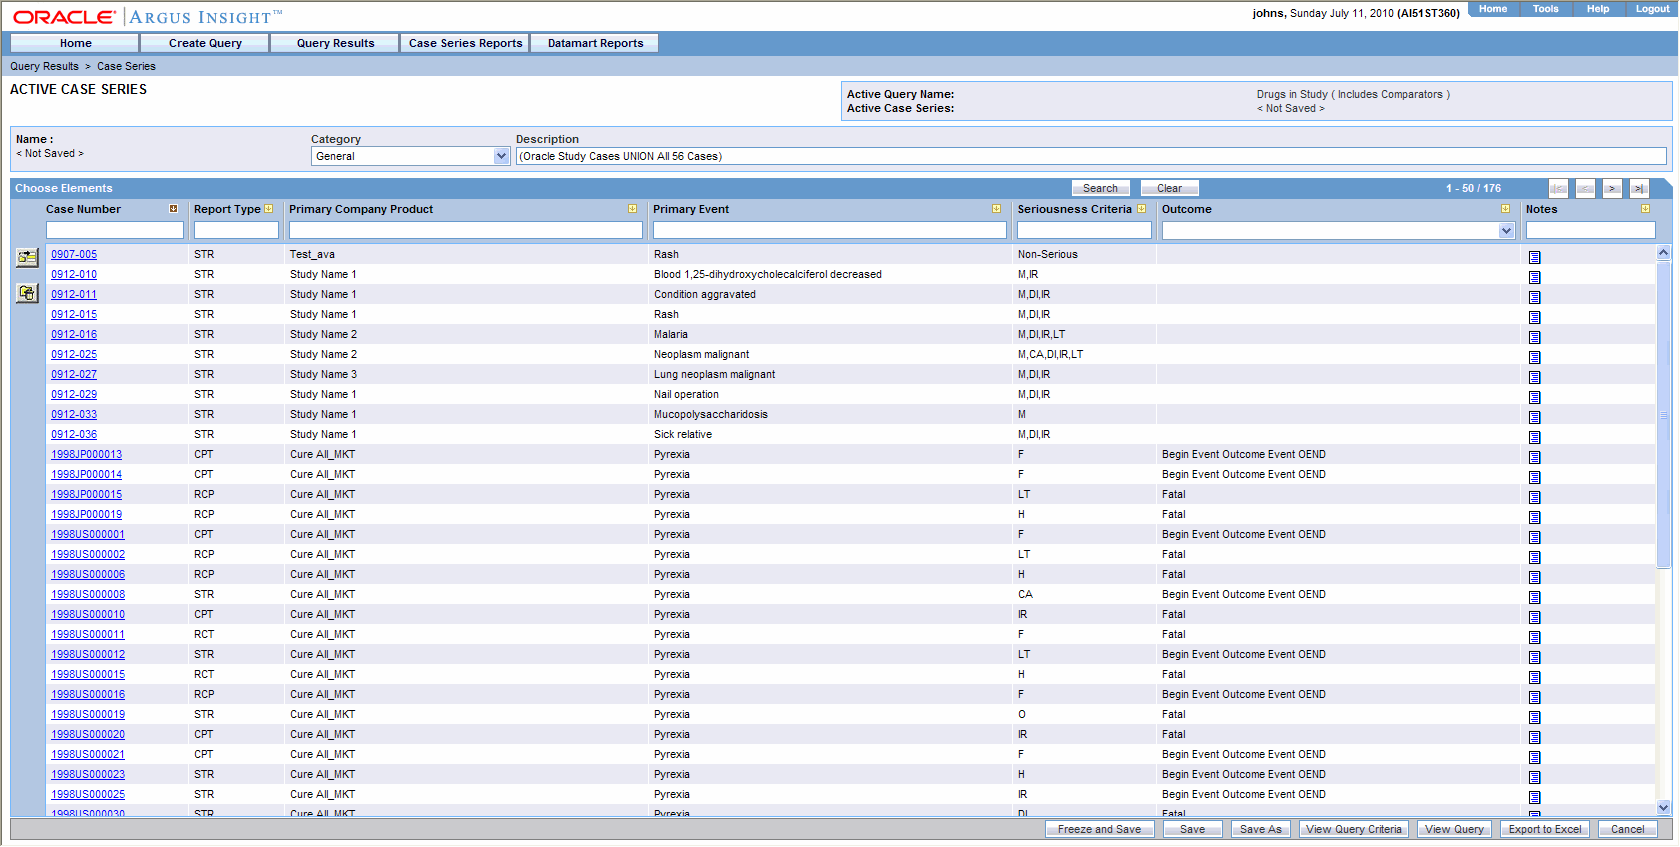
To view an Active Case Series, select Query Results > Case Series > Active. The Active Case Series page displays the Case Series you executed, modified, or manually made active last.
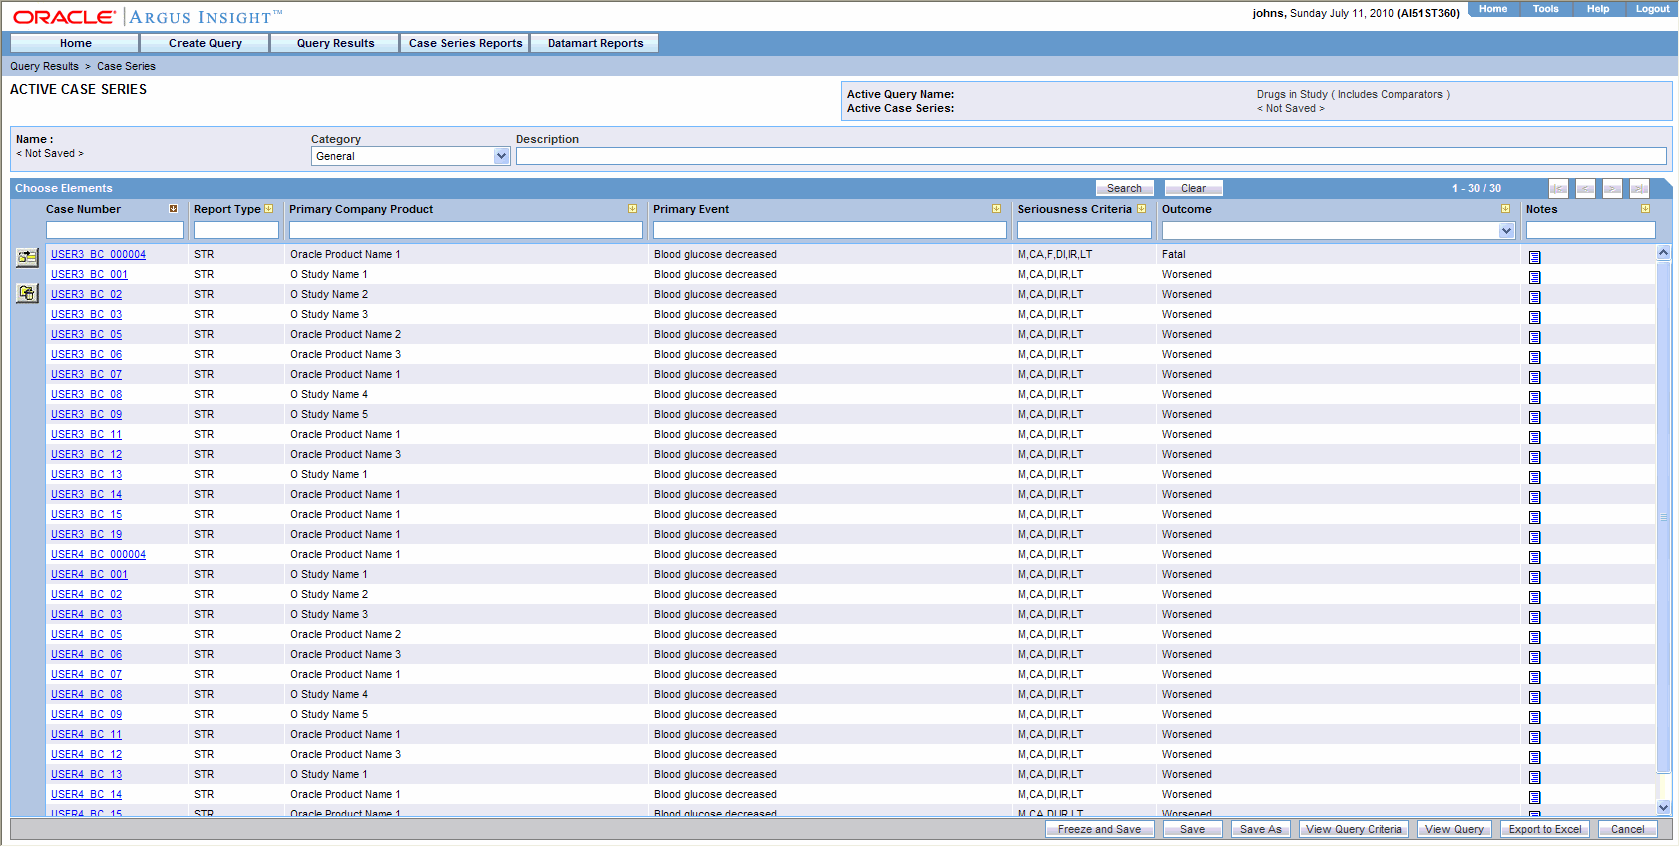
In the Active Case Series page, the Active Query Name label displays the name of the saved query (QBE, Filter, or Advanced Condition) that generated the Case Series. If the query was not saved, the label displays the text <Not Saved>.
The Active Case Series label displays the text <Not Saved> until you save the Case Series by a name. Similarly, the Name label displays the text <Not Saved> until you save the Case Series by a name.
If the active Case Series has more than 50 cases, they are displayed in multiple pages. Use the arrows in the button group to navigate the Case Series pages.
The column headers in the Case Series grid can also be sorted, as shown by the circled icons in the following image.

You can sort the column data by clicking on the arrows displayed in the image. The sorted grid retains its sorting and filtering order even after being exported to Excel. To filter for any column, such as the Seriousness Criteria column, enter the filtering criteria in the textbox under the column header. The grid also supports context menus.
If you have not saved the active Case Series to the system yet, click either the Save or SaveAs buttons to save the Case Series to the system by assigning a name to it. You need to enter the Case Series description in the Description text box before saving the Case Series.
If you are modifying a Case Series that is already saved, click the Save button to save the modification or click Save As to save the Case Series by another name.
Click the View Query button to the see the querying criteria in the query tool interface (QBE form, Values Set page, or Advanced Condition Editor) that was used to generate the Case Series.
This button is only available for an Active Case Series that is not saved to the system.
If you have saved your Active Case Series, then refer to the section onViewing the Case Series Generation Criteria in a Single Page
Setting Access Permissions
You can set group-level access permissions for the Case Series. This determines which user groups will be able to view, modify, or delete a Case Series.
|
Note: You can set permissions only on Case Series you have saved to the system. |
Use the following procedure to set Case Series permissions.
In the Active Case Series page, click the Permissions button. The Permissions dialog box appears. A list in this dialog box displays the names of all the groups (except the Administrator group) that the system administrator has created.
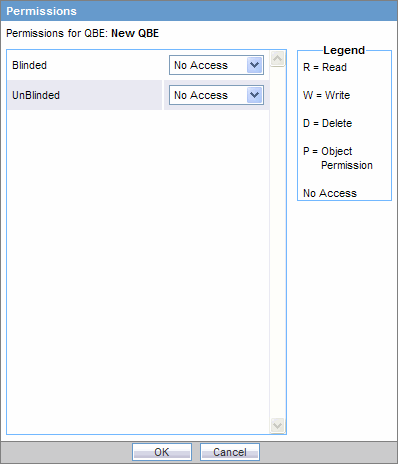
You can set permissions only on Case Series you have saved to the system.
Use the list box next to a group name to assign permissions to the group members on the Case Series you have generated. You can select from these options:
| Permission | Description |
| No Access (Default) | No group members will be able to access the Case Series |
| R | Group members will only be able to view the Case Series |
| R/W | Group members will be able to view and modify the Case Series |
| R/W/D | Group members will be able to view, modify, and delete the Case Series |
| R/W/D/P | Group members will be able to view, modify, delete, and assign permission on the Case Series |
|
Note: The author of the Case Series always has the highest level of permission (R/W/D/P). For example, you belong to the Data Entry group and you assign the No Access permission level to the Data Entry group on a Case Series that you generate. In this case, while you will continue to have the highest level of permission on your Case Series, other members in your group will not be able to access your Case Series. |
Click OK. The system saves the permission settings.
Use the following procedure to view the case series generation criteria.
Click the View Query Criteria button to view the Case Series Generation criteria in a statement format within a dialog box.
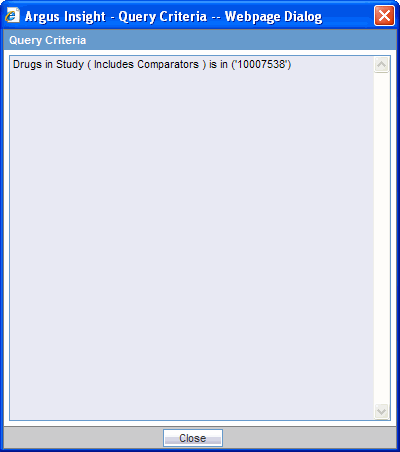
If required, you can modify the Case series by deleting or adding cases manually. Use the following procedure to add a case to the Case Series:
Click the icon on the left bar in the Active Case Series page. The Add Case to Case Series dialog box appears.
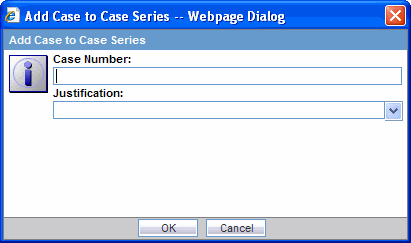
In the Case Number text box, type the case number you want to add to the Case Series.
Use the Justification list box to specify a justification for modifying the Case Series.
|
Note: You can also type your own justification text for modifying the case series. |
Click OK. If the Case number you specified exists in the datamart, the system adds the case to the Case Series and save the changes. If the Case number you specified does not exist in the datamart, a message appears. Click OK to continue.
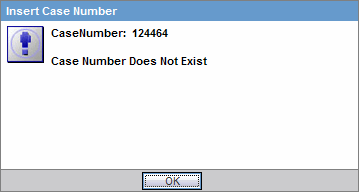
Click Save As to save the modified Case Series by another name. Note that if you have not yet saved the Case Series to the system, clicking either the Save or Save As buttons will prompt you to save the Case Series to the system by assigning a name to it.
Use the following procedure to delete a case from the Case Series.
In the Active Case Series page, select the case you want to delete.
Click the icon on the left bar in the Active Case Series page. The Delete Case Number dialog box appears.
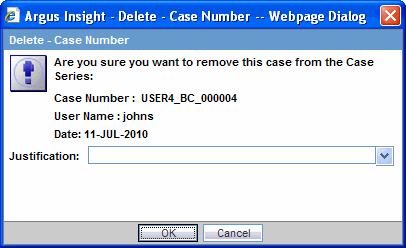
Use the Justification list box to specify a justification for deleting the case.
Click OK. The system deletes the case from the Case Series and save the changes.
The Case Series Library page lists all of the Case Series saved to the system. Select Query Results > Case Series > Library to access the Case Series Library page.

The Case Series Library page displays a list of the saved Case Series in a grid format. The descriptions of the grid columns follow.
| Column | Description |
|---|---|
| Name | Displays the name of the Case Series |
| Description | Displays the Case Series description |
| Last Modified | Displays the date when the Case Series was last modified |
| User Full Name | Displays the name of the user who generated the Case Series |
| Category | Displays the category assigned to the Case Series |
| Source | Displays the source of the Case Series as:
|
| Cases | Displays the number of cases in the Case Series |
Use the following procedure to search for a saved Case Series.
Specify the search criteria, as appropriate:
To search for a Case Series by its name, type the Case Series name in the Name text box.
To search for a Case Series by its description, type the first few words of the description in the Description text box. The system searches for the specified search string in all Case Series descriptions.
To search for a Case Series by its date of modification, enter the modification date in the first Last Modified date field. You can also specify a date range by typing the start and end dates in the first and second date fields, respectively.
To search for a Case Series by its author, select the author name from the User Full Name list box.
To search for a Case Series by its category, select the category from the Category list box.
Click Search. Based on your search criteria, the system displays the search result in a list.
You can sort the search result list by clicking the sort icon next to the column headers in the list.
To clear the search result and display all the saved Case Series in the list, click the Clear button.
Use the following procedure to make a case series active.
In the Case Series Library page, select the Case Series you want to make Active.
Click Make Active. The Active Case Series label in the upper-right corner of the Case Series Library page displays the name of the Case Series you made Active.
You may want to modify an existing Case Series by adding cases to it or deleting existing cases. You can also change the group-level access permissions on the Case Series.
Use the following procedure to modify a Case Series.
In the Case Series Library page, select the Case Series you want to modify.
Click Modify. The Case Series is displayed in the Active Case Series page. See the Working with the Last Generated Case Series for detailed information about making modifications to the Case Series and setting permission.
Argus Insight allows creating a new Case Series by merging two Case Series through a Set operator. The Set operator you select works on the Case numbers. The case numbers included in the merged Case Series depend on the type of Set operator you use:
Union - creates a new Case Series that consists of all the cases in both Case Series; common case numbers are included, and are listed only once
Intersect - creates a new Case Series that consists of only those case numbers that exist in both Case Series
Minus - creates a new Case Series that contains only those case numbers that are present in the first Case Series, but are not present in the second Case Series.
Use the following procedure to generate a merged Case Series:
In the Case Series Library page, click Merge. The Case Series Merge page appears.
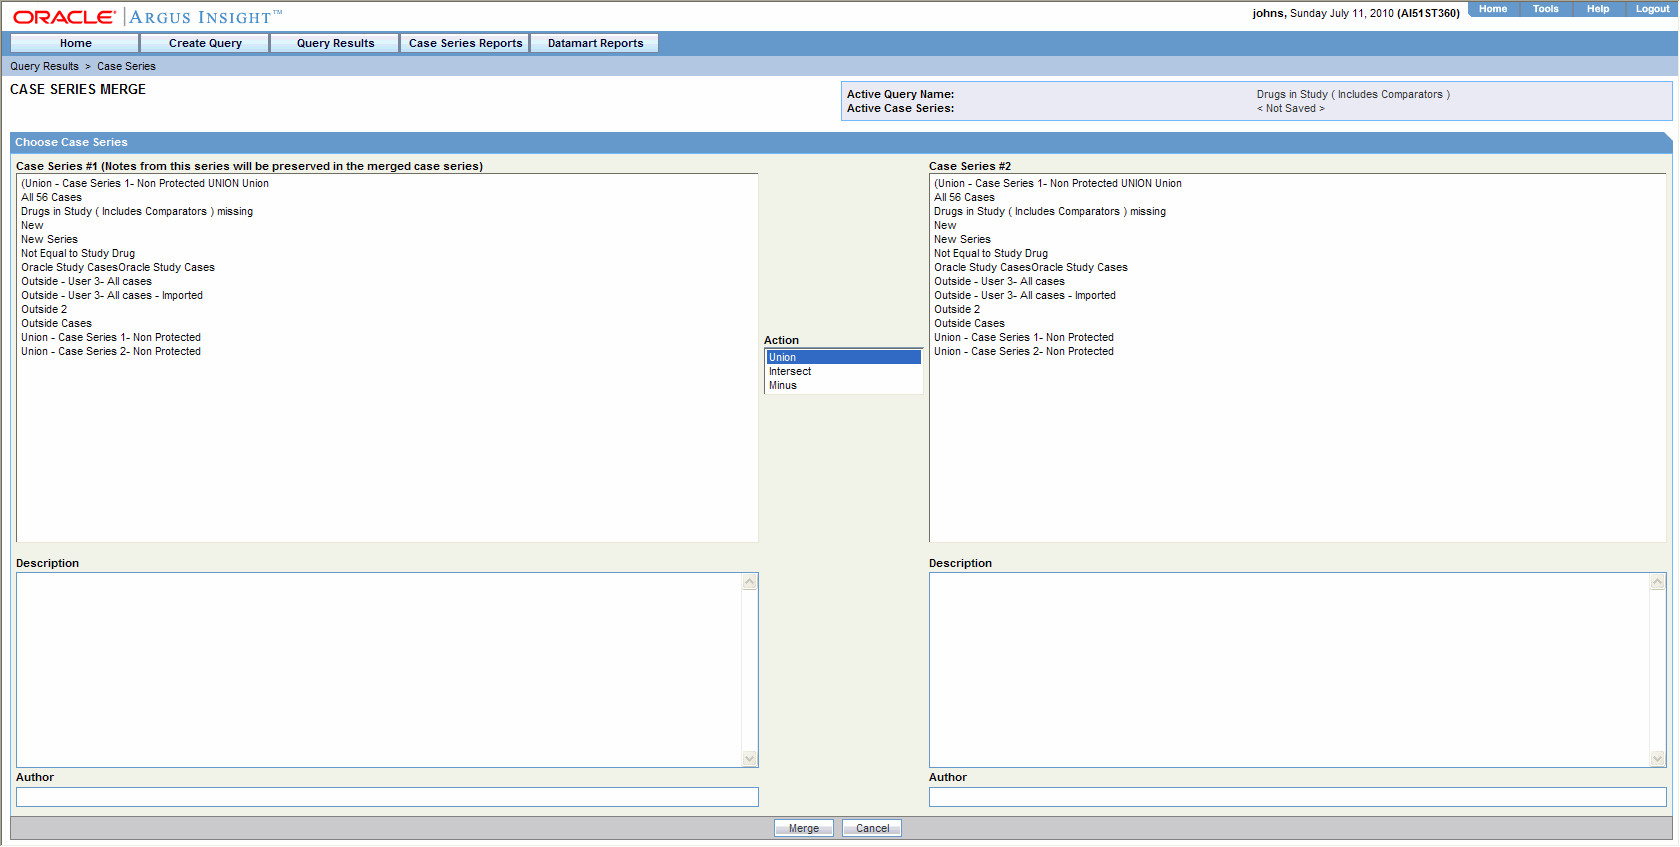
Select the two Case Series you wish to merge.
Select the first Case Series from the Case Series # 1 list.
Select the second Case Series from the Case Series # 2 list.
From the Action list, select the Set operator you wish to use to merge the two selected Case Series you selected. The two Case Series and the operator are selected.
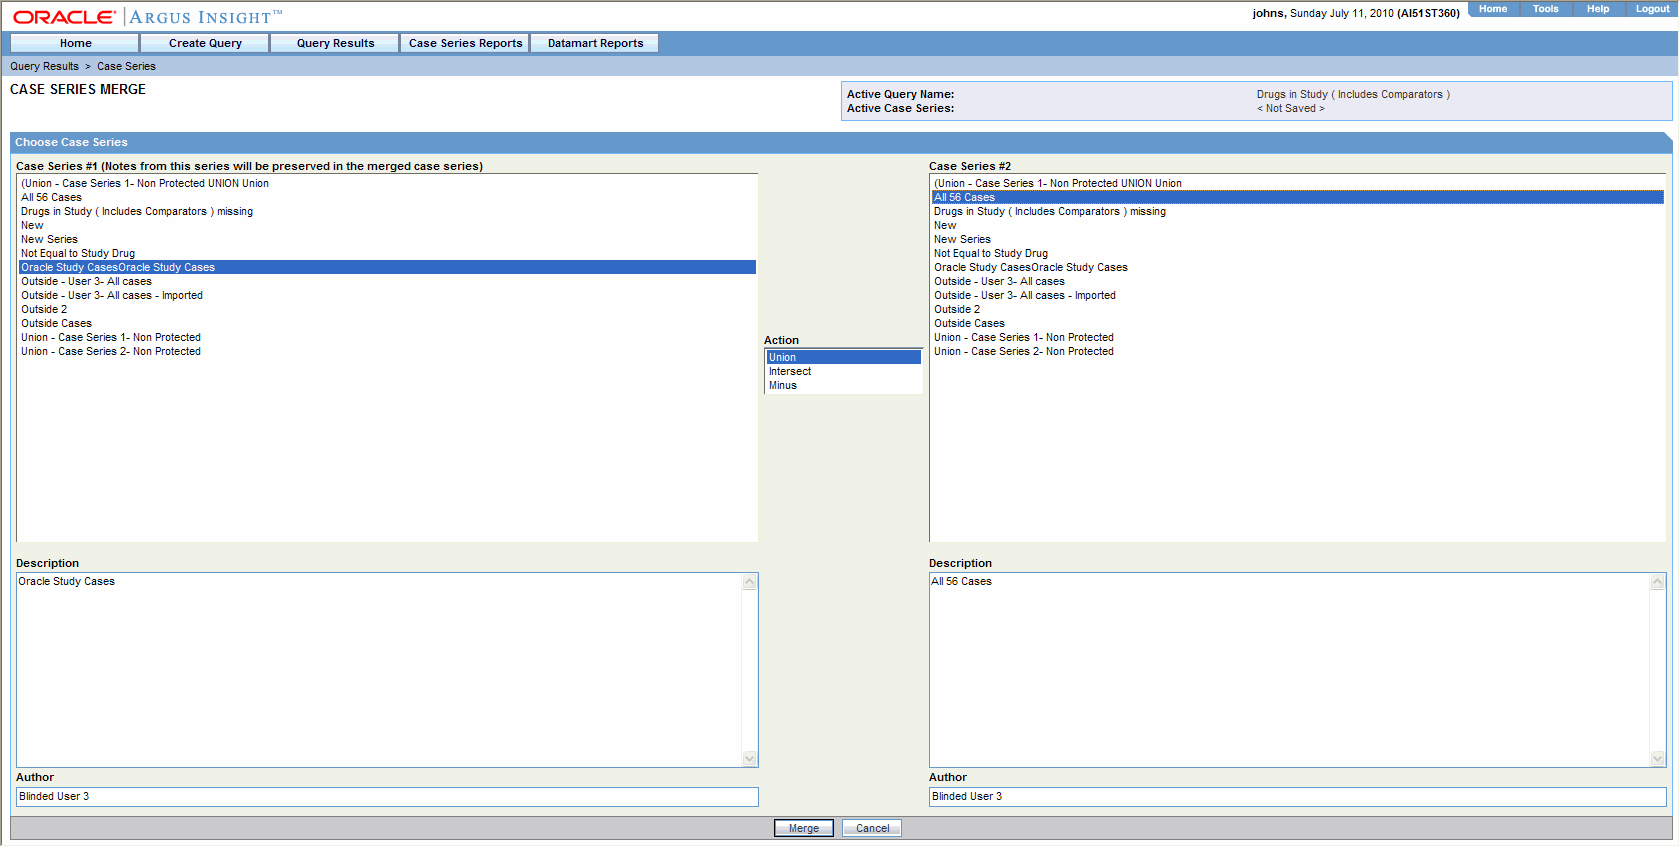
Click Merge. The system merges the selected Case Series and displays the resultant Case Series in the Active Case Series page.
Use the following procedure to import a Case Series from anexternal sources, such as TXT or CSV, into Argus Insight.
In the Case Series Library page, click Import. The Select File for Import dialog box appears.
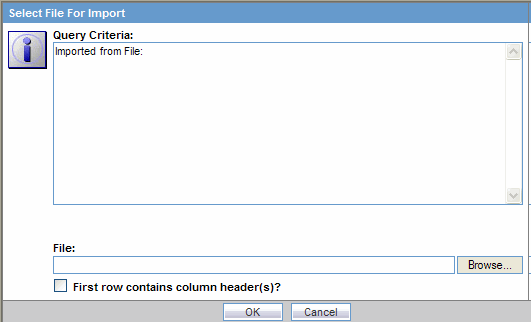
Click Browse to locate the external Case Series source file. Alternatively, type the file name with complete system path. Each case number in the file must be on a new line.
If the first row in your TXT or CSV is the column-header row, check the First row contains column header(s) checkbox.
Click OK.
The Import Case Series dialog box displays the status of the import operation.
|
Note: You can view the import operation log by clicking the View Log button. |
Click OK to view the imported Case Series in the Active Case Series page.
|
Note: Case Series Import supports only Case Numbers that are separated by either an ENTER or a ';' character. |
Use the following procedure to delete an existing Case Series.
In the Case Series Library page, select the Case Series you wish to delete.
Click Delete. A confirmation dialog box appears.
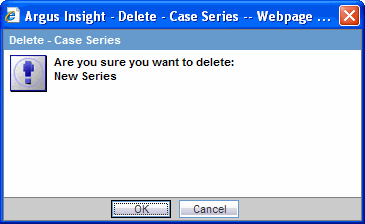
Click OK. The system deletes the selected Case Series; the Case Series Library page appears.
Use the following procedure to view the details of the query that generated a Case Series:.
In the Case Series Library page, select a Case Series.
Click Query Criteria. The Query Criteria dialog box displays the criteria.

|
Note: For a saved Case Series, the system displays the query details only in an SQL-statement format within the Query Criteria dialog box. However, for an Active Case Series that is not yet saved to the system, you can view the query details within the query tool interface (QBEform, Values Set page, or Advanced Condition Editor) as well as in the SQL-statement format. |
The system enables you to share cases between Argus Safety Web and Argus Insight using Query Results > Make Active from Argus.
Use the following procedure to share cases between Argus Insight and Argus Safety Web.
Login to Argus Insight with your user id and password.
|
Note: You need a common user id and password for Argus Safety Web and Argus Insight to enable case sharing between the two applications.An error message stating "Your user id is not present in Argus" appears if you do not have a valid user id in Argus Safety Web |
Select Query Results > Case Series > Make Active From Argus to view the Active Cases in the Argus Safety Web application. The Active Case Series of Argus appear on the screen. The Active Case Series present in Argus are now the active case series in Argus Insight.
|
Note: If there are no cases present in the active series of Argus, an error message appears indicating the same. |
Save the case series using the Save or Save As feature.
|
Note: Customers on Argus Safety 6.0 can share Frozen Case Series with Argus Insight 7.0. |
Use the following procedure to export a case series to an Excel file.
Create a new query from Query By Example, Filter or an Advanced Condition, or open a saved query from the Library of Query By Example, Filter or an Advanced Condition.
Click Execute to open the Case Series page with the list of cases.

Now, click Export to Excel at the lower right end of the web page.
A dialog box displays for saving or opening an excel file.
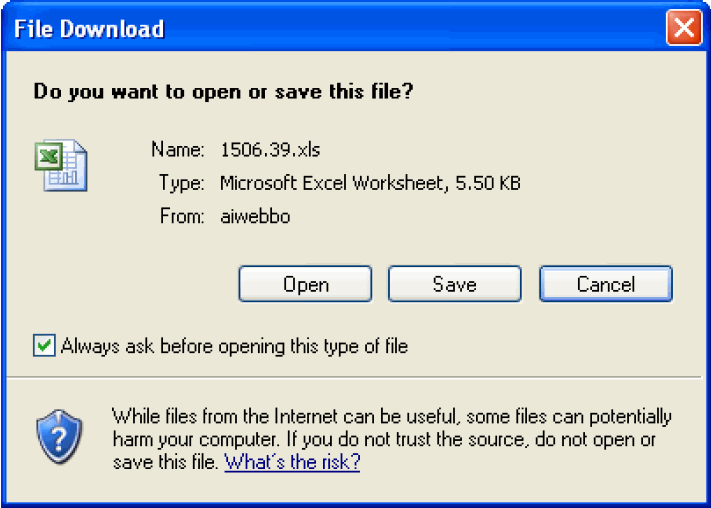
Click Open to open the excel file and view the Case Series results in excel. Click Save to save the excel file in your system for future reference.
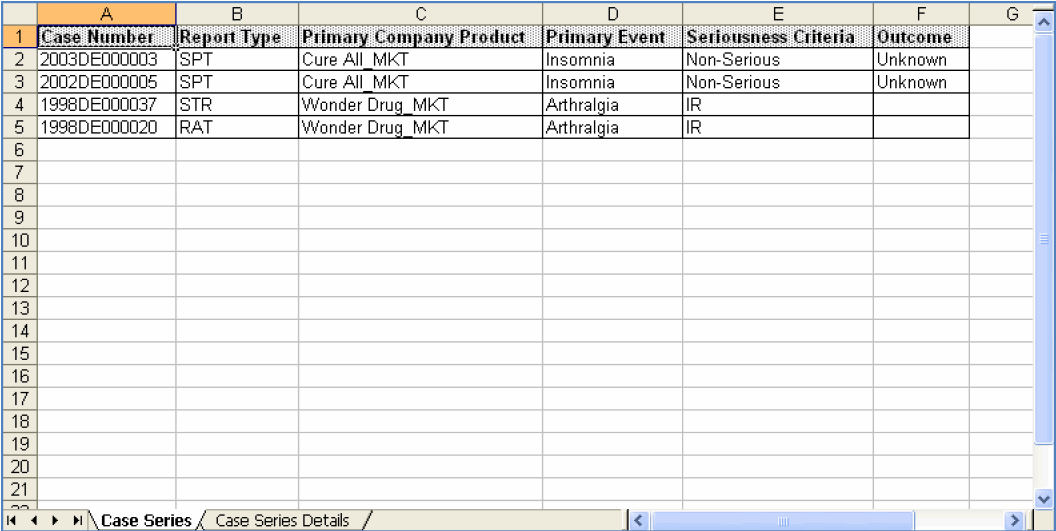
In the excel file you can see the case Series results in Case Series tab and Case Series details, i.e., Name, Case Count, Description and Criteria in Case Series Details tab.
