38.2 Create the Query and Paper Layout for a Multibyte Report
When you create a report, you can use either the Report Wizard to assist you or create the report manually.
To build the report in this example, you will use the Report Wizard. Using the wizard you will specify the layout, style, fields, and template details for the report. You will also provide the SQL query that contains the condition with a runtime user parameter. This parameter allows users to specify the language in which they want the report output printed.
-
Launch Oracle Reports Builder (or, if already open, choose File > New > Report).
-
In the Welcome or New Report dialog box, select Use the Report Wizard, then click OK.
-
If the Welcome page displays, click Next.
-
On the next page, make sure that Create both Web and Paper Layout is selected, then click Next.
-
On the Style page:
-
Type a Title for your report, such as
Product List. -
Make sure that Tabular is selected.
-
Click Next.
-
-
On the Data Source page, make sure that SQL Query is selected, then click Next.
-
On the Data page, click Query Builder.
-
In the Select Data Tables dialog box, click PRODUCT_DESCRIPTIONS, then click Include.
-
Click Close.
-
The table is displayed in the Query Builder. Click to the left of the following column names to select them:
-
PRODUCT_ID
-
LANGUAGE ID
-
TRANSLATED_NAME
-
TRANSLATED_DESCRIPTION
-
-
Click OK.
-
In the Data Source definition field, your query should look something like this:
SELECT ALL PRODUCT_DESCRIPTIONS.PRODUCT_ID,
PRODUCT_DESCRIPTIONS.LANGUAGE_ID,
PRODUCT_DESCRIPTIONS.TRANSLATED_NAME,
PRODUCT_DESCRIPTIONS.TRANSLATED_DESCRIPTION
FROM PRODUCT_DESCRIPTIONS
Note:
You can enter this query in any of the following ways:-
Copy and paste the code from the provided text file called
utf8_code.txtinto the Data Source definition field. -
Click Query Builder to build the query without entering any code manually, as described in the steps above.
-
Type the code in the Data Source definition field.
-
-
In the Data Source definition field, type
wherelanguage_id = :p_lang_id, after theFROMclause in the query. This adds the where clause to the query definition Thewhereclause restricts data based on the language selected by the user at runtime.Your query should now look like this:
SELECT ALL PRODUCT_DESCRIPTIONS.PRODUCT_ID,
PRODUCT_DESCRIPTIONS.LANGUAGE_ID,
PRODUCT_DESCRIPTIONS.TRANSLATED_NAME,
PRODUCT_DESCRIPTIONS.TRANSLATED_DESCRIPTION
FROM PRODUCT_DESCRIPTIONS
where language_id = :p_lang_id
Note:
The expression,:p_lang_id, when prefixed with a colon is treated as a parameter. If the parameter does not exist, Oracle Reports Builder creates the parameter. From here on, you can access this parameter in the User Parameters section under the Data Model node in the Object Navigator. -
Click Next.
Oracle Reports Builder displays the following message to indicate that an additional parameter is created:
Note: The query 'Q_1' has created the bind parameter(s) 'P_LANG_ID'.
-
Click OK.
-
On the Fields page:
-
Click PRODUCT_ID in the Available Fields list, and click the right arrow (>) to move the field to the Displayed Fields list.
-
Click TRANSLATED_NAME and click the right arrow (>) to move the field to the Displayed Fields list.
-
Click TRANSLATED_DESCRIPTION and then click the right arrow (>) to move the field to the Displayed Fields list.
-
-
Click Next.
-
On the Totals page, click Next.
-
Click Next on the Labels page.
-
On the Templates page, make sure that Beige is selected and click Finish.
Oracle Reports Builder displays the Runtime Parameter Form because you referenced a user parameter.
-
Type
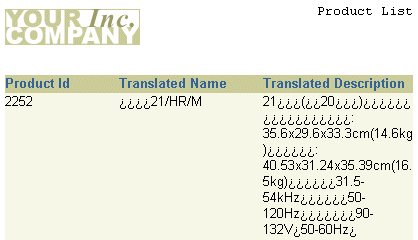
JA, and click the Run Report button to execute the report.The report output is displayed in Paper Design view. It should look something like this:
Figure 38-4 Paper design view of the report without Japanese characters in default setting

Description of "Figure 38-4 Paper design view of the report without Japanese characters in default setting"
Tip:
If you do not see any results, make sure that the valueJAis typed in capital letters so that data is retrieved from the database for the specified condition.You will not see any Japanese characters yet since a UTF8 TrueType font has not been selected.
-
Save the report as
multibyteutf8_your_initials.rdf.Note:
When designing a report, it is good practice to save it frequently under a different file name as a precautionary measure. Then, if you need to revisit some of the changes or if you generate an error, you can go back to the previously saved file and make revisions from that point.