9 Working With Static Lists
This section covers the following topics:
-
Note:
Unlike a dynamic list, which displays individual contributor data files or native documents on a web page, a static list displays all of its content from a single contributor data file.
9.1 About Static Lists
Lists can take many forms. If you have spent much time in a word processor or a web page editor, then you are probably familiar with the two basic kinds: the bulleted list and the numbered list (see "Adding Numbered and Bulleted Lists"). On a Site Studio Web site, there are two more types of lists that you can work with: dynamic list and static lists. These offer more advanced editing capabilities in Contributor.
A static list is a flexible and powerful feature in Site Studio Contributor. The list itself is created by the designer of the site and then turned over to you, the contributor, so that you can edit and manage the list. Static lists can be used to show things like your office locations, product summaries, or job openings.
A static list is similar to a table in that it contains rows and columns of information. The difference is that, in a static list, each row or column can be opened up and edited as an individual field in Contributor. Furthermore, in a static list, you can add a row or column and remove a row or column, but you cannot change the fundamental layout of the list (just like a dynamic list).
The look-and-feel of the static list may vary, depending on how it was originally set up. It may contain a single row or column, containing text and graphics, or it may contain several rows and columns containing text, graphics, links, and much more. A static list may not look like a list at all when viewed on a web page.
9.2 Static Lists in Contributor
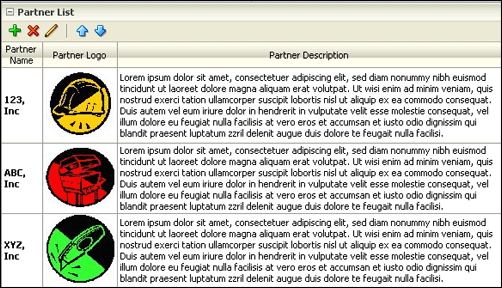
On a web page, a static list can take many forms. It may contain a single column of text and graphics, or it may contain numerous rows and columns and rows containing text, graphics, links, and much more. When editing a static list in Contributor, however, you see a list in the form of a table with columns and rows (Figure 9-1).
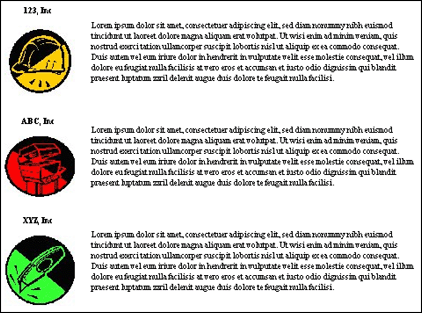
It contains multiple rows and columns, possibly a description or instructions in the field labels. In the above illustration, "Partner Name," "Partner Logo," and "Partner Description" are used for the field labels. The way it looks in Contributor may vary quite a bit from how it looks on the actual web page. Figure 9-2, for example, shows it as an invisible table, with the partner name above the partner logo, and the description to the right of the logo.
Each static list in a contribution region has a separate editing section in the Contributor editor. At the top of the section is the static list toolbar (Figure 9-3), which you use to add to, and edit, the list.
| Toolbar Option | Description |
|---|---|
| Adds a row to the static list. | |
| Removes the currently selected row from the static list. | |
| Launches the static list row editor (see "Static List Row Editor"), where you can edit the current row in the static list. | |
| Moves the selected row up one position in the static list. | |
| Moves the selected row down one position in the static list. |
9.3 Adding and Removing Rows in a Static List
You can add a row to, or remove a row from, a static list. Once you add the row, you can then edit it in Contributor.
To add a row to a static list, perform these tasks:
-
Open the static list in the Contributor editor.
-
Place your mouse cursor on the row above which you want to add a row.
-
Click the Add Row icon (Figure 9-4) in the static list toolbar.
Alternatively, you can also right-click the row and choose Add row in the context menu.
The row is added immediately above the currently selected row. (For information on changing the location of the row, see "Reordering Rows in a Static List".)
To remove a row, perform these tasks:
-
Open the static list in the Contributor editor.
-
Place your mouse cursor on the row that you would like to remove.
-
Click the Remove Row icon (Figure 9-5) in the static list toolbar.
Alternatively, you can also right-click the row and choose Delete row in the context menu.
The row is removed from the list.
9.4 Reordering Rows in a Static List
You can reorder the rows in a static list by moving a row up or down in the list. This is especially useful after you have added a row and want to move it to a different position.
To reorder the rows in a static list, perform these tasks:
-
Open the static list in the Contributor editor.
-
Place your mouse cursor on the row that you would like to move.
-
Perform one of the following steps:
-
To move the row up, click the Move Row Up icon (Figure 9-6) in the static list toolbar.
-
To move the row down, click the Move Row Down icon (Figure 9-6) in the static list toolbar.
-
9.5 Editing a Static List
A static list contains rows and columns of information. To edit the list, you select a row in the list and then edit the individual fields (or cells) in that row. When you do this, Contributor opens a window for you to work in. When you are finished, you can close the window and return to Contributor where you can edit other rows or even other parts of the web page.
To change a static list, perform these tasks:
-
Open the static list in the Contributor editor.
-
Click to select the row in the static list that you would like to edit.
-
Click the Edit Row icon (Figure 9-7) in the static list toolbar.
If you receive the message "Please select a row," the table may not contain any rows yet. You must add a row before you can edit it (see "Adding and Removing Rows in a Static List").
-
The Static List Row editor opens (see "Static List Row Editor"), with appropriate sections for you to edit. Enter the appropriate text, graphics, and other content as you normally would in Contributor.
The number of fields in this dialog may vary, depending on how your site was set up.
-
Click the Update icon (Figure 9-8) to save your work.
This returns you to the Contributor editor for the contribution region, where you see the row you just edited highlighted within the static list section editor.
Note:
When you preview the list, it may look very different from what it looks like in Contributor. This depends on how the list was originally set up by the designer. The available editing options in the static list may vary, too, depending on how the site was set up. You cannot change the column headings for the static list. They are created by the designer when the list was first set up. Contact your site designer for details.

