3 Post Discovery Configuration and Verification
Once the Oracle Exalytics Machine has been discovered through Enterprise Manager Cloud Control 12c, you must complete the following post-discovery configuration:
3.1 Configure the Compute Node ILOM SNMP for Enterprise Manager Monitoring
The compute node ILOM targets are responsible for displaying a number of disk failure alerts for their respective compute node that are received as SNMP traps. To configure the ILOM SNMP:
-
Log in to the ILOM console.
-
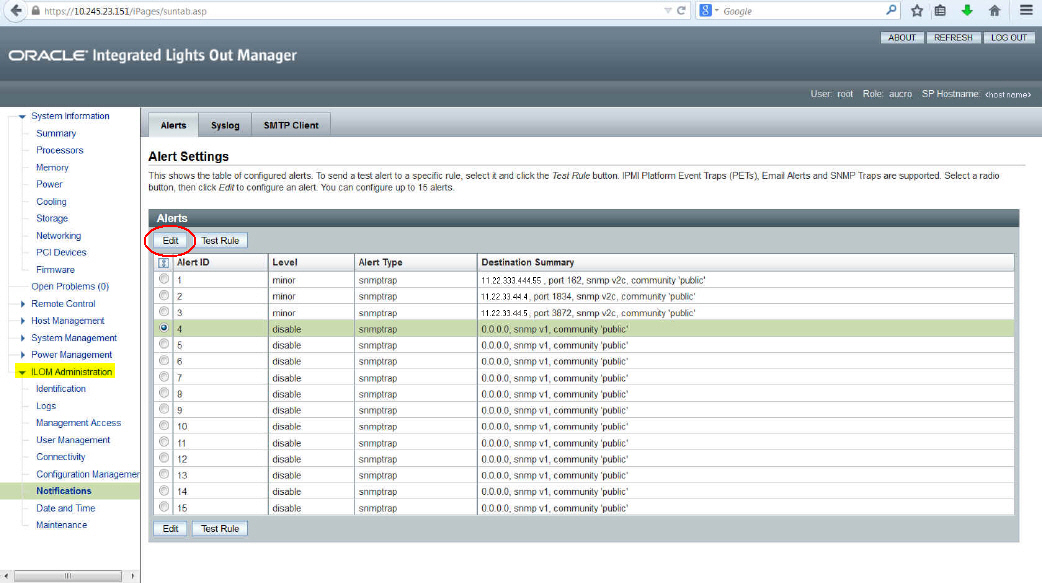
In the left-hand navigation, select ILOM Administration, then select Notifications. Select a rule that has a disable level and click Edit as shown in Figure 3-1:
-
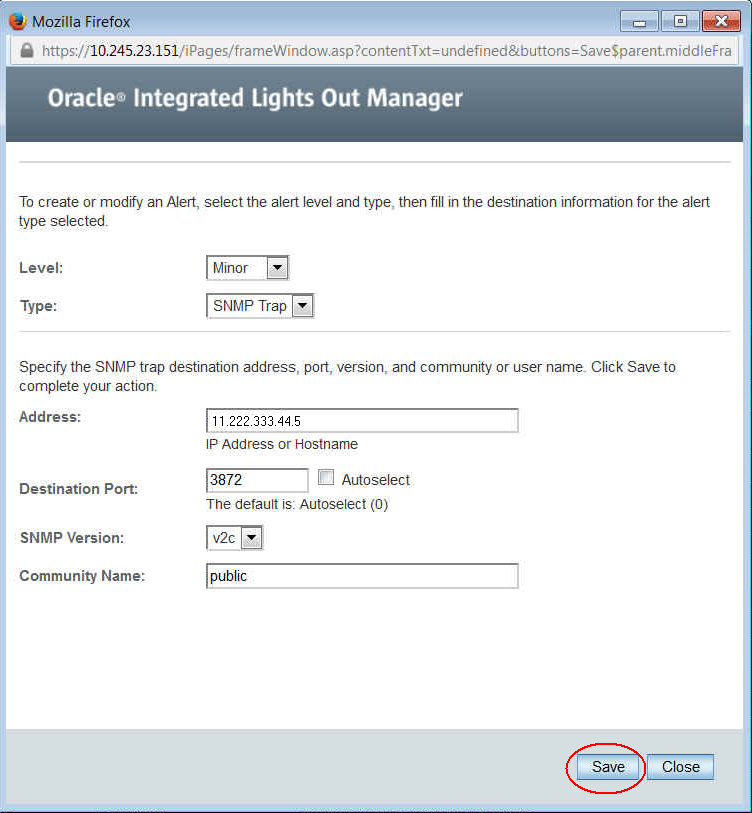
In the Edit pop-up window, enter the following information:
-
Level: select Minor from the drop-down menu.
-
Type. select SNMP Trap from the drop-down menu.
-
Address: enter the IP address of the host where agent monitoring the ILOM is running.
-
Destination port: enter the agent port number.
-
SNMP Version: select v2c from the drop-down menu.
-
Community: enter public.
Click Save to save the changes, as shown in Figure 3-2:
-
3.2 Verify the Compute Node ILOM SNMP
To verify the ILOM SNMP configuration:
-
Log in to the compute node host as
rootand run the following command:# ipmitool -I lan -H myhost.mycompany.com -U root -P welcome1 -L OPERATOR event PCIE5/PRSNT absent assert
The results of this command should look like this:
PCIE5/PRSNT absent assert
Finding sensor PCIE5/PRSNT... ok
   0 | Pre-Init Time-stamp | Entity Presence #0xa7 | Absent | Asserted
-
Refresh the ILOM target page. An incident should appear in the Incidents section. Once it is verified, clear the incident in Cloud Control.