7 Chargeback Functionality
This chapter provides the instructions for configuring chargeback functionality for Microsoft SQL Server.
This chapter contains the following sections:
7.1 About Chargeback
Chargeback, as the name implies, is a tool of accountability. The application's primary uses can generally be described as follows:
-
Provide resource usage metering by aggregating and normalizing the enormous amount of metric data Enterprise Manager collects.
-
Provide IT with a means to "charge" a currency amount to the consumers of resources.
-
Provide consumers with reports detailing their consumption and associated charges.
7.2 Chargeback Plug-in Deployment
In order to use the Chargeback functionality, it is necessary to deploy the Chargeback plug-in (from the Setup menu, select Extensibility, and then select Plug-ins).
For information on how to deploy the Chargeback Plug-in for Oracle Enterprise Manager, see the Enterprise Manager 12c Cloud Control Metering and Chargeback White Paper:
http://www.oracle.com/technetwork/oem/cloud-mgmt/wp-em12c-chargeback-final-1585483.pdf
7.3 Configuring Global Settings for Chargeback
To configure the global settings for chargeback:
-
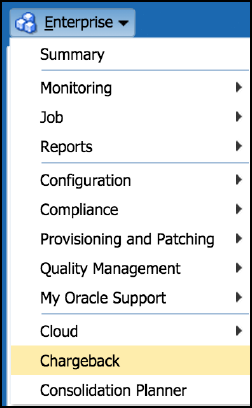
From the Enterprise menu, select Chargeback, as shown in Figure 7-1:
-
If you have not already configured global settings for currency symbol and uptime calculations, select the Settings subtab on the bottom of the Home tab.
-
To change the default currency (USD), click in the currency symbol text box and enter the desired currency symbol. The new selection becomes the default currency across all charge plans; that is, the universal plan and all extended charge plans. All reports, including historical reports, reflect the new currency.
Note:
No rate conversion occurs when you change the currency; that is, the numbers stay the same. For example, a change from dollars to euros means that a one dollar charge becomes a one euro charge. -
Select the appropriate radio button to ignore or include uptime in charge calculations. The default is to include uptime as a consideration. Including uptime has an impact on all fixed and configuration-based charge calculations for all entities.
Chargeback prorates charges and discounts accordingly. So, for example, if an entity was available 22.5 hours in a 24-hour period, the daily charge would be adjusted 1.5 hours. A change in the uptime setting is effective from the beginning of the current report cycle, but does not impact previous report cycles; that is, charges in historical reports are not prorated based on a change made to the setting in the current cycle.
-
-
Click Save to update the settings.
7.4 Configuring a Charge Plan
A charge plan defines the resources to charge for and their associated rates. There are two types of charge plan: the universal charge plan and the extended charge plan.
The universal plan establishes rates for three basic metrics (CPU, memory, and storage). If you have not configured the universal charge plan, refer to the "Chargeback Administration" section of the Oracle Enterprise Manager Cloud Administration Guide:
http://docs.oracle.com/cd/E24628_01/doc.121/e28814/chargeback_cloud_admin.htm#EMCLO926
An extended charge plan enhances the universal plan to include entity-specific metrics. It allows you to implement charges that relate to specific characteristics of an entity. The entity type determines the items for which rates can be charged.
Following the steps below to create an extended charge plan for Microsoft SQL Server:
-
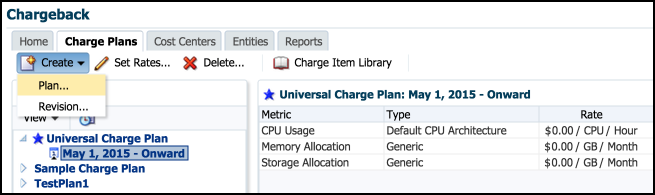
From the Charge Plans tab, select Create, and then select Plan as shown in Figure 7-2. This will bring you to the Create Plan page.
-
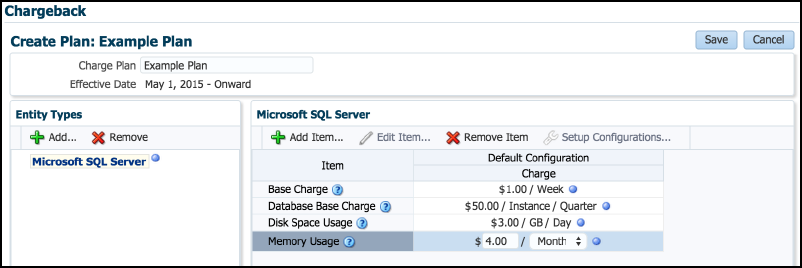
On the Create Plan page, you can name your plan at the top. In the left panel labeled "Entity Types" click Add and select Microsoft SQL Server as your Entity type.
-
Next, select Add Item in the center menu (Figure 7-3) to add the different items you can charge for. You can choose between the following four charge items or add them all:
-
Base Charge
-
Database Base Charge
-
Disk Space Usage
-
Memory Usage
-
-
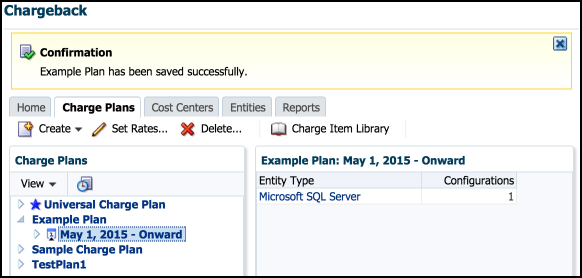
Once you have selected the types you wish to include in your Charge Plan, set the rate and frequency. You can set the frequency for each item by hour, day, week, month, quarter or year. After you have set the charge items, click Save located at the top right of the screen. This will bring you back to the Charge Plans tab and give you confirmation at the top of your screen (Figure 7-4) that your plan was saved. You should now see it listed in the left hand panel.
At this point you will have created a Charge Plan.
7.5 Revising Extended Charge Plans
You can update an extended charge plan in the following ways:
-
Make changes to the charge rates in effect for the current or a future cycle.
-
Create a plan revision for the next or a later report cycle, based on an existing plan.
To make changes to the charge rates in effect for the current or a future cycle:
-
Select the plan revision in the navigation pane and click Set Rates.
-
Make adjustments to the charge items and rates in effect.
-
Click Save to update the plan revision.
Note:
When changing charge rates for the current cycle, the changes are retroactive to the beginning of the cycle.To create a plan revision for the next or a later report cycle, based on an existing plan revision:
-
Select a plan in the navigation pane, and then select Revision from the Create menu.
-
In the dialog that opens, select the effective date of the revision. The default date is the first month after the most recently added revision. For example, if the current cycle is for May and a June revision already exists, July 01 is the default effective date. Click OK.
-
In the familiar create-like model, the configurations, charge items, and rate adjustments for the plan you selected in the navigation pane appear in the plan details table on the right.
Edit the plan details as desired:
-
Add and remove entity types.
-
Add and remove configurations.
-
Add, change, and delete charge items.
-
Make adjustments to metric rates.
-
-
When done, click Save to complete the plan revision.
7.6 Configuring a Cost Center
Cost centers can be an individual or department within an organization that spreads charges across an enterprise.
The next step to setting up chargeback functionality is to configure a cost center.
Follow the steps below to create a cost center:
-
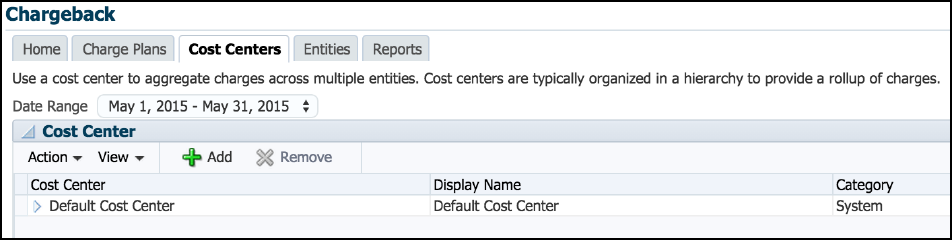
From the Cost Centers tab, select Add as shown in Figure 7-5:
-
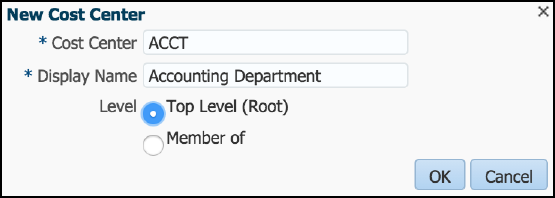
In the box that appears, give your cost center a unique identifier and a display name. In the example shown below (Figure 7-6), ACCT was used as the identifier and the name was Accounting Department. For the Level value, select either Top Level (Root) or Member of depending on its position in the hierarchy.
-
Once you have selected the names, click OK. You should now see your cost center listed (Figure 7-7).
You will now have successfully created a cost center.

7.7 Configuring an Entity
For each chargeback entity (target), the administrator is able to assign a charge plan to a target and a target to a cost center.
The following steps are used to setup your entities:
-
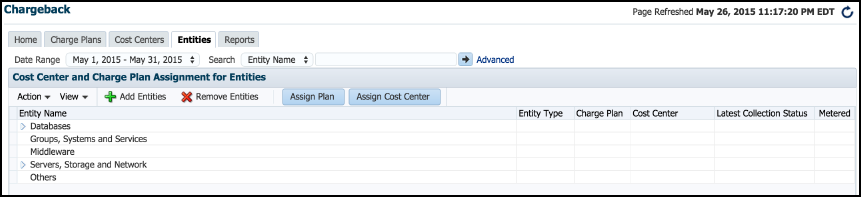
From the Entities tab, select Add Entities (Figure 7-8). This will take you to the Add Entities page.
-
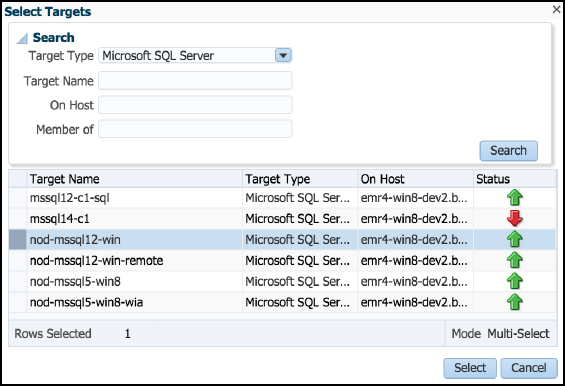
From the Add Entities page, click Add. In the box that appears (Figure 7-9), select Microsoft SQL Server for the target type and then select the target you would like to add. You can also search the target's name to find it, if it does not appear in the list.
-
Once you have found the target you would like to add, click Select. It should now appear in the list of targets located at the center of the page (Figure 7-10). Click Next.
-
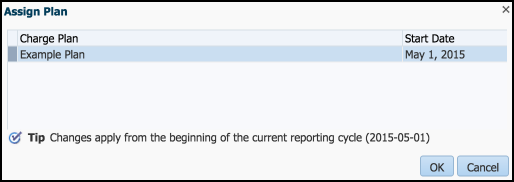
Assign a plan to your entity. Select the target and click Assign Plan. In the Assign Plan pop-up (Figure 7-11), choose the charge plan you would like to assign to the entity and select OK.
-
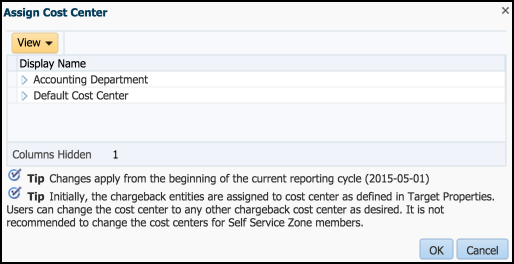
Assign a cost center to your entity. In the Assign Cost Center pop-up (Figure 7-12), choose the cost center that you would like to assign the entity to. After you have assigned both a charge plan and cost center, click Next.
-
Review your selections. If everything appears correct, click Submit. At the top of the Chargeback page you should see confirmation that the entity was added correctly (Figure 7-13):

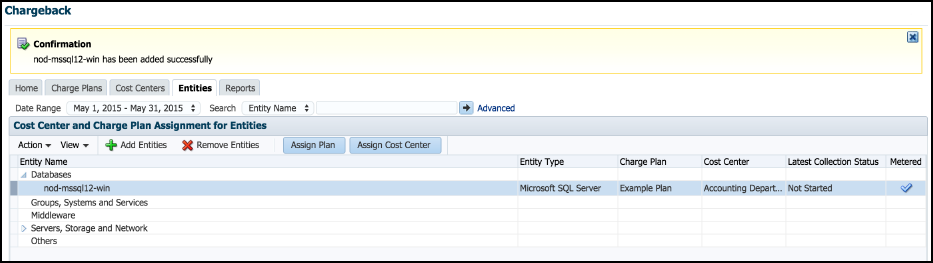
From the Entities tab, you can change the cost center or charge plan associated with a specific entity by selecting the entity and clicking either Assign Plan or Assign Cost Center, depending on which one you want to change. To delete the entity, click Remove Entities.
7.8 Generating and Distributing Chargeback Reports
Chargeback summary reports are a powerful analytical tool for tracking resource usage and charge distributions. These summary reports show information related to charge or resource utilization broken down by cost center, entity type, and resource. They enable you to quickly assess the entities or cost centers with the greatest charges or resource utilization. Summary reports are primarily useful for drill-down purposes.
Data collection occurs once a day. The daily data collection job for the current cycle is based on charge plan and cost center assignments. The reporting cycle defines the time period for which to calculate charges. The cycle is for the current month starting on the first day of the month.
To generate ad hoc reports:
-
From the Enterprise menu, select Chargeback.
-
Select the Reports tab.
-
Design your report from the following options:
-
Use the current report cycle or customize a date range to report on.
-
Choose between summary and trend report types. A summary report presents a pie-chart breakdown, while a trend report uses a y-axis multiple bar chart to denote usage trends.
-
Select specific cost centers or report on all users.
-
Select specific entities or entity types or report on all entities within all entity types.
-
Choose the metric to report on.
Click View Report to see the results.
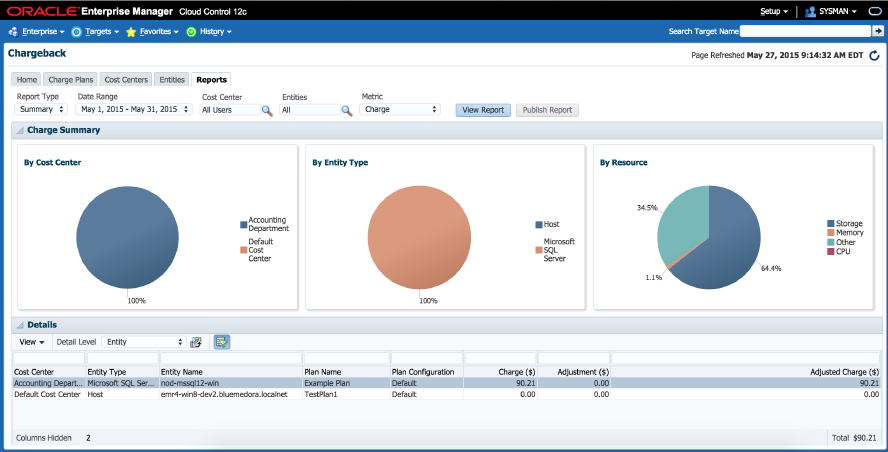
The report displays color-coded graphs summarizing charges by cost center, entity type, and resource, with details displayed in the table at the bottom. Click a color box link in the respective graph to recalculate the report contents for the color-coded selection, for example memory in the resource graph.
Figure 7-14 shows and example of a summary report showing charges for the current reporting cycle for all cost centers and entity types, with a breakdown by resource.
-
-
Filter the details by choosing from the drop-down list; the default is All. Use the query-by-example feature (
 ) to search report details. The icon acts as a toggle; clicking it alternately shows or hides text and selection boxes above the table columns. The feature is also available in the View menu. Enter search criteria in various combinations by selecting a date and by typing values in the respective columns. Click Enter to activate the search.
 -
Click the Export icon (
 ) in the details region to export report contents to a file.
 -
Click Publish Report to make report contents public. This action integrates with BI Publisher, where you can:
-
Save reports in a variety of formats (Excel, PowerPoint, HTML, PDF).
-
Distribute generated reports to e-mail lists (users who do not have access to Enterprise Manager, for example) on a defined schedule.
-
For information on BI Publisher setup, see the "Configuring BI Publisher on Enterprise Manager" chapter in the Enterprise Manager Cloud Control Advanced Installation and Configuration Guide:
http://docs.oracle.com/cd/E24628_01/install.121/e24089/install_em_bip.htm#CEGBEJDJ
7.9 Additional Information
For further information regarding Chargeback, refer to the Chargeback Administration section of the Oracle Enterprise Manager Cloud Administration Guide.
http://docs.oracle.com/cd/E24628_01/doc.121/e28814/chargeback_cloud_admin.htm#EMCLO926