8 Building Portal Pages for WebCenter
This chapter contains the following topics:
8.1 Overview
WebCenter Spaces portals provide two arenas for the presentation of resources and information: a Space and the Home Space.
Spaces are typically used to create portals and communities that are scoped to a specific audience, for example, a specific division, department, project, or community.
The Home Space provides each user with a private work area for storing personal content, viewing and responding to business process assignments, maintaining a list of online buddies, and performing many other tasks relevant to his or her unique working day.
The WebCenter administrator will determine which users will be able to create Spaces based on the role and permissions assigned to each user.
8.2 Creating a Space
Login into WebCenter Spaces using the user name and password provided to you. If you do not have user name and password, register yourself.
The user name for the portal you are using must match the user name for the EnterpriseOne environment that the portlets are running on.
E.g. If the user name and password for PY900 is AB1234, then the portal user name and password for the WebCenter/Collaborative Portal running PY900 portlets must be AB1234.
Note:
If WebCenter user name is not a valid E1 user name:-
Map WebCenter user name to E1 user name.
-
Launch P0092|W0092P from Fast Path.
-
Click Add.
-
Enter E1 user in EnterpriseOne UserID field, WebCenter user in Enterprise UserID field. Username must be entered in upper case even though the actual WebCenter user name has lower case characters.
These are the steps to create a Space:
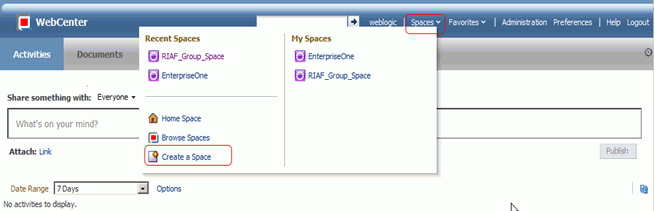
Description of the illustration image132.png
-
Once you login to the WebCenter, click on the Spaces link which will display a menu of actions that can be performed on Spaces. Click on the Create a Space menu item.
Description of the illustration image133.png
-
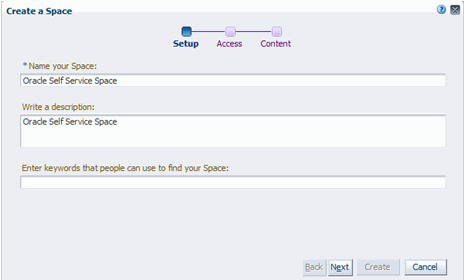
Enter the name of your Space and click Next.
Description of the illustration image134.png
-
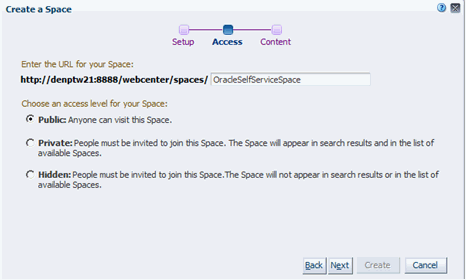
Select the level of access; either Public, Private, or Hidden, then click Next.
Description of the illustration image135.png
-
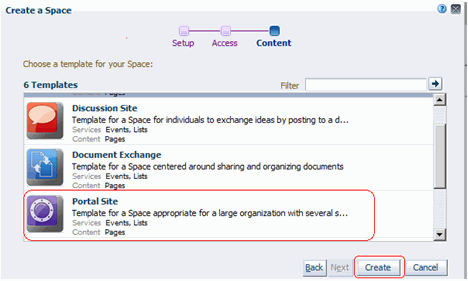
Select the type of template to be used. In this example, select the Portal Site template and click the Create button.
Description of the illustration image136.png
-
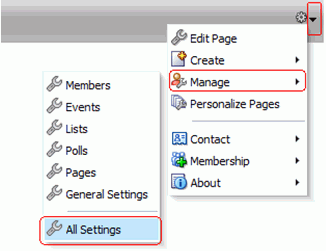
After the Space is created, click on the arrow to the right of the screen to access the drop down menu. Click Manage, and then click All Settings.

Description of the illustration image139.png
-
Click the Members tab. If people need to be added, click the Add People tab. For now, we will not be adding any members to the Space.
Description of the illustration image138.png
-
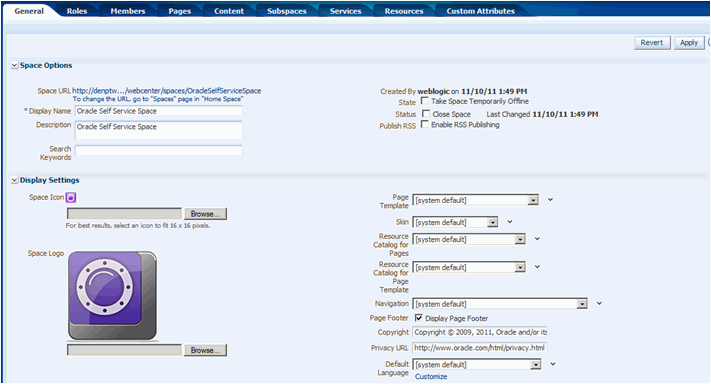
Select the General tab.
Fill the following details:
-
Display Name: Oracle Self Service Space
-
Description: Oracle Self Service Space
-
-
To add a logo to the work space, browse to the location of the logo.
-
Select the logo file and click Open.
Description of the illustration image140.png
-
Configure the other details. Set the Default Language and Site Template to Maximized, so that the Space will display the page with the logo we have chosen and will not have the default page settings. Set Copyright to add any copyrights to the page.
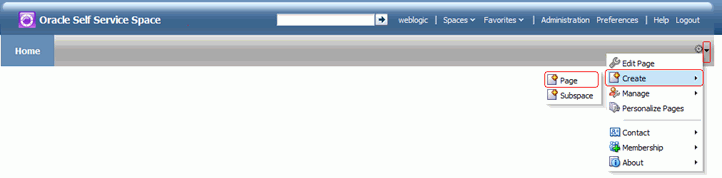
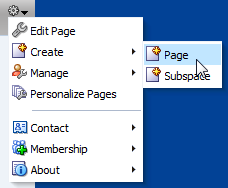
By default, Home and Settings pages will be available. Go back to the Home page. The following image shows the Home page. The Home page will have the instructions to Edit and Create pages as well as instructions to enable and disable services for this space. Select the down arrow, click Create, and then click Page.
Description of the illustration image141.png
-
The portal pages can be made available or unavailable by enabling/disabling the display of portal pages on the spaces.
To disable the display of the Home portal pages:
-
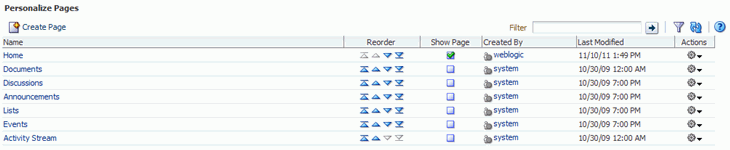
Click on the down arrow on the right of the screen and click Manage, and then click Pages, which will display the list of Portal pages on the current Spaces.
-
To disable a portal page, uncheck the Show page property for the corresponding portal page.
In this case, the Search and Activity Stream pages are unchecked:
-
8.3 Creating a Buyer Self-Service Portal Page
WebCenter Spaces also provide a variety of page layouts (called styles) that can used to create different types of pages with different layouts. Page types may restrict the type of content that can be added to a page, such as text only, wiki only, blog only, and the like. Page layouts define the number of columns and content areas that define a page's geometry. Layouts are initially determined by the style that is selected while creating the page. Some page styles inherently allow switching to another page layout, such as wikis or blogs.
In addition to the layouts available through page styles, the user can create their own layouts using the layout components available through the Resource Catalog.
In this section, we are going to build a Buyer Workspace page, as shown in this image:
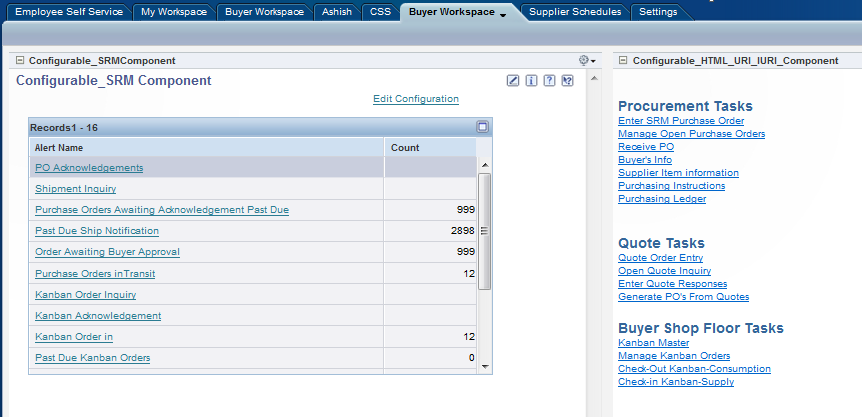
Description of the illustration bwc038.png
Follow these steps to create the Buyer Workspace page:
-
Log into WebCenter and access the Oracle Self Service Space the was created in the previous section.

Description of the illustration bwc039.png
-
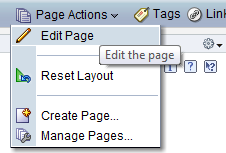
Click the Page Actions dropdown arrow, select Create, and then Page.
Description of the illustration bwc001.png
-
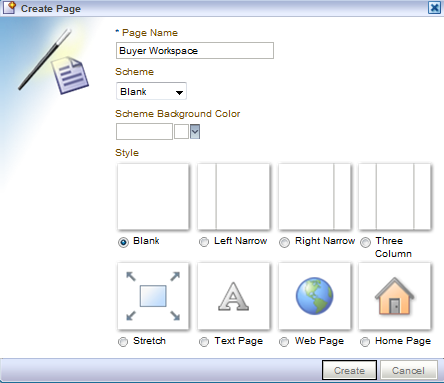
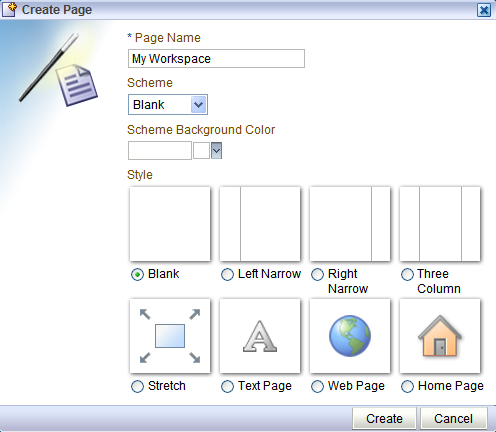
Enter the Page Name as “Buyer Workspace” and let the Scheme be Blank and click Create button. This will show Buyer Workspace page in Edit mode having only one column.

Description of the illustration bwc002.png
-
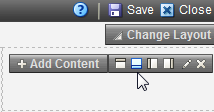
Click on Add Box Right.
Description of the illustration bwc003.png
-
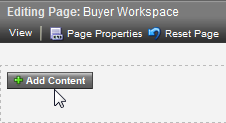
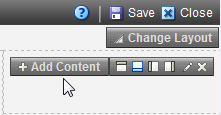
Click Add Content to add E1 portlets.
Description of the illustration bwc004.png
-
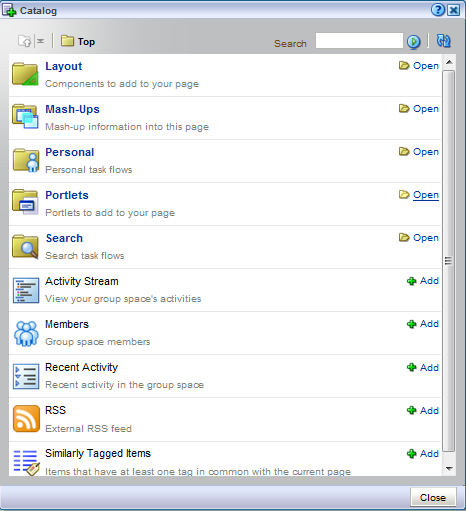
Click on Portlets to open the Portlets catalog.

Description of the illustration bwc005.png
-
Select stg_oracle_webcenter (this name could be different based on the setup) to see the list of EnterpriseOne portlets available.

Description of the illustration bwc006.png
-
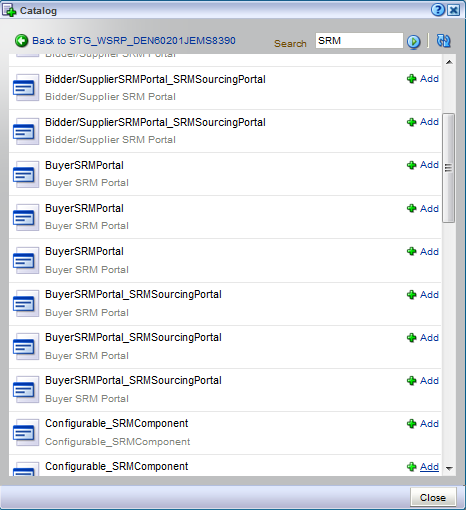
Add the Configurable_SRM Component portlet from the list of portlets available, and then click the Close button.
Description of the illustration bwc007.png
-
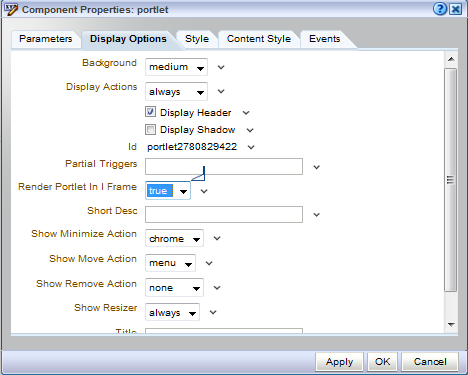
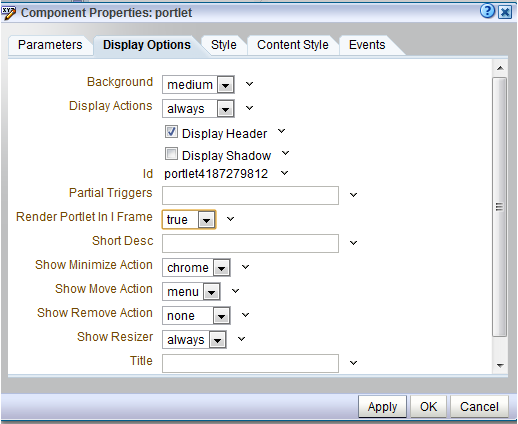
Click on the edit button of the portlet and select the Display Options tab. Set the property Render Portlet in I Frame to true. Click the OK button.

Description of the illustration bwc008.png
-
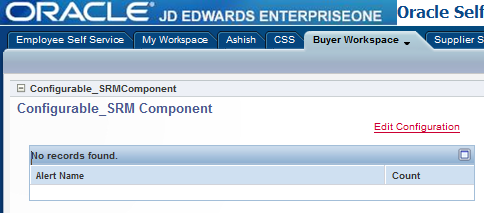
Save and close the page. Click on the Edit Configuration link.
Description of the illustration bwc009.png
Description of the illustration bwc010.png
-
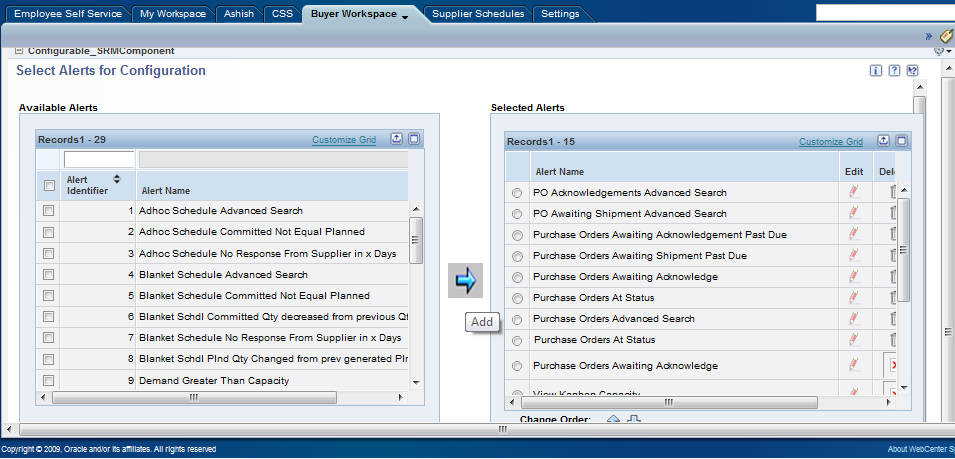
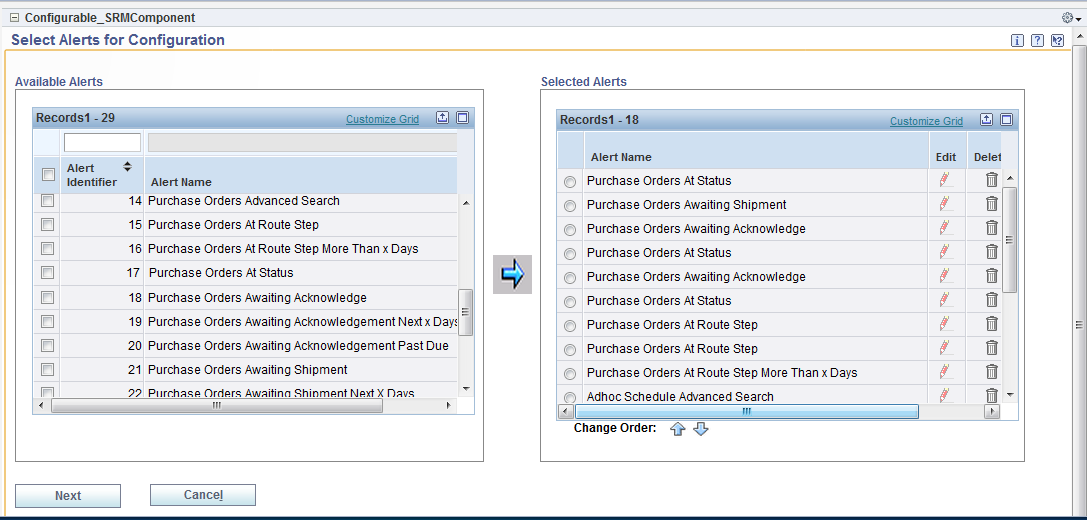
Click the Add arrow to add the selected alerts from the Available Alerts grid to the Selected Alerts grid.
Description of the illustration bwc011.png
-
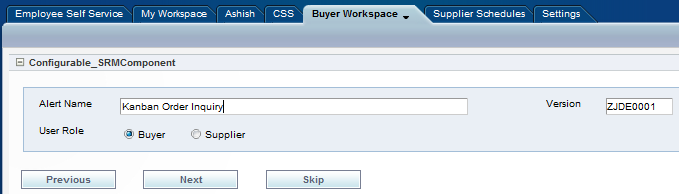
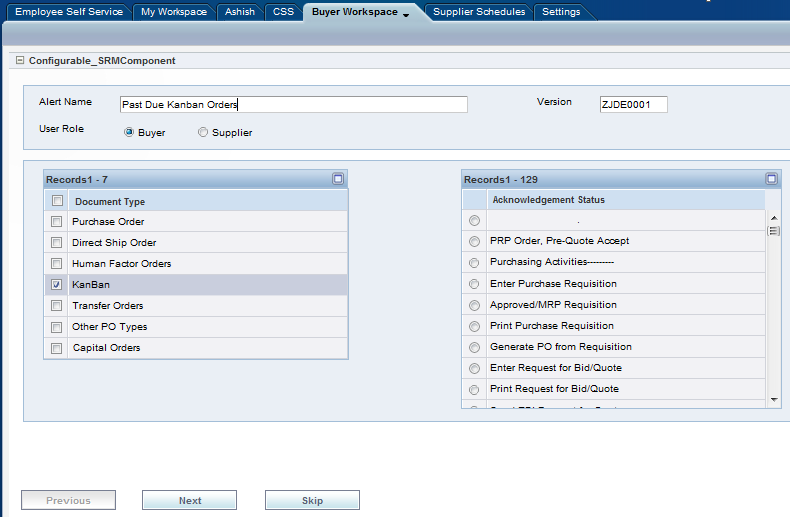
Click Next. This will allow the user to override all of the alert names as desired.
The images below list all of the alert name overrides.
Figure 8-3 Purchase Orders Awaiting Acknowledgement Past Due Alert
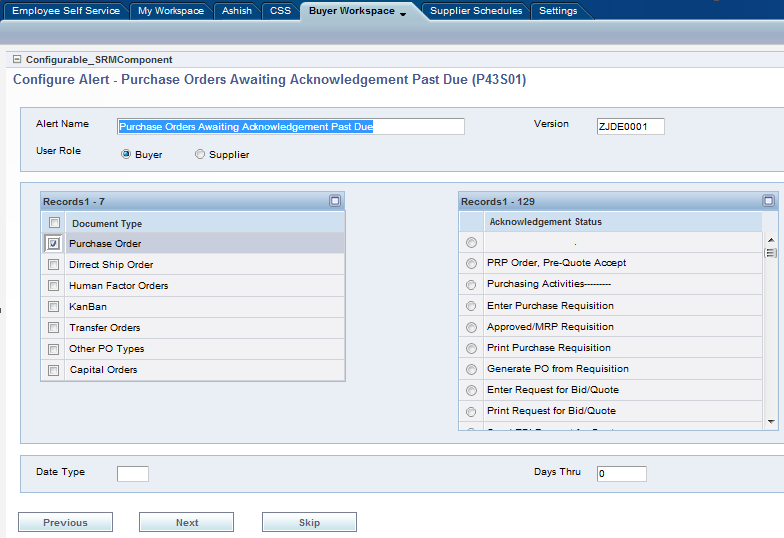
Description of "Figure 8-3 Purchase Orders Awaiting Acknowledgement Past Due Alert"
Figure 8-4 Purchase Orders Awaiting Shipment Past Due Alert
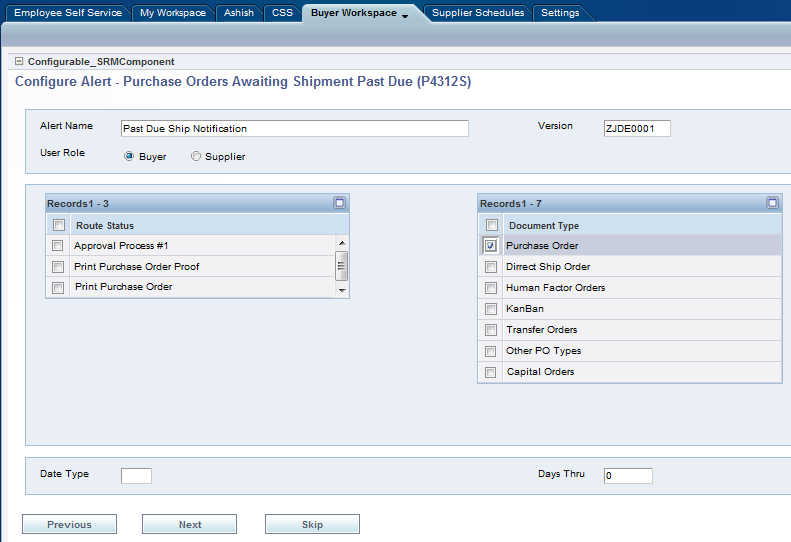
Description of "Figure 8-4 Purchase Orders Awaiting Shipment Past Due Alert"
Figure 8-5 Purchase Orders in Status Alert
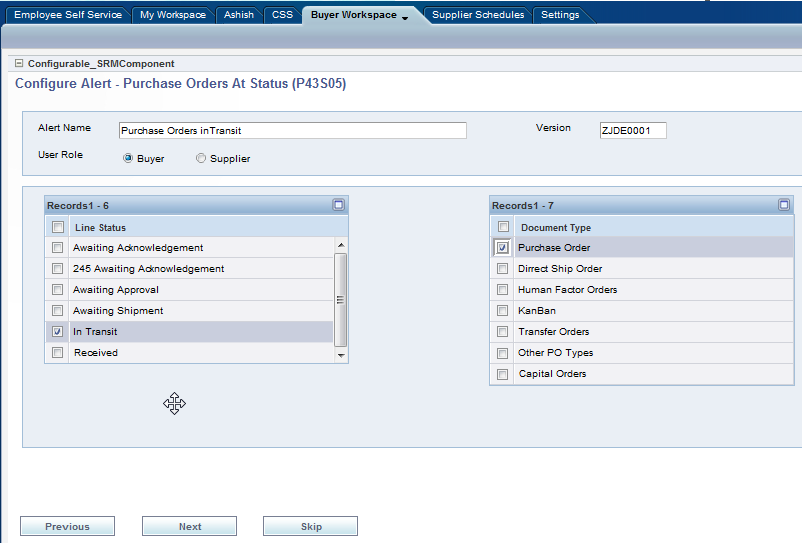
Description of "Figure 8-5 Purchase Orders in Status Alert"
Figure 8-9 Purchase Orders At Route Step Alert
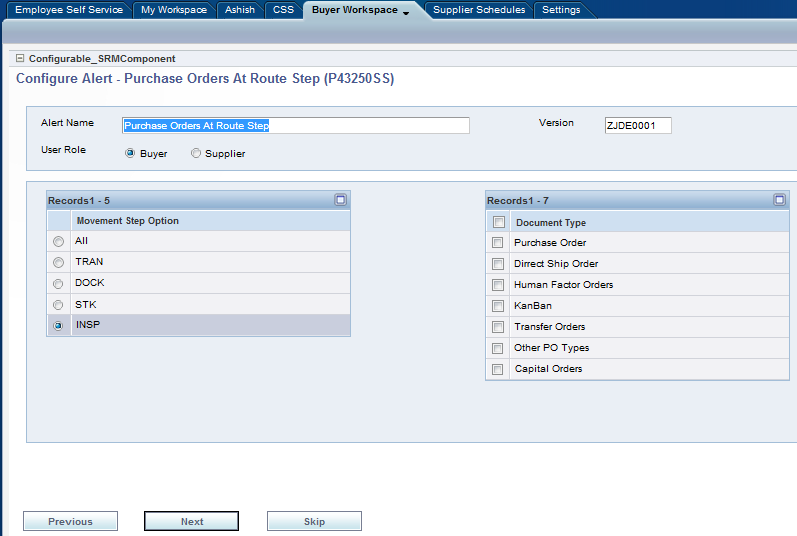
Description of "Figure 8-9 Purchase Orders At Route Step Alert"
Figure 8-10 Inventory Advanced Search Alert
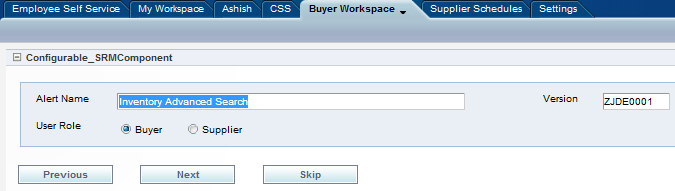
Description of "Figure 8-10 Inventory Advanced Search Alert"
Figure 8-11 Search for Receipt Lines Alert
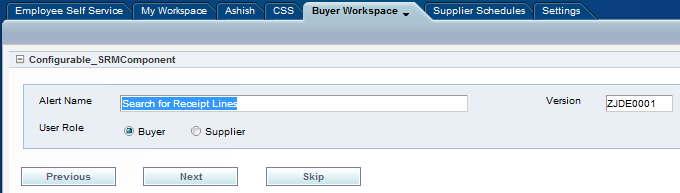
Description of "Figure 8-11 Search for Receipt Lines Alert"
Figure 8-12 Search for Payment Information Alert
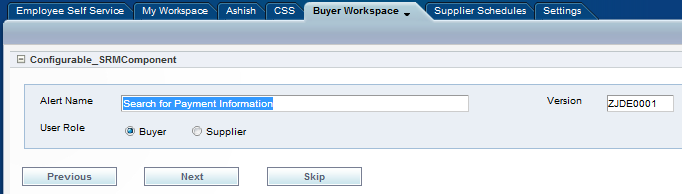
Description of "Figure 8-12 Search for Payment Information Alert"
Description of the illustration bwc027.png
-
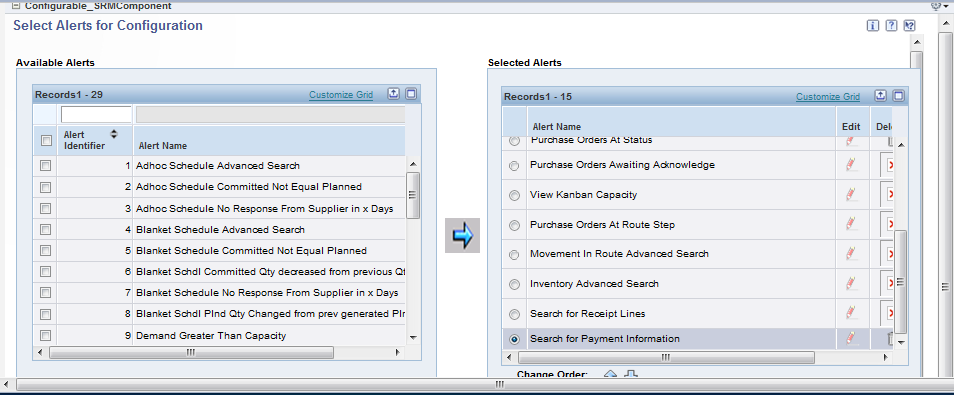
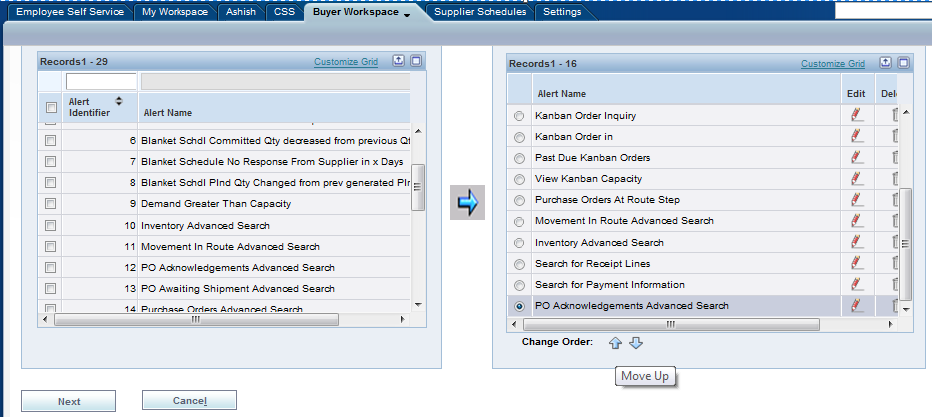
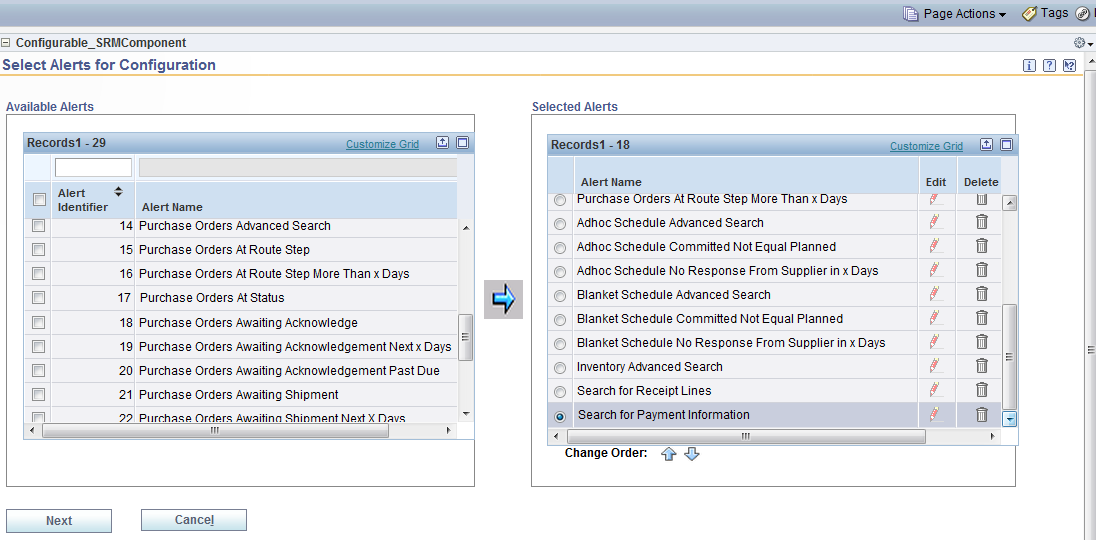
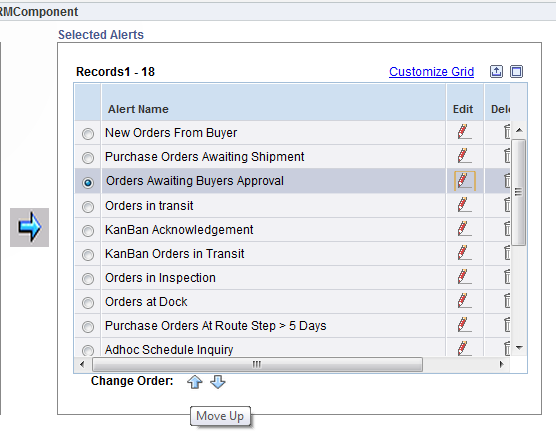
The user can still add new alerts to the Selected Alerts grid from the Available Alerts grid. Also, the user can change the order by using the Move Up or Move Down icons as shown in the image below.
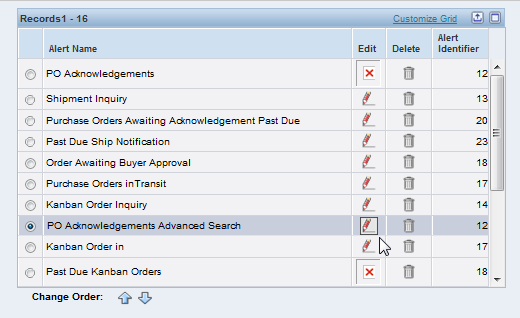
Description of the illustration bwc028.png
-
The user can update the new alert added by clicking the edit box provided.
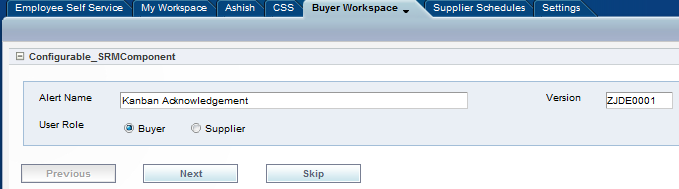
Description of the illustration bwc029.png
-
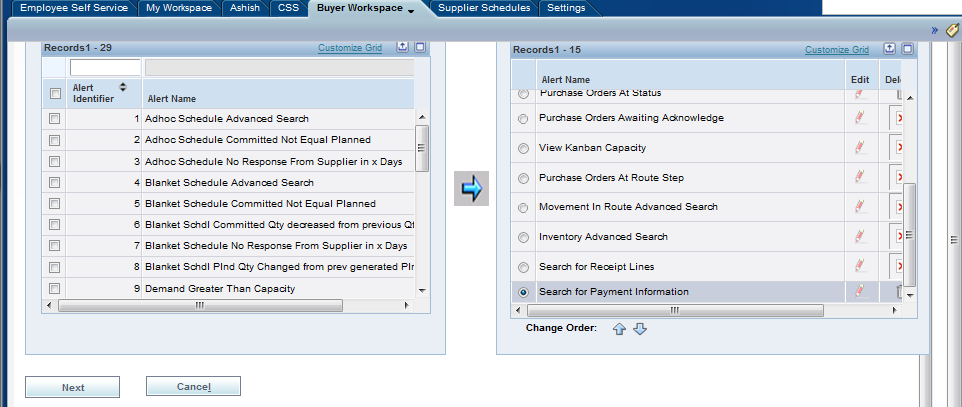
Click the Next button as shown below after the editing is done. Click the Cancel button provided to exit from the configuration screen.
Description of the illustration bwc030.png
-
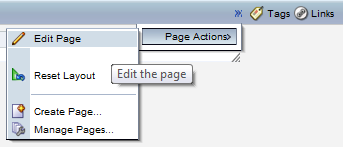
Choose Page Actions, and then Edit Page.
Description of the illustration bwc031.png
-
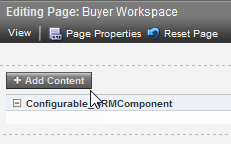
Click Add Content.
Description of the illustration bwc032.png
-
Follow the steps 5, 6 and add the Configurable_HTML_URI_IURI_Component from the available list.
Description of the illustration bwc033.png
-
Click on the edit button of the portlet and select the Display Options tab. Set the property Render Portlet in I Frame to true.
Description of the illustration bwc034.png
-
Click the Configuration icon.
Description of the illustration bwc035.png
-
Select HTML Portlet from the available list and click Next.
Description of the illustration bwc036.png
-
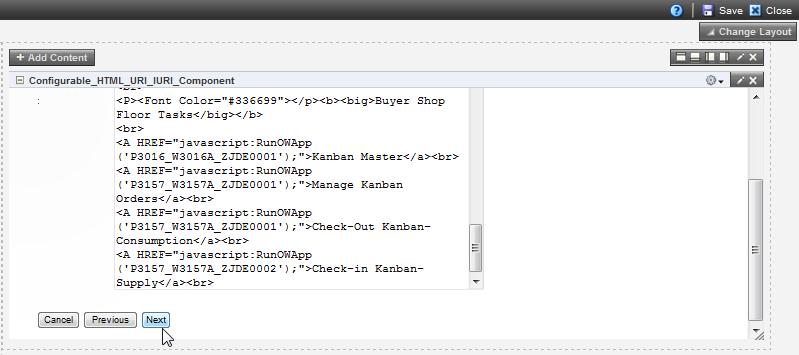
Enter the Name as BWS and Title as BWS and paste following text in HTML Code text area and click the Next button.
<P><Font Color="#336699"></p><b><big>Procurement Tasks</big></b><br>
<A HREF="javascript:RunOWApp('P4310_W4310I_ZJDE0001');">Enter SRM Purchase Order</a><br>
<A HREF="javascript:RunOWApp('P4310_W4310G_ZJDE0001');">Manage Open Purchase Orders</a><br>
<A HREF="javascript:RunOWApp('P4310_W4310I_ZJDE0003');">Receive PO</a><br>
<A HREF="javascript:RunOWApp('P01012_W01012A_ZJDE0005');">Buyer's Info</a><br>
<A HREF="javascript:RunOWApp('P43090_W43090A_ZJDE0001');">Supplier Item information</a><br>
<A HREF="javascript:RunOWApp('P04012_W04012D_ZJDE0002');">Purchasing Instructions</a><br>
<A HREF="javascript:RunOWApp('P43041_W43041A_ZJDE0001');">Purchasing Ledger</a><br><br>

<br>
<P><Font Color="#336699"></p><b><big>Quote Tasks</big></b>
<br>
<A HREF="javascript:RunOWApp('P4310_W4310I_ZJDE0002');">Quote Order Entry</a><br>
<A HREF="javascript:RunOWApp('P4310_W4310G_ZJDE0002');">Open Quote Inquiry</a><br>
<A HREF="javascript:RunOWApp('P4334_W4334B_ZJDE0001');">Enter Quote Responses</a><br>
<A HREF="javascript:RunOWApp('P43360_W43360H_ZJDE0001');">Generate PO's From Quotes</a><br>

<br>
<P><Font Color="#336699"></p><b><big>Buyer Shop Floor Tasks</big></b>
<br>
<A HREF="javascript:RunOWApp('P3016_W3016A_ZJDE0001');">Kanban Master</a><br>
<A HREF="javascript:RunOWApp('P3157_W3157A_ZJDE0001');">Manage Kanban Orders</a><br>
<A HREF="javascript:RunOWApp('P3157_W3157A_ZJDE0001');">Check-Out Kanban-Consumption</a><br>
<A HREF="javascript:RunOWApp('P3157_W3157A_ZJDE0002');">Check-in Kanban-Supply</a><br>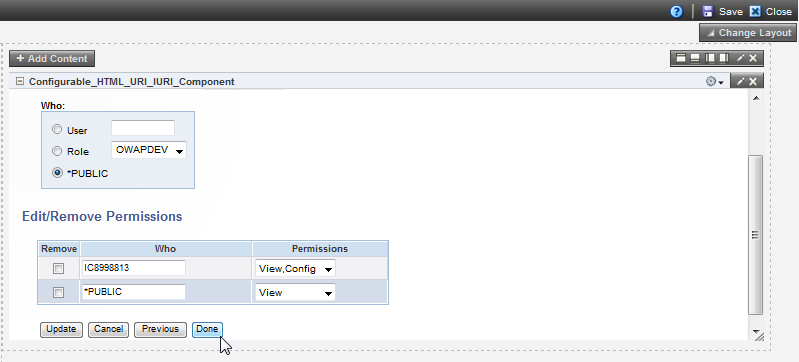
Description of the illustration bwc037.png
-
Set required permissions and click Done.
-
Save the changes made to the portal page and close.


8.4 Creating a Customer Self-Service Portal Page
WebCenter Spaces also provides a variety of page layouts (called styles) that you can use to create different types of pages with different layouts. Page types may restrict the type of content that you can add to a page, such as text only, wiki only, blog only, and the like. Page layouts define the number of columns and content areas that define a page's geometry. Layouts are initially determined by the style you select when you create the page. Some page styles inherently allow switching to another page layout, such as wikis and blogs.
In addition to the layouts available through page styles, you can create your own layouts using the layout components available through the Resource Catalog.
The Customer Self Service portal page is created using eight EnterpriseOne FDA portlets. The following three images comprise the Customer Self Service Space:
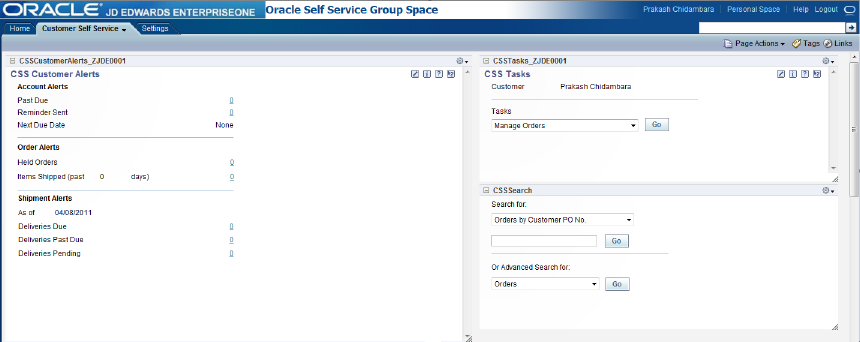
Description of the illustration cwc030.png
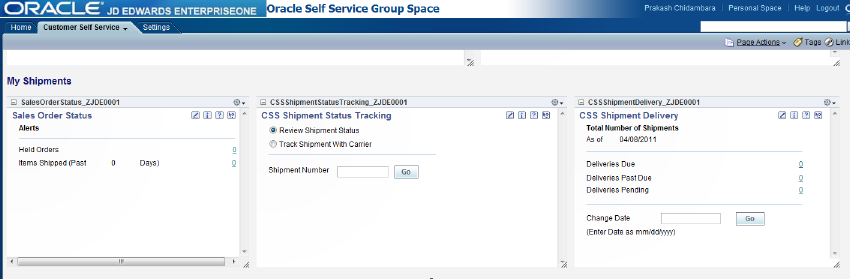
Description of the illustration cwc031.png

Description of the illustration cwc032.png
To create the Customer Self Service page:
-
Log into WebCenter and access the Oracle Self Service Space the was created in the previous section.

Description of the illustration cwc033.png
-
Click the Page Actions dropdown arrow, then select Create, and then Page.
Description of the illustration cwc001.png
-
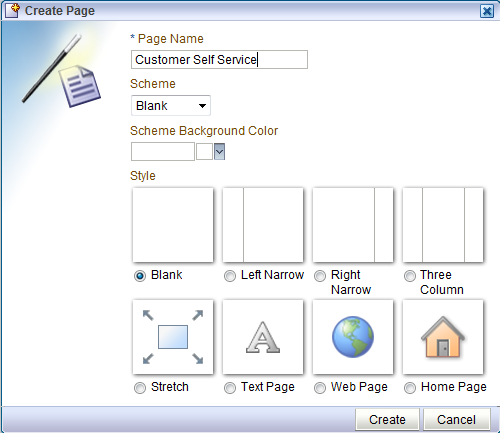
Enter the Page Name as Customer Self Service and let the Scheme be Blank and click Create button. This will show Customer Self Service page in Edit mode having only one column.

Description of the illustration cwc002.png
-
Click Add box below.
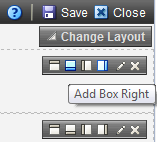
Description of the illustration cwc003.png
-
Click Add box right.
Description of the illustration cwc004.png
-
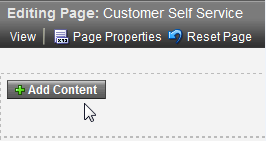
Click the Add Content button to add EnterpriseOne portlets.
Description of the illustration cwc005.png
-
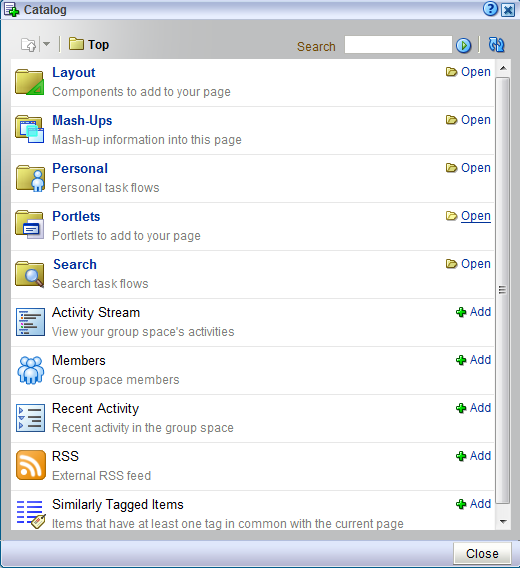
Click Portlets to open the Portlets catalog.
Description of the illustration cwc006.png
-
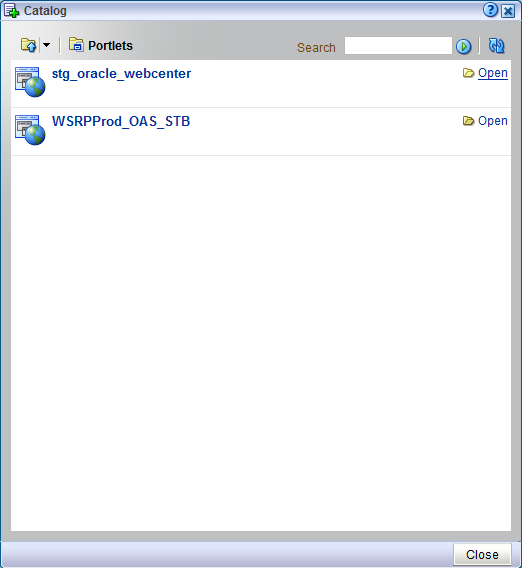
Select stb_oracle_webcenter (this name could be different on your setup) to see the list of E1 portlets available.
Description of the illustration cwc007.png
-
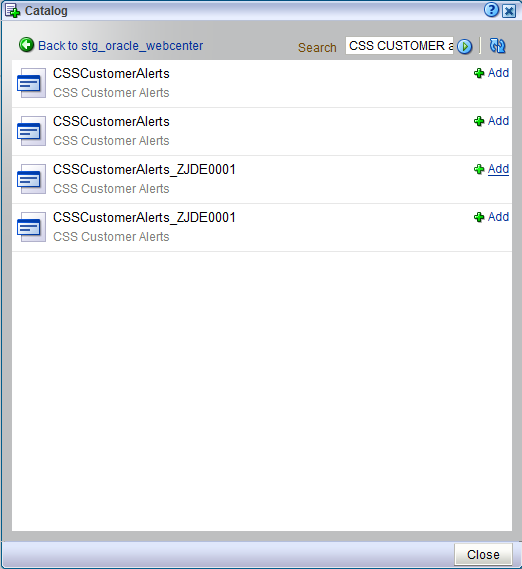
To add the CSSCustomerAlerts portlet to the left pane, search for the string CSSCustomerAlerts to find the list of CSSCustomerAlerts portlets available and select one.

Description of the illustration cwc008.png
-
Follow the steps 5, 6 and 7 on the right pane of the EnterpriseOne portlet and add the CSS Search portlet from the list of CSS Search portlets available.
Description of the illustration cwc009.png
-
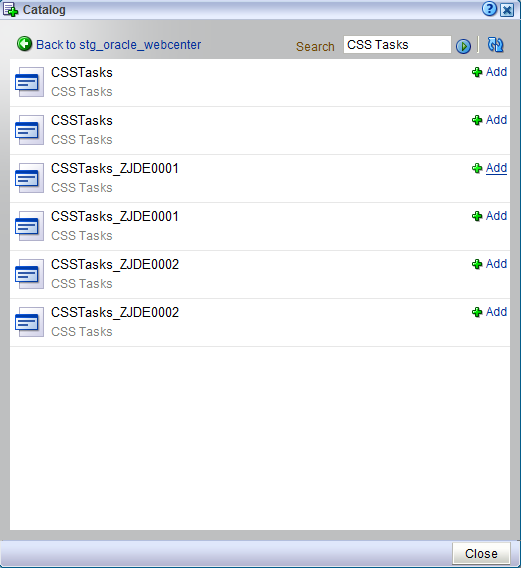
Follow the steps 5, 6 and 7 on the right pane of the EnterpriseOne portlet and add the CSS Tasks portlet from the list of CSS Tasks portlets available.
Description of the illustration cwc010.png
-
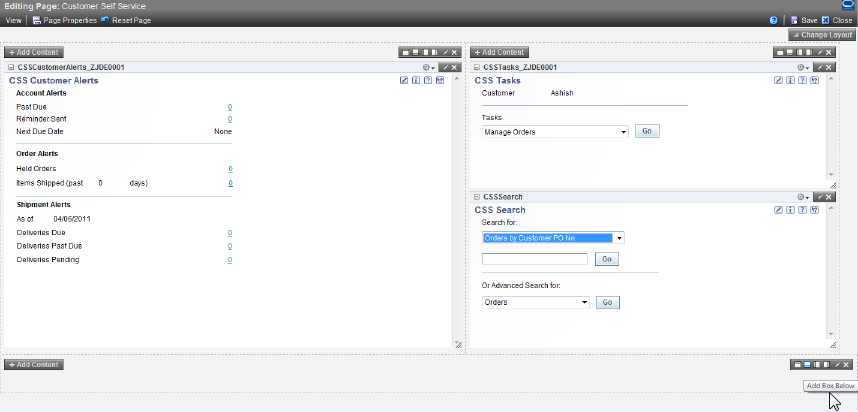
Click on Add box below.
Description of the illustration cwc011.png
-
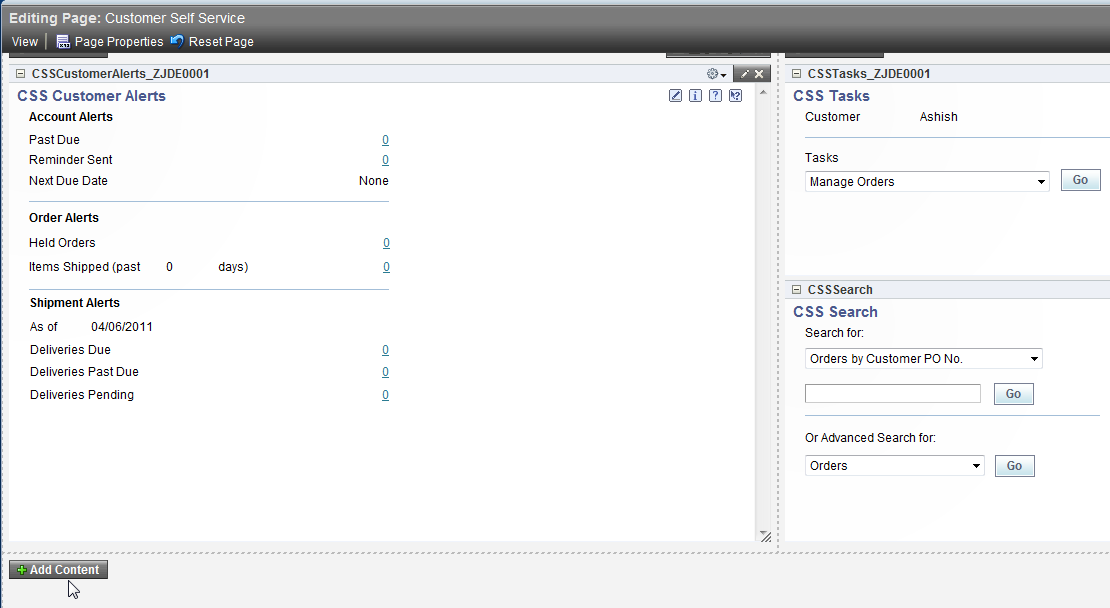
Click Add Content.
Description of the illustration cwc012.png
-
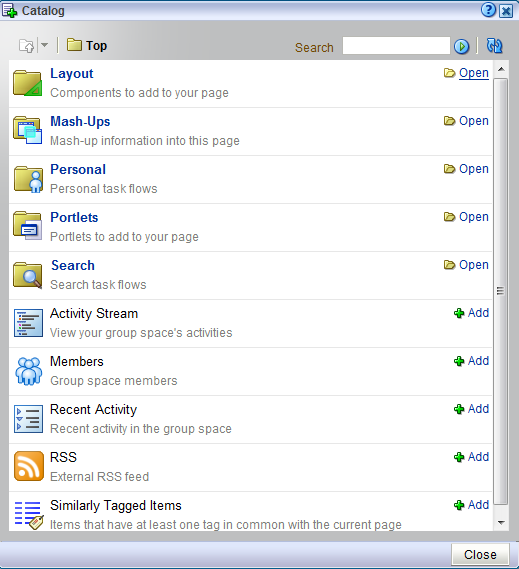
Click Layout to open the Layout catalog.
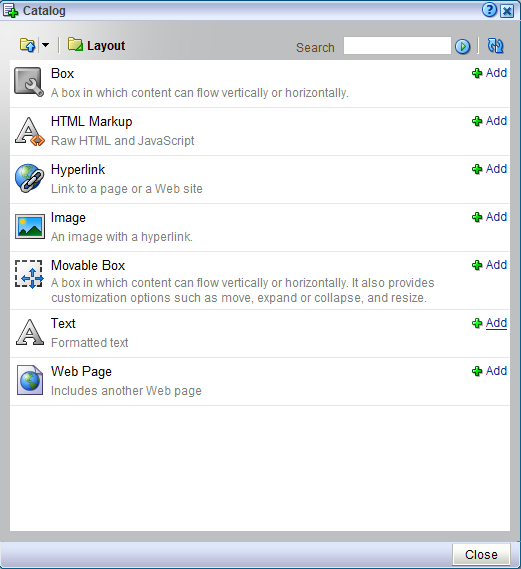
Description of the illustration cwc013.png
-
Select Text.
Description of the illustration cwc014.png
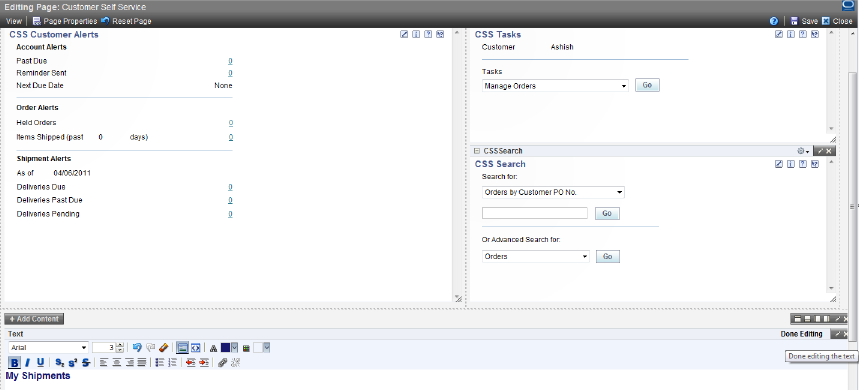
Description of the illustration cwc015.png
-
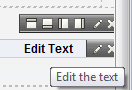
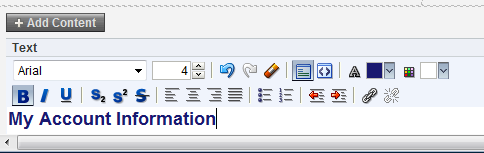
Format the text as shown in these images:
Description of the illustration cwc016.png
-
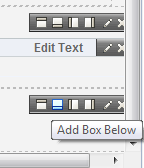
Click on Add Box Below.
Description of the illustration cwc017.png
-
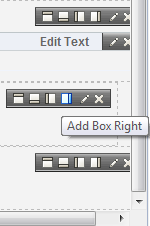
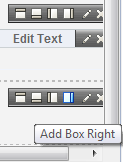
Click on Add Box Right.
Description of the illustration cwc018.png
-
Click Add Content to add the EnterpriseOne portlet as shown in the image below for the left pane.
Description of the illustration cwc019.png
-
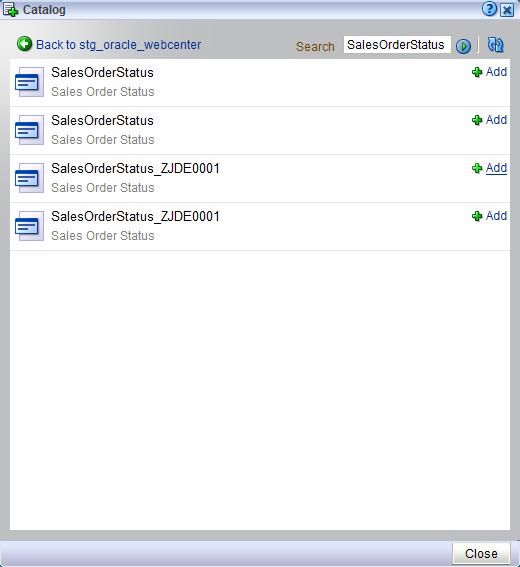
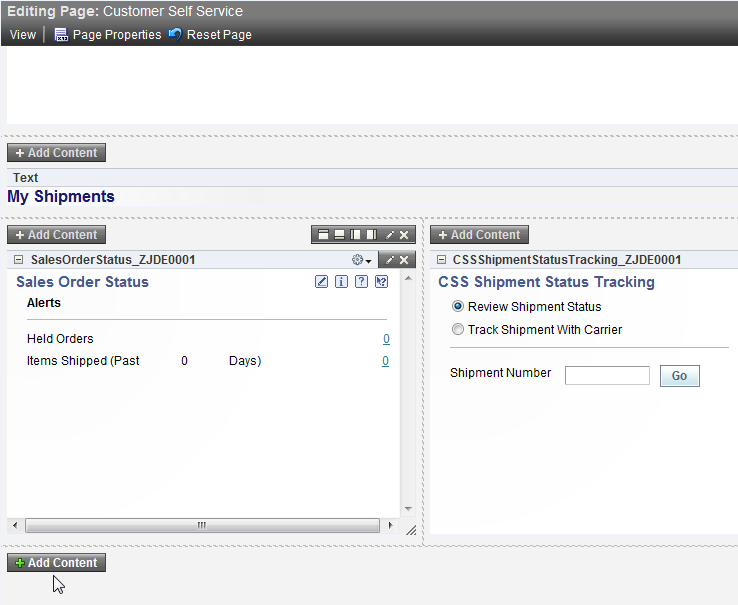
Follow the steps 5, 6 and 7 on the left pane of the EnterpriseOne portlet and add the Sales Order Status portlet from the list of Sales Order Status available.
Description of the illustration cwc020.png
-
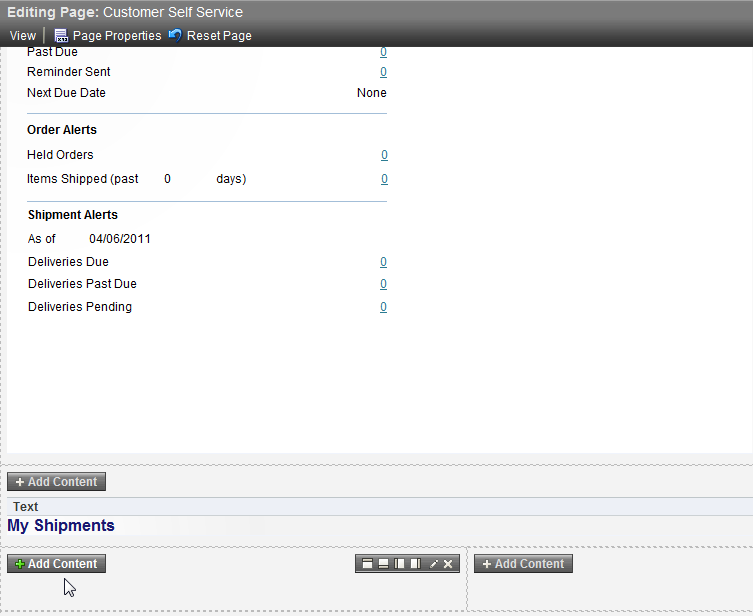
Click Add Content to add EnterpriseOne portlet as shown in the image below for the center pane.
Description of the illustration cwc021.png
-
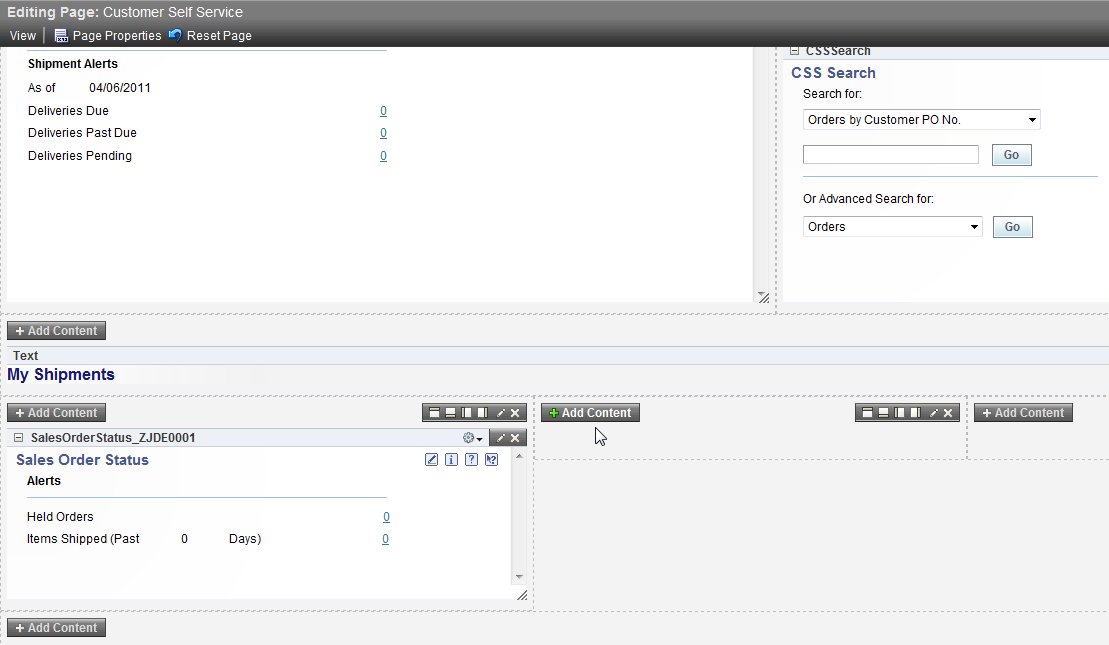
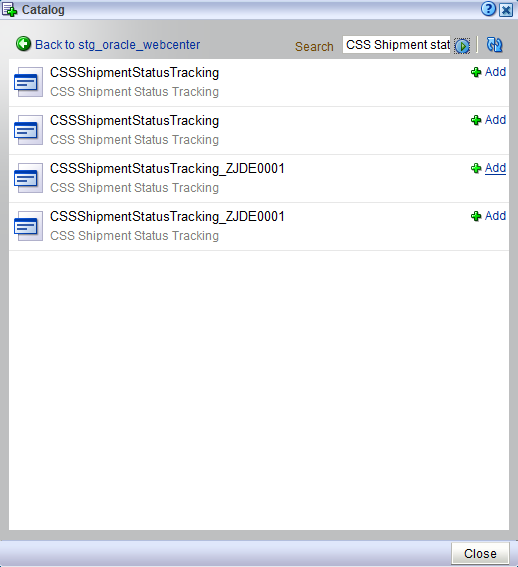
Follow the steps 5, 6 and 7 on the center pane of the E1 portlet and add the CSS Shipment Status Tracking portlet from the list of CSS Shipment Status Tracking available.
Description of the illustration cwc022.png
-
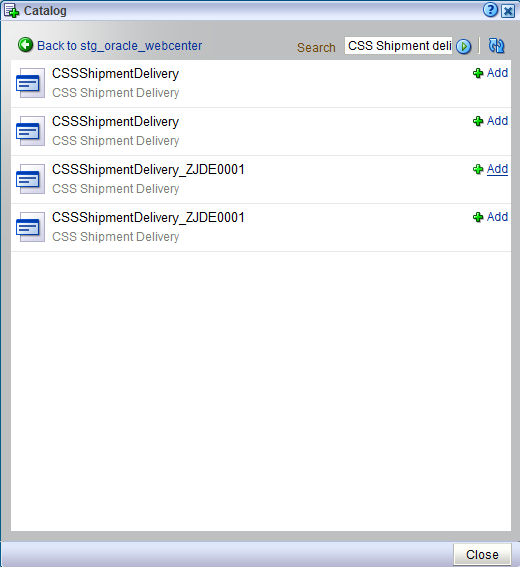
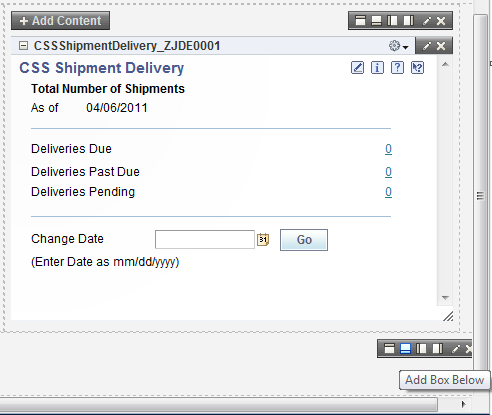
Follow the steps 5, 6 and 7 on the right pane of the E1 portlet and add the CSS Shipment Delivery portlet from the list of CSS Shipment Delivery available.
Description of the illustration cwc023.png
-
Click on Add box below.
Description of the illustration cwc024.png
-
Click Add Content to add layout portlet.
Description of the illustration cwc025.png
Description of the illustration cwc026.png
-
Follow steps 13 and 14 and format the text as shown in the following images:
Description of the illustration cwc027.png
-
Click on Add box right.
Description of the illustration cwc028.png
-
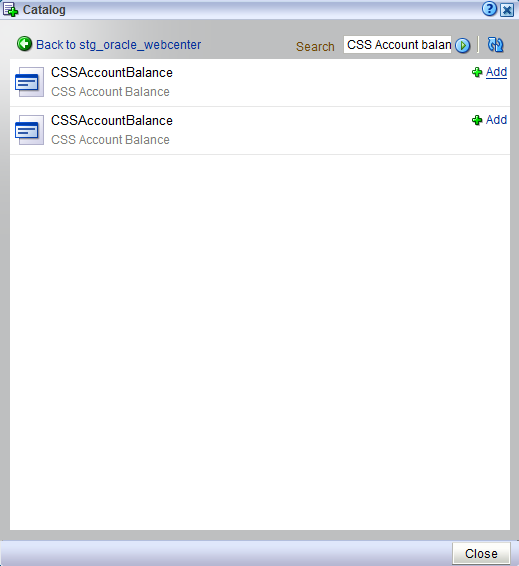
Follow the steps 5, 6 and 7 on the left pane of the E1 portlet and add the CSS Account Balance portlet from the list of CSS Account Balance available.
Description of the illustration cwc029.png
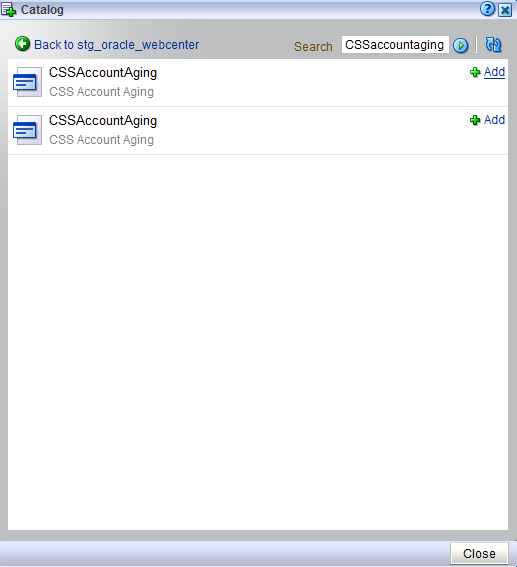
-
Follow the steps 5, 6 and 7 on the right pane of the E1 portlet and add the CSS Account Aging portlet from the list of CSS Account Aging available.
8.5 Creating an Employee Self-Service Portal Page
WebCenter Spaces also provides a variety of page layouts (called styles) that you can use to create different types of pages with different layouts. Page types may restrict the type of content that you can add to a page, such as text only, wiki only, blog only, and the like. Page layouts define the number of columns and content areas that define a page's geometry. Layouts are initially determined by the style you select when you create the page. Some page styles inherently allow switching to another page layout, others, such as wikis and blogs.
In addition to the preceded layouts available through page styles, you can create your own layouts using the layout components available through the Resource Catalog.
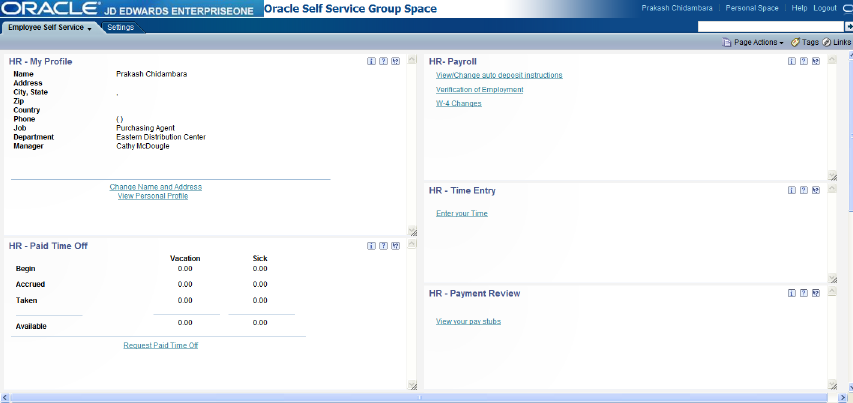
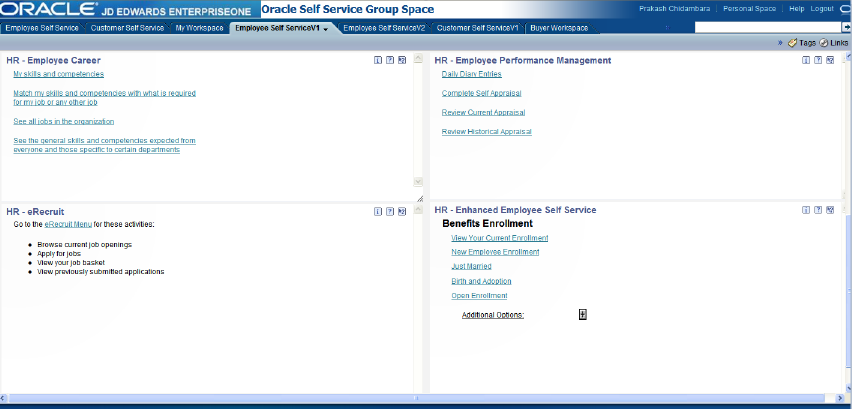
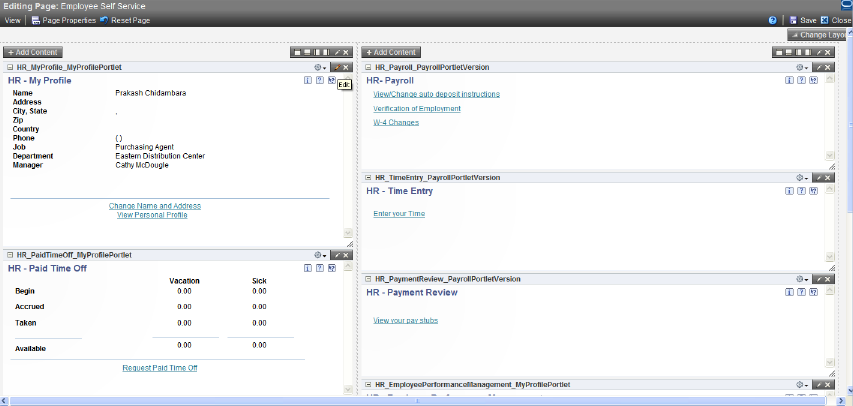
The Employee Self Service portal page is created using nine EnterpriseOne FDA portlets. The following images comprise the Employee Self Service portal page.
Description of the illustration ewc015.png
Description of the illustration ewc016.png
To create the Employee Self Service page:

Description of the illustration ewc017.png
-
Click the Page Actions dropdown arrow, then select Create, and then Page.
Description of the illustration ewc001.png
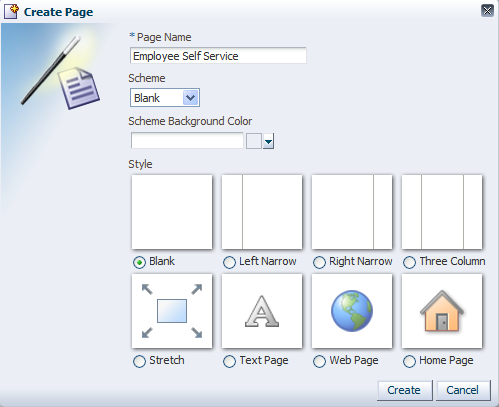
-
Enter the Page Name as Employee Self Service and let the Scheme be Blank. Click the Create button. This will show Customer Self Service page in Edit mode with only one column.

Description of the illustration ewc002.png
-
Click on Add Box Right.
Description of the illustration ewc003.png
-
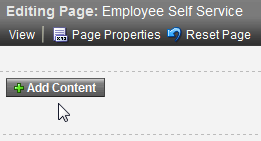
Click Add Content to add E1 portlets.
Description of the illustration ewc004.png
-
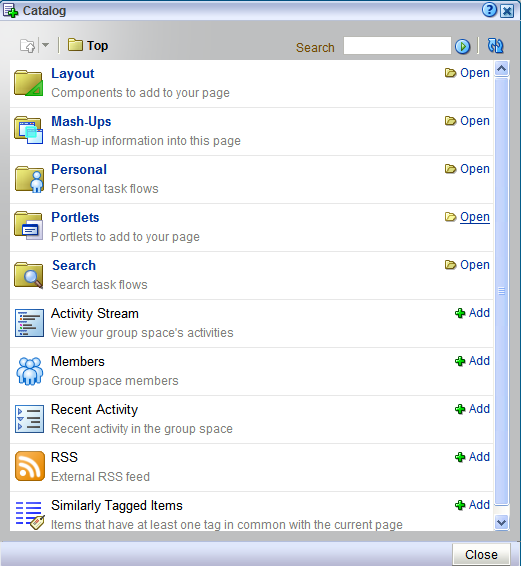
Open the Portlets catalog.
Description of the illustration ewc005.png
-
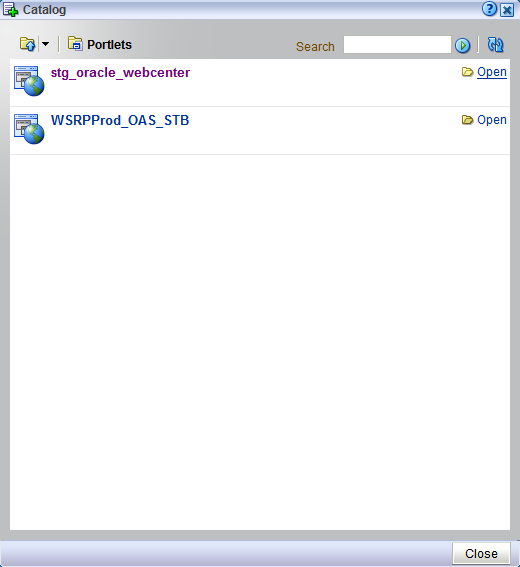
Select stb_oracle_webcenter (this name could be different on your setup to see the list of E1 portlets available.
Description of the illustration ewc006.png
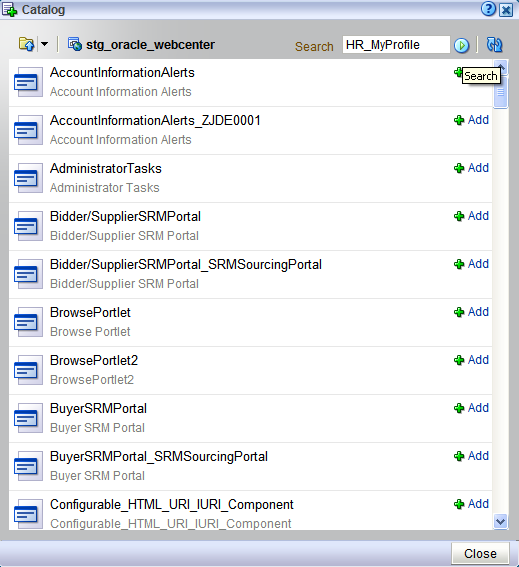
This image shows the beginning of the list of available portlets:
Description of the illustration ewc007.png
-
On the Employee Self Service page, the left pane has these portlets in this order:
-
HR - My Profile
-
HR - Paid Time Off
-
HR - Employee Career
-
HR - eRecruit
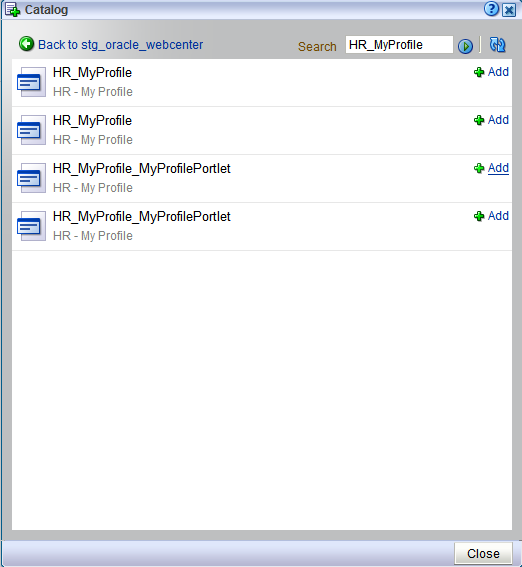
To add the HR - My Profile portlet to the left pane search for the string HR_MyProfile to find the list of HR_MyProfile portlets available and add the required portlet from the list to the portal page.
Description of the illustration ewc008.png
-
-
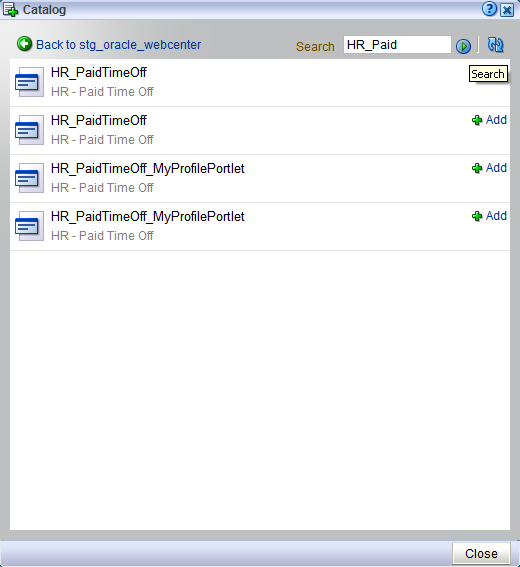
To add the HR - Paid Time Off portlet to the left pane search for the string HR_Paid to find the list of HR_PaidTimeOff portlets available and add the required portlet from the list to the portal page.
Description of the illustration ewc009.png
-
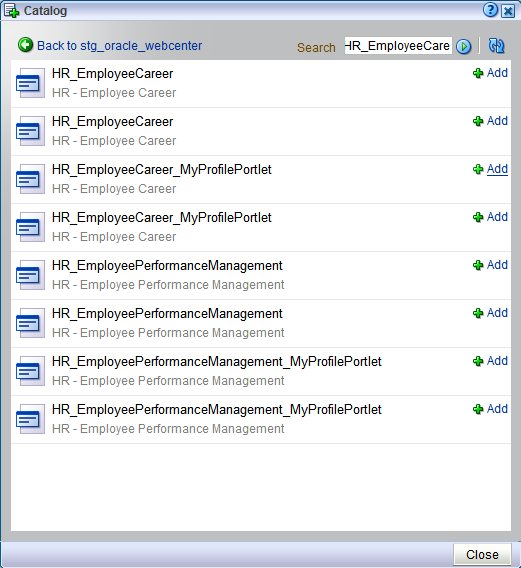
To add the HR - Employee Career portlet to the left pane search for the string HR_Employee to find the list of portlets starting with the string HR_Employee and add the required HR - Employee Career portlet from the list to the portal page.
Description of the illustration ewc010.png
-
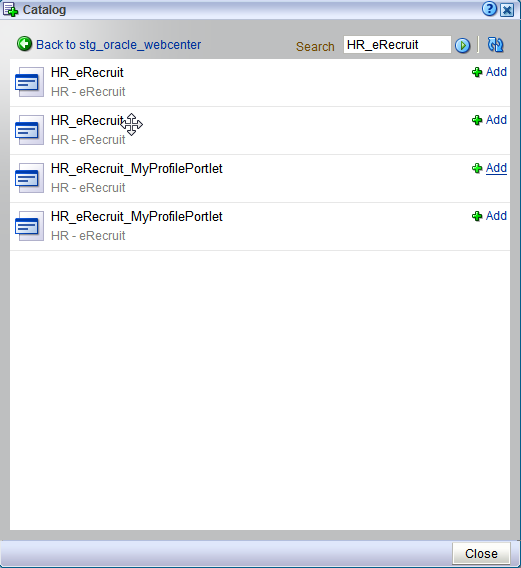
To add the HR - eRecruit portlet to the left pane search for the string HR_eRecruit to find the list of HR_eRecruit portlets available and add the required portlet from the list to the portal page.
Description of the illustration ewc011.png
-
After adding all the required portlets to left pane click the Close button.
-
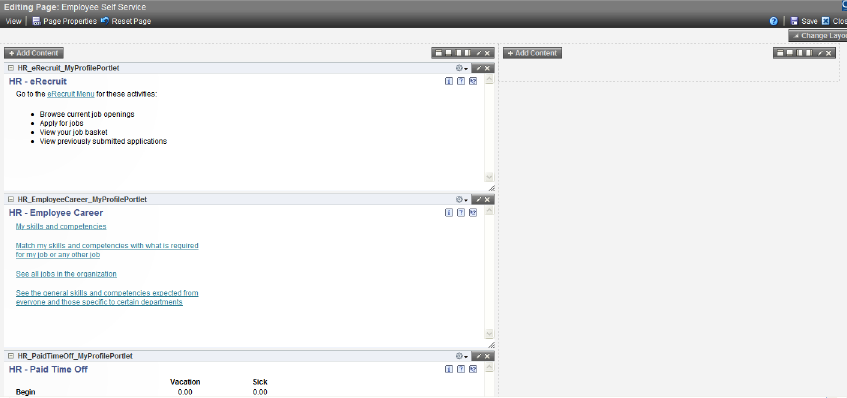
Notice that the portlets are arranged on the left pane of the portal page in reverse order. We can move the portlets up or down so that the portlets are arranged as given in the sample portal page. Follow the steps below to move the portlets.
Description of the illustration ewc012.png
-
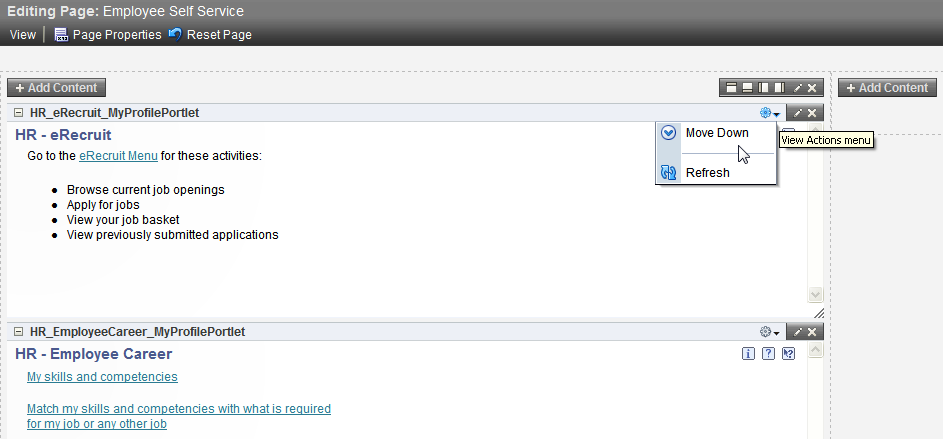
All of the portlets on WebCenter have the Action menu which has the menu item to move up/down and to refresh. Since the HR - eRecruit portlet has to be at the bottom of the left pane, click on the Move Down menu action.
Description of the illustration ewc013.png
-
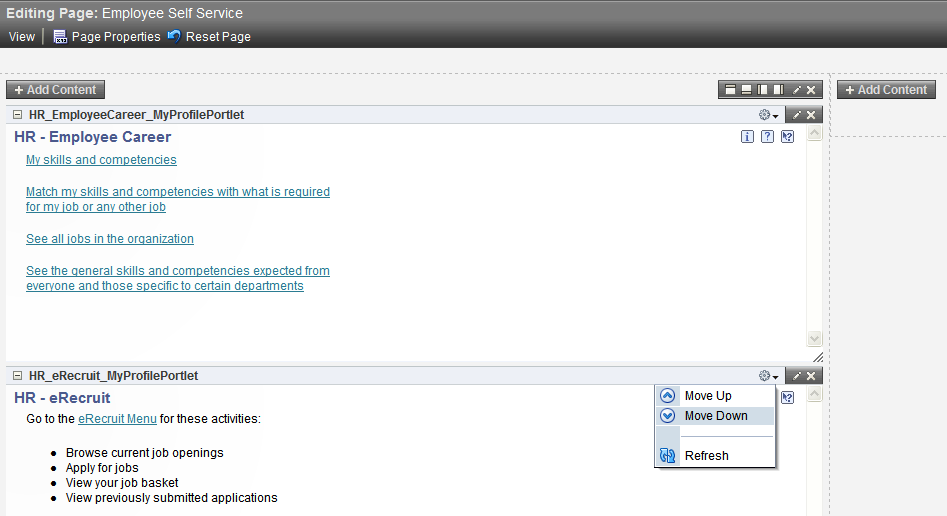
Continue to move the HR_eRecruit portlet down until it reaches the bottom on the left pane.
Description of the illustration ewc014.png
-
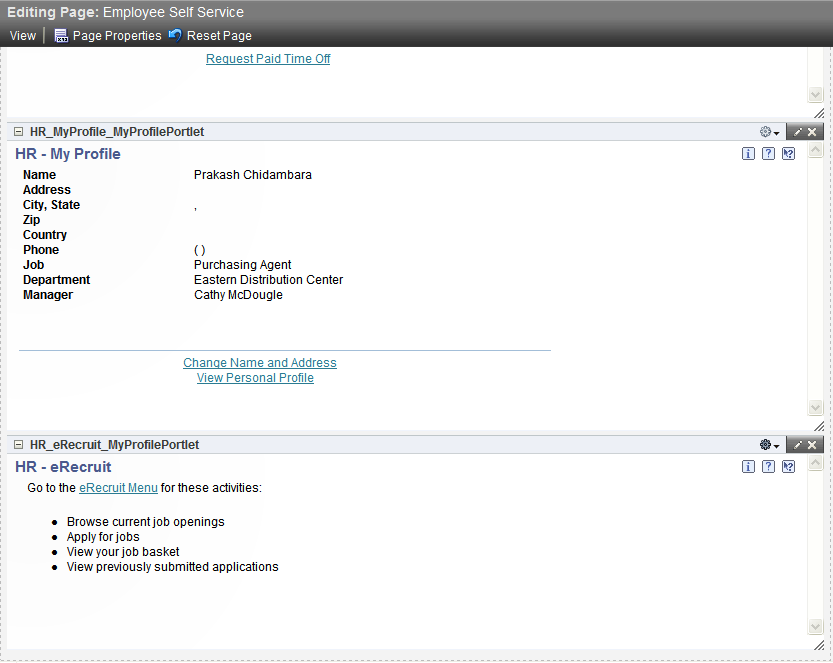
Similarly arrange the positions of other portlets by moving up or down as required.
Note:
The portlets can also be arranged by drag and drop.
-
-
The following portlets need to be added to the Right pane in the order given below:
-
HR_Payroll
-
HR_TimeEntry
-
HR_Payment Review
-
HR Employee Performance Management
-
HR Enhance Employee Self Service
Note:
To avoid re-arranging the portlets on the right pane, add the portlets to the right pane in the reverse order starting with HR - Enhance Employee Self Service. -
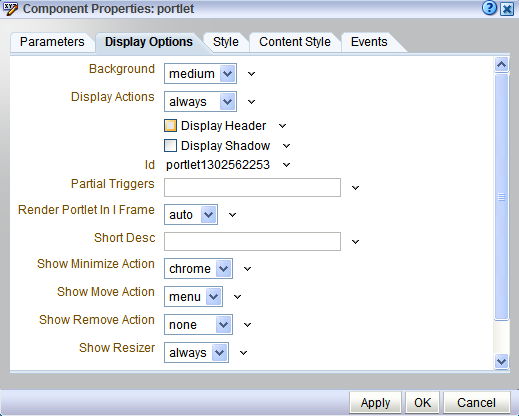
8.5.1 Removing the Portlet Header
To remove the Portlet header:
Description of the illustration wwc001.png
-
Click the Edit button on portlet.
Description of the illustration wwc002.png
-
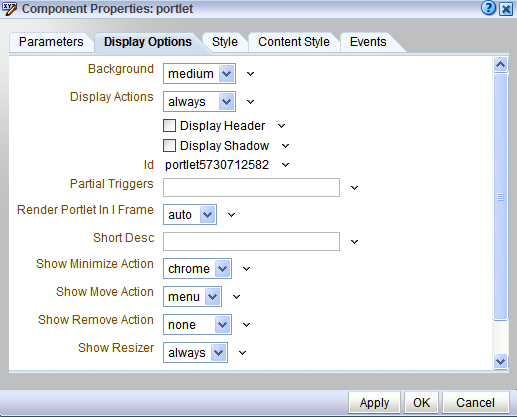
Select the Display Options tab and then uncheck Display Header.
8.5.2 Required WebCenter EnterpriseOne Portlets Setup
For EnterpriseOne portlets to work on WebCenter, the property Render Portlet in I Frame which is available on the Display Options of Component properties should be set to true. To set the property click on the edit button of the portlet and select the Display Options tab. Set the property Render Portlet in I Frame to true as shown in the image below.
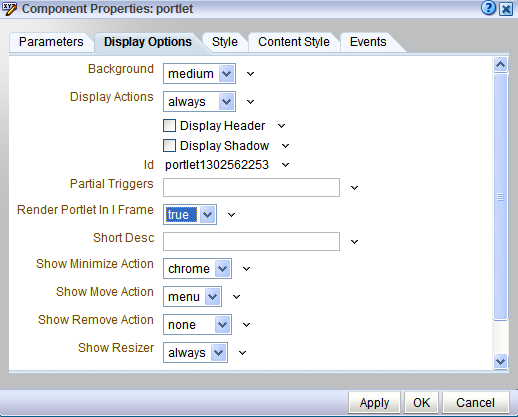
Description of the illustration wwc003.png
8.6 Creating a Supplier Self-Service Portal Page
WebCenter Spaces also provide a variety of page layouts (called styles) that can used to create different types of pages with different layouts. Page types may restrict the type of content that can be added to a page, such as text only, wiki only, blog only, and the like. Page layouts define the number of columns and content areas that define a page's geometry. Layouts are initially determined by the style that is selected while creating the page. Some page styles inherently allow switching to another page layout, such as wikis or blogs.
In addition to the layouts available through page styles, the user can create their own layouts using the layout components available through the Resource Catalog.
The following image represents the Supplier Self-Service portal page:
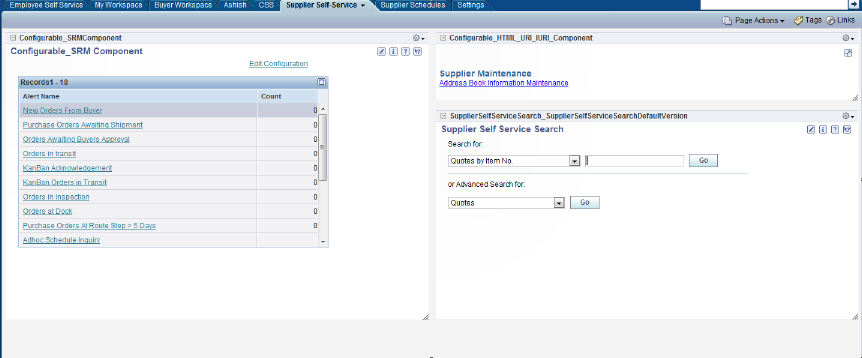
Description of the illustration swc043.png
Follow these steps to create the Supplier Self-Service page:

Description of the illustration swc044.png
-
Click the Page Actions dropdown arrow, then select Create, and then Page.
Description of the illustration swc001.png
-
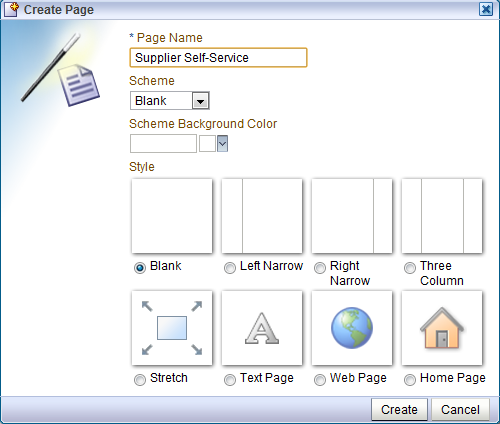
Enter the Page Name as Supplier Self-Service and let the Scheme be Blank and click Create button. This will show Supplier Self-Service page in Edit mode having only one column.
Description of the illustration swc002.png
-
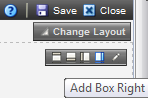
Click on Add Box Right.

Description of the illustration swc003.png
-
Click Add Content to add E1 portlets.
Description of the illustration swc004.png
-
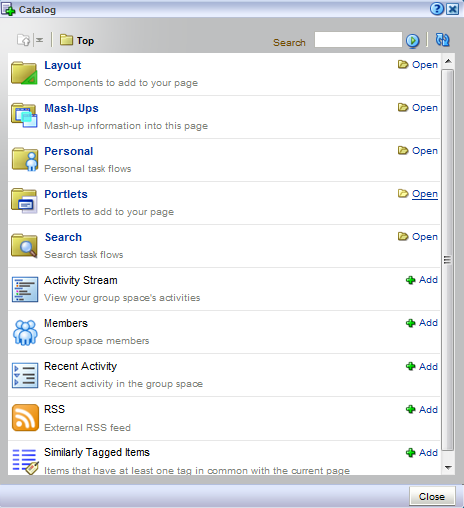
Open the Portlets catalog.
Description of the illustration swc005.png
-
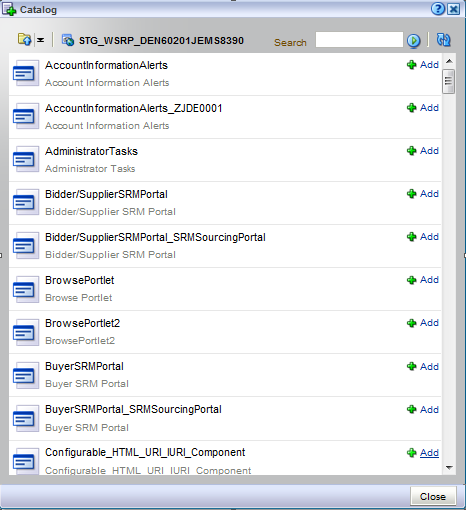
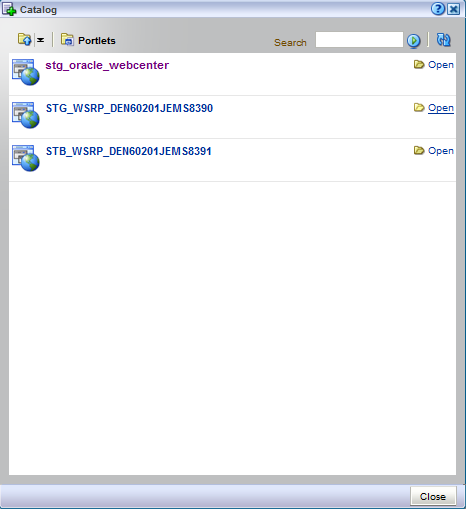
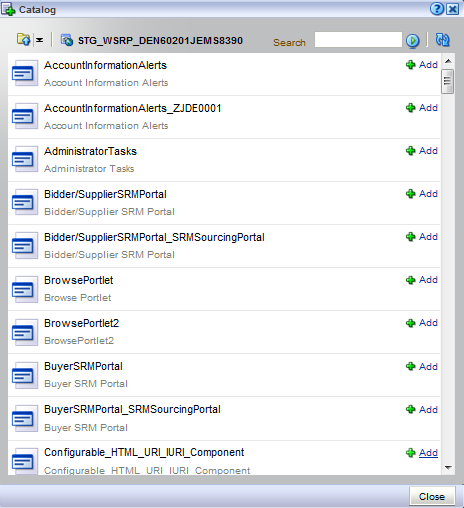
Select STG_WSRP_DEN60201JEMS8390 (this name could be different based on the setup) to see the list of EnterpriseOne portlets available.
Description of the illustration swc006.png
-
Add the Configurable_SRM Component portlet from the list of portlets available.

Description of the illustration swc007.png
-
Click on the edit button of the portlet and select the Display Options tab. Set the property Render Portlet in I Frame to true.
Description of the illustration swc008.png
-
Save and close the page. Click on Edit Configuration link.
Description of the illustration swc009.png
-
Add the alerts as shown in the image using the arrow to move them from the Available Alerts grid to the Selected Alerts grid.
Description of the illustration swc011.png
-
Click on Next. This will allow the user to override all the alert names as desired.
The images below list the alert name overrides:
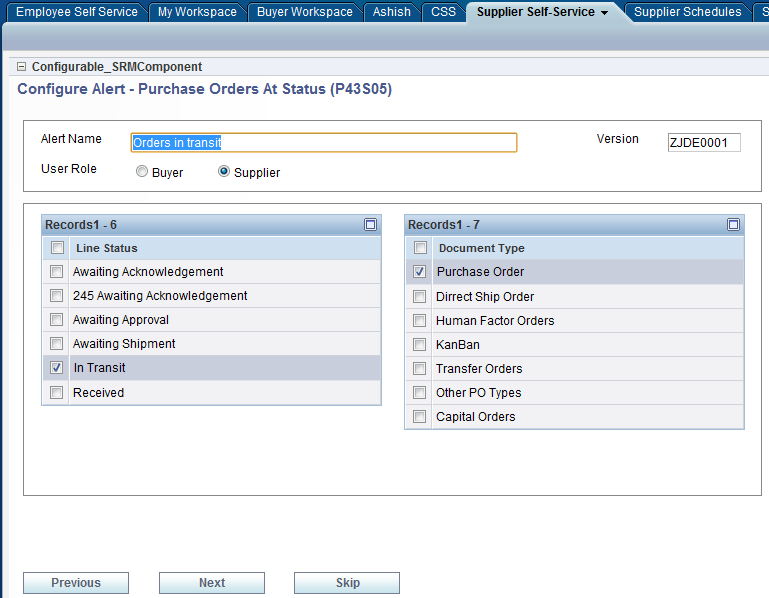
Figure 8-13 Purchase Orders At Status Alert

Description of "Figure 8-13 Purchase Orders At Status Alert"
Figure 8-14 Purchase Orders Awaiting Shipment Alert
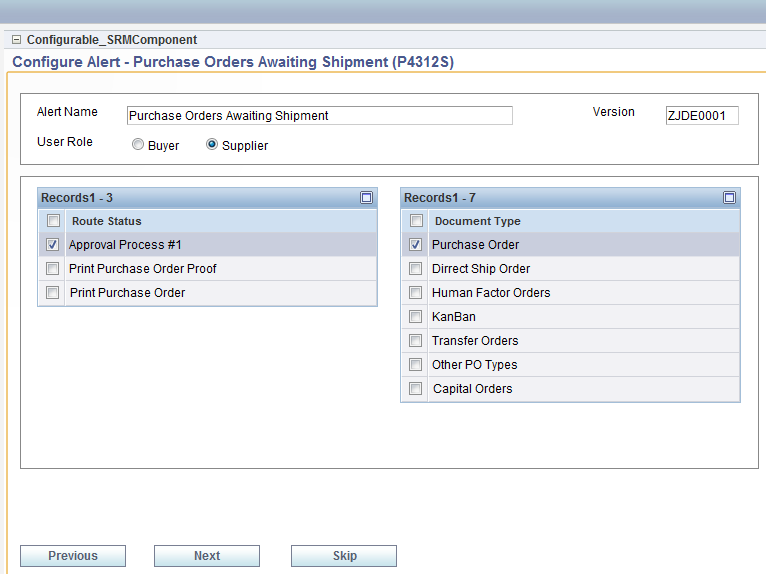
Description of "Figure 8-14 Purchase Orders Awaiting Shipment Alert"
Figure 8-15 Purchase Orders Awaiting Acknowledge Alert
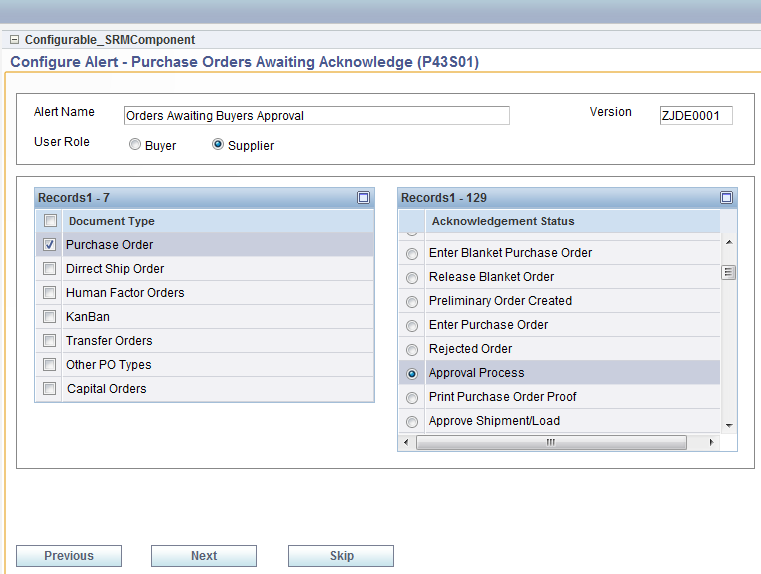
Description of "Figure 8-15 Purchase Orders Awaiting Acknowledge Alert"
Figure 8-16 Purchase Orders At Status Alert
Description of "Figure 8-16 Purchase Orders At Status Alert"
Figure 8-17 Purchase Orders Awaiting Acknowledge Alert
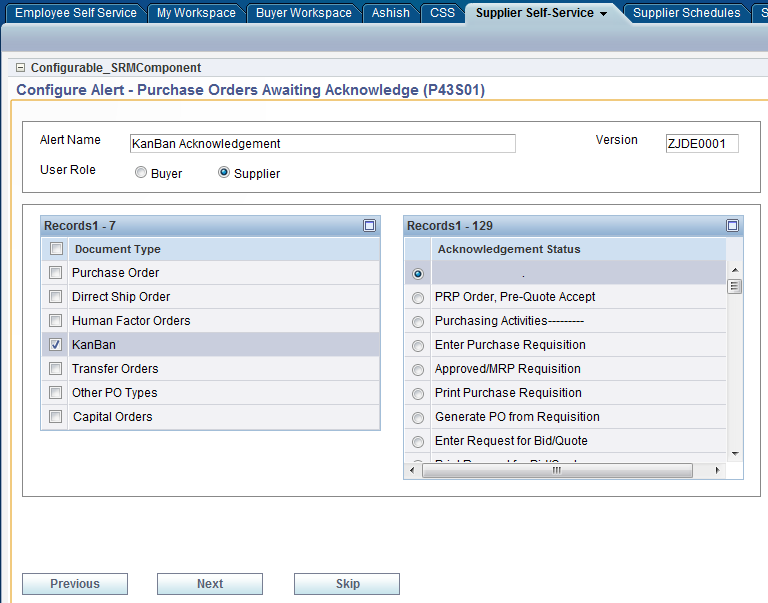
Description of "Figure 8-17 Purchase Orders Awaiting Acknowledge Alert"
Figure 8-18 Purchase Orders At Status Alert
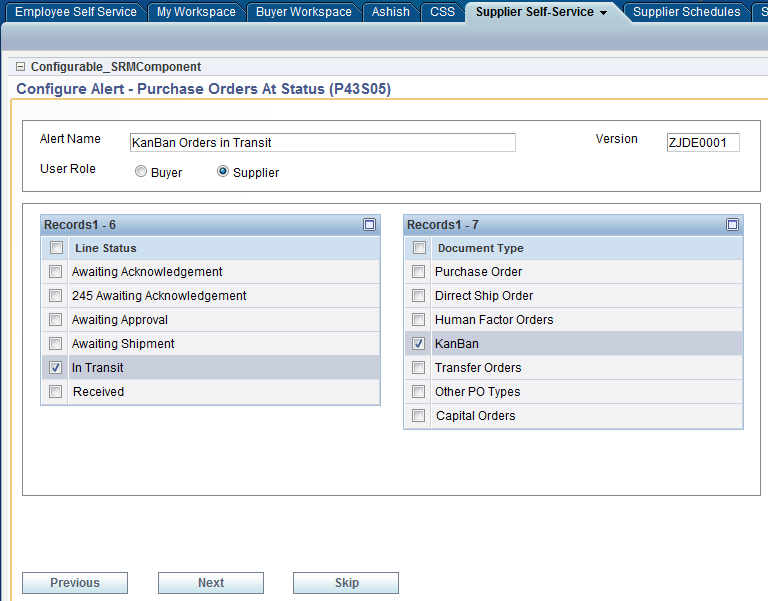
Description of "Figure 8-18 Purchase Orders At Status Alert"
Figure 8-19 Purchase Orders At Route Step - Orders in Inspection Alert
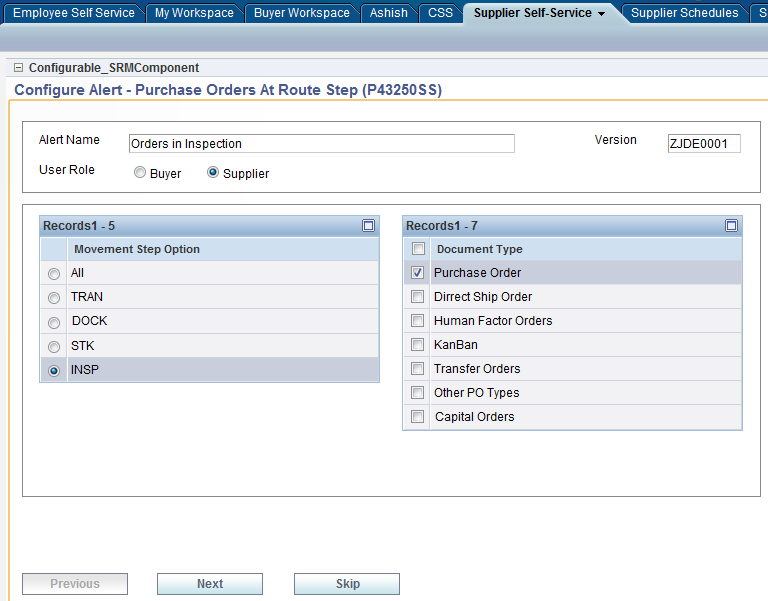
Description of "Figure 8-19 Purchase Orders At Route Step - Orders in Inspection Alert"
Figure 8-20 Purchase Orders at Route Step - Orders at Dock Alert
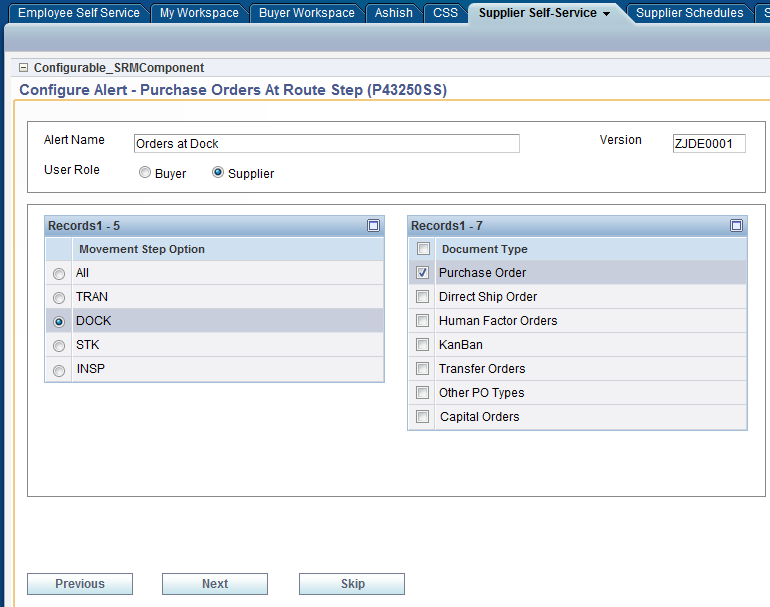
Description of "Figure 8-20 Purchase Orders at Route Step - Orders at Dock Alert"
Figure 8-21 Purchase Orders At Route Step More Than X Days

Description of "Figure 8-21 Purchase Orders At Route Step More Than X Days"
Figure 8-22 Adhoc Schedule Advanced Inquiry
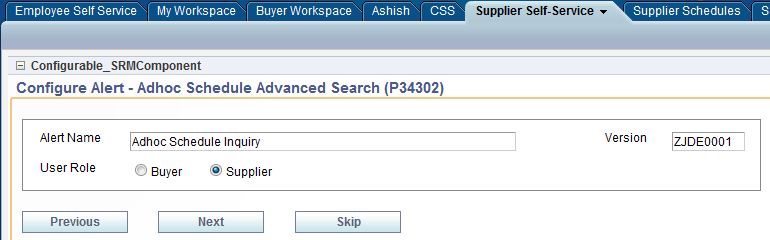
Description of "Figure 8-22 Adhoc Schedule Advanced Inquiry"
Figure 8-23 Adhoc Schedule Committed Not Equal Planned Alert
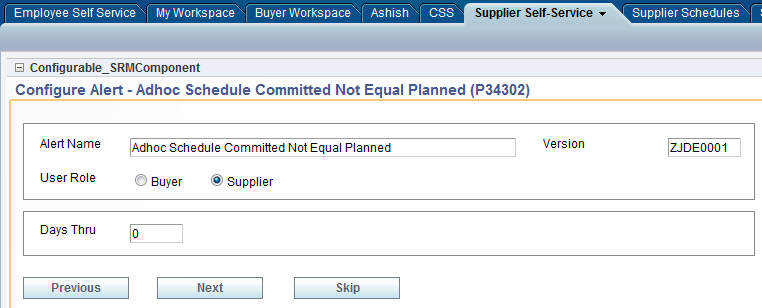
Description of "Figure 8-23 Adhoc Schedule Committed Not Equal Planned Alert"
Figure 8-24 Adhoc Schedule No Response From Supplier in X Days Alert
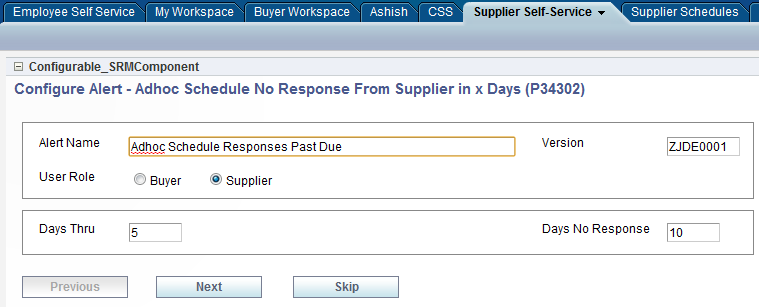
Description of "Figure 8-24 Adhoc Schedule No Response From Supplier in X Days Alert "
Figure 8-25 Blanket Schedule Advanced Search Alert
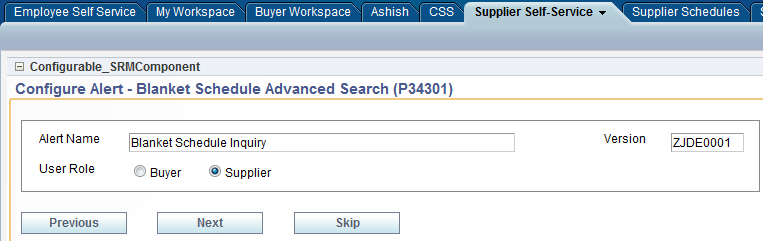
Description of "Figure 8-25 Blanket Schedule Advanced Search Alert"
Figure 8-26 Blanket Schedule Committed Not Equal Planned Alert
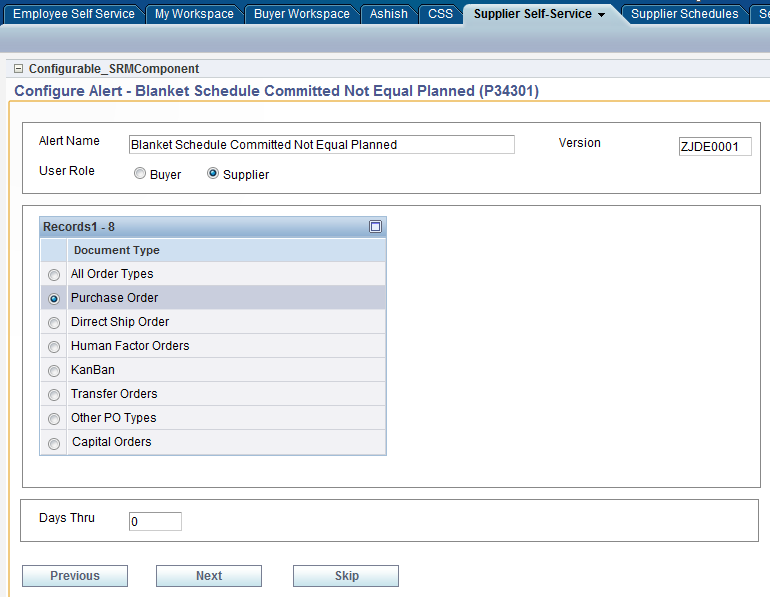
Description of "Figure 8-26 Blanket Schedule Committed Not Equal Planned Alert"
Figure 8-27 Blanket Schedule No Response From Supplier in X Days
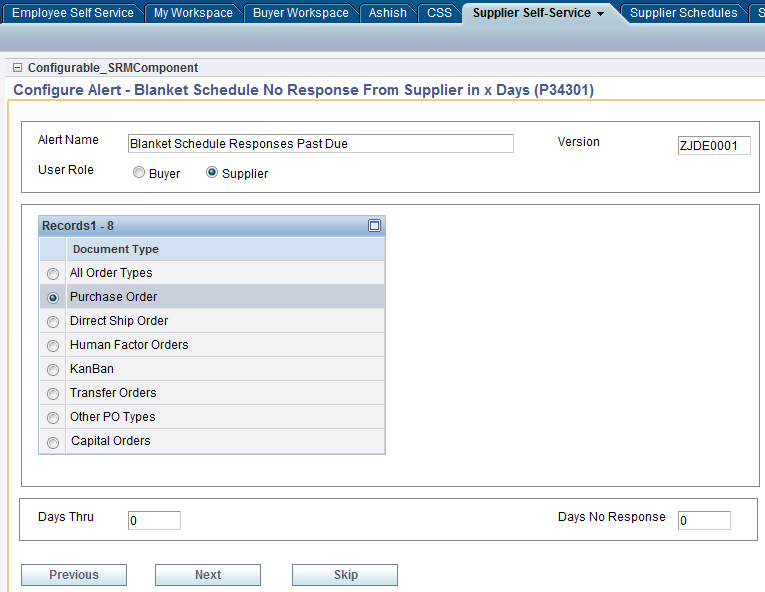
Description of "Figure 8-27 Blanket Schedule No Response From Supplier in X Days "
Figure 8-28 Inventory Advanced Search Alert
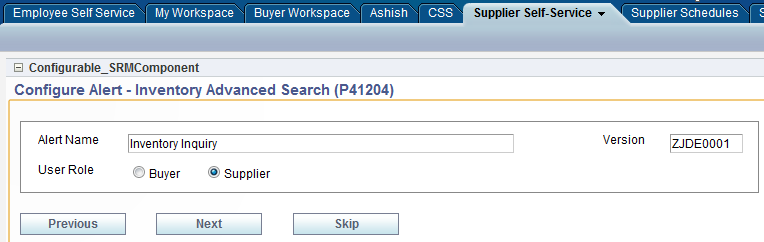
Description of "Figure 8-28 Inventory Advanced Search Alert"
Figure 8-29 Search for Receipt Lines Alert
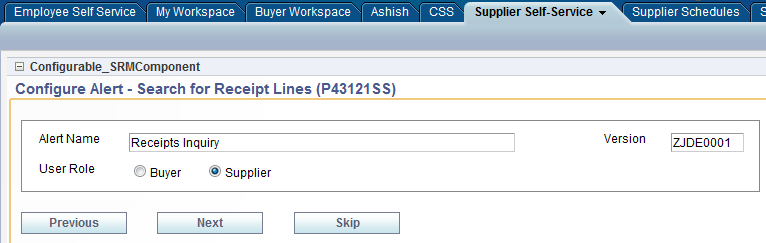
Description of "Figure 8-29 Search for Receipt Lines Alert"
Figure 8-30 Search for Payment Information Alert
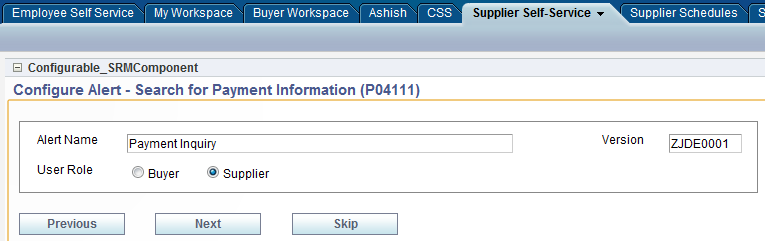
Description of "Figure 8-30 Search for Payment Information Alert"
Description of the illustration swc030.png
-
User can change the order in which alerts are displayed using the Move Up or Move Down icons.
Description of the illustration swc032.png
-
Click on Edit Page options available under page actions.
Description of the illustration swc031.png
-
Click on Add Box Down.
Description of the illustration swc033.png
-
Click on Add Content to add E1 portlets.
Description of the illustration swc034.png
-
Follow the steps 5, 6 and add Configurable_HTML_URI_IURI_Component from the available list as shown in the following image.
Description of the illustration swc035.png
-
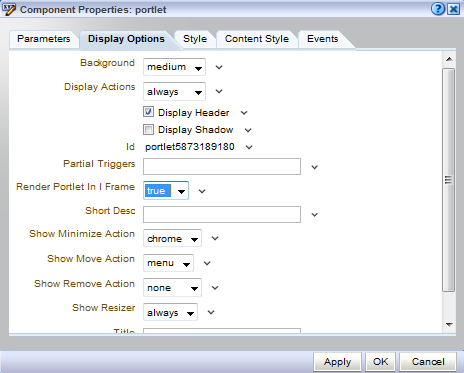
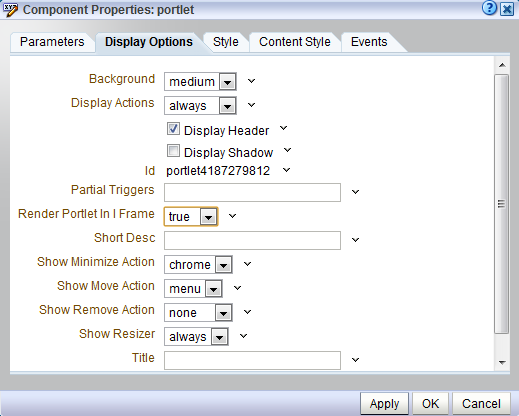
Click on the edit button of the portlet and select the Display Options tab. Set the property Render Portlet in I Frame to true as shown in the screen shot below.
Description of the illustration swc036.png
-
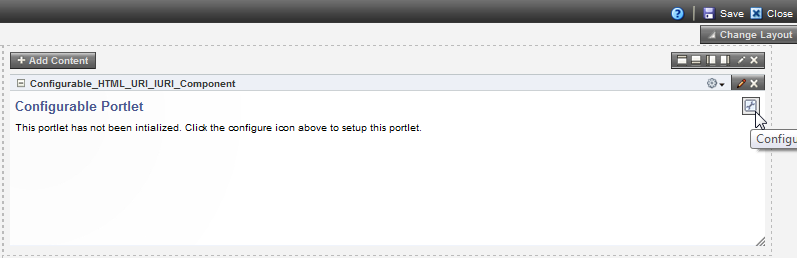
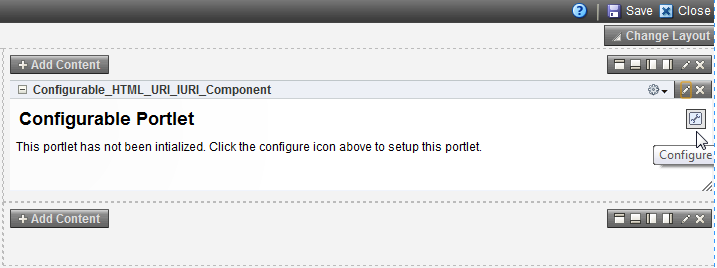
Click the Configuration icon.
Description of the illustration swc037.png
-
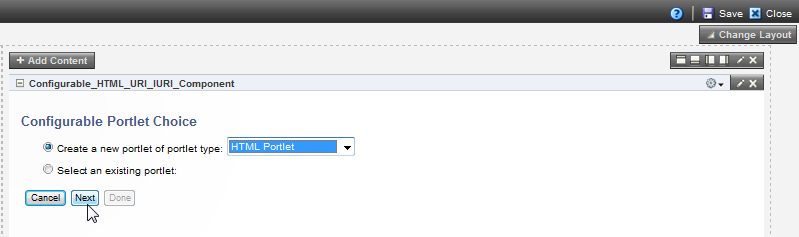
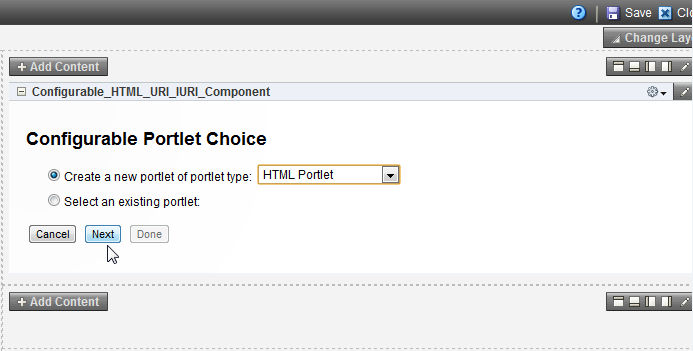
Select HTML Portlet from the available list and click Next.
Description of the illustration swc038.png
-
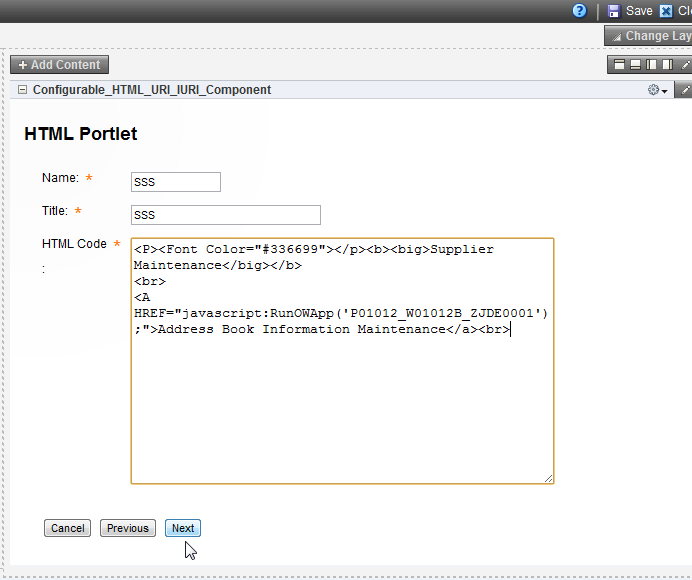
Enter the Name as SSS and Title as SSS and paste following text in “HTML Code” text area and click “NEXT” button.
<P><Font Color="#336699"></p><b><big>Supplier Maintenance</big></b>
<br>
<A HREF="javascript:RunOWApp('P01012_W01012B_ZJDE0001');">Address Book Information Maintenance</a><br>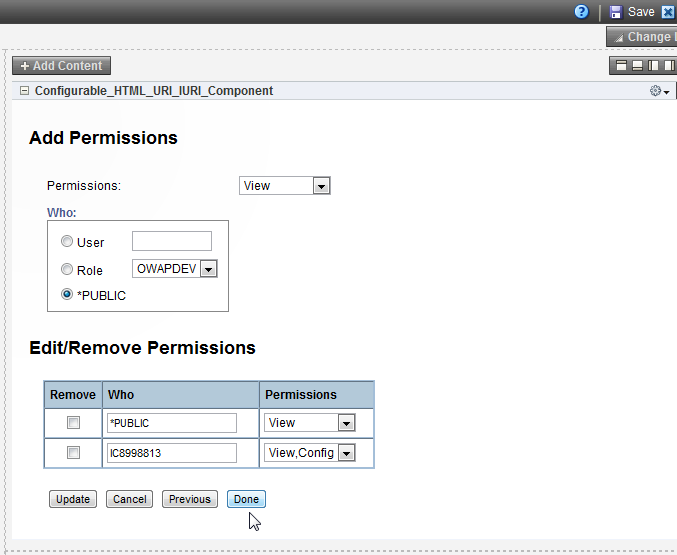
Description of the illustration swc039.png
-
Set required permissions and click Done.
Description of the illustration swc040.png
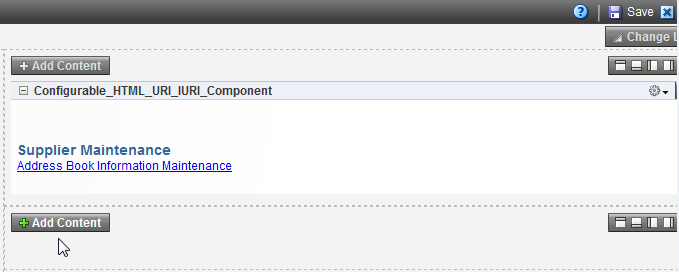
-
Click on Add Content to add EnterpriseOne portlets.
Description of the illustration swc041.png
-
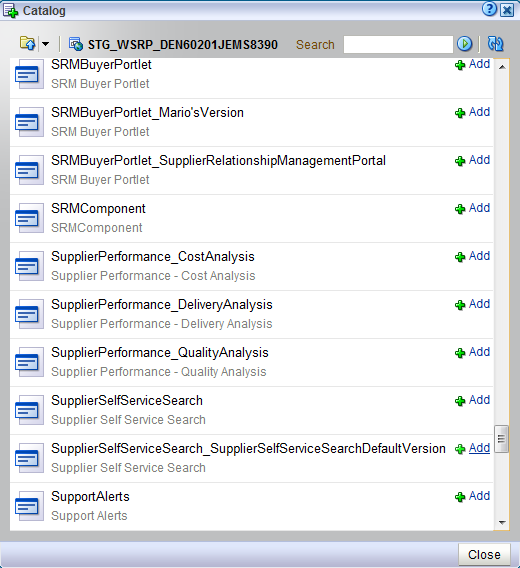
Follow the steps 5 and 6 and add Supplier Self Service Search from the available list.
Description of the illustration swc042.png
-
Click on the edit button of the portlet and select the Display Options tab. Set the property Render Portlet in I Frame to true.
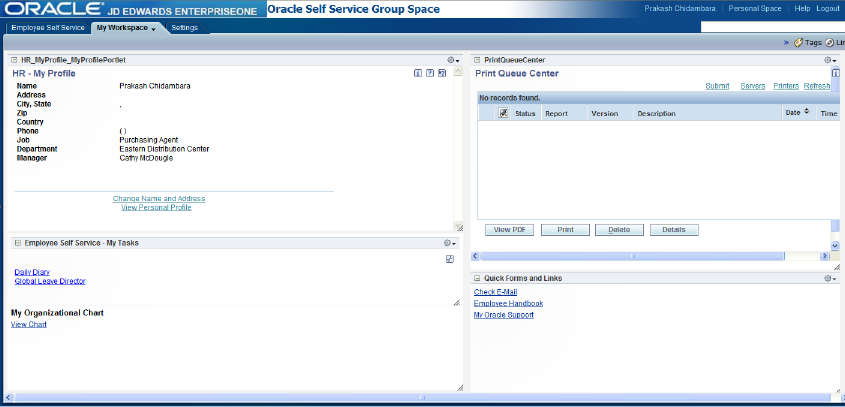
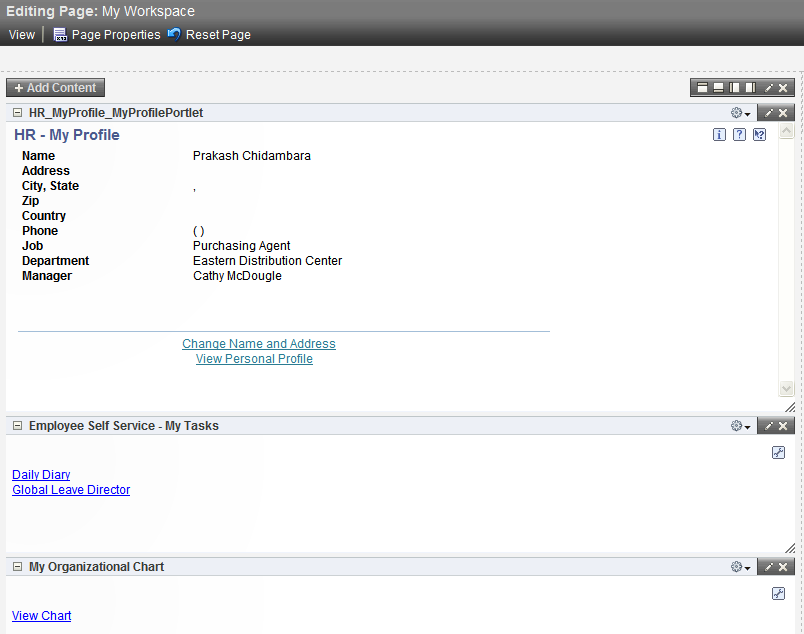
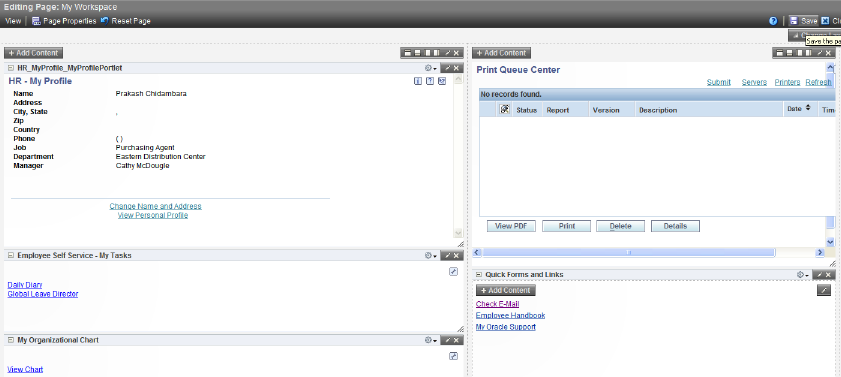
8.7 Creating a My Workspace Portal Page
The sample My Workspace portal page layout has portlets arranged in two columns. The page has two EnterpriseOne FDA portlets one Configurable HTML portlet and two WebCenter portlets, as shown below.
Description of the illustration wwc004a.png
Follow these steps to create the My Workspace portal page:
-
Log into WebCenter and access the Oracle Self Service Space the was created in the previous section.
Description of the illustration wwc049.png
-
Click the Page Actions dropdown arrow, then select Create, and then Page.
Description of the illustration wwc004b.png
-
Enter Page Name as My Workspace and let the Scheme be Blank. Click the Create button. This will show My Workspace page in Edit mode having only one column.
Description of the illustration wwc005.png
-
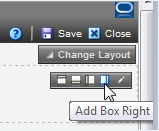
Since the sample page has two columns click on Add Box Right as shown in this image.
Description of the illustration wwc006.png
-
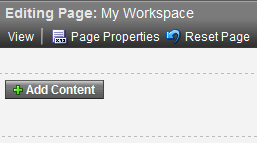
Click Add Content on the left pane to add portlets.

Description of the illustration wwc007.png
-
Open the Portlets catalog.

Description of the illustration wwc008.png
-
Open stb_oracle_webcenter (this name could be different based on the setup) to see the list of E1 portlets available.

Description of the illustration wwc010.png
-
Add two Configurable HTML portlets. To add the Configurable_HTML_URI_IURI_Component portlet to the left pane, search for the string Configurable_HTML to find the list of portlets, starting with the string Configurable_HTML.
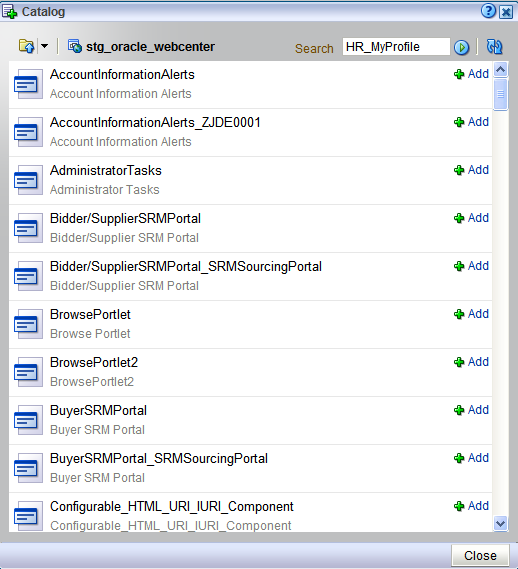
Description of the illustration wwc009.png
-
To add the HR - My Profile portlet to the left pane, search for the string HR_MyProfile to find the list of HR_MyProfile portlets available, and then add the required portlet from the list to the portal page.
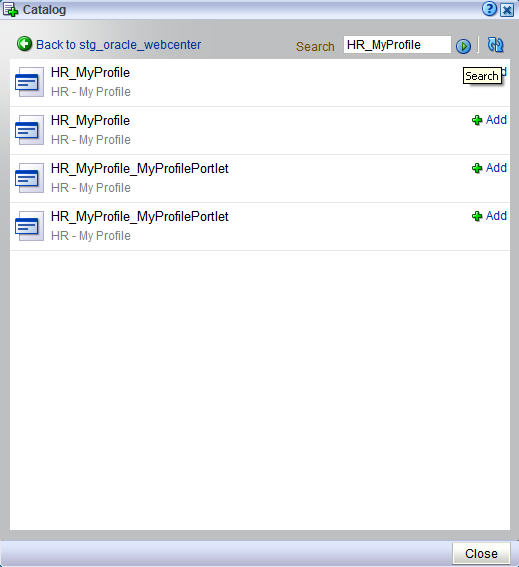
Description of the illustration wwc011.png
-
Add the required portlet from the list to the portal page, and then click the Close button to close the catalog.
Description of the illustration wwc013.png
-
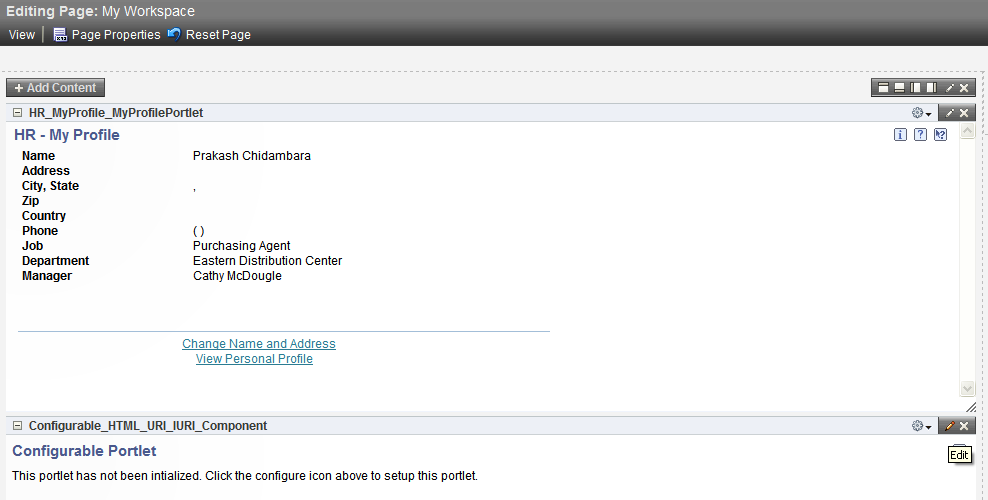
To change the header of the Configurable HTML portlet, click the Edit button on Configurable HTML portlet as show below.
Description of the illustration wwc014.png
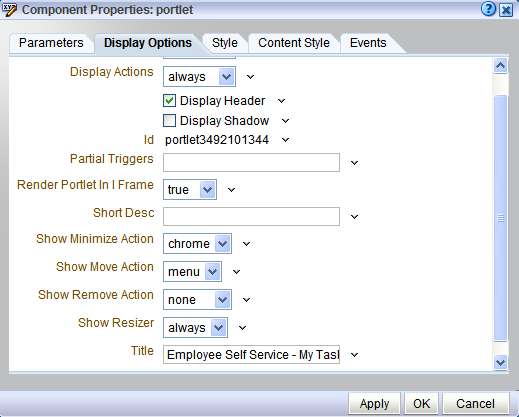
-
On the Display Options tab, set Title as Employee Self Service - My Task.

Description of the illustration wwc015.png
-
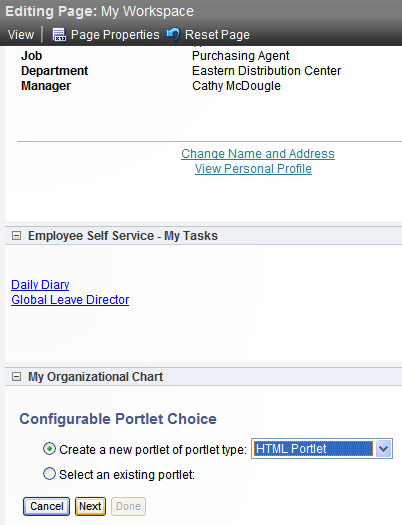
To configure the Configurable HTML portlet, click the Configure icon on the portlet. Make sure that the steps given under the topic Required WebCenter EnterpriseOne Portlets Setup are completed for the configurable portlet to work.
Description of the illustration wwc016.png
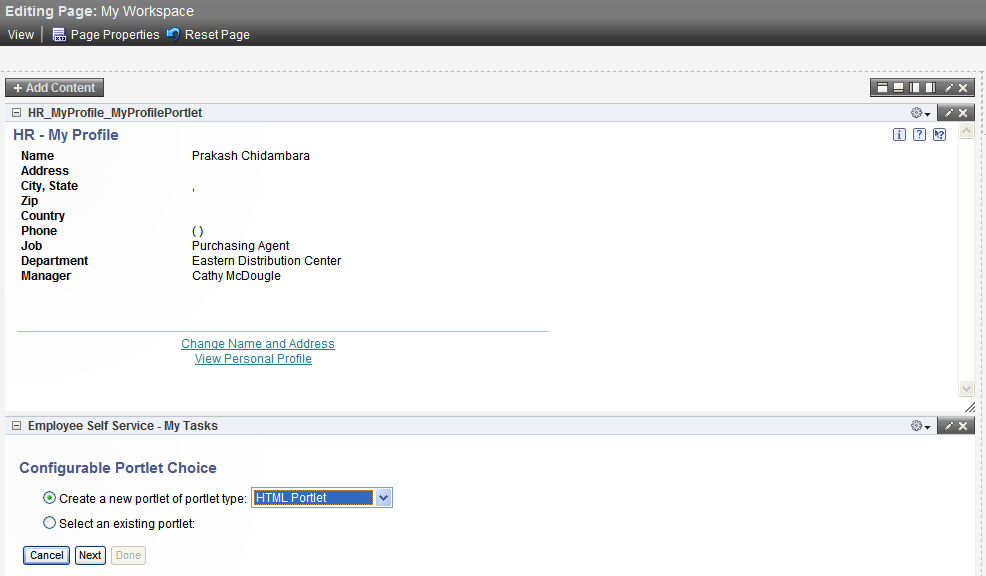
-
Make sure that Create a new portlet of portlet type radio button is selected and select HTML Portlet from the list.
Description of the illustration wwc017.png
-
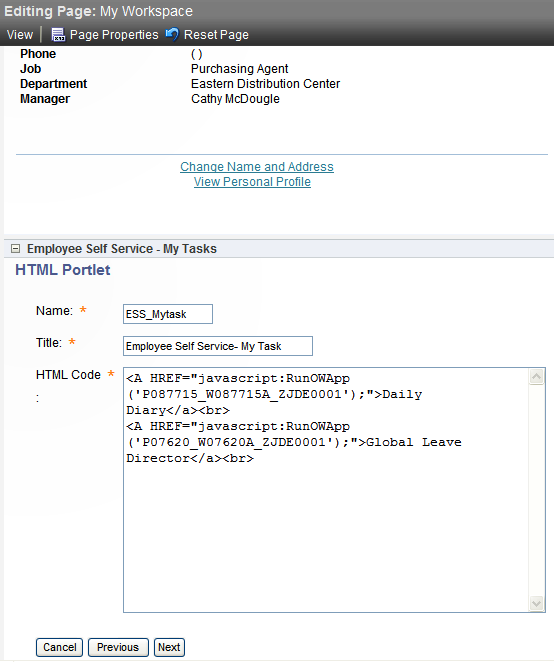
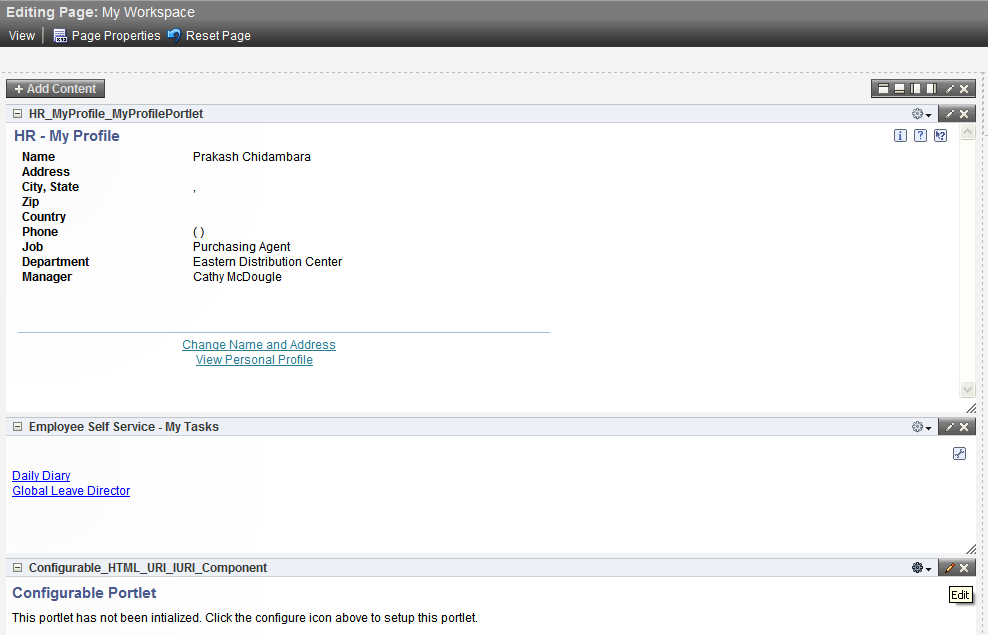
Enter the Name as ESS_MyTask and Title as ESS My Task and paste following text in the HTML Code text area. Click Next.
<A HREF="javascript:RunOWApp('P087715_W087715A_ZJDE0001');">Daily Diary</a><br>
<A HREF="javascript:RunOWApp('P07620_W07620A_ZJDE0001');">Global Leave Director</a><br>
Description of the illustration wwc018.png
-
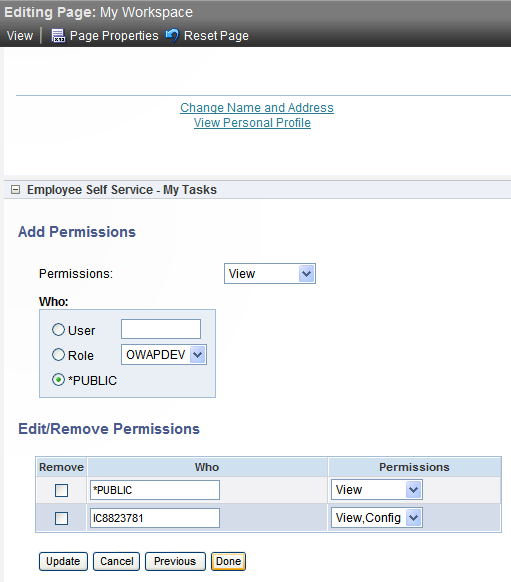
Set required permissions. Click Done.
Description of the illustration wwc019.png
-
To change the header of the second Configurable HTML portlet, click the Edit button on the Configurable HTML portlet.
Description of the illustration wwc020.png
-
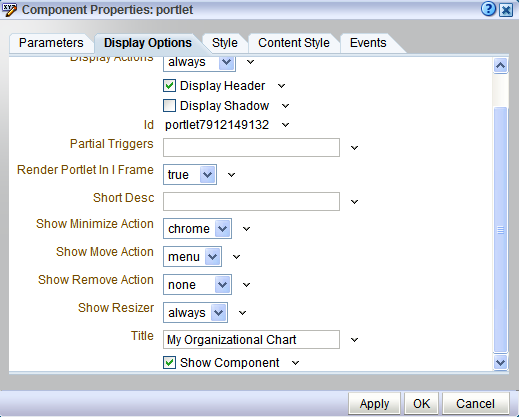
On the Display Options tab, set the Title as My Organizational Chart.
Description of the illustration wwc021.png
-
To configure the Configurable HTML portlet, click the Configure icon of the portlet. Make sure that the steps given under the topic Required WebCenter EnterpriseOne Portlets Setup are completed for the configurable portlet to work.
Description of the illustration wwc022.png
-
Make sure that Create a new portlet of portlet type radio button is selected. Select HTML Portlet from the list.
Description of the illustration wwc023.png
-
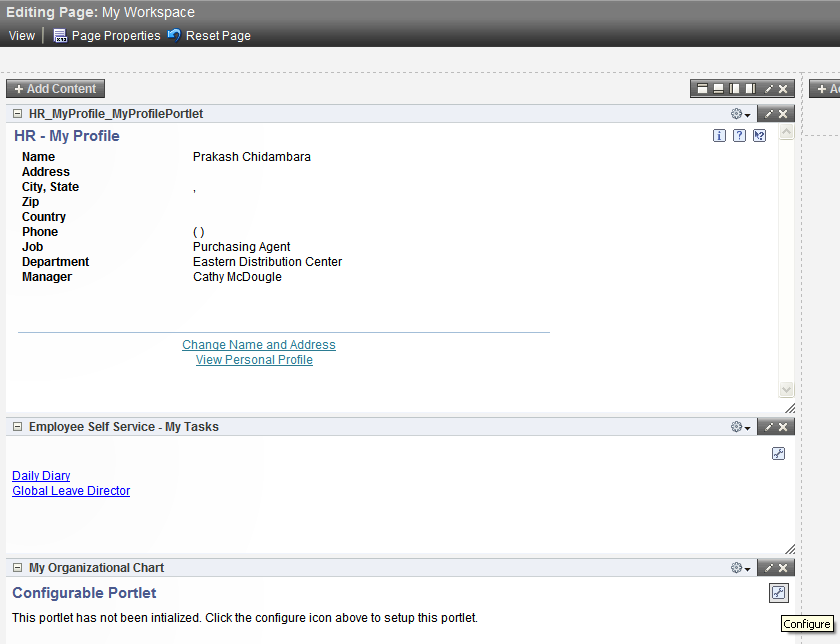
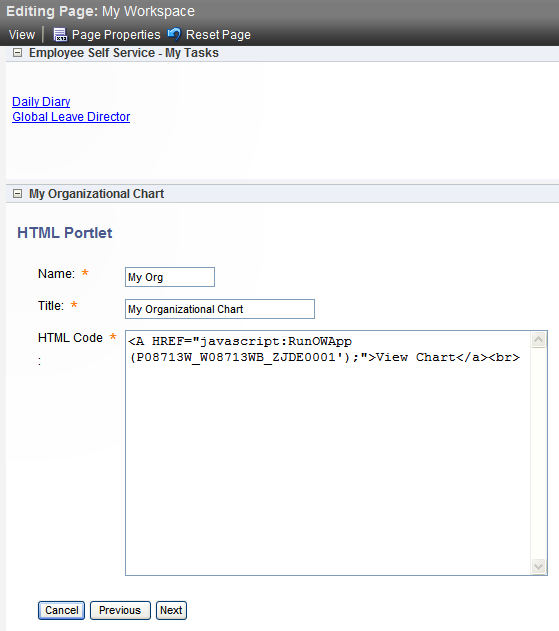
. Enter the Name as My Org and Title as My Organizational Chart. Paste the following text in the HTML Code text area. Click Next.
<A HREF="javascript:RunOWApp('P08713W_W08713WB_ZJDE0001');">View Chart</a><br>
Description of the illustration wwc025.png
-
Set required permissions. Click Done.
Adding Portlets to the Right Pane
To add portlets to the right pane follow these steps:
-
Click Add Content on the right pane.

Description of the illustration wwc026.png
-
Open the Layout catalog.
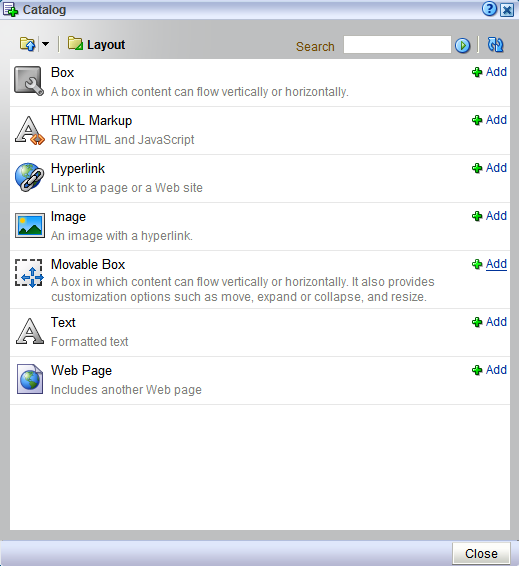
Description of the illustration wwc027.png
-
Add the Movable Box portlet.

Description of the illustration wwc029.png
-
Go to the Portlets folder.

Description of the illustration wwc030.png
-
Select stb_oracle_webcenter (this name could be different based on the setup) to see the list of EnterpriseOne portlets available.
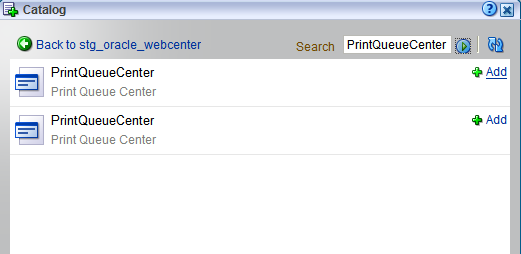
Description of the illustration wwc031.png
-
To add the Print Queue Center portlet to the right pane, search for the string PrinQueueCenter in order to find the list of PrinQueueCenter portlets available, and then add the required portlet from the list to the portal page.
-
Follow these steps to add contents to the Movable Box portlet:
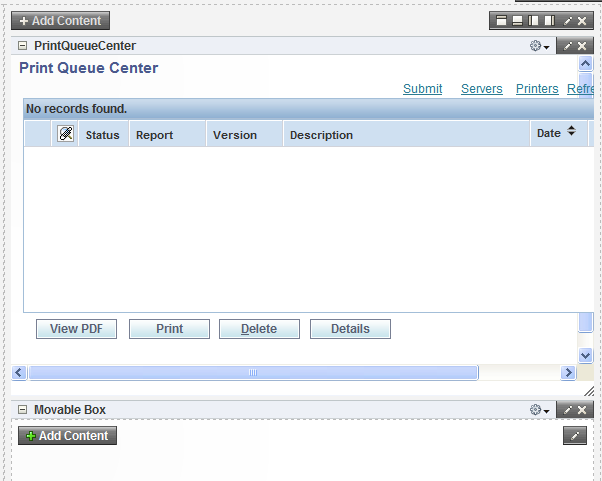
Description of the illustration wwc032.png
-
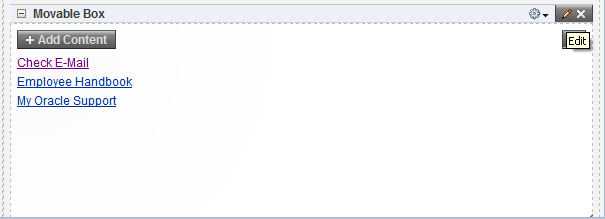
Click the Add Content button on the Movable Box portlet.
-
Open the Layout catalog.
-
Add three hyperlink portlets.
-
Close the Catalog.
-
-
Follow these steps to configure the hyperlink portlets added in the previous step:
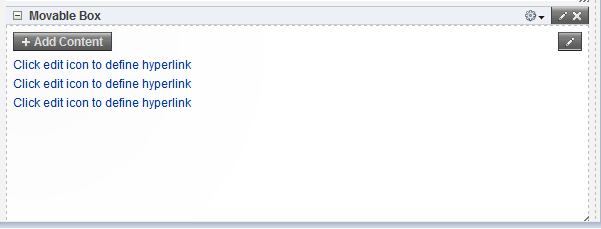
Description of the illustration wwc035.png
-
Click Edit on the hyperlink portlet.
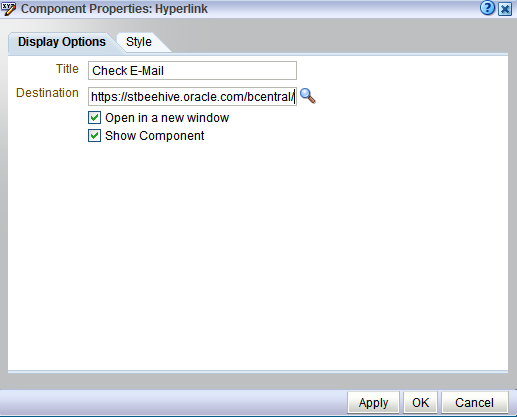
Description of the illustration wwc036.png
-
On the Display Options tab, set Title as Check E-mail and set Destination with the URL of the Web mail. Make sure that Open in a new window is checked so that the web mail opens in a new window.
Description of the illustration wwc037.png
-
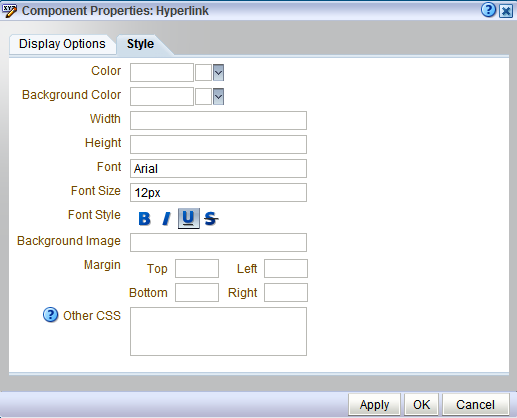
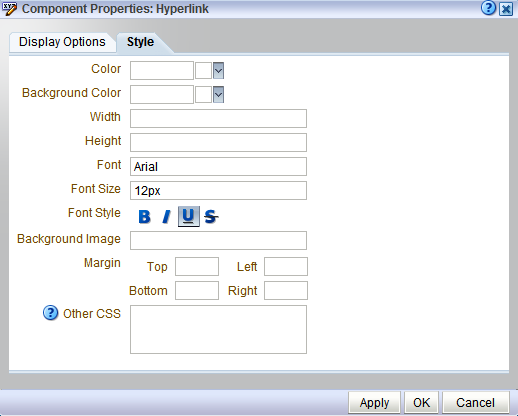
On the Style tab set the Font and Font Size as shown below. Click OK.
Description of the illustration wwc038.png
-
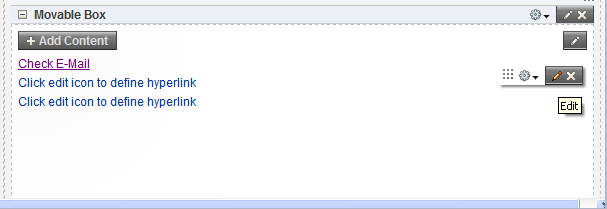
To configure the second hyperlink portlet, click Edit on the hyperlink portlet as shown below.
Description of the illustration wwc039.png
-
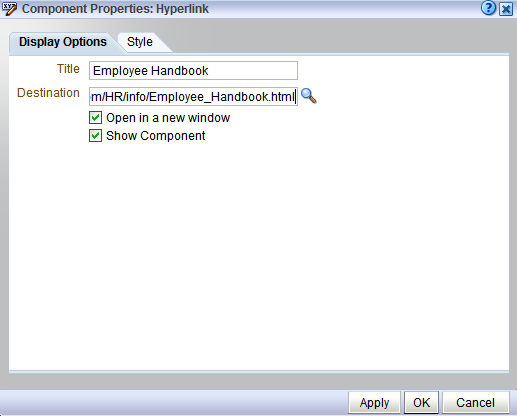
On the Display Options tab, set Title as Employee Handbook and set Destination with the URL of the Employee Handbook. Make sure that Open in a new window is checked so that the Employee Handbook opens in a new window.

Description of the illustration wwc040.png
-
On the Style tab set the Font and Font Size as shown below. Click OK.
Description of the illustration wwc041.png
-
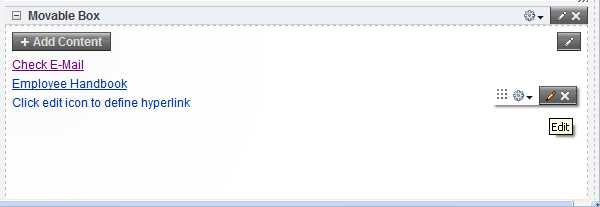
To configure the second hyperlink portlet, click Edit on the hyperlink portlet as shown below.
Description of the illustration wwc042.png
-
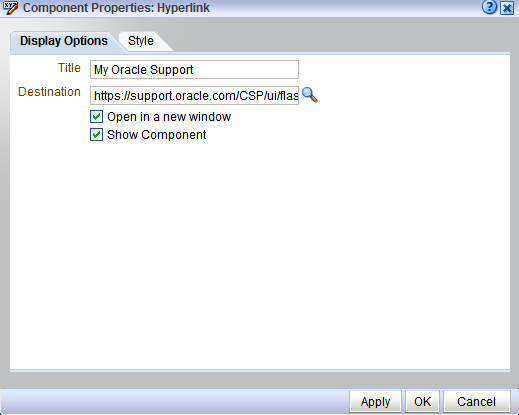
On the Display Options tab, set Title as My Oracle Support and set Destination with the URL of the My Oracle Support. Make sure that Open in a new window is checked so that the My Oracle Support opens in a new window.
Description of the illustration wwc043.png
-
On the Style tab set the Font and Font Size as shown below. Click OK.
Description of the illustration wwc045.png
-
-
To remove heading of the Print Queue Center portlet, click on the edit button on the portlet, and then select the Display Options tab and uncheck Display Header as shown below.
-
To change the heading of the Movable Box portlet follow these steps.
Description of the illustration wwc046.png
-
Click on the Edit button on the Movable Box portlet.
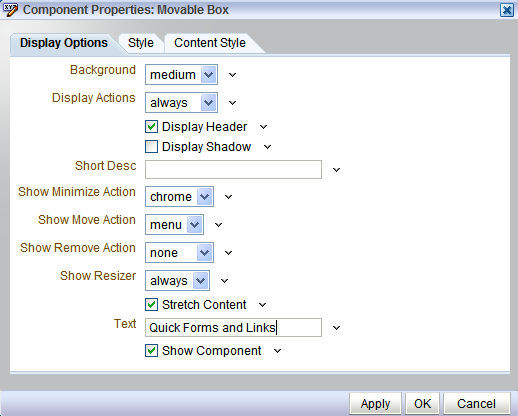
Description of the illustration wwc047.png
-
Set Text as Quick Forms and Links.
Description of the illustration wwc048.png
-
-
Save the changes made to the portal page.
8.7.1 Required WebCenter EnterpriseOne Portlets Setup
For EnterpriseOne portlets to work on WebCenter, the property Render Portlet in I Frame which is available on the Display Options of Component properties should be set to true. To set the property click on the edit button of the portlet and select the Display Options tab. Set the property Render Portlet in I Frame to true as shown in the image below.
Description of the illustration wwc003.png