22 System Administrator and Designer Tasks for EnterpriseOne Pages
This chapter contains the following topics:
22.1 Understanding EnterpriseOne Pages
EnterpriseOne Pages are the first screen end-users see when they log into EnterpriseOne. They are HTML files, and can contain any HTML-enabled functionality, such as interactive process flows, URL links and web pages, company logos, etc. You must be proficient in coding HTML to configure or create EnterpriseOne Pages.
You create EnterpriseOne Pages outside of EnterpriseOne using any HTML editor, then upload them to EnterpriseOne.
Typical Process Flow
The following list is an example of a basic process flow for creating EnterpriseOne Pages.
-
Add an EnterpriseOne Page by accessing the User Generated Content Management application. (P982400)
-
Add an object.
-
Upload the content for that object.
-
Preview the page to verify it is correct.
-
-
Advance the Object status from Editing status to Pending Review.
-
Advance the Object status from Pending Review to Review.
-
Advance the Object status from Review to Approved.
-
Publish the page (assign the page to User or Role or *PUBLIC.
-
Activate the page.
22.1.1 Understanding Designer, System Administrator, and End-User Tasks for EnterpriseOne Pages
There are three user-groups who create and modify, set up, and use EnterpriseOne Pages: designers, system administrators, and end-users. Each group is explained below:
Designers
Designers can create new, or modify existing EnterpriseOne Pages using an HTML editor. (Designers must be proficient in coding HTML to create or modify EnterpriseOne Pages). Designers save the EnterpriseOne pages and supporting files as a .zip or .jar file, ensuring that the EnterpriseOne Page resides at the root of the file structure and is named as home.htm or file structure and is named as home.html.
Designers can create EnterpriseOne Pages, or use one of the templates available in EnterpriseOne. These templates contain interactive process models for EnterpriseOne tasks, which designers can use as a basis for creating their own EnterpriseOne Pages. There are also two templates that contain FDA Portlets. For more information on EnterpriseOne Pages with FDA Portlets, see the Adding Portlets to EnterpriseOne Pages (Release 9.1. Update 2) section of this guide.
The following list contains the EnterpriseOne Pages templates:
EnterpriseOne Pages templates:
-
Financial Budgeting and Planning
-
Capital Asset Management
-
HCM Recruitment Management
-
Manufacturing Work Orders
-
Order to Cash
-
Procure to Pay
-
Projects
-
Work Orders
EnterpriseOne Pages Templates with FDA Portlets:
-
CSS Account
-
CSS Service
After you create or modify an EnterpriseOne Page, you upload them to EnterpriseOne and send it through a status flow, which a system administrator has created.
System Administrators
System Administrator tasks include the following:
-
Set up activity rules, also known as status flows, for EnterpriseOne Pages life cycle management.
-
Define which users, roles, or *PUBLIC have access to the activity rule status.
-
Assign activity rules to users, role, or *PUBLIC.
-
Publish EnterpriseOne Pages to a user, role, or *PUBLIC.
-
Restore an EnterpriseOne Page from a history queue.
End-Users
End-users see EnterpriseOne Pages when they login to EnterpriseOne. They cannot change or create the pages themselves, and see only those that a system administrator has assigned to their roles, *Public, or their individual user ID. End-users can select different pages if more than one is assigned to them, by clicking on the tab at the top of each page. When the tab is hovered over, EnterpriseOne Pages displays a detailed description of the page, if a description was included by a designer.
22.2 System Administrator Tasks for EnterpriseOne Pages (Advanced Tasks)
This section is for System Administrators only. If you are a designer, see the Section 22.3, "Designer Tasks for EnterpriseOne Pages"section in this chapter. This section contains the following topics:
-
Section 22.2.2, "Assigning Users, Roles, or *PUBLIC, and Publishing EnterpriseOne Pages"
-
Section 22.2.3, "Recovering an EnterpriseOne Page from History"
-
Section 22.2.4, "Transferring EnterpriseOne Pages from One Pathcode to Another"
-
Section 22.3.6, "Creating or Modifying Override Pages after Production"
22.2.1 Creating Status Flows (Activity Rules)
Before a designer can upload an EnterpriseOne Page to EnterpriseOne, you must create statuses, also called activity rules, and status flows through which the page will go for approval. You must create at least two statuses: an entry status, such as Editing, and a final status, such as Approved.Before you begin setting up status flows your company should consider how restrictive or lenient you want these status flows to be. Spend some time thinking if designers should be required to send the pages through several statuses before they are approved, or if just a few statuses are necessary. Also, consider what to name the statuses, for example Pending Review, Review, Editing, etc. Preparing ahead of time will make the setting-up process much quicker and more efficient. The following example is of a restrictive status flow where designers must send their EnterpriseOne Pages through several statuses before it is approved:
-
Editing > Pending Review
-
Pending Review > Reviewing
-
Reviewing > Pending Approval
-
Pending Approval > Approval
The following example is of a lenient status flow where designers must send their EnterpriseOne Pages through on two statuses before it is approved:
Editing > Approval
Note:
You create new statuses using the Work with User Defined Codes EnterpriseOne application. After you create a new status, you can access it and create a status combination to assign to EnterpriseOne Pages. See Chapter 10, "Working with User Defined Codes"EnterpriseOne has designated the UDC with a Product Code: H95, and User Defined Codes: US for EnterpriseOne Pages activity rules. Additionally, EnterpriseOne has reserved Codes 02, 06, 07, 08, 98, and 99, so customers cannot use these numbers for their status descriptions. Oracle recommends that you use these pre-existing codes to create your status flows. If none of these codes meet your needs, however, you can create new ones.
The following graphic displays the EnterpriseOne UDC information that you should select when creating statuses for EnterpriseOne Pages.
Oracle recommends that you have already determined your status flows before you begin creating them in EnterpriseOne.
To create a status flow:
-
In the Fast Path, type P982405 and press Enter.
-
Click Add.
-
On Manage LCM Order Activity Rules, select EnterpriseOne Pages from the Object Type drop-down menu.
-
Complete the following fields in the grid row:
-
Status
Set the status to active or inactive. If you choose Active, the rule is effective immediately. If you choose Inactive, the rule is created, but is not available to be used yet. You might choose this option if you set up your statuses prior to the time that you want them to actually be available for use.
-
User/Role
Enter user, role, or *PUBLIC.
-
Last Status
The last status is the previous status.
-
Next Status
The Next status is the one following the current status.
Note:
Select only one next status to be the final status, which will need to be approved. Only one status can be marked as approved. once that status is obtained you cannot go back and change the EnterpriseOne Page.
-
-
Click OK.
22.2.2 Assigning Users, Roles, or *PUBLIC, and Publishing EnterpriseOne Pages
You can assign EnterpriseOne Pages to individual users, roles, or to *PUBLIC. You can assign multiple pages to any user or role. End-users will be able to see all pages you have assigned to them once the pages are published and activated.
To assign users, roles, or *PUBLIC to EnterpriseOne Pages:
-
In the Fast Path, type P982400 and press Enter.
-
On the User Generated Content Management form, select EnterpriseOne Pages from the Object Type drop-down menu.
-
Click the Form exit, and then click Admin, and then Publish.
On Published User Generated Contents, you can add users, roles, or *PUBLIC to EnterpriseOne Page.
Note:
The user, roles, or *PUBLIC is based on EnterpriseOne security that is determined when a user logs into EnterpriseOne. -
Click OK.
22.2.3 Recovering an EnterpriseOne Page from History
When an EnterpriseOne Page reaches the end of a status flow (the final status was identified when the activity rules were created), users, usually managers, click a checkbox that marks the page as Approved. When this checkbox is marked, EnterpriseOne changes the EnterpriseOne Page status from an Editing to "Published" State record in the appropriate table. At the "Published" State, you can make the page available to end-users by subscribing individual users, roles, or *PUBLIC to the page. There are three circumstances under which an EnterpriseOne Page is saved to a history queue.
The first is when a new EnterpriseOne Page is created and moved through the status flow until its status is changed to Approved.
The second is when a published EnterpriseOne Page is returned to the status flow for editing. EnterpriseOne saves the original EnterpriseOne Page in the History queue while the EnterpriseOne Page is re-approved and returned to the published state.
The third is when an EnterpriseOne Page that is in the published state is deleted.
To recover and EnterpriseOne Page from the history queue:
-
In the Fast Path, type P982400 and press Enter.
-
Click the Form exit, and then select Advanced Management from the Admin menu.
-
Click the Form exit again, and click History.
-
On UGC History Management, select EnterpriseOne Pages from the Object Type drop-down menu.
-
In the Reason field, select the reason why the EnterpriseOne Page is in the History queue.
-
Click Find.
EnterpriseOne displays the EnterpriseOne Pages that match your search criteria in the grid.
-
Click the corresponding checkboxes for the EnterpriseOne Pages that you want to restore from the History queue.
-
Click the Row exit, and then click Restore.
22.2.4 Transferring EnterpriseOne Pages from One Pathcode to Another
You transfer EnterpriseOne Pages from one pathcode to another to make them available in different environments.
-
Type P982400 in the Fast Path.
-
Click the Form exit, click Admin, and then click Transfer.
-
On the Work With Transferred Jobs, click Add.
-
On Transfer User Generated Contents, enter an alphanumeric name in the Transfer Name field.
If you do not enter a name in this field, EnterpriseOne will enter the default name E1USERID:YYYYMMDD:HHMMSS.
In the Pathcode field, EnterpriseOne automatically enters the pathcode where the EnterpriseOne Page currently resides. Pathcode field and Release fields have default values in them. In the Release field, EnterpriseOne automatically enters the release with which the EnterpriseOne Page is currently associated.
-
Select one of the following options:
-
Transfer Required
-
Transferred Objects
-
All Objects
-
-
Click Find, or to narrow down your search options, complete the following fields in the grid, and then click Find:
-
Object Name
-
Name
-
Object Type
The EnterpriseOne Pages that match your search criteria display in the grid.
-
-
Select the EnterpriseOne Pages you want to transfer.
-
From the Row exit, select Pathcodes Transfer.
-
On PathCodes for Transfer, select a pathcode to which you want to transfer the EnterpriseOne Page and then click OK, or find other pathcodes than the ones in the grid by entering information into the following fields, and clicking Find.
-
Path Code
-
Release Number
-
Data Source
-
-
Click OK.
22.2.5 Exporting EnterpriseOne Pages
You export EnterpriseOne Pages to package them for customer installation.
To export EnterpriseOne Pages:
-
Type P982400 in the Fast Path and press Enter.
-
Click the Form exit, and then click Import-Export Mgmt.
-
Click Export.
-
On Work With Exporting User Generated Contents, click Add.
-
In the Export Name field, type the .zip file name into which the EnterpriseOne Pages are saved.
-
From the grid, select one or more EnterpriseOne pages that you want to export.
Located above the grid is a Notes tab. Click the tab, then enter a note specific to the export into the blank field. This is generated as part of a readme.txt file that is saved in the EnterpriseOne .zip file.
-
Click Save.
-
On File Download dialog box, click Save to save the EnterpriseOne Pages to a location you specify.
-
Click Save to save the .zip file.
WARNING:
Your file MUST be saved as a .zip file.
-
Open the .zip file EnterpriseOne just saved, to verify that the E1PAGE.xml file is present, and contains the EnterpriseOne Pages information.
The readme.txt file contains the information you entered in the notes field on the notes tab when you selected the EnterpriseOne Pages you wanted to export.
22.2.6 Importing EnterpriseOne Pages
Customers import EnterpriseOne Pages that have been exported using the export process.
To import EnterpriseOne Pages:
-
Type P982400 in the Fast Path and press Enter.
-
Click the Form exit, and then click Import-Export Mgmt.
-
Click Import.
-
On Work With Importing User Generated Contents, click Add.
-
Click the Load Import File button.
-
On File Upload, click Browse.
-
Select the EnterpriseOne Pages .zip file you want to import and then click Open.
-
Click Load.
The E1Page.xml file displays in the grid.
-
Click Preview to view the records within the xml file.
-
If you check the Pending Approval checkbox, located beside the Import File, the EnterpriseOne Page will be imported with Edit status. Otherwise, EnterpriseOne will import the page with an Approved status.
-
Click Save to import the EnterpriseOne Pages from the E1Page.xml file.
22.3 Designer Tasks for EnterpriseOne Pages
This section contains the following topics:
-
Section 22.3.1, "Downloading and Modifying EnterpriseOne Pages Templates"
-
Section 22.3.2, "Uploading EnterpriseOne Pages to EnterpriseOne"
22.3.1 Downloading and Modifying EnterpriseOne Pages Templates
EnterpriseOne Page templates are delivered in EnterpriseOne. To modify them, you download them from EnterpriseOne, save them to a local drive, modify the HTML code, and upload them back to EnterpriseOne.
When you save the templates to a local drive, you must save them as either .zip or .jar files because EnterpriseOne recognizes these formats when you upload the files. Additionally, you must save the EnterpriseOne Page in the root directory with the filename "home.html" for EnterpriseOne to recognize and display it. The following graphic shows the proper file structure and proper naming conventions:

To download EnterpriseOne Pages to a local drive:
-
In the Fast Path, type P982400 and press Enter.
-
Click Find, and select the EnterpriseOne Page you want to download.
-
From the Row exit, select Get/Download.
The page displays in the lower left corner of your screen.
-
Click the file and select the tool with which to open it.
The file displays in the lower corner of your screen.
-
Save the EnterpriseOne Page to a directory that you choose.
22.3.2 Uploading EnterpriseOne Pages to EnterpriseOne
After you create or modify an EnterpriseOne Page, you upload, or add, it into EnterpriseOne. Once uploaded, you submit the page through a status flow that your system administrator has set up.
Note:
Your EnterpriseOne Page must be saved in a .jar or .zip folder, and must be saved in the root directory of the .zip or .jar folder with the following naming convention: home.htmlTo upload EnterpriseOne Pages to EnterpriseOne:
-
In the Fast Path, type P982400 and press Enter.
-
On the User Generated Content Management form, click Add.
-
Enter information into the following fields:
-
Object Type.
This field is already populated with the information you chose on the previous form.
-
Object Name
Type the alphanumeric name of the EnterpriseOne Page you are adding.
-
Page Title
Type the text that will display on the tabs that display at the top of each EnterpriseOne Page.
-
Product Code
Oracle recommends you use product code 55 for customized EnterpriseOne Pages.
-
Language Code
EnterpriseOne Pages must have a base language assigned to the original page (blank language code). A Language page requires that two pages be created. A Language page requires that two pages be created. Each page should have the same Object Name and Product Code. One page should have the Language code set to a blank value. The other page should have the Language code set to the pertinent language, for example, Spanish or German. The Language Code defaults as blank, which is English. If you want to change the language, enter a new language code.
If language is specified, EnterpriseOne enables the EnterpriseOne Page to be viewed in a User Profile defined language.
-
Page Description
Type the text that displays when end-users hover over the Page Title. Use it to further describe the corresponding EnterpriseOne Page.
-
URL Link
Select this option if you want the EnterpriseOne Page that you are adding to link to a URL. Type the full URL address in the corresponding field, starting with http:\\.
-
HTML Content
Select this option if you want the EnterpriseOne Page that you are adding to display an HTML page.
-
-
Click Upload Content to add the EnterpriseOne Page.
-
Click the .zip folder that contains the EnterpriseOne Pages home.html that you want to add.
-
To view the page before adding it, click View Page.
-
The following fields are blank. If you leave the fields blank, then EnterpriseOne inserts a default value. For example, if Reserved By is left blank, then EnterpriseOne inserts the login user ID. Complete the following optional fields:
Reserved By
Reserved Date
Designer
Start Date
-
Click OK.
22.3.3 Changing EnterpriseOne Page Statuses
All EnterpriseOne Pages must go through an activity rule status flow after they are entered into EnterpriseOne. These statuses are determine by the System Administrator and are a way to track the progress of an EnterpriseOne Page through the life cycle. All EnterpriseOne Pages are assigned an entry status and an end status, such as "Editing" and "Approved." When you add EnterpriseOne Pages to EnterpriseOne, you assign a beginning status, and then are able to change the status to the next one in the activity rules status flow.
Depending on how your System Administrator has set up statuses, you might not be able to change the status of an EnterpriseOne Page. If you are not allowed to change the status, you will receive a message indicating that you are not authorized to make the change.
To change an EnterpriseOne Page Status:
-
Type P982400 in the Fast Path.
-
On User Generated Content Management, select EnterpriseOne Pages from the Object Type menu.
-
Select the current status of the EnterpriseOne Page from the Status menu.
-
Click Find.
A list of all the EnterpriseOne Pages that are at the status you selected display in the grid.
-
Select the EnterpriseOne Page on which you want to change the status, and then click the current status in the Current Status (Click to update) field.
-
In the Update Status form that displays, select a status from the Next Status drop-down menu.
Your system administrator determines the sequence of statuses.
-
Click OK.
The EnterpriseOne status changes.
22.3.4 Viewing Test Pages
To view an EnterpriseOne Page Status:
-
Type P982400 in the Fast Path.
-
On User Generated Content Management, select EnterpriseOne Pages from the Object Type menu.
-
Select the current status of the EnterpriseOne Page from the Status menu.
-
Click Find.
A list of all the EnterpriseOne Pages that are at the status you selected display in the grid.
You can also search for EnterpriseOne Pages by typing information into the grid and clicking Find.
-
Select the EnterpriseOne Page you want to view.
-
Click the Row exit, and then select View.
Additionally, you can click the link located in the Object Name column to view the associated page.
The EnterpriseOne Page displays.
22.3.5 Viewing User Generated Logs
EnterpriseOne generates logs that describe the status and errors associated with an EnterpriseOne Page. The logs reside in the F98211 table.
To view user generated logs:
-
Type P982400 in the Fast Path.
-
On User Generated Content Management, select EnterpriseOne Pages from the Object Type menu.
-
Select the current status of the EnterpriseOne Page from the Status menu.
-
Click Find.
A list of all the EnterpriseOne Pages that are at the status you selected display in the grid.
-
Select the EnterpriseOne Page you want to view.
-
Click the Row exit at the top of the screen.
-
Select Logs.
-
Click Select.
The Detail Message form displays the log information.
22.3.6 Creating or Modifying Override Pages after Production
You might want to create new pages, or modify existing ones that have been moved to production and transferred to a different pathcode.
-
In the Fast Path, type P982400 and press Enter.
-
On the User Generated Content Management form, click Add.
-
Enter information into the following fields:
-
Object Type
This field is already populated with the information you chose on the previous form.
-
Object Name
Type the alphanumeric name of the EnterpriseOne Page you are adding.
-
Page Title
Type the text that will display on the tabs that display at the top of each EnterpriseOne Page.
-
Product Code
Oracle recommends you use product code 55 for customized EnterpriseOne Pages.
-
Language Code
EnterpriseOne Pages must have a base language assigned to the original page (blank language code). Language Code defaults as blank. If you want to change the language enter a new language code.
-
Page Description
Type the text that displays when end-users hover over the Page Title. Use it to further describe the corresponding EnterpriseOne Page.
-
URL Link
Select this option if you want the EnterpriseOne Page that you are adding to link to a URL. Type the full URL address in the corresponding field, starting with http:\\.
-
HTML Content
Select this option if you want the EnterpriseOne Page that you are adding to display an HTML page.
-
-
Click Upload Content to add the EnterpriseOne Page.
-
Click the .zip folder that contains the EnterpriseOne Pages home.html that you want to add.
-
To view the page before adding it, click View Page.
-
The following fields are blank. If you leave the fields blank, then EnterpriseOne inserts a default value. For example, if Reserved By is left blank, then EnterpriseOne inserts the login user ID. Complete the following optional fields:
Reserved By
Reserved Date
Designer
Start Date
-
Click OK.
22.3.7 Adding One View Reporting (OVRs) to EnterpriseOne Pages (Release 9.1. Update 3)
To add OVRs to an EnterpriseOne Page:
-
In an HTML editor, open the EnterpriseOne home.html page to which you want to add an OVR.
-
Use the following sample text strings and OVR ID and enter it in the HTML code:
/jde/ShortcutLauncher?TaskId=MHOVRTASK1"
Note:
If you are creating an EnterpriseOne Page from the User Generated Content Management application (P982400), you would enter this same text string in the URL field. -
Save the EnterpriseOne Page.
-
View the EnterpriseOne Page.
22.3.8 Adding Portlets to EnterpriseOne Pages (Release 9.1. Update 2)
You can add portlets to EnterpriseOne Pages, though only Form Design Aid (FDA) portlets are supported. Portlets enable you to interact with an application without having the application open.
(Release 9.1 Update 3) EnterpriseOne Pages are not intended to completely replace functionality found in an actual portal implementation such as WebCenter Spaces or WebSphere Portal. Form interconnects function differently in EnterpriseOne Pages. The initial EnterpriseOne portlet application and form that is displayed in the EnterpriseOne Page provides a launching mechanism with one-way communication into subsequent form interconnects. The EnterpriseOne Page support for EnterpriseOne portlet applications does not include returning data or other information back to the initial EnterpriseOne portlet application and form.
To add an FDA portlet to an EnterpriseOne Page:
-
In an HTML editor, open the EnterpriseOne home.html page to which you want to add a portlet.
-
In the HTML code, search for "/jde/E1PagePortlet?OID=.
The graphic below shows an example of portlet values in an EnterpriseOne Page. These values are the ones you add to create your own portlets.
Note:
You do not need to include a pUID number unless you have the same portlet on an EnterpriseOne Page more than once. The number provides distinction between the portlets. If you do not include a number and have two or more of the same portlets, when you change one portlet, the other portlet will reflect the changes as well. -
Save the EnterpriseOne Page.
-
View the EnterpriseOne Page.
Note:
EnterpriseOne Pages only support FDA portlets. If you have entered portlet values that are not supported, the following error message displays: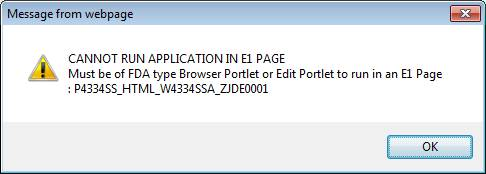

22.3.9 Creating an Embedded EnterpriseOne Page (Release 9.1.5)
Embedded EnterpriseOne Pages enable users to work on multiple EnterpriseOne application by simply switching to different EnterpriseOne Pages. Embedded EnterpriseOne Pages display as tabs located at the top of the EnterpriseOne interface. Applications launched from these EnterpriseOne Pages do not contain a Close button. Instead, users navigate away from the application by clicking other EnterpriseOne Pages located at the top of the screen. When a user navigates away from an application in an Embedded Page, EnterpriseOne saves any information they have already entered, so when they return, their information remains as they left it. To create an Embedded EnterpriseOne Page:
-
In the Fast Path, type P982400 and press Enter.
-
On the User Generated Content Management form, click Add.
-
Enter information into the following fields:
-
n Object Type
This field is populated with the information you chose on the previous form.
-
Object Name
Type the alphanumeric name of the EnterpriseOne Page you are adding.
-
Page Title
Type the text that will display on the tabs that appear at the top of each EnterpriseOne Page.
-
Product Code
Oracle recommends you use product code 55 for customized EnterpriseOne Pages.
-
Language Code
EnterpriseOne Pages must have a base language assigned to the original page (blank language code). Language Code defaults as blank. If you want to change the language, enter a new language code.
-
Page Description
Type the text that displays when end-users hover over the Page Title. Use it to further describe the corresponding EnterpriseOne Page.
-
URL Link
Enter a URL to an EnterpriseOne application. Use the following syntax to denote that the EnterpriseOne Page you are creating is an Embedded EnterpriseOne Page.
/jde/EmbeddedE1FormPageLaunch?OID=application information
The following list contains samples that support the Embedded EnterpriseOne Page:
-
/jde/EmbeddedE1FormPageLaunch?OID=P30200_W30200C_ZJDE0001&FindOnEntry=true&FormQueryId=NONE&FormDSTmpl=|8|9|10|11|15|&FormDSData=|60011| M30||3.0000|EA|
-
/jde/EmbeddedE1FormPageLaunch?OID=P01012_W01012B_ZJDE0001&FindOnEntry=true&FormQueryId=0a192767-26d8-4f5d-9a98-ba55f9a5e5ce
-
/jde/EmbeddedE1FormPageLaunch?OID=P0901_W0901H_ZJDE0001&FindOnEntry=true&FormQueryId=NONE
-
/jde/EmbeddedE1FormPageLaunch?OID=P01012_W01012B_ZJDE0001&FindOnEntry=false
-
/jde/EmbeddedE1FormPageLaunch?OID=P98MOQUE_W98MOQUEA&FindOnEntry=true
-
/jde/EmbeddedE1FormPageLaunch?OID=P05PTLET_S05PTLETA
-
/jde/EmbeddedE1FormPageLaunch?OID=P01012_W01012A_ZJDE0001
-
/jde/EmbeddedE1FormPageLaunch?OID=P01012_W01012A_ZJDE0003&FindOnEntry=true&FormDSTmpl=|5|12|13|14|15|16|17|18|19|20|21|22|23|&FormDSData=||1||||||||||||
-
/jde/EmbeddedE1FormPageLaunch?OID=P4210_W4210E_ZJDE0001
-
/jde/EmbeddedE1FormPageLaunch?OID=P982400_W982400A
-
/jde/EmbeddedE1FormPageLaunch?OID=PMODAL_WMODALA
-
/jde/EmbeddedE1FormPageLaunch?TaskId=3/G01
-
/jde/EmbeddedE1FormPageLaunch?TaskId=1/G05BE1
-
-
To view the page before adding it, click View URL.
-
The following fields are blank. If you leave the fields blank, then EnterpriseOne inserts a default value. For example, if Reserved By is left blank, then EnterpriseOne inserts the login user ID. Complete the following optional fields:
-
Reserved By
-
Reserved Date
-
Designer
-
Start Date
-
-
Click OK.
22.3.10 Kiosk Mode (Release 9.1.5)
Kiosk mode is a way to designate a JAS port so that all users on that port are running in Simplified Navigation mode, regardless of the User or Role Simplified setting.
To assign Kiosk mode to a JAS server:
-
Access Server Manager.
-
In the Configuration section, select the Advanced from the View menu.
-
Locate the appropriate JAS.ini file, and change the Force KIOSK setting to True.