2 Installing the WebSphere Portal Server
This chapter contains the following topics for installing the WebSphere Portal Server:
2.1 Prerequisites
You must follow the prerequisites in the section before installing the WebSphere Portal Server.
2.1.1 Minimum Technical Requirements
Before you install Portal v7.0, you must first install WebSphere Application Server 7.0 and the latest supported fix pack listed in the JD Edwards EnterpriseOne HTML Web Server Minimum Technical Requirements (MTRs). These MTRs are available on My Oracle Support in document ID 705409.1 and can be accessed at this link:
https://metalink3.oracle.com/od/faces/secure/km/DocumentDisplay.jspx?id=705409.1
2.1.2 Installing WebSphere Application Server 7.0
To install WebSphere Application Server 7.0, refer to Chapter 3: Installing and Configuring WebSphere Application Server 7.0 in the JD Edwards EnterpriseOne HTML Web Server Reference Guide for iSeries -Based Systems and WebSphere Application Server 7.0. This document is available on My Oracle Support in document ID 705495.1 and can be accessed at this link:
https://metalink3-dr.oracle.com/od/faces/secure/km/DocumentDisplay.jspx?id=705495.1
If you are using same single physical machine for both the Portal and the HTML Server, you cannot install the JD Edwards EnterpriseOne HTML Web Server (also called JAS) to the same profile as that of Portal. By default, WebSphere Portal v7.0 creates a separate profile called wp_profile.
2.1.3 References
IBM product documentation for Portal v7.0:
IBM WebSphere Application Server 7.0 Info Center:
http://publib.boulder.ibm.com/infocenter/wasinfo/v7r0/index.jsp
IBM Portal v7.0 Hardware and Software Requirements:
2.2 Retrieving WebSphere Portal 7.0 Software from Oracle JD Edwards Update Center
To retrieve WebSphere Portal 7.0 Software from the Oracle JD Edwards Update Center:
-
Log on to EnterpriseOne Update Center:
-
Select “EnterpriseOne Technology Foundation” type.
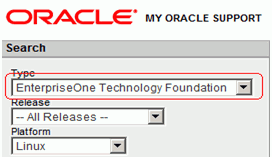
Description of the illustration image001.png
-
Select the platform.
-
Select and download the following files for WebSphere Portal 7.0 installation (The files are based on platform type):
Name Description IBM_WPS_7.0_Install_Guide_IBMi_1-2 WebSphere Portal 7.0 Install and Quick Start Guide 1/2 IBM_WPS_7.0_Install_Guide_IBMi_2-2 WebSphere Portal 7.0 Install and Quick Start Guide 2/2 Note:
Uses the regular Microsoft Windows unzip command to extract the files. -
Unzip the .par files that you downloaded from the Update Center to a temporary location. When unzipped, they files will appear as follows:
-
wps70-ibmi.zip.001
-
wps70-ibmi.zip.002
-
Extracting WebSphere Portal 7.0 Software
To extract WebSphere Portal 7.0 Software on IBM i from a Microsoft Windows machine:
-
Move both wps70-ibmi.zip* files to a “WPS70” folder.
-
Extract wps70-ibmi..zip.001 using the 7zip product.
-
The extract process will process both files.
2.3 Installing the Portal Server
To begin the installation:
-
From either the Setup CD or directory, you can use various methods to launch the installer, as shown in this table:
Installation Method Command and Description Graphical user interface install400.bat Optional attribute: WebSphere Application Server profiles and configurations are performed with the Classic 64-bit JVM, which allows for a faster installation but slower runtime performance. To achieve better performance, add the -W enableClassicJVM.active=false attribute to your installation command to install with J9 32-bit JVM.
Console mode remote install400.bat -console Console mode local install.sh Optional attribute: WebSphere Application Server profiles and configurations are performed with the Classic 64-bit JVM, which allows for a faster installation but slower runtime performance. To achieve better performance, add the -W enableClassicJVM.active=false attribute to your installation command to install with J9 32-bit JVM.
Silent install remote install400.bat -options "path_to_file\response_filename" where path_to_file is the full path to the response file, and where response_filename is the name of the file. A sample install response file (installresponse.txt) and a sample uninstall response file (uninstallresponse.txt) are located in the setup CD root directory.
Important: Do not place the response file in a path that contains a space and do not put a space in the file name.
Silent install local install.sh -options "path_to_file\response_filename" where path_to_file is the full path to the response file, and where response_filename is the name of the file. A sample install response file (installresponse.txt) and a sample uninstall response file (uninstallresponse.txt) are located in the setup CD root directory.
Important: Do not place the response file in a path that contains a space and do not put a space in the file name.
Note:
If the installation program does not detect a WebSphere Application Server instance that you know exists, exit the installation program and re-run it using command line options to specify the WebSphere Application Server instance location.For example: install.sh -W was.undetectedWas="/my/WAS/location"
Upon execution, by default the installer creates a separate profile called wp_profile. This profile is used to host the Portal contents. Therefore, you should not install Portal into an existing profile with other applications installed.
After launching install400.bat provide the AS/400 machine and user profile details for the portal server *ALLOBJ and *SECADM profile in the first screen:
Note:
It is not possible to use QSECOFR to perform the WebSphere Portal v7.0 installation. In the image below a copy of QSECOFR by name PORTALUSR has been created for this purpose.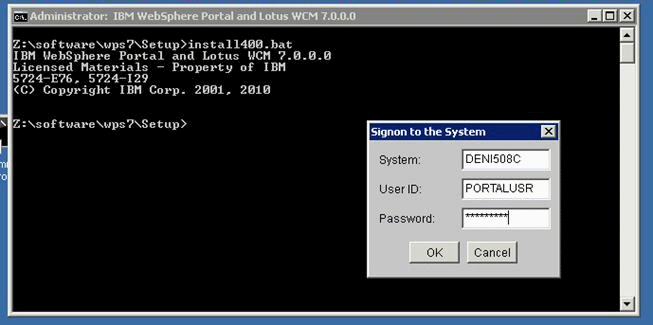
Description of the illustration image005.gif
Description of the illustration image006.gif
-
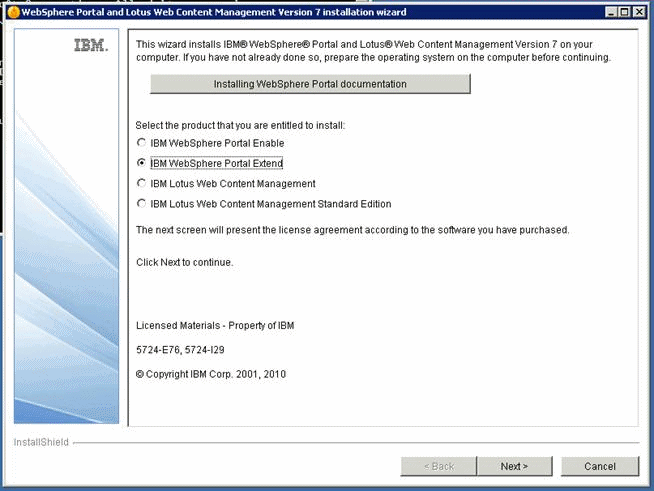
On the installation type screen, select IBM WebSphere Portal Extend, and then click the Next button.
Description of the illustration image007.gif
-
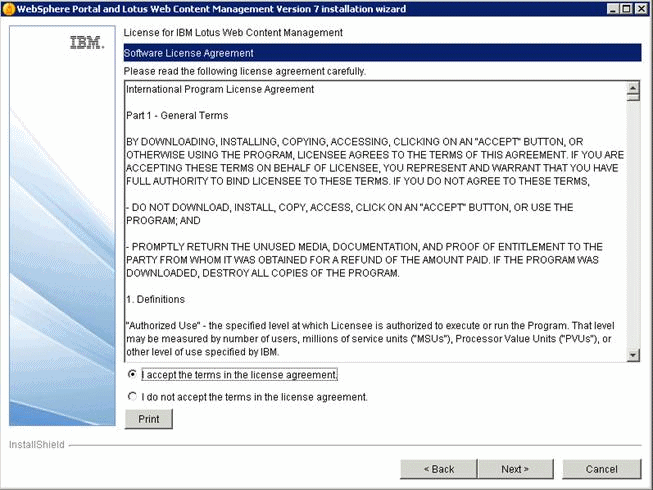
Accept the license terms and click the Next button.
Description of the illustration image008.gif
-
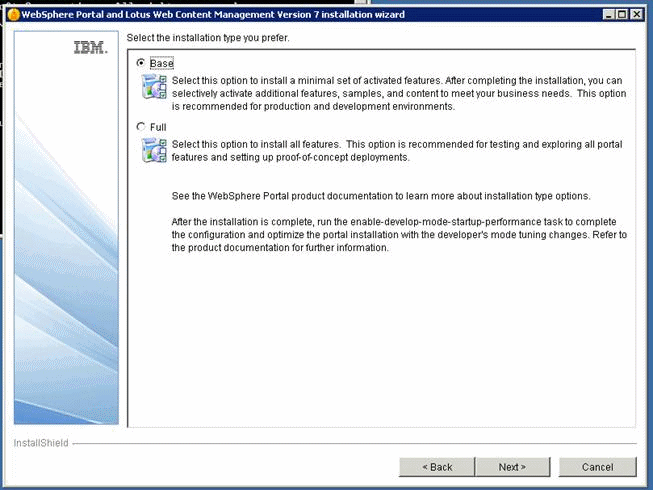
Select Base as the install type and click the Next button.
Description of the illustration image009.gif
-
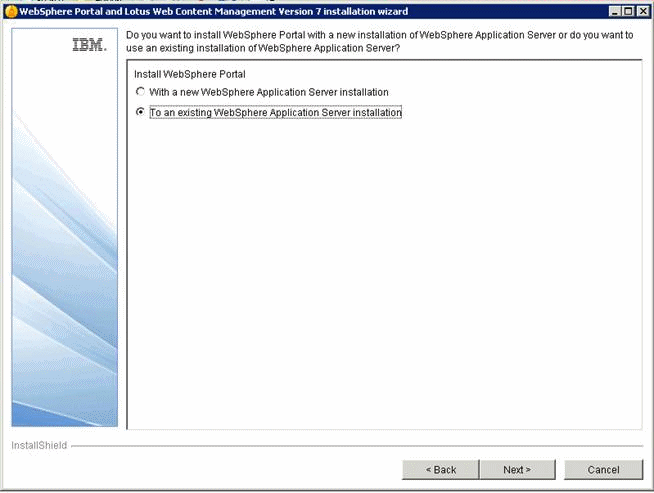
Select the "To existing WebSphere application server installation" option and click the Next button.
The installer detects your WebSphere Application Server 7.0 installation. For example: /QIBM/ProdData/WebSphere/AppServer/V7/ND

Description of the illustration image010.gif
-
On the WAS location screen, choose the WAS installation into which you want to install the Portal. If you have multiple installations of WebSphere, the program may detect more than one WebSphere location.
It is not possible to use WebSphere Application Server Express 7.0 for installing Portal v7.0.
-
For the IBM i platform the installer automatically chooses the installation location.
Description of the illustration image011.gif
-
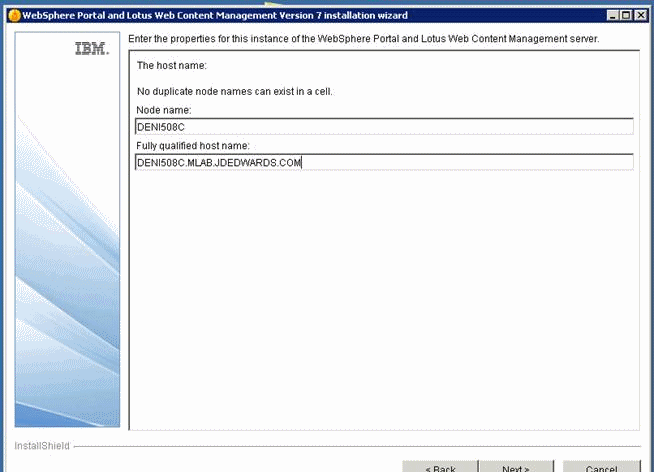
On the instance properties screen, complete these fields:
Field Description Node name Enter a unique Node name for this installation of WebSphere Portal and Lotus Web Content Management. The Node name is used to identify the server. Having a unique node name is important when configuring a federated, production environment.
Do not use names that contain special characters, such as _ (underscore), and so forth.
Host name Enter the fully qualified Host name for this installation of WebSphere Portal and Lotus Web Content Management. The Host name must include the fully qualified domain name (for example, hostname.example.com). Do not use a local host or a loopback address -
Click the Next button.
Description of the illustration image012.gif
-
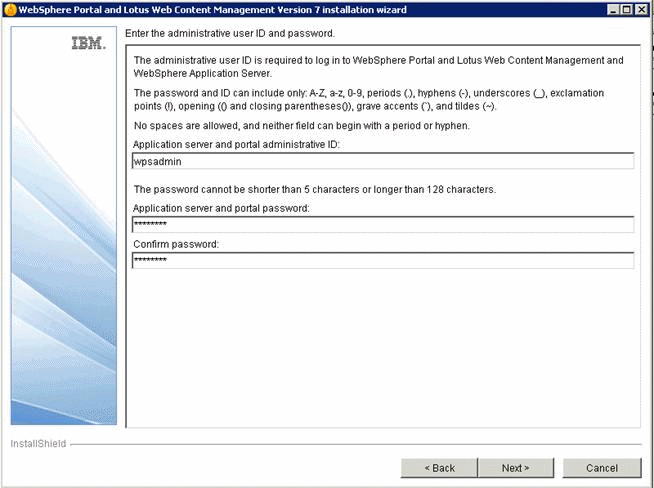
On the security screen for the administration user ID and password, WebSphere Portal enables security by default. It is not possible and/or recommended to disable security. Complete these fields:
Field Description Administrative User ID Enter the user ID that you assign for the Portal administrator. For example: wpsadminThis user is used for Stopping Services after the Portal installation is completed. It is not related to any user IDs used to access the operating system.
Administrative Password Enter the password for the Administrative User defined in the previous field. Confirm Password Confirm the password you entered in the previous field. 
Description of the illustration image013.gif
-
On the summary screen, review your selections for the Portal installation.
-
Click the Next button to start the installation process.
As the installer begins, it creates a default portal profile called wp_profile.
-
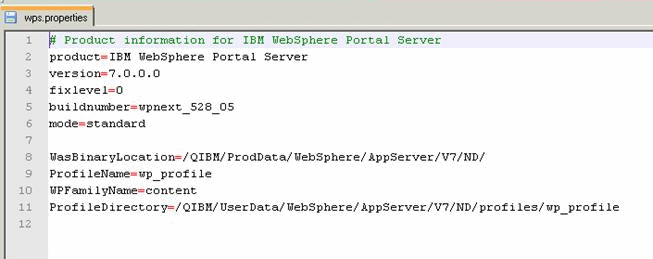
When the installation completes, locate and open the wps.properties file from this directory:
/QIBM/ProdData/WebSphere/PortalServer/V7/Content/PortalDirectory structure for IBM i platform is different compared to Windows and UNIX directory structures.
Description of the illustration image014.gif
-
Verify the version= parameter in the wps.properties file specifies the updated Portal version: 7.0.0.0
Description of the illustration image015.gif
-
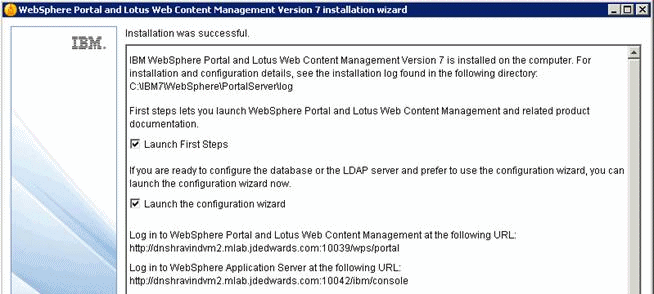
After the installation completes successfully, the following screen displays. Uncheck both the boxes and click Finish to complete the installation. Note the WebSphere Portal and Web Content Management and WebSphere Application Server URL's from the screen.
Description of the illustration image016.gif
-
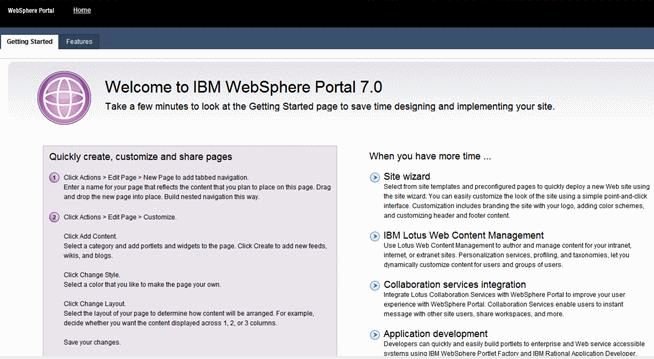
Accessing the WPS and WCM link brings up the following screen above.
Description of the illustration image017.gif
-
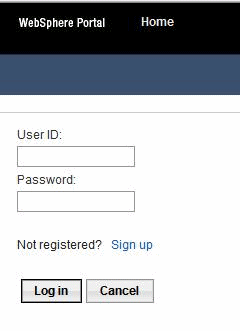
Clicking Login brings up the preceding login portlet. Log in with the credentials provided during the installation (i.e with wpsadmin user credentials).
Description of the illustration image018.gif
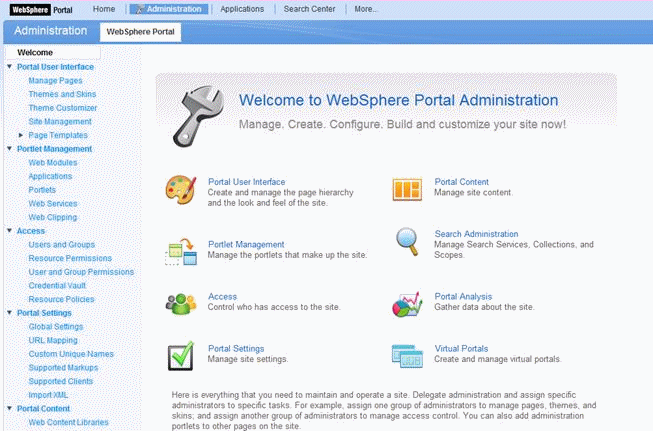
-
After successful login the Administrative page is displayed as shown above.
This completes the successful installation of WebSphere Portal v7.0.